
AI Summary
If your WordPress site sends any kind of automated email — order confirmations, password resets, newsletters, form notifications — you’ve probably been told to use an email subdomain to protect your deliverability. This guide explains what that actually means, when it matters, and exactly how to set one up.
- Quick summary
- What is an email subdomain?
- Why use an email subdomain?
- Email subdomain vs email alias: what's the difference?
- Common email subdomain examples
- When to use an email subdomain
- How to set up an email subdomain
- How to send WordPress emails from a subdomain
- Common email subdomain mistakes
- FAQs about email subdomains
Quick summary
- An email subdomain is a prefixed version of your main domain (like
send.yourdomain.com) used to send specific types of email. - It protects your root domain’s sender reputation by isolating different email streams (marketing vs transactional, for example).
- Setup involves adding DNS records (MX, SPF, DKIM, DMARC) for the subdomain in your DNS host.
- For WordPress, the easiest path is using a mailer like SendLayer with WP Mail SMTP, which creates and configures the subdomain for you.
What is an email subdomain?
An email subdomain is a prefix added to your root domain, used for sending email separately from your main domain. Internet service providers (ISPs) and mailbox providers treat the subdomain as a distinct sender, so its reputation builds independently from your root domain.
Every email address has two parts: the username and the domain. In [email protected], “pattie” is the username and “yourdomain.com” is the domain. An email subdomain adds a prefix before the root: [email protected]. Here, “news” is the subdomain.
The subdomain is still part of your domain — you own it, it points to your DNS, and it visibly belongs to your brand. But because mailbox providers track its reputation separately, what happens on the subdomain doesn’t directly affect the root.
Why use an email subdomain?
The main reason is sender reputation. Every domain you send email from accumulates a reputation score with mailbox providers (Gmail, Outlook, Yahoo, and others), based on factors like spam complaints, bounce rates, engagement, and authentication. Once your root domain has a bad reputation, it’s painful to recover, and you can’t easily change the root domain because it’s tied to your brand.
An email subdomain solves four problems:
1. Reputation isolation
If your marketing emails generate complaints, only the marketing subdomain takes the hit. Transactional emails from a separate subdomain (and personal emails from your root) keep delivering normally.
2. Recoverable failure
If a subdomain’s reputation gets damaged, you can spin up a new one and start over. You can’t do that with a root domain — your brand lives there.
3. Cleaner tracking and analytics
Subdomains let you measure how each email stream is performing on its own terms. Newsletter open rates aren’t muddied by transactional emails (which always have high engagement) or by your CEO’s outreach replies.
4. Authentication segmentation
SPF, DKIM, and DMARC records can be tailored per subdomain. Stricter DMARC policies on transactional subdomains (where you want zero spoofing) can coexist with more relaxed policies elsewhere.
Email subdomain vs email alias: what’s the difference?
This trips a lot of people up: changing the part before the @ symbol is not the same as using a subdomain.
[email protected] and [email protected] are both at the same domain. To mailbox providers, they look like one sender with one reputation. The “marketing” and “reset” parts are aliases, helpful for humans but invisible to reputation tracking.
[email protected] and [email protected], on the other hand, are at different subdomains. Each one builds its own reputation. That’s the distinction that matters.
| Setup | Example | Separate reputation? |
|---|---|---|
| Alias (same domain, different username) | [email protected] | No |
| Subdomain | [email protected] | Yes |
| Separate domain | [email protected] | Yes, but visually disconnected from brand |
If you only change the username, you haven’t gained any deliverability protection. The subdomain is the level that matters.
Common email subdomain examples
There’s no rule about what to call a subdomain, but a few conventions have emerged. Pick something short, readable, and indicative of what the subdomain is for. Here are the prefixes you’ll see most often:
| Subdomain | Typical use | Example |
|---|---|---|
news or newsletter | Marketing newsletters | [email protected] |
mail | General sending subdomain | [email protected] |
send or sending | Catch-all sending subdomain | [email protected] |
notify or notifications | Transactional alerts | [email protected] |
orders or billing | Receipts, invoices, order confirmations | [email protected] |
support or help | Support and ticket replies | [email protected] |
em, mg, sl | Mailer-generated subdomains (used by some ESPs) | [email protected] |
If you’re using a mailer like SendLayer, Mailgun, or SendGrid, the service may automatically create a subdomain for you (often sl, mg, or similar). You don’t have to use the auto-generated name — you can specify your own — but the default works fine for most setups.
When to use an email subdomain
You don’t need a subdomain for every email. Personal correspondence and direct one-to-one business email is fine from your root. Use a subdomain when:
- You send transactional email at scale. Password resets, order confirmations, and account alerts need to land in the inbox reliably. A dedicated subdomain protects them from anything else affecting your reputation.
- You send marketing newsletters or promotional emails. These get more spam complaints than other email types. Keep them on their own subdomain so complaints don’t bleed into your other streams.
- You do cold outreach or PR. Outreach emails are usually unsolicited and have lower engagement. A separate subdomain (or even a separate domain) shields the rest of your sending.
- You run multiple brands or product lines. Each can have its own subdomain to keep reputations distinct.
- You use a transactional mailer or ESP. Most mailers will either require or recommend a sending subdomain when you connect your domain.
For small sites sending only a handful of emails per month, the overhead may not be worth it. But for any WordPress site running WooCommerce, a membership plugin, or a contact form that generates regular notifications, a subdomain is worth setting up.
How to set up an email subdomain
Setting up an email subdomain happens at the DNS level. You don’t need a new domain or new hosting — the subdomain is a configuration on top of your existing domain.
There are two paths, depending on whether you’re managing the subdomain yourself or letting a mailer handle it.
Path 1: Set up the DNS records yourself
If you’re configuring email authentication manually, you’ll need to add four types of DNS records for your sending subdomain:
| Record | Purpose | Required for sending? |
|---|---|---|
| MX | Tells servers where to deliver mail addressed to the subdomain | Required only if you want to receive email at the subdomain |
| SPF | Specifies which servers are authorized to send mail from the subdomain | Yes |
| DKIM | Adds a cryptographic signature so recipients can verify the email wasn’t tampered with | Yes |
| DMARC | Tells mailbox providers what to do with mail that fails SPF or DKIM | Yes (required by Gmail and Yahoo for bulk senders since 2024) |
The general process:
- Log in to your DNS host (Cloudflare, GoDaddy, Namecheap, your domain registrar, or wherever your domain’s nameservers are managed).
- Add an SPF record (TXT type) for the subdomain, listing the servers authorized to send on its behalf.
- Add a DKIM record (TXT type) using the public key provided by your email sending service.
- Add a DMARC record (TXT type at
_dmarc.send.yourdomain.com, where “send” is your subdomain). - If receiving mail at the subdomain, add an MX record pointing to your mail server.
- Wait for DNS propagation (up to 48 hours, usually under an hour).
- Verify each record with a DNS lookup tool before sending production email.
For the exact values, see our guides on SPF, DKIM, and DMARC and creating a DMARC record.
Path 2: Let your mailer handle the subdomain
Most transactional email providers will create and configure a sending subdomain automatically when you verify your domain with them. You add the DNS records they provide, and they handle the rest.
This is what most WordPress sites should do. It’s faster, less error-prone, and the resulting setup is functionally identical to doing it yourself.
The walkthrough below uses SendLayer because it creates a subdomain automatically and integrates directly with WP Mail SMTP. The same general process works for Mailgun, SendGrid, Postmark, Brevo, and other supported mailers — see our list of best transactional email providers for alternatives.
How to send WordPress emails from a subdomain
To get a working email subdomain set up for WordPress, you’ll need a transactional mailer and the WP Mail SMTP plugin. Here’s the full process using SendLayer.
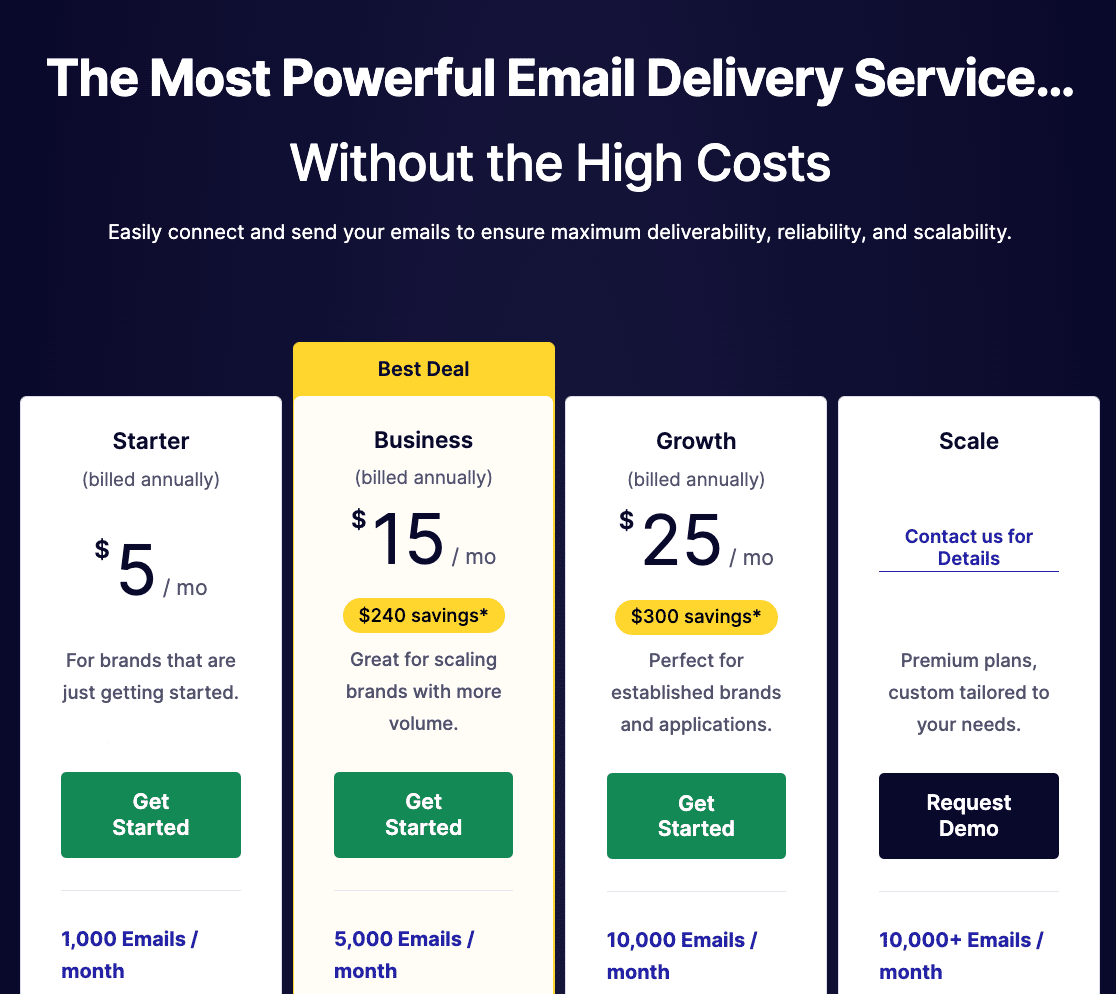
1. Sign up for SendLayer
Go to the SendLayer pricing page and choose a plan. There’s a free option for up to 500 emails to test with.
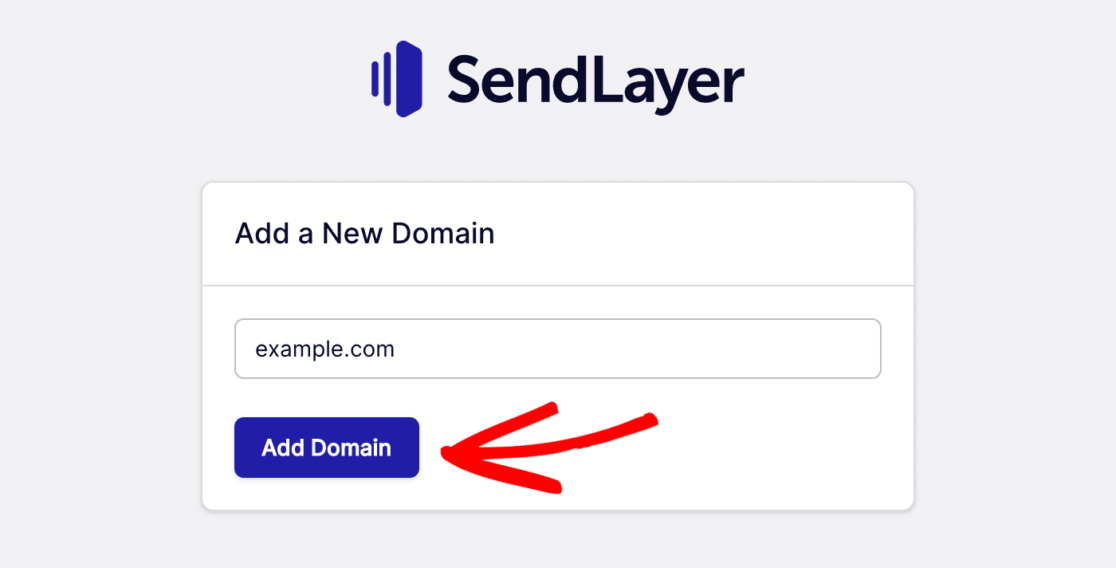
2. Authorize your domain
In your SendLayer dashboard, click Add Domain and enter your root domain (e.g. yourdomain.com).
SendLayer generates the DNS records you’ll need and automatically creates an sl subdomain for you. This is the subdomain your emails will actually be sent from at the DNS level, even though the visible “From” address can still use your root domain.
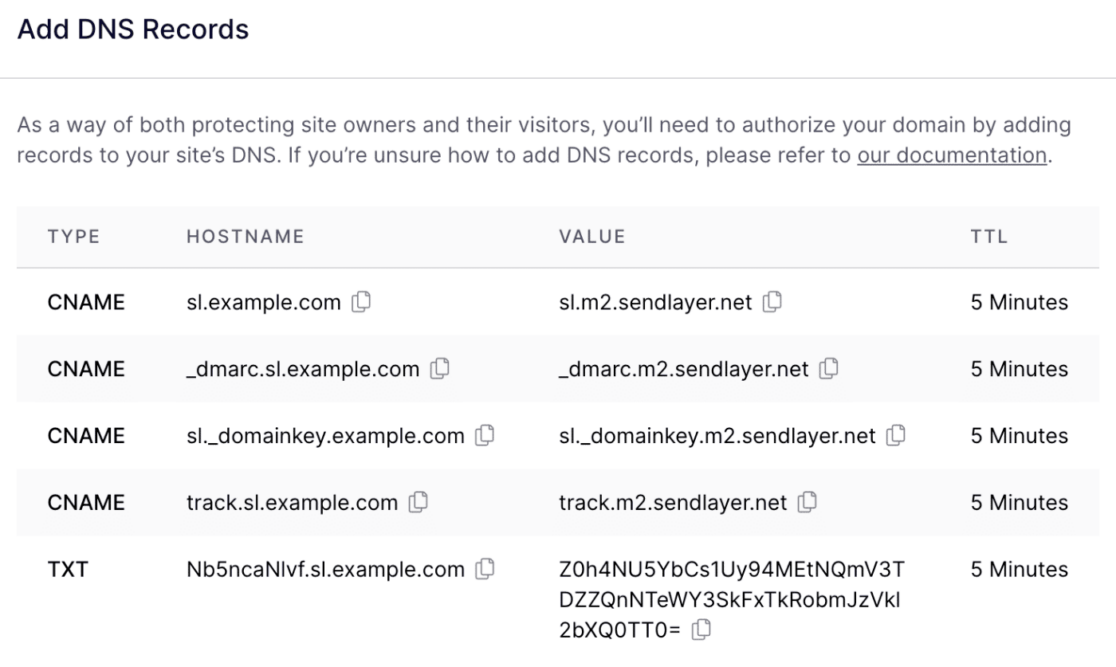
Copy each DNS record and add it in your DNS host’s settings. When all records are added, check the box confirming you’ve added them and click to verify.
DNS changes can take up to 48 hours to propagate, though most are live within an hour. You can check status under Settings → DNS Records & Settings in SendLayer — green checkmarks mean each record is verified.
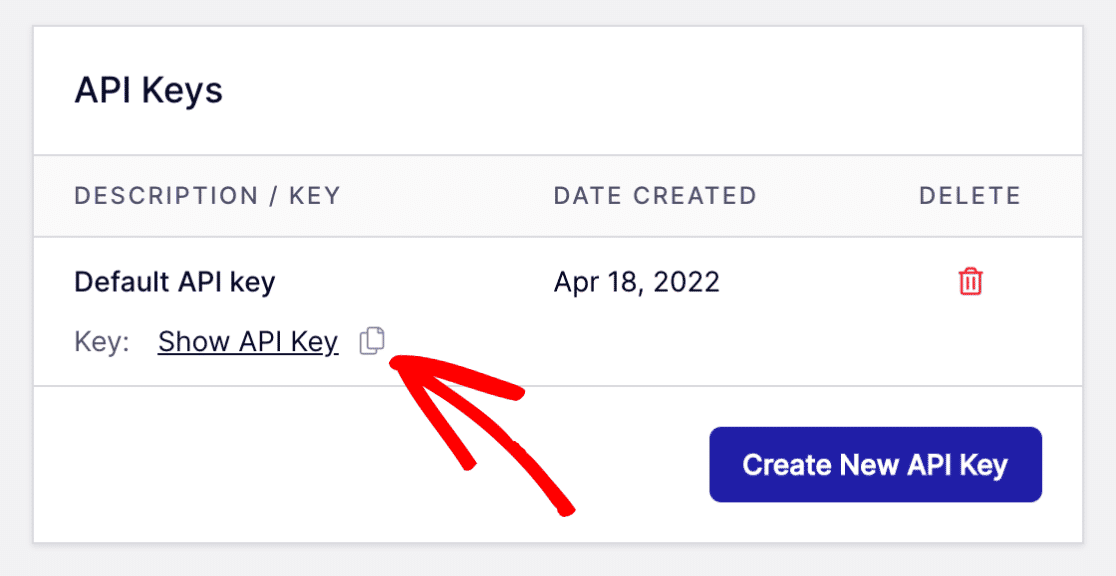
3. Get your SendLayer API key
Go to Settings → API Keys. SendLayer already created a default API key when you authorized your domain. Copy it — you’ll need it in WP Mail SMTP.
4. Install and configure WP Mail SMTP
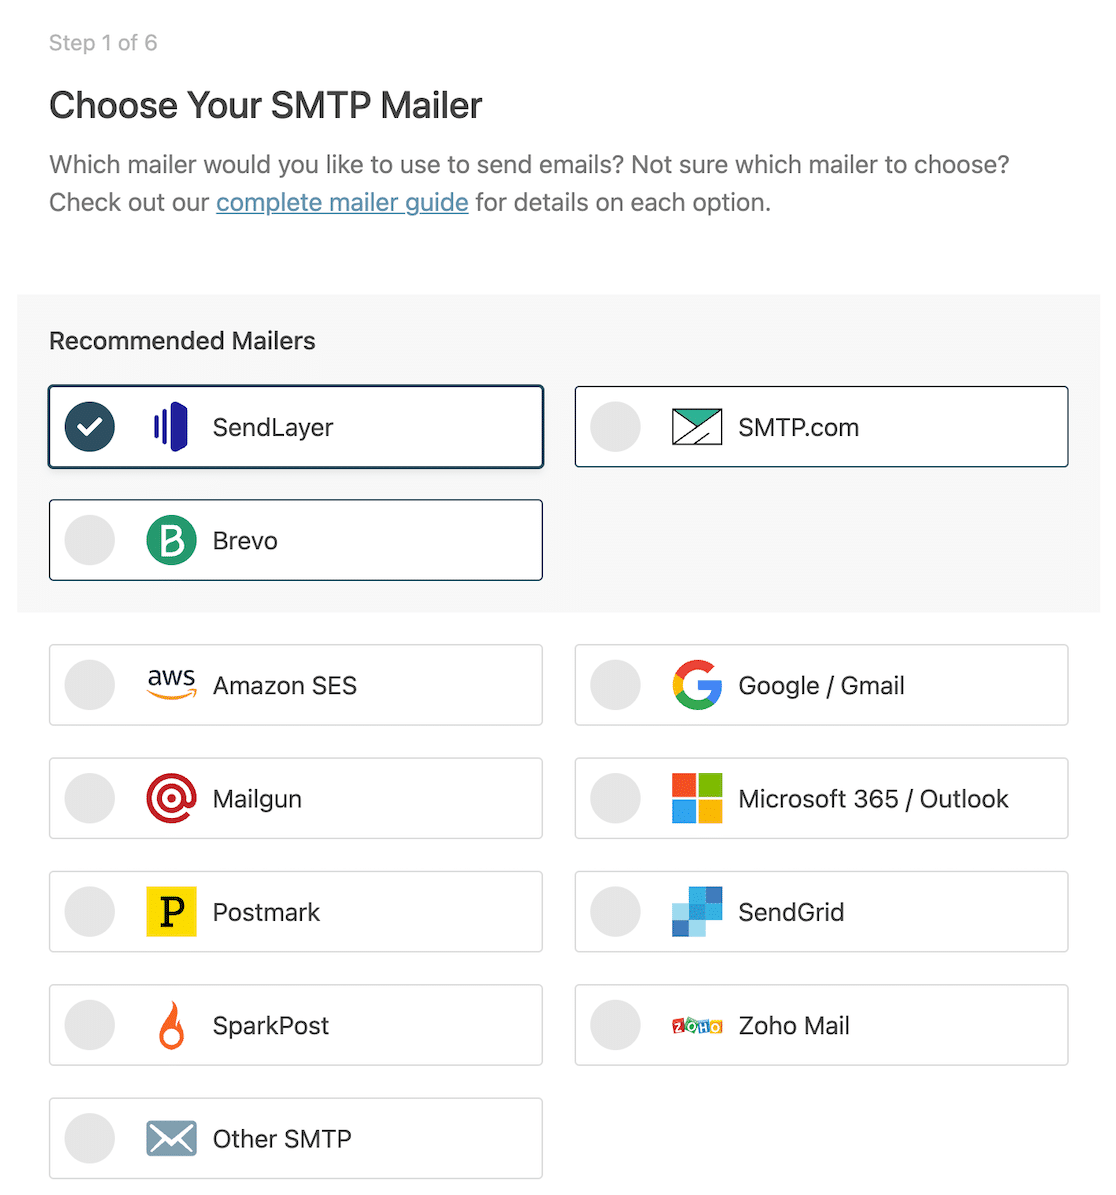
Install WP Mail SMTP on your WordPress site and launch the Setup Wizard. Select SendLayer as your mailer.
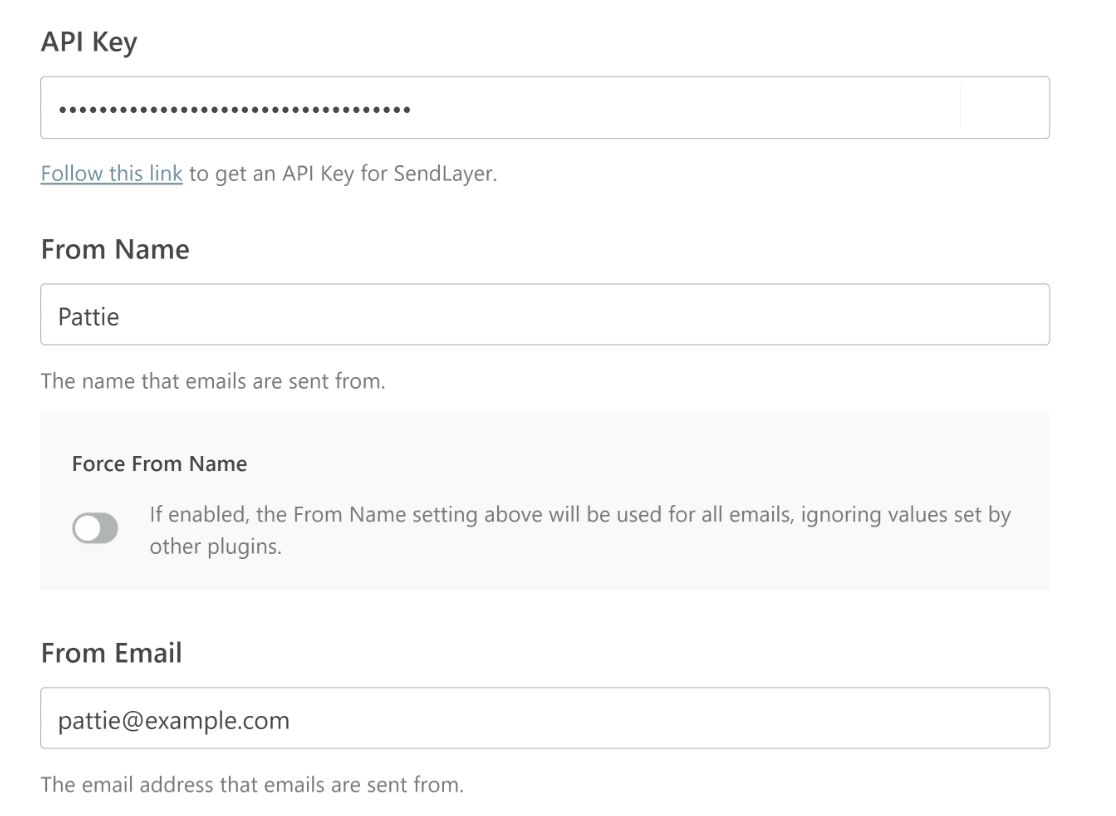
Paste your API key. Enter your From Name (what recipients see) and From Email (any address at the domain you authorized with SendLayer). SendLayer will route through the subdomain automatically at the DNS level, even though the visible address can be at your root domain.
Click Save and Continue, then pick which optional features you want enabled (Detailed Email Logs and Weekly Email Summary are both worth turning on).
5. Send a test email
Go to WP Mail SMTP → Tools → Email Test, enter an address you can check, and send. If everything’s configured correctly, you’ll see a successful test email in your inbox.
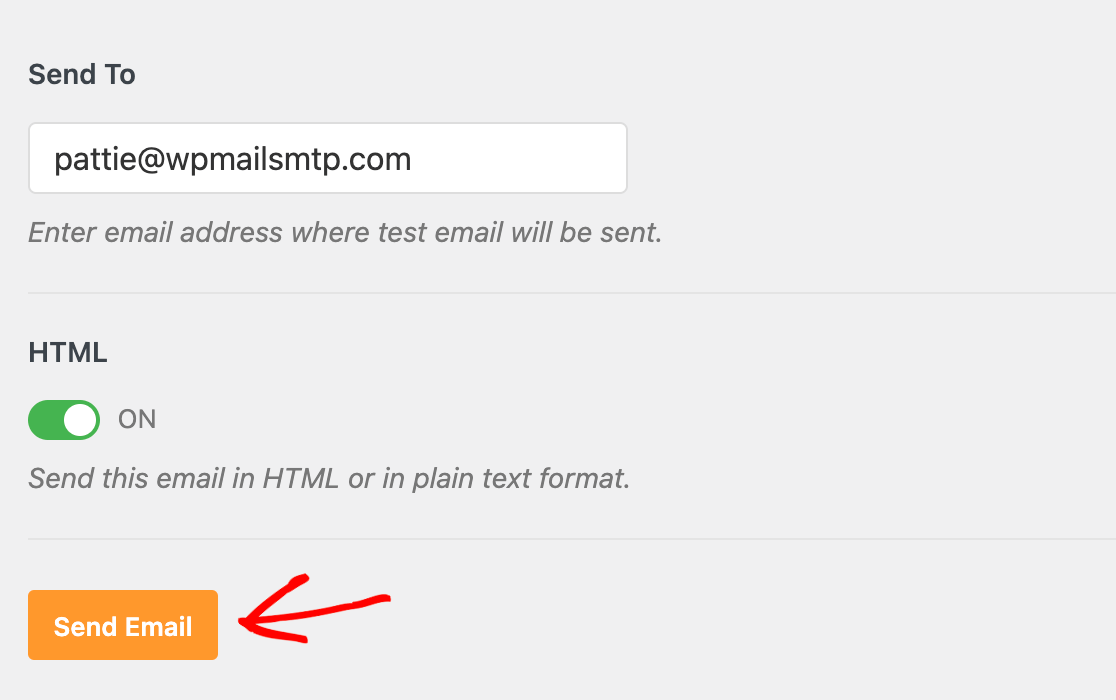
If the test fails, WP Mail SMTP returns a specific error pointing to what needs fixing — usually a DNS record that hasn’t propagated yet or a missing authentication step.
Common email subdomain mistakes
A few patterns to watch for:
- Using an alias and thinking it’s a subdomain.
[email protected]isn’t isolated from your root. You need[email protected]or similar. - Skipping DMARC on the subdomain. Gmail and Yahoo’s 2024 sender requirements apply to subdomains too. Without DMARC, bulk mail will get rejected.
- Reusing an old, damaged subdomain. If a subdomain’s reputation has been wrecked, it doesn’t reset overnight. Sometimes it’s faster to start a fresh one.
- Sending from a subdomain without warming it up. A new subdomain has no reputation. Ramping volume gradually over several weeks gives mailbox providers time to build trust.
- Using too many subdomains for low volume. If you barely send anything from a subdomain, its reputation never establishes properly. One or two well-used subdomains beat five barely-used ones.
FAQs about email subdomains
Here are answers to the questions readers ask most often about email subdomains.
What is the difference between a domain and a subdomain?
A domain is your main web address (yourdomain.com). A subdomain is a prefixed version of that domain (mail.yourdomain.com), created in your DNS settings. The subdomain is part of your domain — you don’t have to buy or register it separately — but mailbox providers and ISPs treat it as a distinct sender with its own reputation.
Do I need to buy a new domain to use an email subdomain?
No. A subdomain is created from your existing domain at the DNS level. There’s no additional registration cost and no separate hosting needed.
Will recipients see the subdomain in the From address?
Only if you use the subdomain in the visible From address (e.g. [email protected]). Many mailers handle the subdomain at the DNS level only, letting you keep a root-domain From address like [email protected] while still gaining the reputation isolation benefit. Your From Name appears the same either way.
Do I need separate SPF, DKIM, and DMARC for a subdomain?
Yes. Each sending subdomain needs its own authentication records. Your email provider will give you the exact values to add to your DNS. It’s a one-time setup, and most ESPs walk you through the process step by step.
How many email subdomains should I have?
For most small to medium WordPress sites, one or two is plenty: one for transactional email (receipts, password resets, form notifications) and optionally one for marketing (newsletters, promotions). Larger organizations may use separate subdomains per department or product line. Don’t over-fragment — each subdomain needs enough volume to build a meaningful reputation.
Do I need a separate inbox for the subdomain?
Not necessarily. You can send from [email protected] and set the Reply-To header to [email protected] so any replies land in your normal mailbox. Most transactional email runs send-only this way, so a dedicated inbox usually isn’t needed.
Does an email subdomain actually improve deliverability?
Indirectly, yes — by isolating sender reputation. The subdomain itself doesn’t make individual emails more deliverable, but it prevents problems on one email stream (like spam complaints on a marketing campaign) from damaging deliverability on other streams (like transactional mail). It’s protection, not a boost.
How long does it take to set up an email subdomain?
The actual configuration takes 10 to 15 minutes if you have your DNS host and email provider details on hand. DNS propagation can take anywhere from a few minutes to 48 hours, though most records are live within an hour.
Next, disable unnecessary WordPress emails
Once your subdomain is set up, the next step is making sure you’re only sending the emails you actually want to send. WordPress generates a lot of notification emails by default — many of which you can safely turn off. See our guide on how to disable WordPress email notifications for the easy way to do this.
You might also want to read our guide on how to change the sender email in WordPress.
Ready to fix your emails? Get started today with the best WordPress SMTP plugin. If you don’t have the time to fix your emails, you can get full White Glove Setup assistance as an extra purchase, and there’s a 14-day money-back guarantee for all paid plans.
If this article helped you out, please follow us on Facebook and Twitter for more WordPress tips and tutorials.