AI Summary
Is LearnPress not sending an email when a user has enrolled in a course? This is actually a common problem but not entirely specific to LearnPress.
The culprit? WordPress’s default wp_mail() function just can’t handle the volume and variety of emails that Learning Management Systems generate.
LearnPress sends enrollment confirmations, instructor alerts, completion certificates, and dozens of other notification types, and most hosting providers can’t deliver them reliably.
I’ll show you exactly how to fix this using WP Mail SMTP, plus some LMS-specific tips I’ve learned from working with hundreds of online course creators.
Fix Your LearnPress Emails Now! 🙂
What Is LearnPress?
LearnPress is a complete LMS plugin for WordPress. The core plugin is free to use but you’ll have to pay for premium addons.

The plugin comes with an easy-to-use, drag-and-drop course builder. You can create a course with lessons and quizzes to make it interesting for students.
LearnPress can also be used as a WordPress membership plugin. It supports major payment gateways like 2Checkout, Authorize.Net, and Stripe.
When Does LearnPress Send Email?
LearnPress sends an email to administrators, users, or instructors each time a particular action is completed.
For example, when a user registers for a course, LearnPress sends an email to the admin, instructor, and the user.
Likewise, when a user finishes the course, they get an email with a certificate.
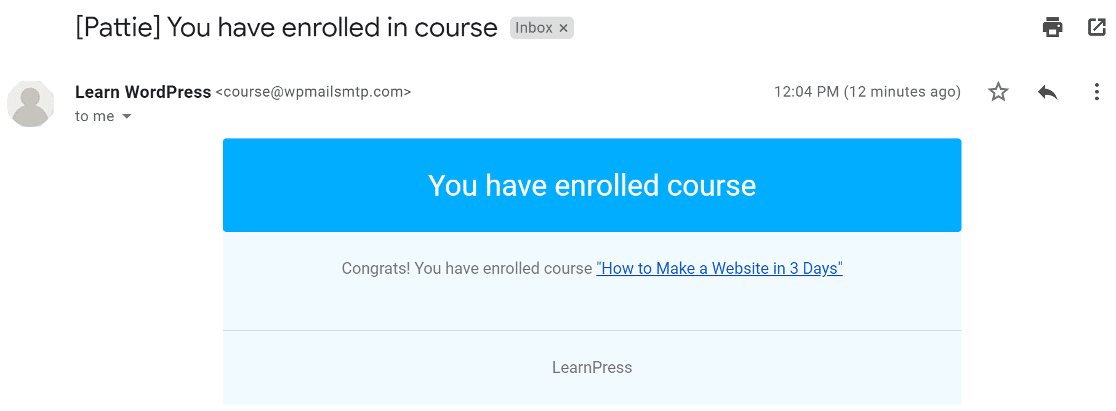
If such emails don’t end up in the inbox, your users won’t get emails about their course.
In this article, I’m going to show you how to fix the problem by sending emails with authentication.
How to Fix LearnPress Not Sending Email
Step 1: Check if LearnPress Emails Are Enabled
LearnPress sends email notifications to the admin, users, or instructor when a certain action is completed. You have the control to enable or disable email notifications for each action.
Let’s check if we have the notifications enabled for each action. To do that, from the WordPress navigation menu, click LearnPress » Settings.
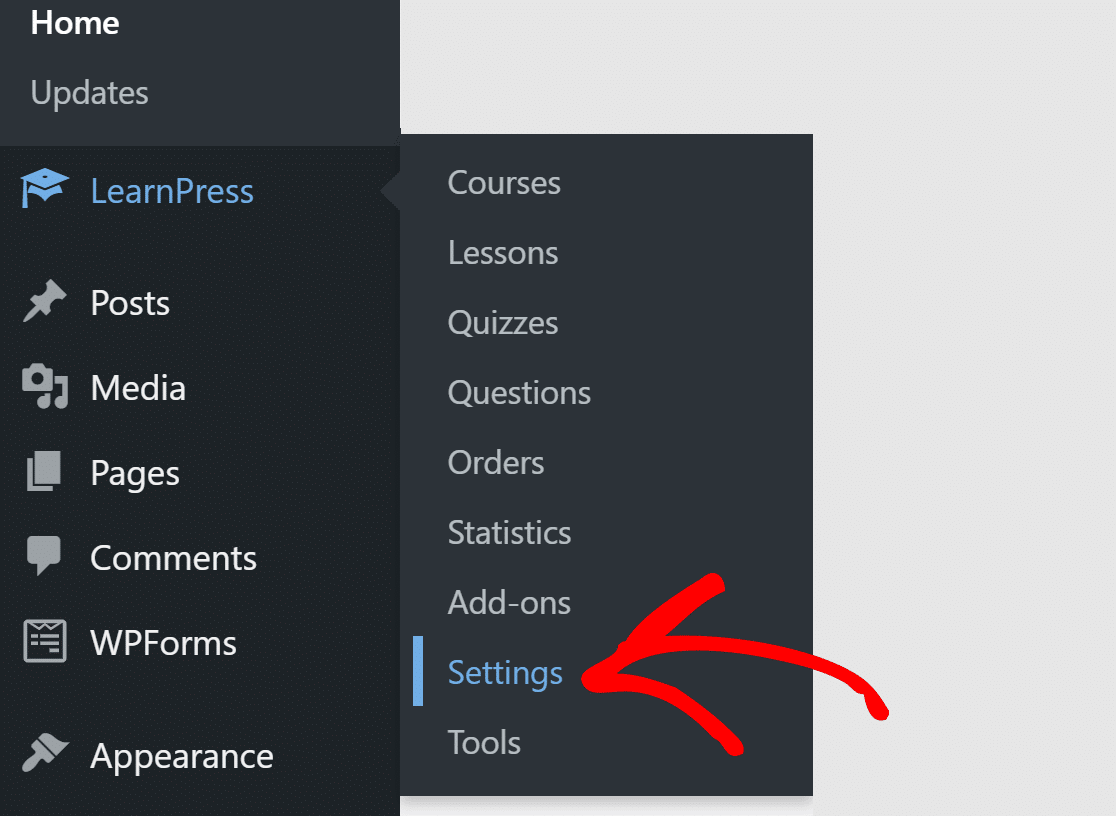
You will see different tabs at the top. Click on the one that says Email. This is where LearnPress controls all its email notifications.

You’ll see a table listing every type of email the plugin can send, from enrollment confirmations to course completion certificates.

Each row in the table represents a different email trigger. Look at the Status column. You should see blue checkmarks next to the emails you want LearnPress to send.
Next to each email, you will see the status of it. Make sure every action has a blue checkmark in the Status column. You can enable email notifications for all the actions by clicking the Enable All button at the end of the box.
If you see any red X marks or empty checkboxes next to these critical emails, your students aren’t getting the notifications they expect.
Now that we’ve set the email notifications, let’s install the SMTP plugin to ensure emails don’t end up in the junk box.
Step 2. Install the WP Mail SMTP Plugin
WP Mail SMTP makes it easy to send emails by connecting your website to a dedicated mailer service. That helps to fix the issue of LearnPress not sending emails or being marked as spam.
To start, head over to your WP Mail SMTP account and look for the Downloads tab. Click the orange Download WP Mail SMTP button to download the latest version of the plugin.
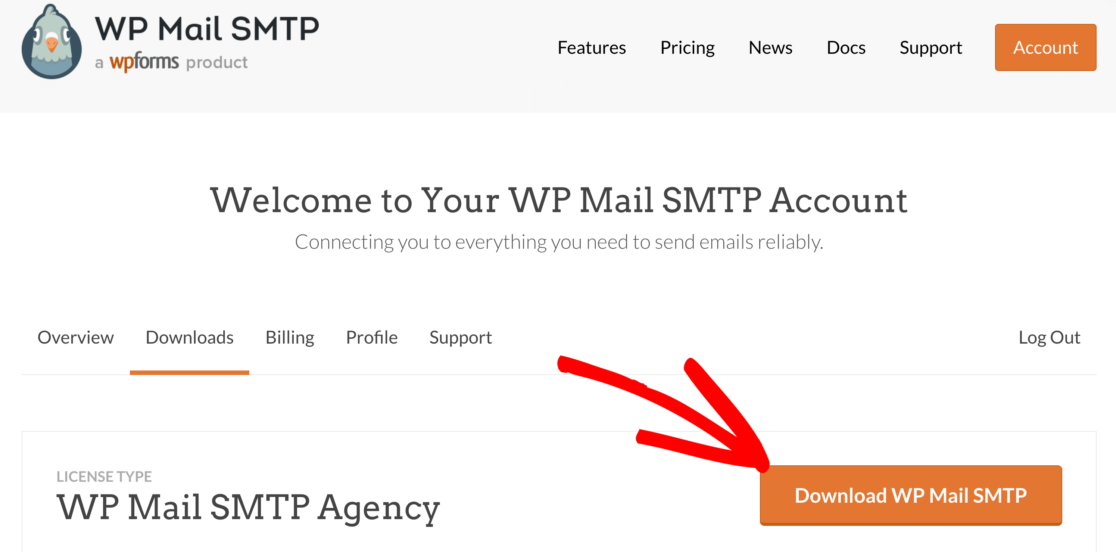
Head back to your website and upload the zip file. Make sure you Activate it. If you need help with this part, check out this detailed guide on how to install a WordPress plugin.

Once you activate the plugin, the Setup Wizard will start. The wizard makes it super easy to configure the plugin.
If you prefer to have someone else set it up for you, White Glove Setup is included with any paid license as an addon.
If you want to pause here and start the wizard manually any time in the future, click on the Launch Setup Wizard button in the plugin settings menu.
Step 3: Choose a Mailer Service
In this step, I’ll walk you through the Setup Wizard in WP Mail SMTP. Click on the Let’s Get Started button to begin. WP Mail SMTP offers you free as well as paid options for the mailer service.

The service you choose will depend on the type of website you have. Since LearnPress is used for online course websites, we recommend SendLayer, SMTP.com, or Brevo (formerly Sendinblue).
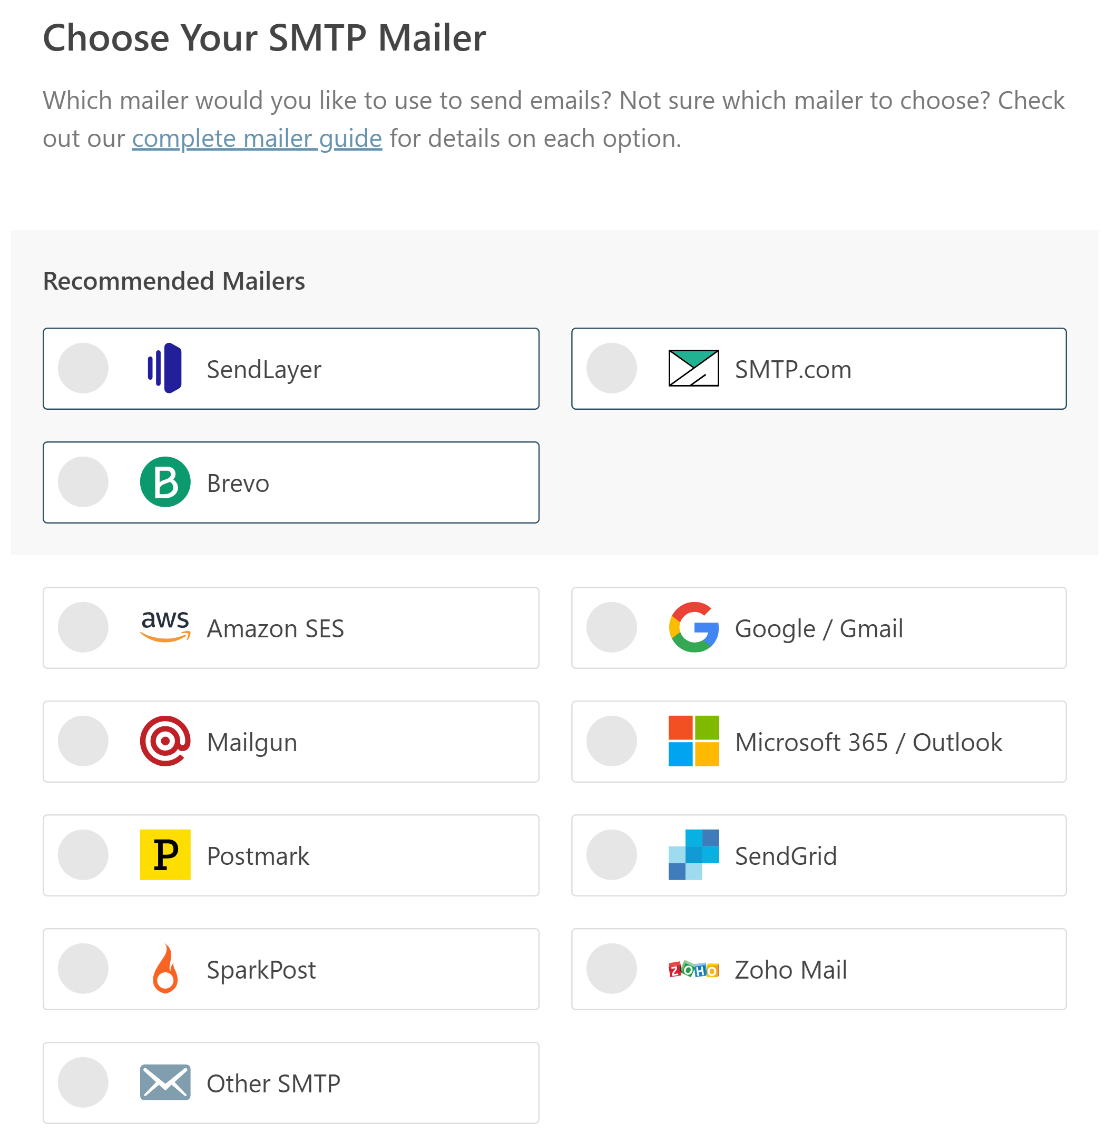
You can read our complete guide on email providers and choose the one that works great for your needs.
Once you’ve selected the mailer service, you need to link it to your website using WP Mail SMTP. We’ve got detailed guides for each service. Click on the one you chose and follow the steps.
- SendLayer
- SMTP.com
- Brevo
- Amazon SES
- Google Workspace / Gmail
- Mailgun
- Microsoft 365 / Outlook.com
- Postmark
- SendGrid
- SparkPost
- Zoho Mail
- Other SMTP
If you want to set up multiple mailers, you can do so in the Additional Connections settings once you’ve finished the Setup Wizard. Then you can select a Backup Connection and configure Smart Routing.
Switch back to this guide after you establish a connection between the mailer service and your site.
Step 4. Log Your LearnPress Emails
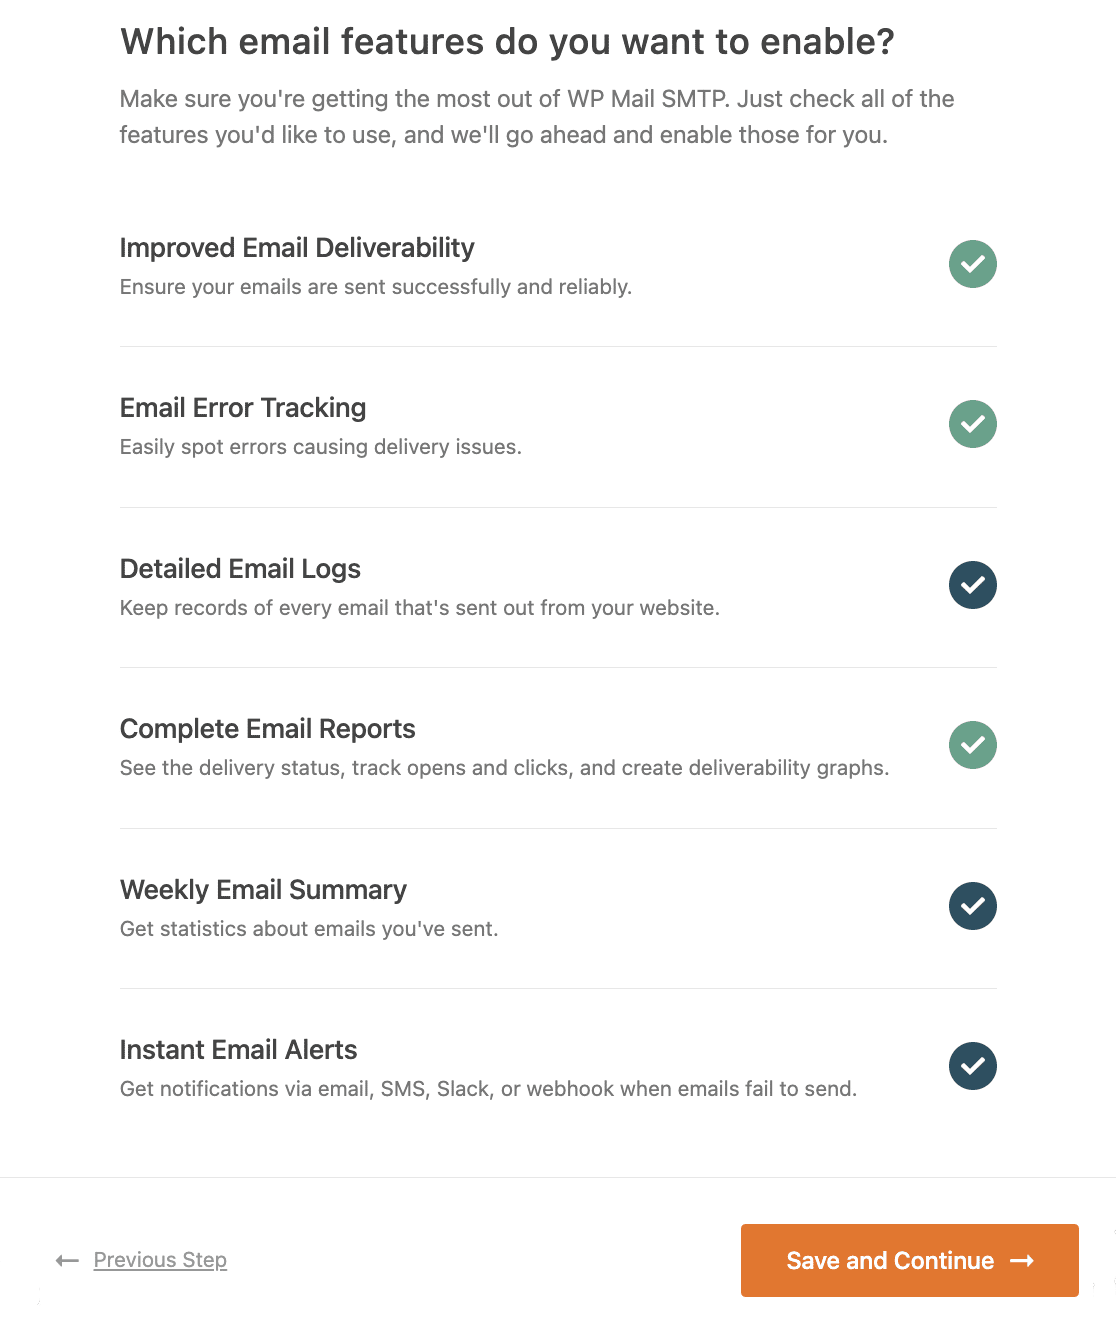
In the next step, the improved email deliverability and email error tracking options will be automatically enabled for you.
If you have our Pro version or higher, you can also turn on Detailed Email Logs to keep track of all emails that are sent out from your site in Complete Email Reports.
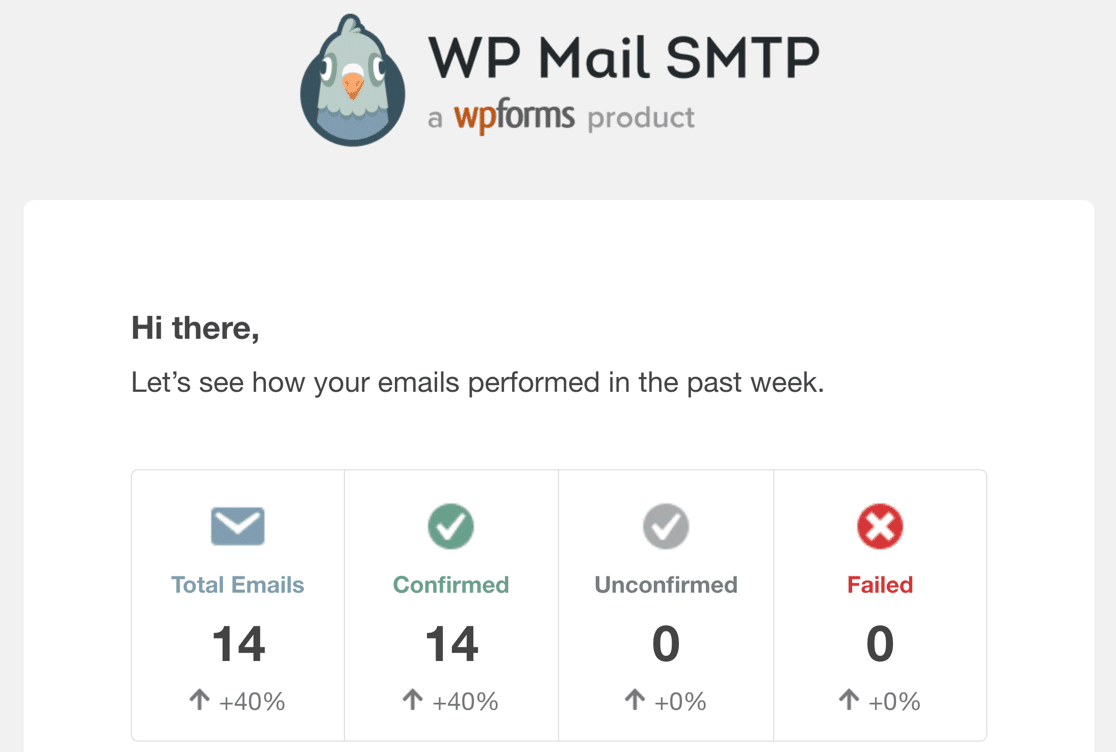
You can also opt to receive the Weekly Email Summary if you want to see your email delivery stats in your inbox each week.
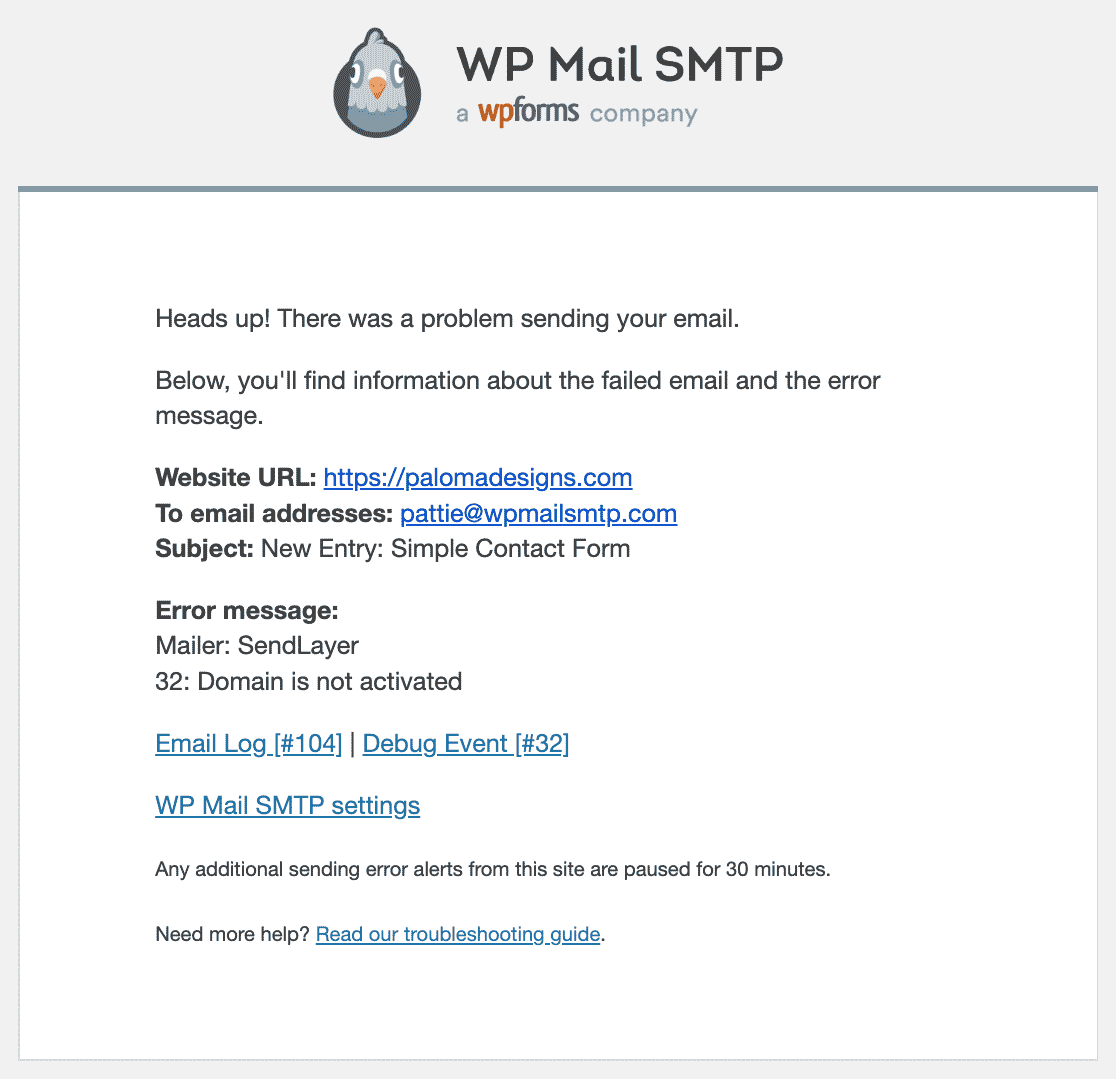
And Instant Email Alerts will let you know right away if your site fails to send an email. The notification will also include information to help you troubleshoot the problem.
On the next screen, you’ll find more email logging options you can enable.
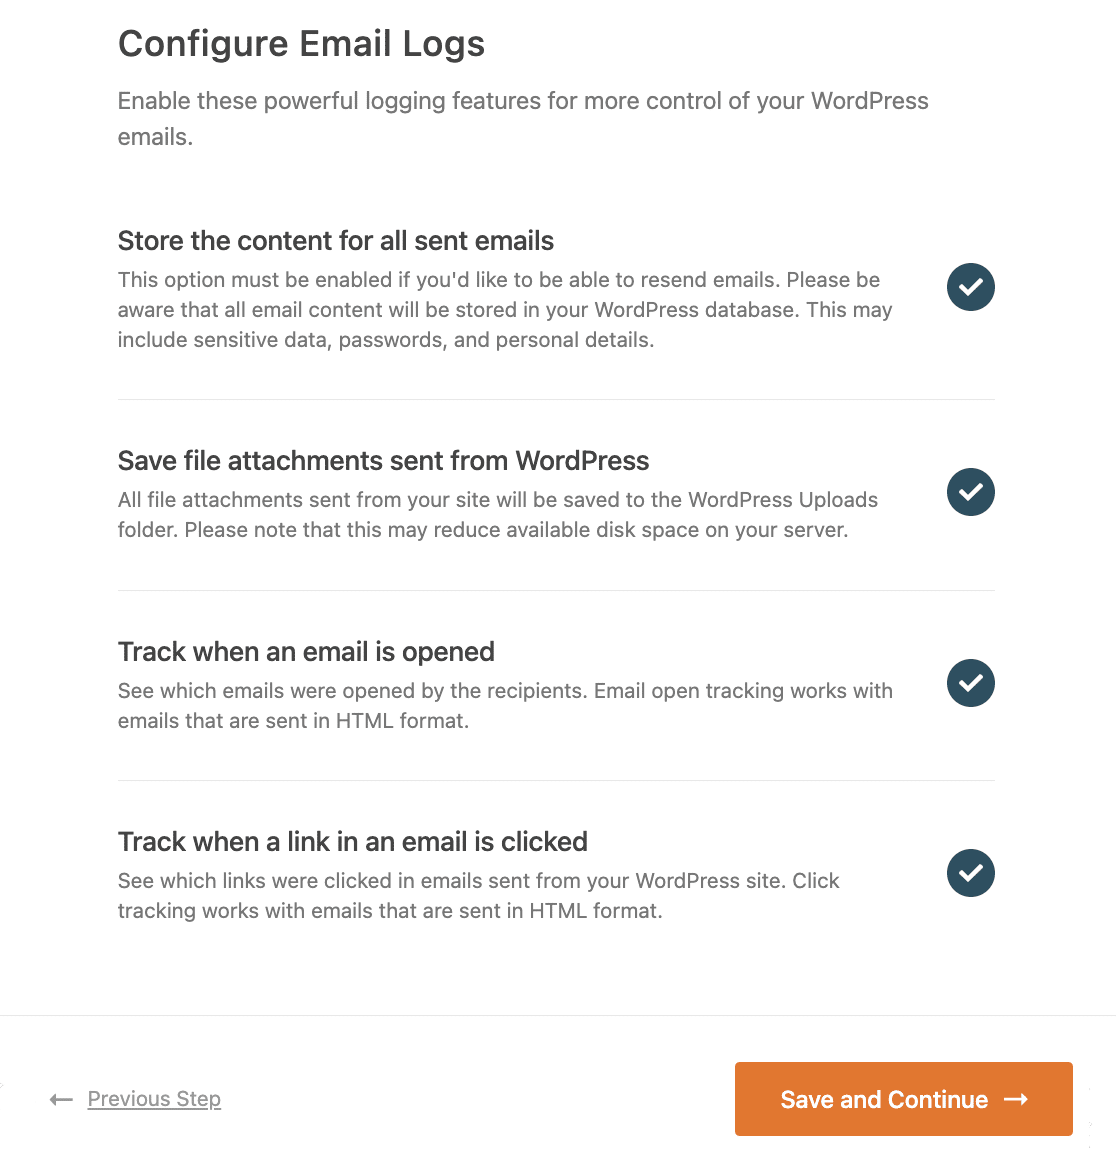
These features let you save email content and attachments and track email opens and link clicks. You can also export your log files in different formats, print logs, resend emails, and more.
Read our article on how to log WordPress emails to see how this works. For the last step, grab the license key from your WP Mail SMTP account and paste it to enable pro features and future automatic updates.

That’s it! We’re done fixing the LearnPress not sending email issue. You can send a test email from WP Mail SMTP to make sure everything’s working.
FAQs on How to Fix LearnPress Not Sending Emails
LearnPress not sending emails is a popular topic of interest among our readers. Here are answers to some common queries about it:
Why is LearnPress not sending emails?
LearnPress email failures typically occur because WordPress’s built-in wp_mail() function lacks proper authentication.
Most hosting providers don’t configure SMTP properly, causing course enrollment confirmations, completion certificates, and instructor notifications to get blocked or marked as spam.
Installing WP Mail SMTP with a dedicated email service provider resolves this by adding proper authentication headers that email servers require.
How do I enable email notifications in LearnPress?
To enable LearnPress email notifications, go to LearnPress » Settings » Email tab in your WordPress dashboard. You’ll see a table showing all available email types with status indicators.
Click the “Enable All” button to activate all notifications, or individually enable specific emails like course enrollment confirmations, completion notifications, and instructor alerts by clicking the checkboxes next to each email type.
What emails does LearnPress send automatically?
LearnPress automatically sends emails for course enrollments, lesson completions, course finishers, payment confirmations, instructor notifications when courses are published, quiz results, certificate deliveries, and administrative alerts.
The plugin can generate dozens of different email types depending on your course setup, which is why proper SMTP configuration is essential for educational websites.
Can I customize LearnPress email templates?
Yes, LearnPress allows you to customize email templates for each notification type.
Go to LearnPress » Settings » Email, then click on any specific email to modify its subject line, content, and recipient settings.
You can personalize messages with student names, course titles, and completion details to create a more engaging learning experience.
Why do LearnPress emails go to spam?
LearnPress emails go to spam because they’re sent through WordPress’s wp_mail() function without proper authentication.
Educational sites generate high email volumes with attachments like certificates, which triggers spam filters.
Using WP Mail SMTP with proper SPF, DKIM, and DMARC records authenticates your emails and dramatically improves deliverability to student inboxes.
Can LearnPress work with Gmail SMTP?
LearnPress can work with Gmail SMTP through WP Mail SMTP, but it’s not ideal for course sites. Gmail limits you to 500 emails per day and may flag automated course emails as suspicious.
For professional educational sites with multiple courses and students, dedicated transactional email services offer better reliability and higher sending limits.
Can I track student engagement through LearnPress emails?
With WP Mail SMTP Pro, you can track email opens and clicks for LearnPress notifications, giving you insights into student engagement.
This helps identify students who might be struggling (not opening course emails) or highly engaged learners (clicking through to additional resources).
These analytics are valuable for improving course completion rates.
Next, Check Your SPF Records
Email servers often use SPF, DKIM, and DMARC records to authenticate emails. WP Mail SMTP will check your DNS settings and alert you if it detects any problem.
SPF records are simple TXT records that validate all outgoing emails to prevent domain spoofing. If you need to have more than 1 SPF record, check out this guide to merge multiple SPF records into one rule.
Ready to fix your emails? Get started today with the best WordPress SMTP plugin. If you don’t have the time to fix your emails, you can get full White Glove Setup assistance as an extra purchase, and there’s a 14-day money-back guarantee for all paid plans.
If this article helped you out, please follow us on Facebook and Twitter for more WordPress tips and tutorials.

