AI Summary
Have you just tried to send out a batch of emails only to find SMTP blocked? You’re not alone. Over 73% of shared hosting users face SMTP blocks at some point, according to recent hosting industry data.
The problem hits hardest when you least expect it. One day your contact forms work perfectly. The next day, nothing. Your customers don’t get order confirmations. Password reset emails vanish. And you have no idea why.
In this post, I’ll explain why your web host may have blocked your SMTP connection and how you can fix it using a sender that supports email API.
Why Is SMTP Blocked By Web Hosts?
Web hosts block SMTP ports (especially port 25) for three main reasons that nobody talks about:
- Spam Protection That’s Too Aggressive: When spam gets sent from a shared IP, major email providers like Gmail and Outlook blacklist the entire server. Every website on that server suffers.
- Cost-Cutting Measures: Running email servers costs money. A lot of money. By blocking SMTP, hosts save on bandwidth, server resources, and support tickets. Some hosts save up to $50,000 per month just by blocking outgoing emails.
- Zero-Tolerance Policies: Many budget hosts use blanket SMTP blocks instead of monitoring individual accounts. It’s easier and cheaper to block everyone than to check who’s sending what.
Before you sign up with any web host, ask specifically: “Do you block port 25, 465, 587, or 2525?” If they say yes to any of these, find another host or plan to use an email API from day one.
Thankfully, you can still use other dedicated mailers to reliably send your WordPress emails using WP Mail SMTP.
Let’s see the steps for connecting WP Mail SMTP with a powerful mailer to bypass the SMTP block once and for all on your WordPress site.
How to Fix SMTP Blocked in WordPress
The best way to fix SMTP issues on your site is to use WP Mail SMTP and configure it with SendLayer or another API-based mailer. These services bypass SMTP blocks completely because they use HTTPS (port 443) instead of email ports. Here are the steps:
Step 1. Install WP Mail SMTP
WP Mail SMTP is the best SMTP plugin for WordPress. Even if your web host is blocking SMTP, you can still use WP Mail SMTP to send emails successfully.
To get started, we recommend investing in the WP Mail SMTP Pro plan for advanced features, though the free version works fine for basic needs.

After purchasing the license, go ahead and install WP Mail SMTP on your site. If you don’t have a mailer account created yet, then you’ll have to create one before running the WP Mail SMTP setup wizard.
So, first, we’ll create a SendLayer account and set things up there. Then we’ll get the SendLayer API Key which we’ll add to your website when we run the WP Mail SMTP setup wizard.
Note that you can also complete these steps using Easy WP SMTP, which is one of our top recommended alternatives for WP Mail SMTP.
Step 2. Create a SendLayer Account
SendLayer is one of the most powerful mailer services. It works reliably even if your SMTP is blocked by your WordPress web host. This is why we’ll use SendLayer with SMTP in this tutorial.
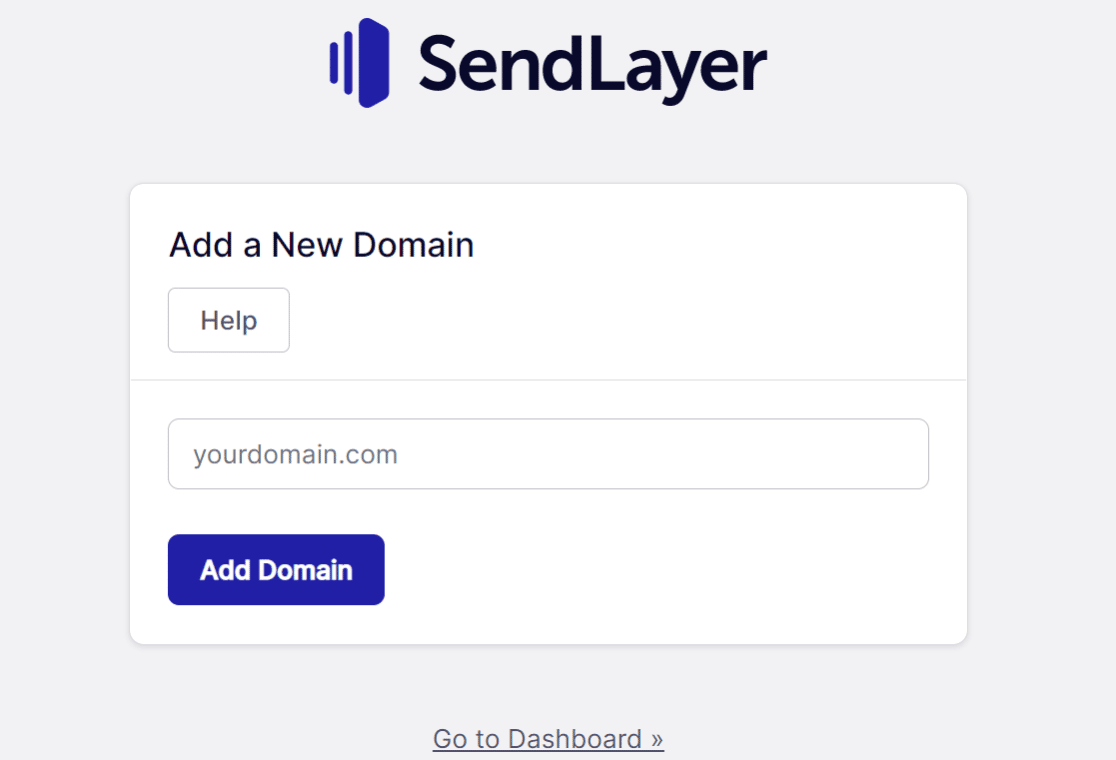
Visit SendLayer and create a new account to get started there. Next, log in to access the admin dashboard. From the dashboard, click on Add Domain.

On the new screen, enter the domain you’ll be sending emails from. Click Add Domain again to finish this step. Now, you’ll need to add DNS records for the domain name you want to authenticate.
Add DNS Records
SendLayer will generate a set of DNS records that you need to add to your domain in your hosting account. Copy these and open up your web hosting account in a new tab. Keep the SendLayer tab open because you’ll be back here momentarily.
Once you’ve added these DNS Records in your hosting account, return to the SendLayer window and checkmark I have added DNS Records, and am ready to proceed. Then press Verify DNS.
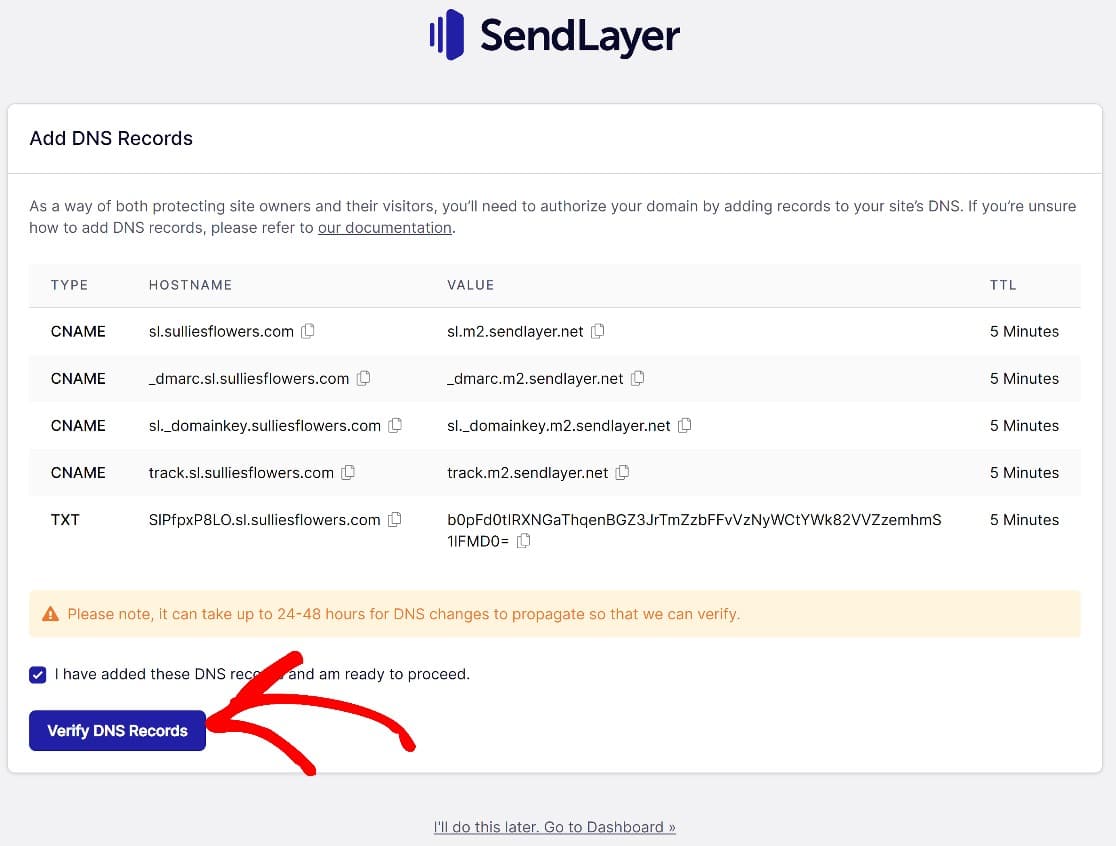
Once this step is done, you’ll be redirected to the DNS Records and Settings page. If you’ve entered the DNS Records properly, you’ll now see a green checkmark next to each DNS Record.
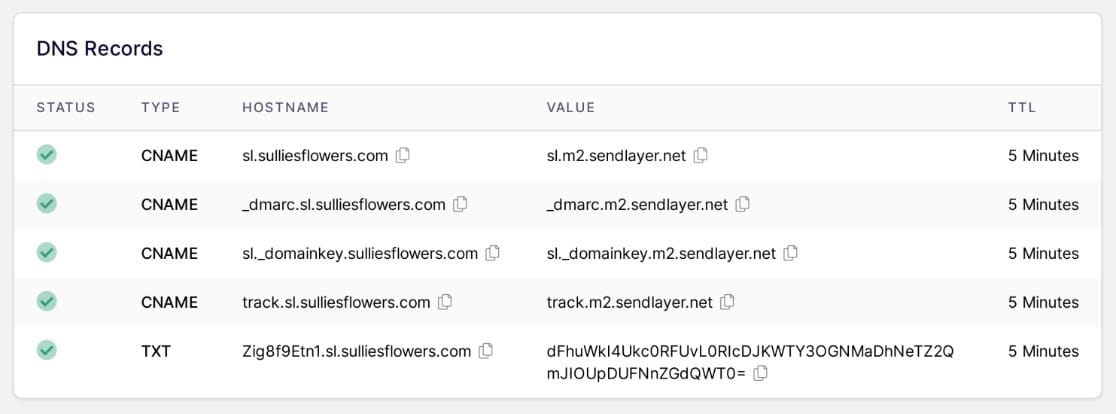
This will mean we’re almost done in SendLayer. But we still haven’t gotten our API Key.
Get Your SendLayer API Key
We’ll need to add a SendLayer API key to your WordPress website. SendLayer will make one for you by default, but you can create additional ones if you need to.
Back in the SendLayer dashboard, click on Settings » API Keys, then copy your API Key by clicking on the icon next to the Show API Key link .
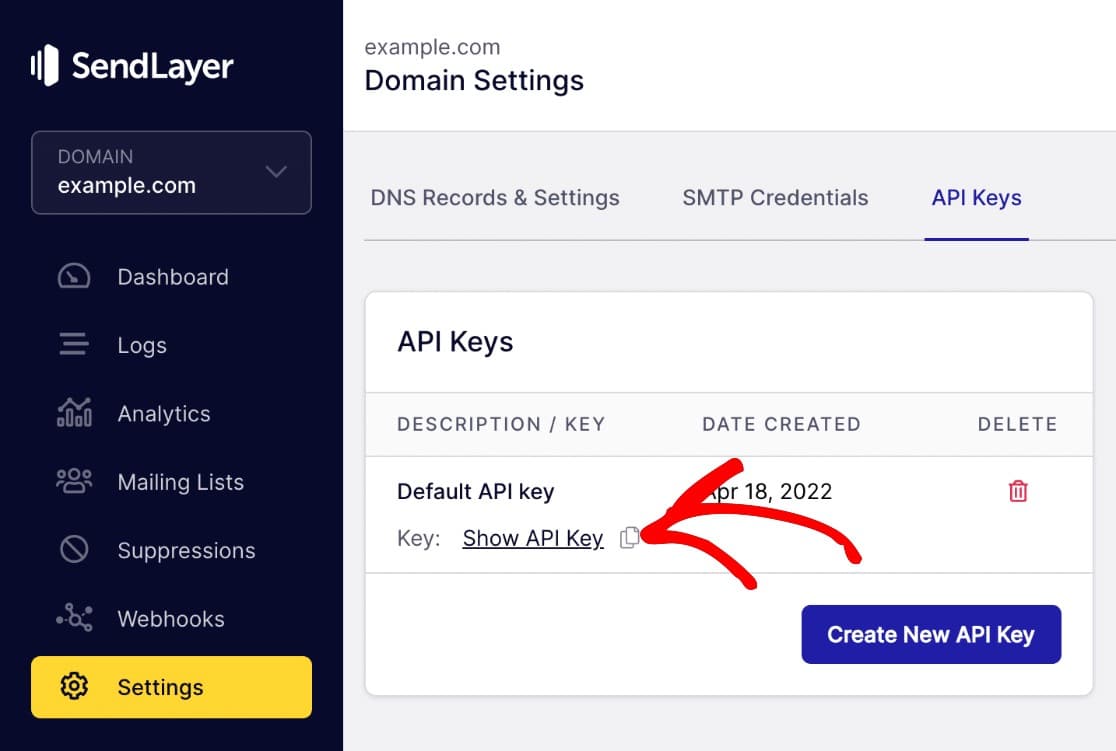
Now, we’ll connect WP Mail SMTP and SendLayer back in WordPress.
Step 3: Connect WP Mail SMTP and SendLayer
In step one we held off on running the setup wizard because we hadn’t created a SendLayer account yet. Now that your domain is authenticated with SendLayer, go ahead and initiate the Setup Wizard:
- Go to WP Mail SMTP » Settings » General
- Scroll down to the Mail section
- Click Launch Setup Wizard
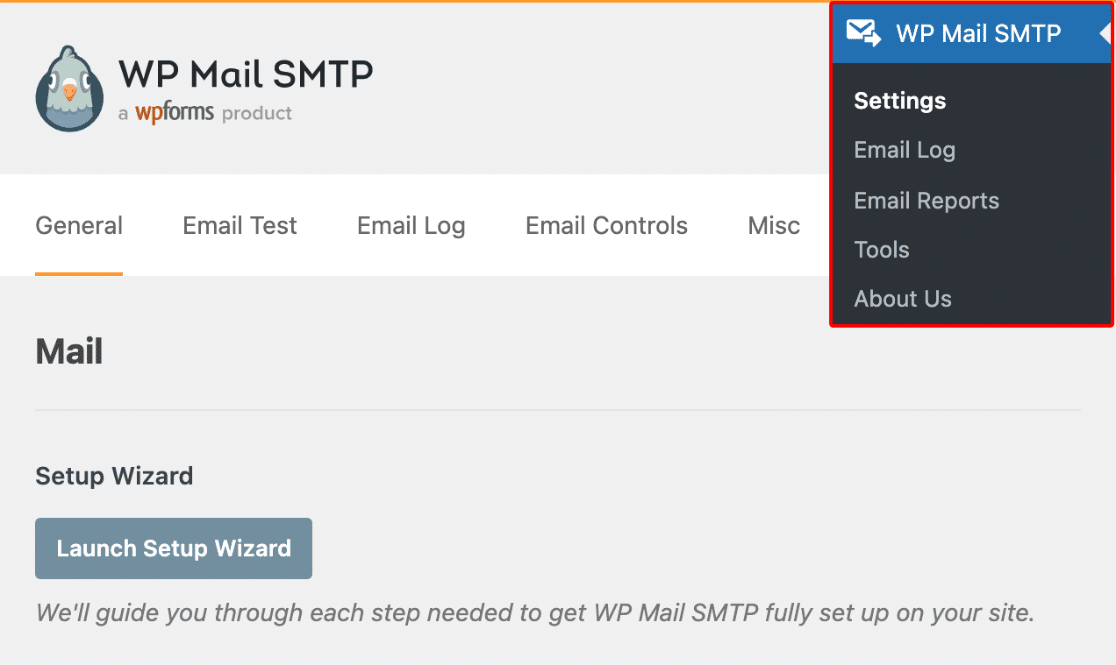
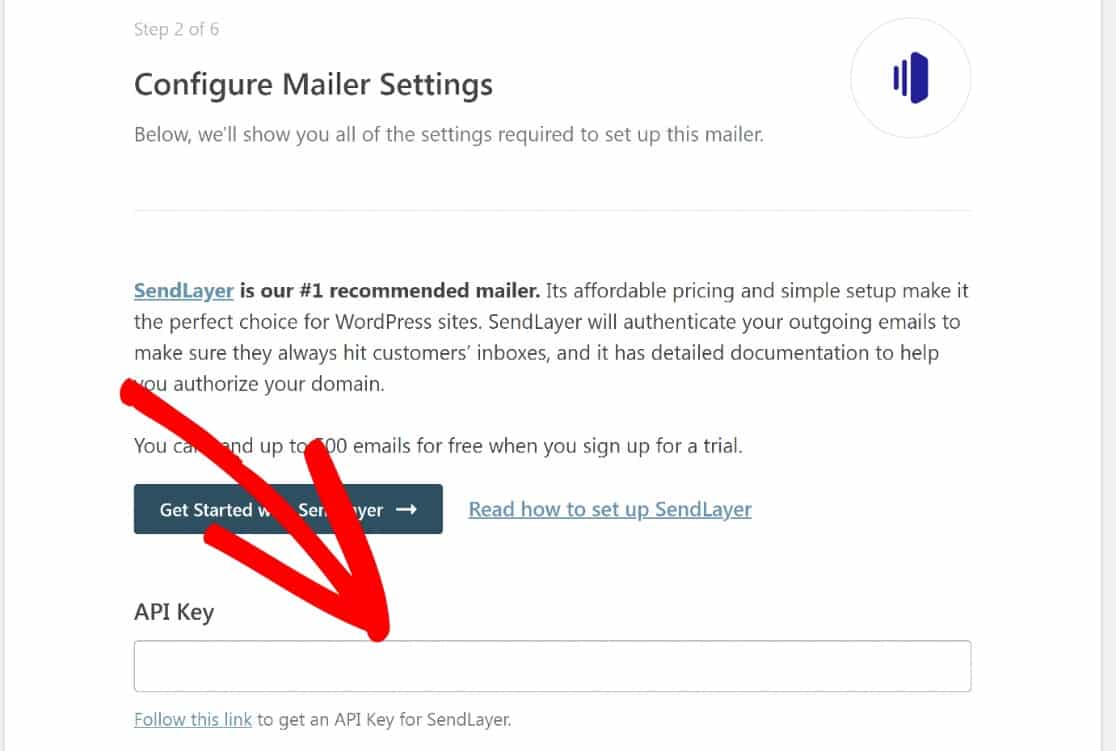
The wizard will prompt you to choose a mailer. Select SendLayer from the list. We’ve chosen SendLayer because its API connection is a reliable alternative to the Other SMTP mailer and works even when SMTP is completely blocked.
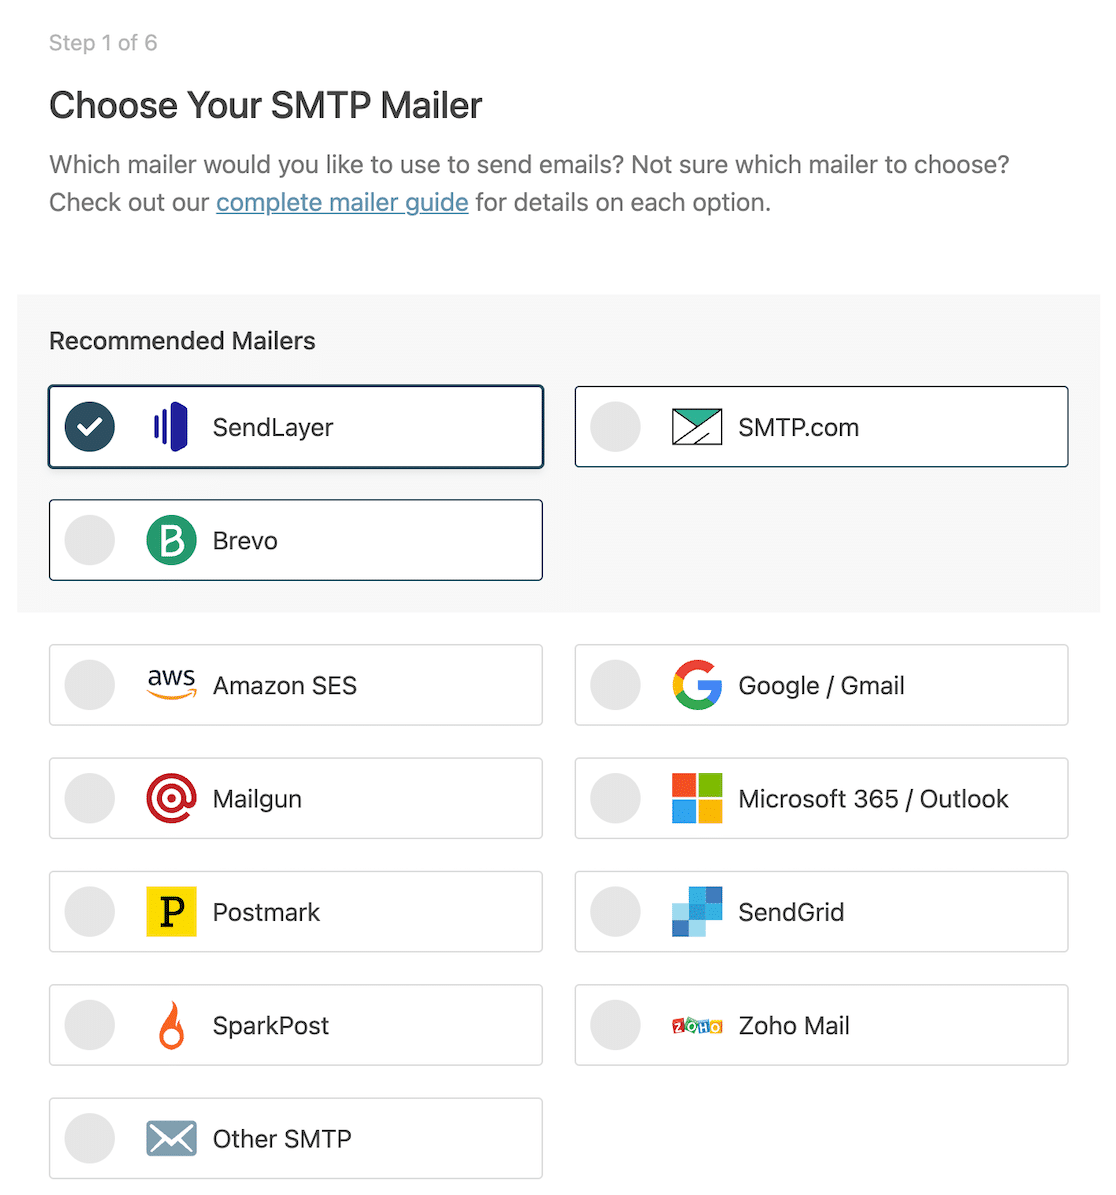
Click Save and Continue to move on to the mailer configuration settings. This is where you’ll enter your SendLayer API Key. This is the most important step to take but there are a few more settings to tinker with.
In the next step of the Setup Wizard, you’ll configure how your emails appear: All your outgoing emails will be sent from your From Email.
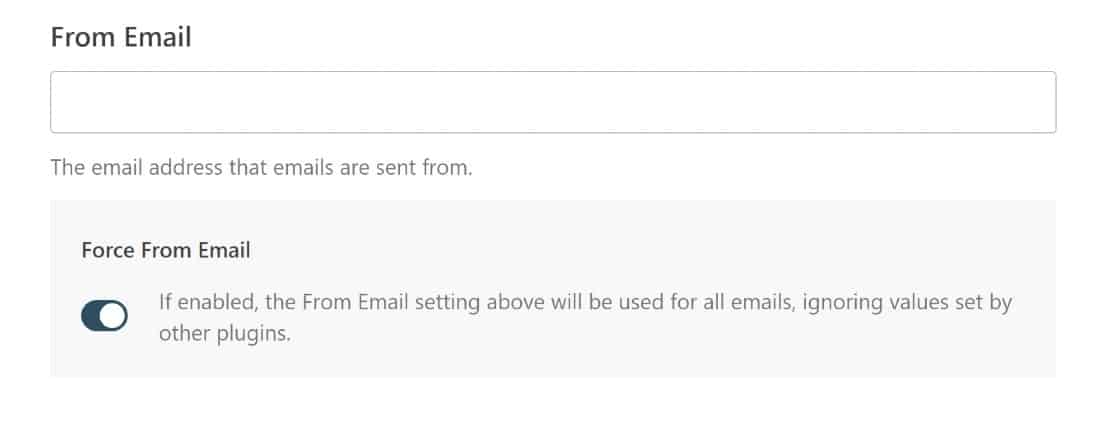
Make sure the email address you enter here matches the domain name that you authenticated with SendLayer earlier. Similarly, the From Name is your sender name that will appear in your emails.
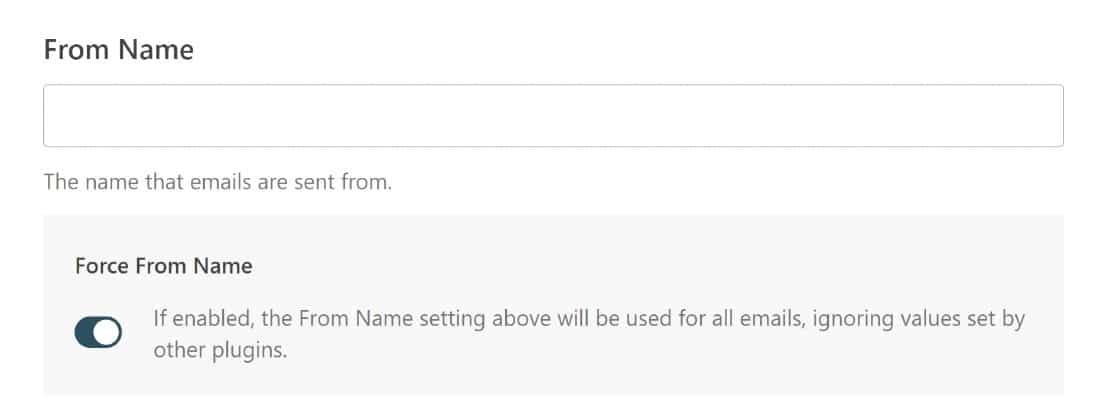
When you enable the Force From Email and Force From Name options, all emails sent from your website will use these email settings and override the email settings other plugins may be using on your site.
Once you’ve enabled these details, click Save and Continue to move on to the next few settings. The wizard now shows optional features. We strongly recommend enabling all of these:

- Improved Email Deliverability
- Email Error Tracking
- Detailed Email Logs
- Weekly Email Summary
It would be smart to enable these features for the best level of email tracking and deliverability management. Again, click the Save and Continue button to move on to the next page of the setup wizard.
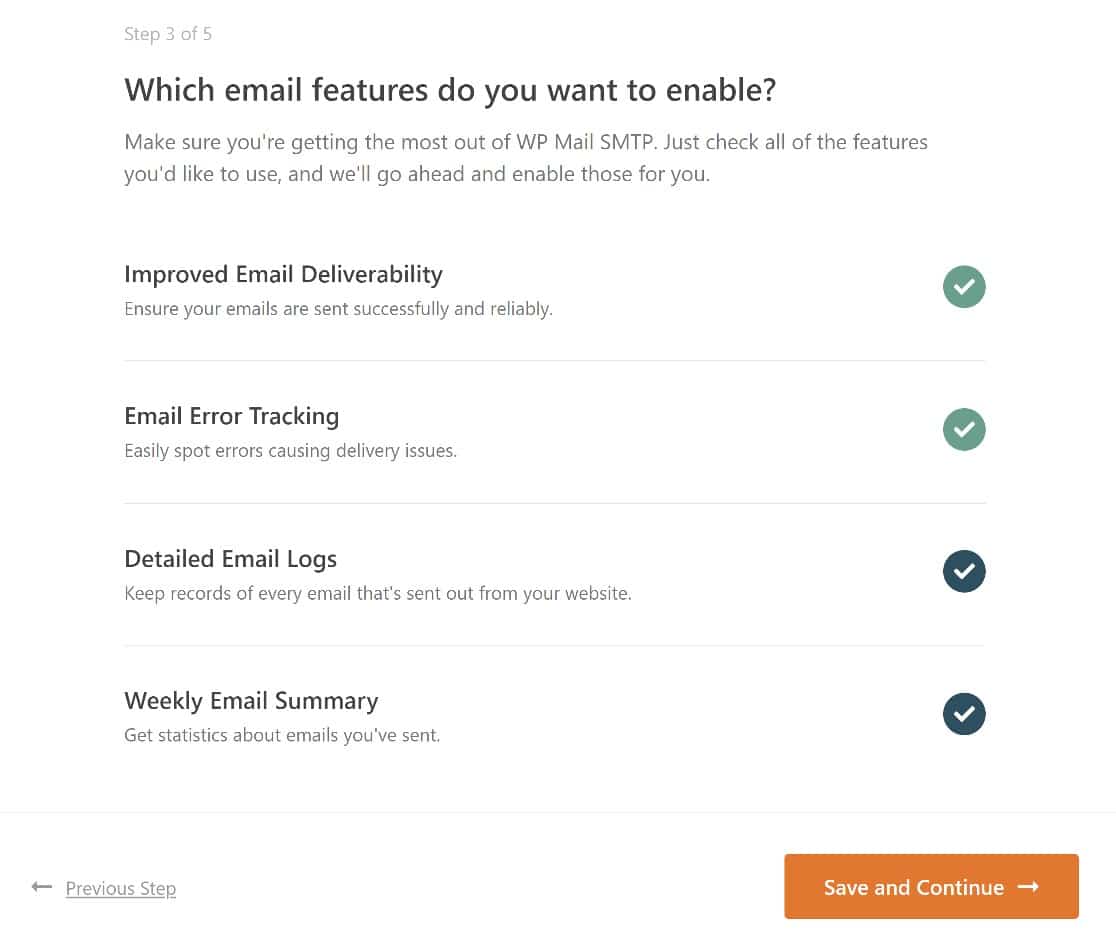
Enable these features for the best level of email tracking and deliverability management. Click Save and Continue.
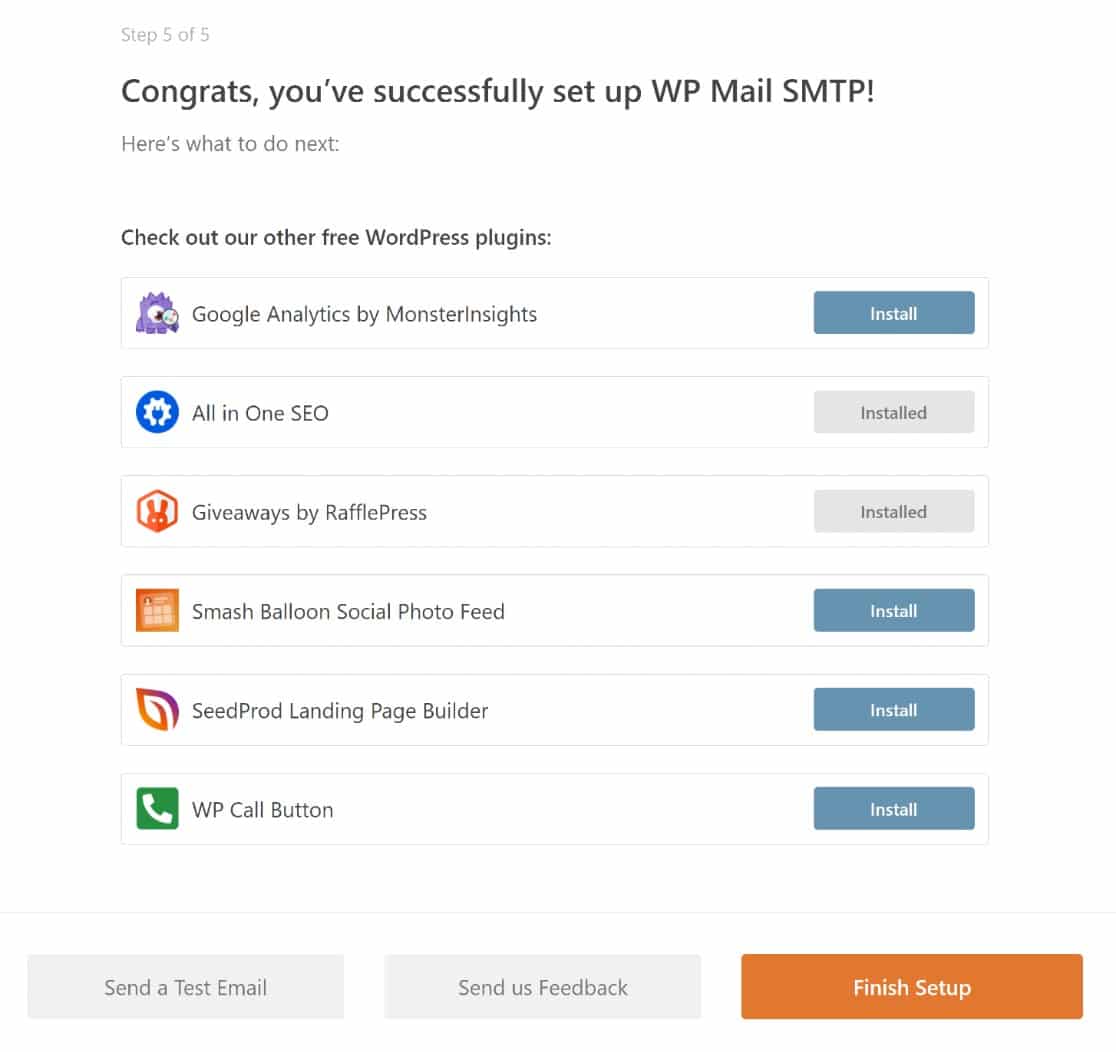
Now that WP Mail SMTP and SendLayer are all set up, SMTP blocks shouldn’t be an issue any longer. There’s only one thing left to do, and that’s to check that everything has worked as it should.
Step 4. Send a Test Email
When you reach the final step of the setup wizard and get the success message, click on the Send a Test Email button on the bottom left.
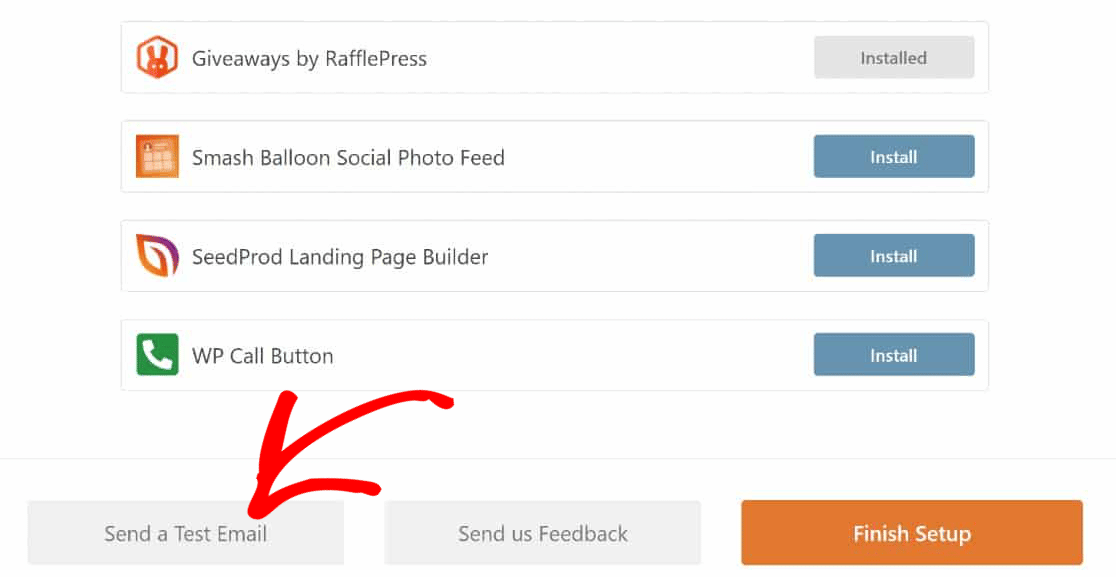
This will take you to WP Mail SMTP’s email testing tool. In the Send To field, enter any email address that you have access to and click Send Email.
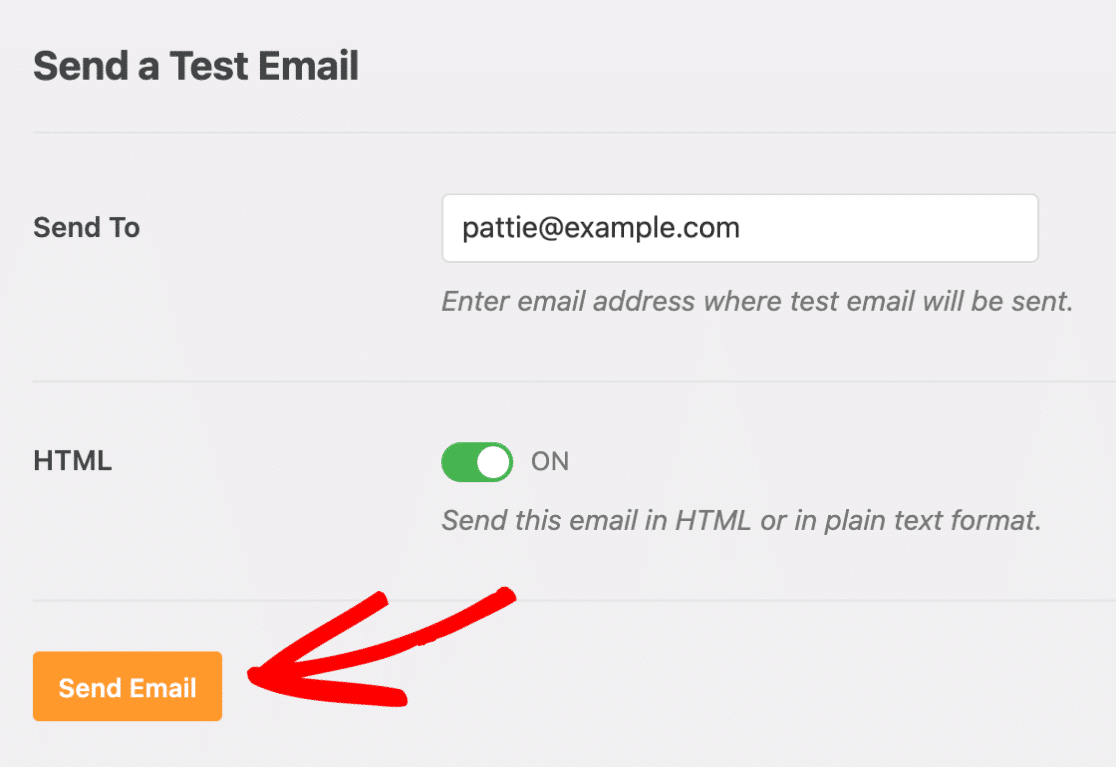
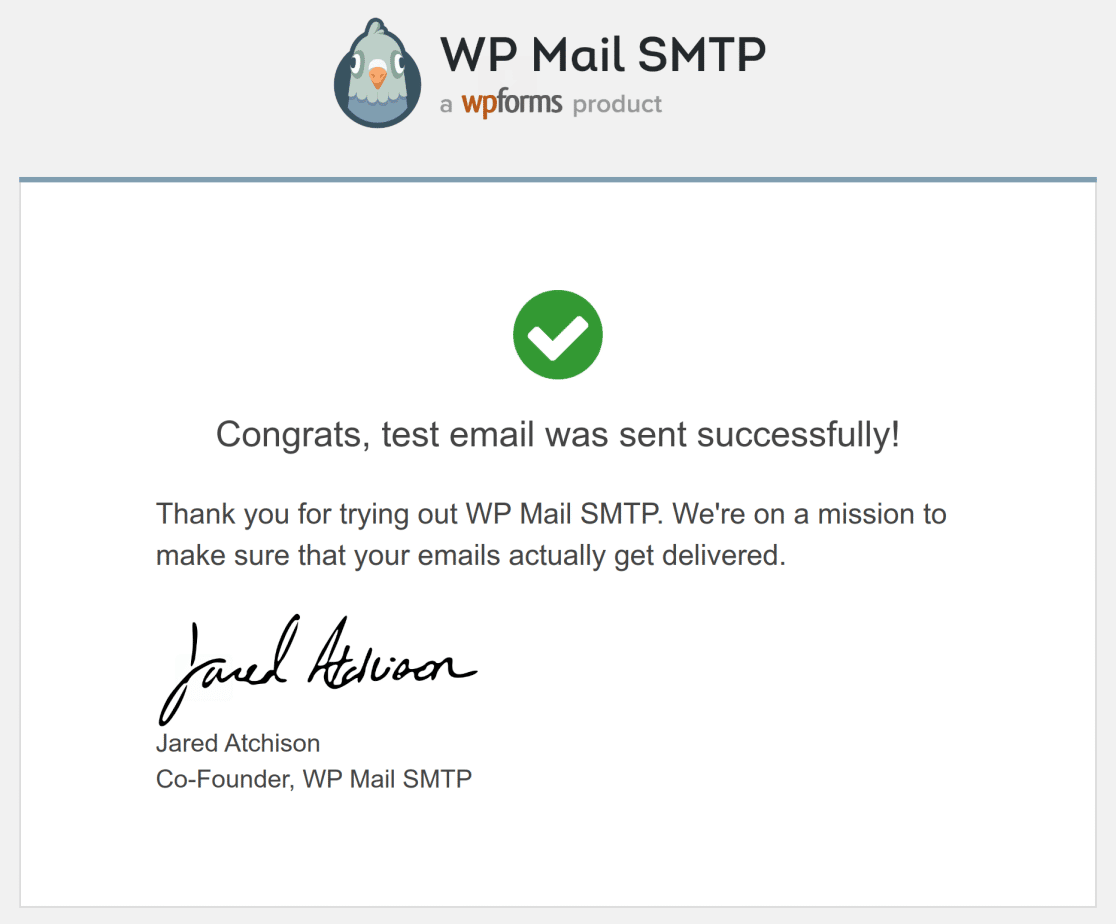
If the message has been sent successfully, you’ll get a success message. If everything went correctly, you should receive the email in your inbox. It will look like this:
And that’s it! Now, having SMTP blocked by your hosting service won’t stop you from sending emails when you need to.
Understanding SMTP Error Messages
Knowing what error messages mean saves hours of troubleshooting. Here’s what you’re dealing with:
| Error Message | What It Means | How to Fix It |
|---|---|---|
| SMTP connect() failed | Your host blocked the port completely | No settings changes will fix this. You must use an API mailer. |
| 535 Authentication failed | Wrong username or password | Double-check credentials. Copy-paste to avoid typos. |
| 550 5.7.1 Unable to relay | Server doesn’t recognize you as authorized | Your IP needs whitelisting. Contact your host. |
| 421 Service not available | Server overloaded or down | Wait 15 minutes and try again. |
| Connection timeout | Firewall blocking connection | Could be your host, security plugin, or ISP. Check all three. |
According to Microsoft’s Exchange documentation, these five errors account for 89% of all SMTP problems.
FAQs on Why Your Web Host Blocked SMTP (and How to Fix It)
Why is my SMTP blocked by my web host?
Web hosts block SMTP ports to prevent spam from their servers. When one user sends spam from a shared server, email providers like Gmail and Yahoo blacklist the entire server IP address. This affects every website on that server.
Most shared hosting providers block port 25 completely. They do this because it costs less than monitoring individual accounts for spam. According to hosting industry reports, over 70% of shared hosting plans have SMTP restrictions. The blocks protect their IP reputation but stop your legitimate emails too.
How do I check if SMTP ports are blocked?
You can also test through WP Mail SMTP. Set up “Other SMTP” with any email provider’s settings.
If you get connection errors when sending a test email, SMTP is likely blocked. The error won’t connect at all, not just fail authentication.
Why is Gmail SMTP server not working?
Gmail SMTP usually fails for four reasons:
Less Secure Apps Blocked: Google disabled “Less Secure App” access in May 2022. You must use App Passwords now.
Go to Google Account settings → Security → 2-Step Verification → App passwords. Generate one for “Mail” and use that instead of your regular password.
Wrong Settings: Use these exact settings:
- SMTP Host: smtp.gmail.com
- Port: 587 (or 465 for SSL)
- Encryption: TLS (or SSL for port 465)
- Username: Your full Gmail address
- Password: The app password (not your regular password)
Daily Limits: Gmail limits you to 500 emails per day for regular accounts, 2,000 for Google Workspace. Hit the limit and SMTP stops working for 24 hours.
IP Not Recognized: Gmail blocks new IP addresses. If you just switched hosts, Gmail might block your server’s IP until it builds reputation.
Which web hosts block SMTP connections?
Based on hosting provider documentation and user reports:
Always Block SMTP:
- GoDaddy (shared hosting)
- InMotion Hosting (shared plans)
- HostGator (shared plans)
- Bluehost (basic shared)
Block by Default (can request unblock):
- DigitalOcean (all droplets)
- Linode (new accounts)
- Vultr (all instances)
- AWS EC2 (new accounts)
Don’t Block SMTP:
- WP Engine
- Kinsta
- SiteGround (most plans)
- Cloudways
Budget and free hosts almost always block SMTP. VPS providers usually block it initially but allow unblocking through support tickets.
Can I send emails if port 25 is blocked?
Yes, you have three options:
- Use Alternative Ports: Try port 587 (submission), 465 (SSL), or 2525 (alternative). Many hosts block 25 but leave these open. About 60% of hosts that block port 25 still allow 587.
- Switch to API Mail Services: Services like SendLayer, Brevo, and Mailgun use HTTPS (port 443) instead of SMTP ports. They work even when all email ports are blocked.
- Use Web Host’s Relay: Some hosts provide their own SMTP relay service. Check your hosting control panel for “Email Relay” or “Smart Host” options.
Port 25 is only required for server-to-server communication. For sending authenticated emails, ports 587 or 465 work fine if they’re not blocked.
Why does DigitalOcean block SMTP?
DigitalOcean blocks SMTP on all new accounts to prevent spam abuse. Their official documentation states they block ports 25, 465, and 587 by default on all droplets created after November 2021.
They do this because spammers often create temporary accounts, send millions of spam emails, then disappear. One spam campaign can blacklist DigitalOcean’s entire IP range.
To unblock SMTP:
- Open a support ticket
- Explain your use case
- Describe anti-spam measures
- Wait 24-72 hours for review
DigitalOcean usually approves legitimate requests but may deny new accounts with no history.
Next, Get Alerts When Your Emails Stop Working
Lots of things can go wrong to make your emails stop working suddenly. Given how important emails are for any modern business, it would be smart to set up alerts so that any email failures are brought to your attention immediately.
Here’s how to get alerts when your WordPress emails stop working. WP Mail SMTP supports a number of different options for getting failure alerts, such as Slack, Discord, Microsoft Teams, SMS, Webhooks, Push Notifications, etc.
Ready to fix your emails? Get started today with the best WordPress SMTP plugin. If you don’t have the time to fix your emails, you can get full White Glove Setup assistance as an extra purchase, and there’s a 14-day money-back guarantee for all paid plans.
If this article helped you out, please follow us on Facebook and Twitter for more WordPress tips and tutorials.

