AI Summary
Is Wordfence not sending email from your website? Many users miss out on important alerts because these messages never make it to their inbox.
If you aren’t getting the right alerts, you might already be locked out of your site with no way to access it. This can be a problem, especially if you’re counting on those alerts to keep your site safe.
In this guide, I’ll walk you through clear steps to fix the problem, so you can start receiving Wordfence emails again without any trouble.
- Does Wordfence work with email logs for troubleshooting?
- 1. Send a Wordfence Test Email
- 2. Fix Wordfence Emails Not Sending With SMTP
- 3. Customize Email Alerts in Wordfence
- 4. Control Other WordPress Alert Emails
Is Wordfence Not Sending Unlock Email?
If Wordfence is not sending lockout emails, temporarily rename the Wordfence plugin directory to get back into WordPress. This will unlock your account.
After that, reinstall Wordfence and follow the steps below to send your Wordfence emails through SMTP. This will improve your email deliverability and stop the same thing from happening next time.
How to Fix Wordfence Not Sending Email
First, let’s send a basic test email to see if wp_mail() is working. This will allow us to see if your web host is set up to send emails from your site, which is an important troubleshooting step.
1. Send a Wordfence Test Email
To test your email alerts, click Wordfence » Tools in the WordPress dashboard.
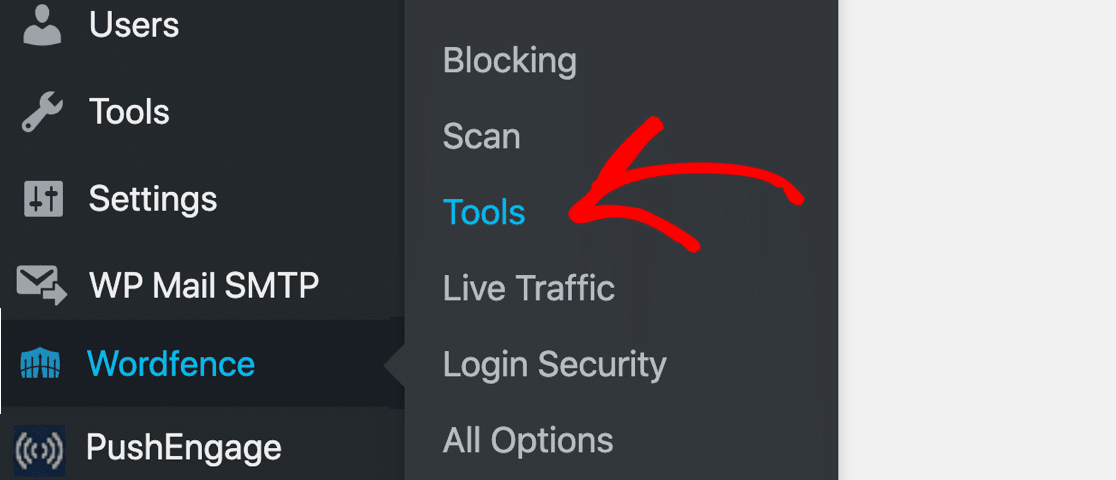
From the Live Traffic screen, click the Diagnostics tab.

Next, scroll all the way down to the bottom and expand the Other Tests section. You’ll see 2 different ways to test your Wordfence emails:
- Send a test email from this WordPress server to an email address
- Send a test activity report email
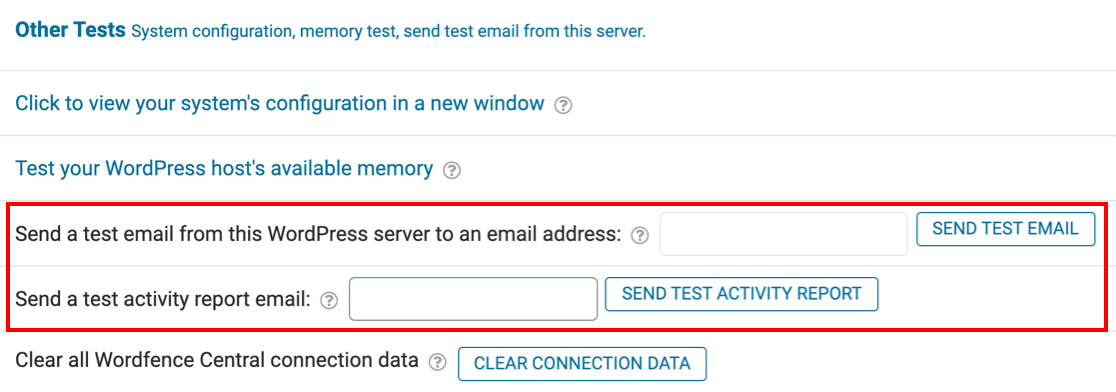
Let’s use the first option, Send a test email from this WordPress server. Type in your email address and press the Send Test Email button.
After triggering the email alert, Wordfence will show a result of True or False.
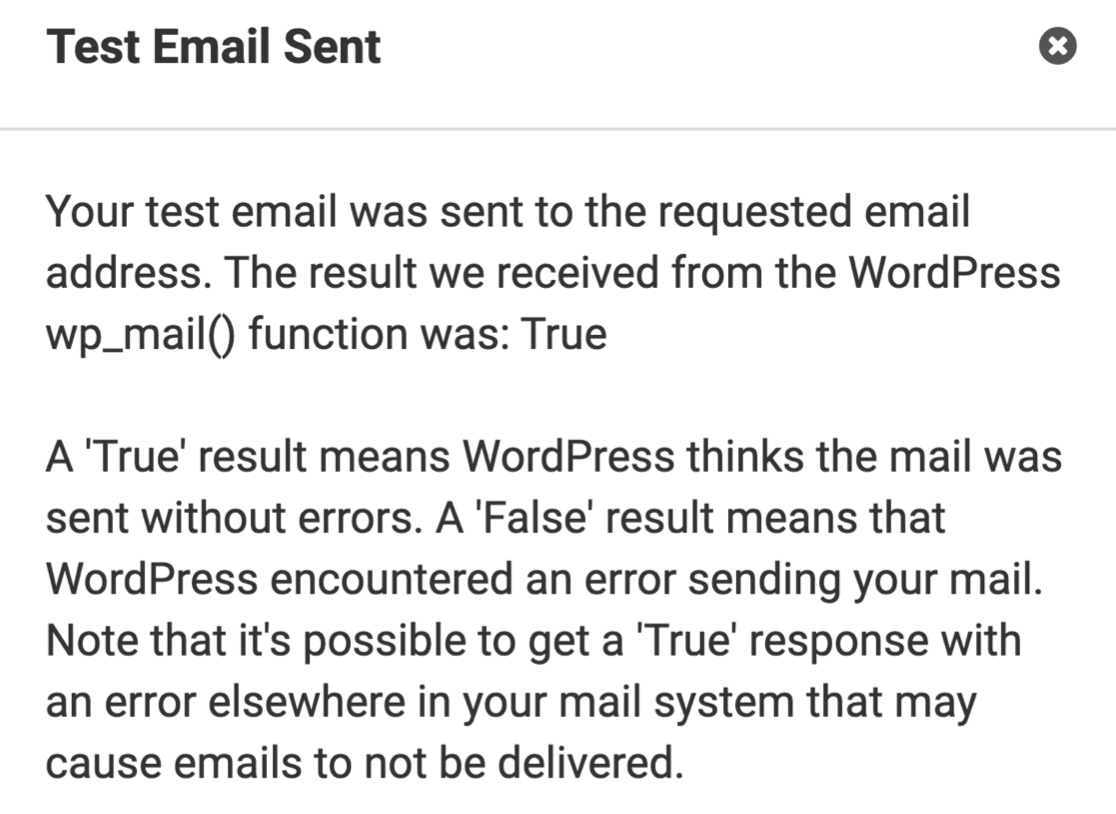
This alert only tells you whether the wp_mail() function generated the email. So it will confirm that your server is set up to send an email, but it can’t tell you what happens after that.
In WordPress, wp_mail() is a basic way of sending emails. It doesn’t authenticate the messages. So when these emails are received by other email servers, they might discard the emails or mark them as spam.
That’s likely why you’re seeing a successful test result, but Wordfence emails aren’t being delivered. To get much more detailed email logs, let’s use WP Mail SMTP to send emails instead.
2. Fix Wordfence Emails Not Sending With SMTP
WP Mail SMTP makes it easy to fix Wordfence not sending email. It takes over the wp_mail() function and sends emails via an external mailer service like SendLayer, Brevo (formerly Sendinblue), or SMTP.com instead.
When you send through a mailing service, every email will have the correct authentication. That’s what helps your emails to get through spam filters.
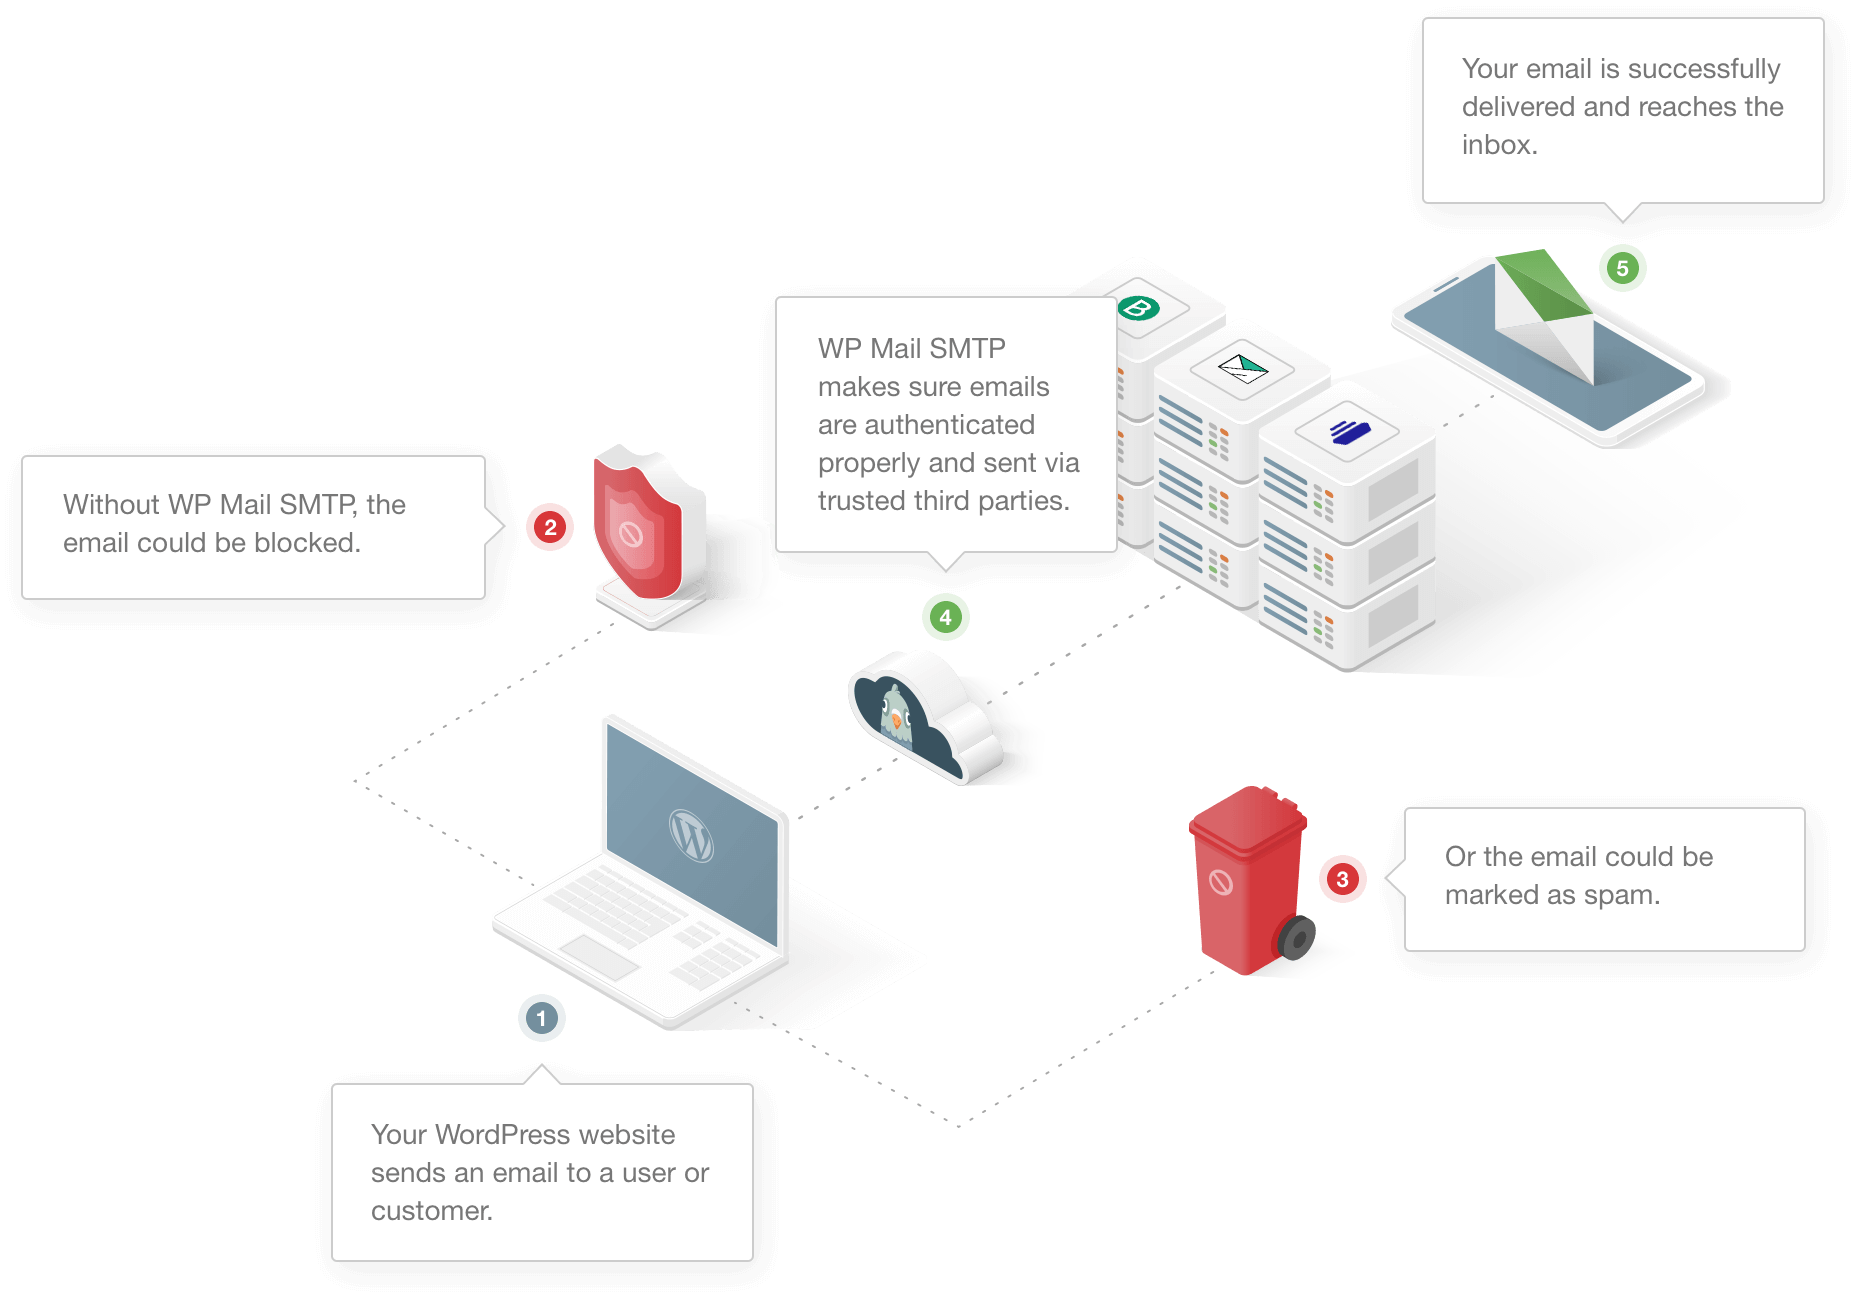
Once you set up WP Mail SMTP, all of your WordPress emails will be sent through the mailer you choose during setup.
It’s a great way to make sure you never miss a security alert, contact form message, or important lockout email.
We’ll show you how to set up WP Mail SMTP now.
Need a hand?
If you’d rather have someone else set up WP Mail SMTP for you, a full White Glove Setup service is included with the Elite license.
Install the WP Mail SMTP Plugin
To start, let’s download the plugin zip file from your WP Mail SMTP account. You’ll find it in the Downloads tab.
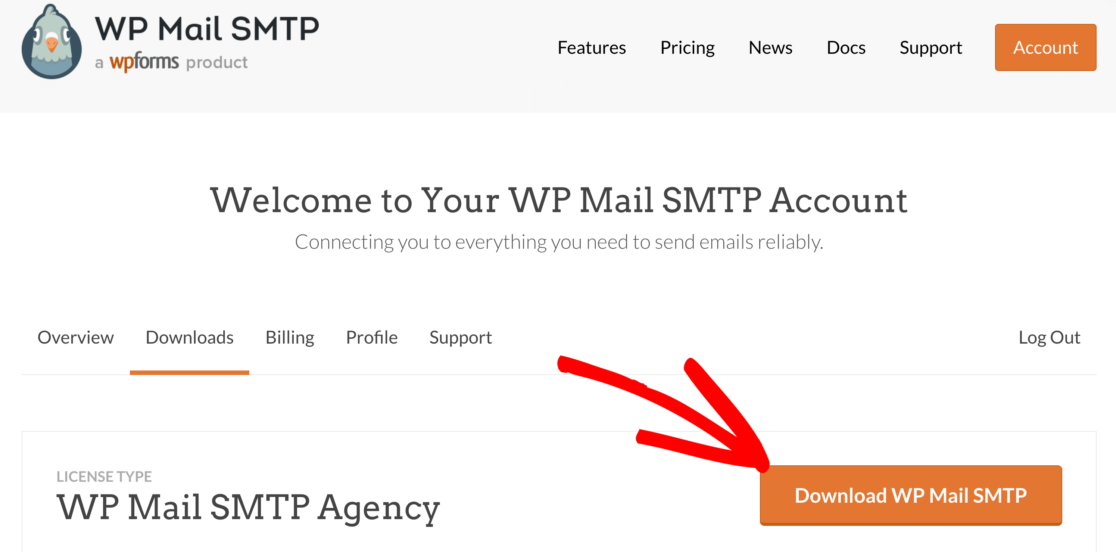
Next, open up the WordPress dashboard and upload the plugin to your WordPress site. If you need help with this, jump over to this guide to installing a WordPress plugin.

Don’t forget to activate the plugin. As soon as you do that, you’ll see the Setup Wizard open up in your browser.
Set Up Your Mailer
Now let’s choose a mailing service to fix Wordfence not sending emails. To start, click the Let’s Get Started button on the first page of the wizard.

Now it’s time to choose your mailer. We recommend SendLayer, SMTP.com, or Brevo because they’re reliable and easy to set up.
They’re also great for large sites that need to send a lot of emails. Check out this complete guide to email providers if you’re not sure which one to use.
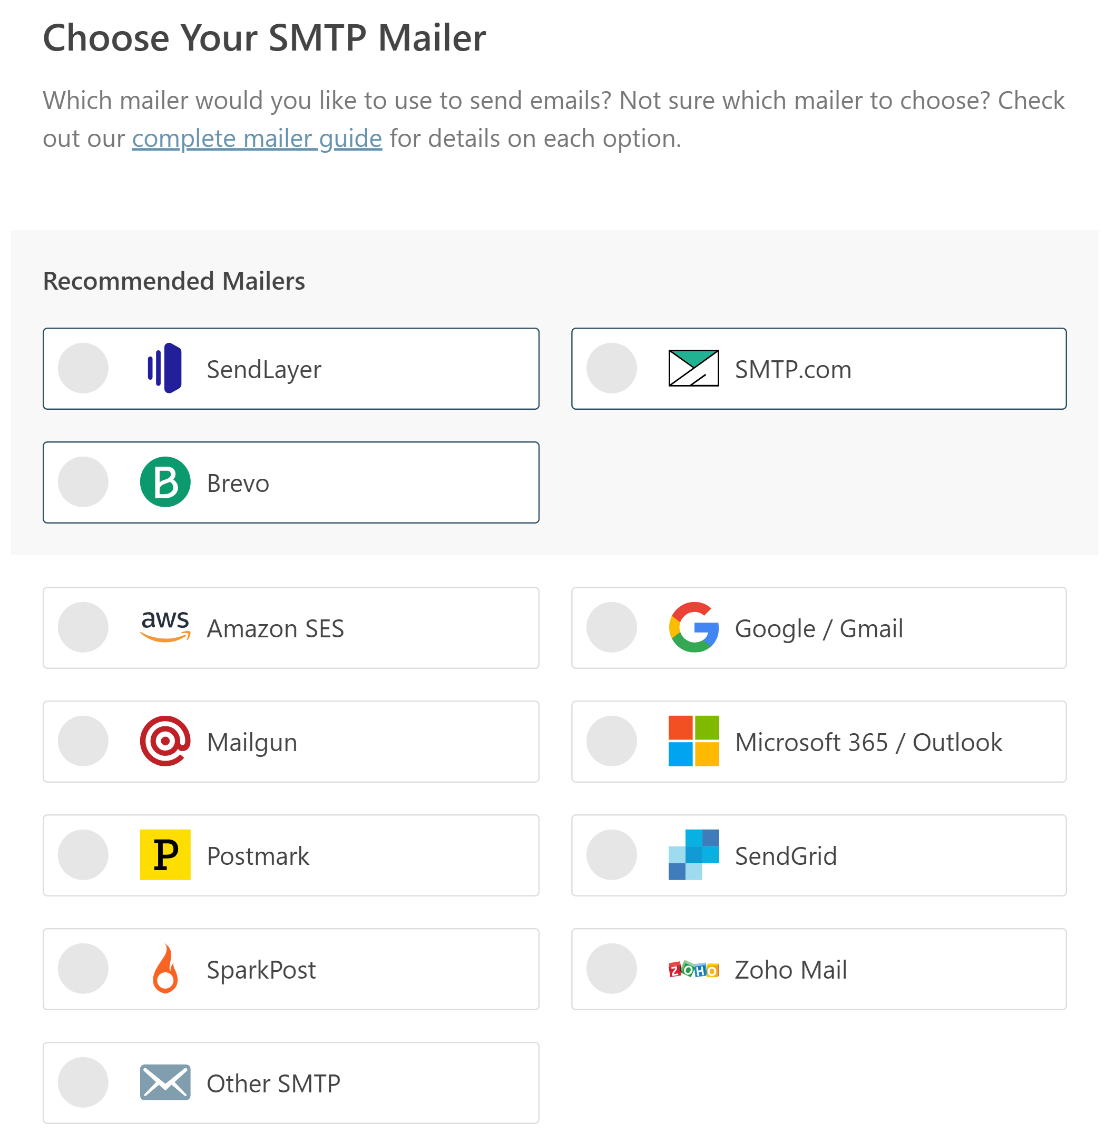
If you don’t want to use an external email service, you can use Other SMTP to send Wordfence emails through an SMTP server that you already have access to.
For example, you can use the SMTP server at your internet service provider. Keep in mind that some ISPs have limitations on the number of emails you can send.
Now you’ll want to switch over to the documentation for your chosen mailer to follow the setup steps. We have a detailed guide for each one:
- SendLayer
- SMTP.com
- Brevo
- Amazon SES
- Google Workspace / Gmail
- Mailgun
- Microsoft 365 / Outlook.com
- Postmark
- SendGrid
- SparkPost
- Zoho Mail
- Other SMTP
If you want to set up multiple mailers, you can do so in the Additional Connections settings once you’ve finished the Setup Wizard.
Then you can select a Backup Connection and configure Smart Routing. Setting up your mailer will take just a few minutes. When you’ve set everything up, come back to this guide.
Turn on WordPress Email Logging (Optional)
At the end of the wizard, WP Mail SMTP will automatically turn on 2 recommended features:
- Improved Email Deliverability
- Email Error Tracking
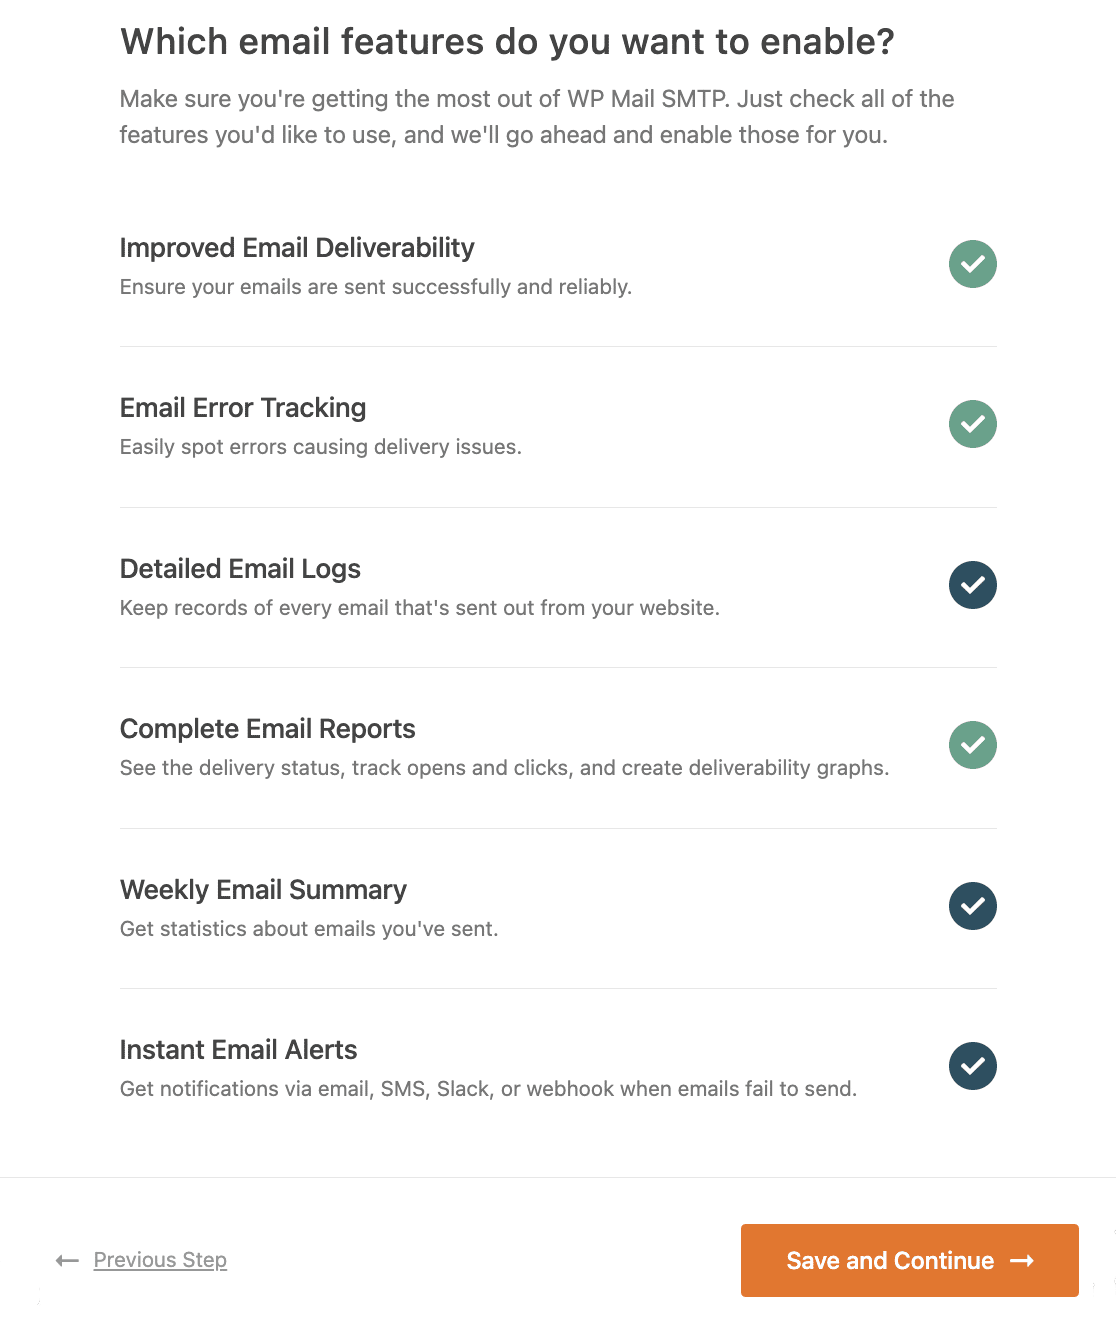
If you have a paid license for WP Mail SMTP, you’ll also be able to turn on Detailed Email Logs. Email logging will track details of each email sent from WordPress, including:
- Email headers
- Subject line
- Date sent
- Status (sent or delivered)
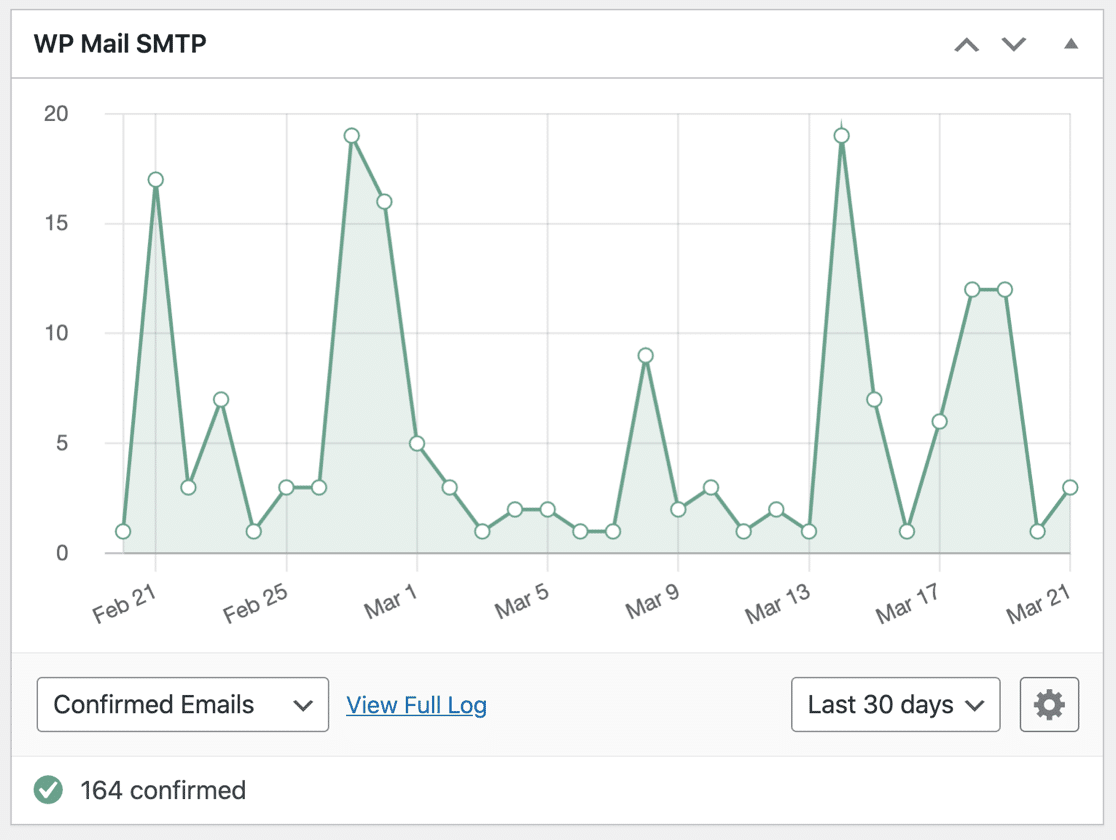
Enabling email logging lets you see the status of your sent emails in a dashboard widget. You can also view all of this information in Complete Email Reports, or see an overview in the Weekly Email Summary.
The other feature available here is Instant Email Alerts. These notifications let you know if your site fails to send an email.
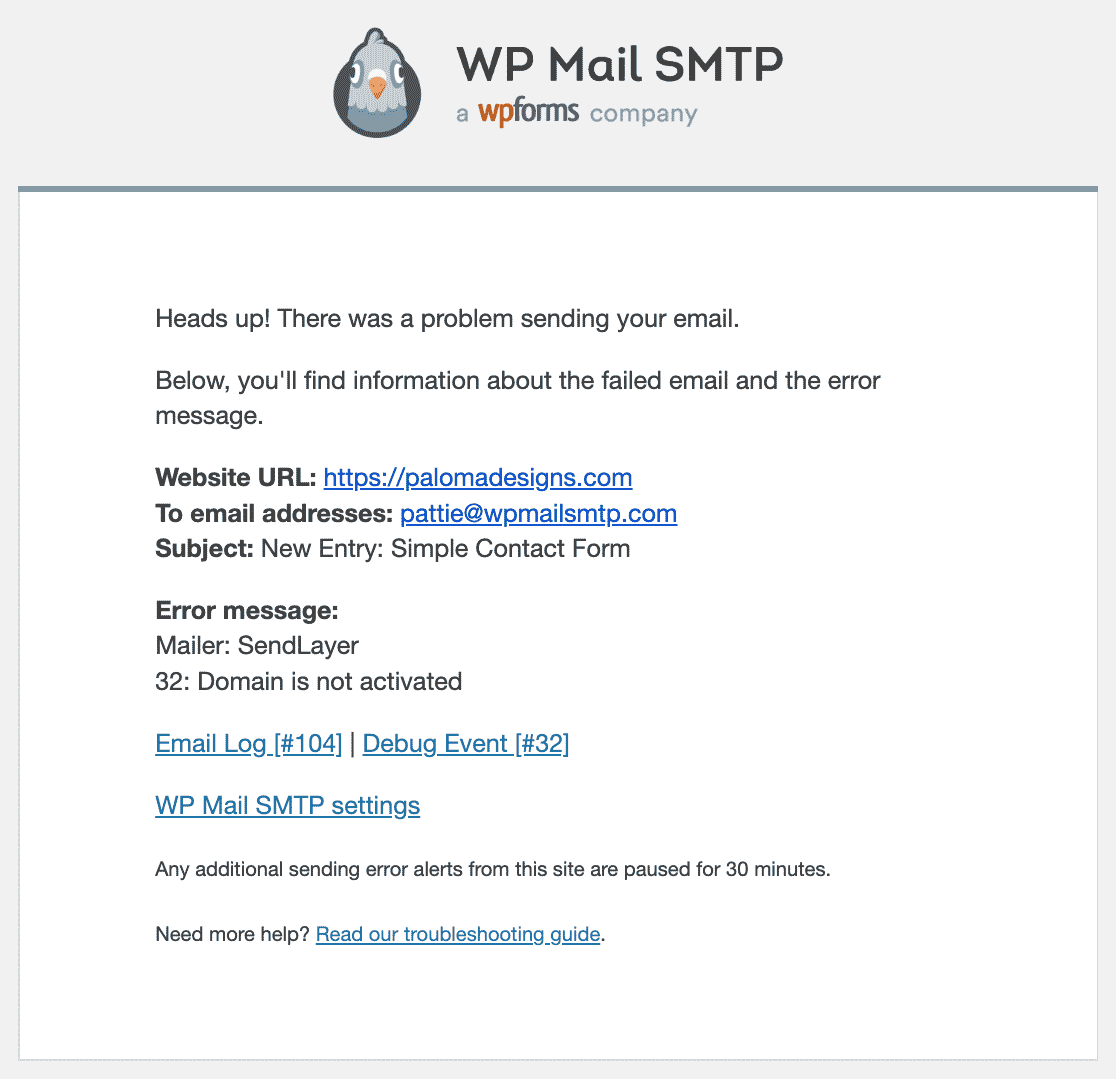
That way you can quickly troubleshoot the issue. Finally, on the next screen, you’ll have the option to enable advanced email logging options.
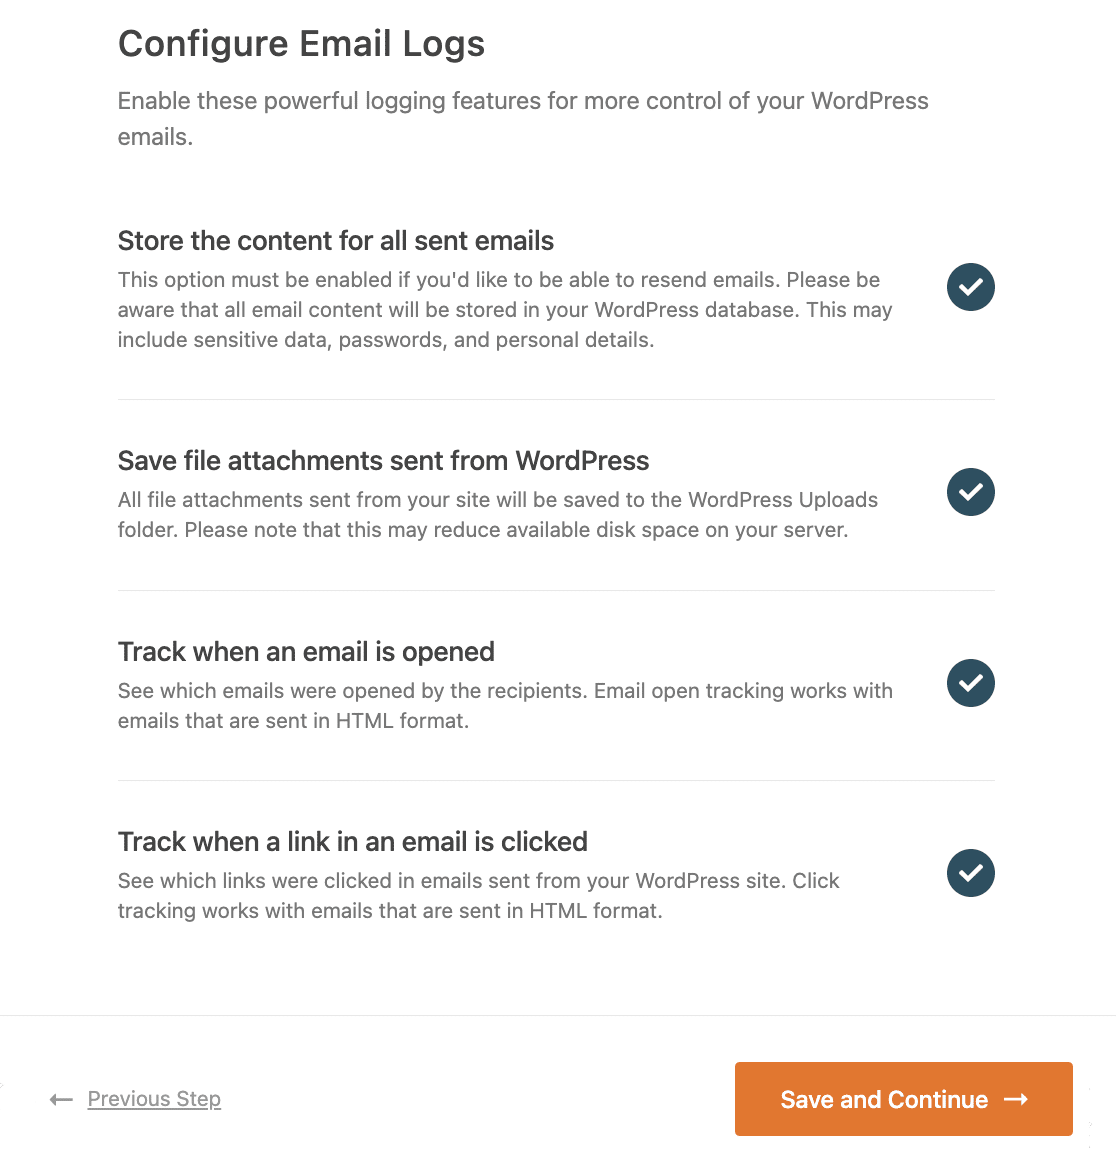
Here you can choose to save the content of all your email so you can resend them if needed. You can also export and print logs, track email opens and link clicks, save attachments, and more.
Check out our guide to WordPress email logging to find out how this works. OK, we’re almost done.
At the end of the wizard, paste in your license key. This will give you all of the updates and features in the Pro version of WP Mail SMTP.

And that’s it! WP Mail SMTP will automatically send a test email to your account. If you want to send another test, you can do it manually at any time.
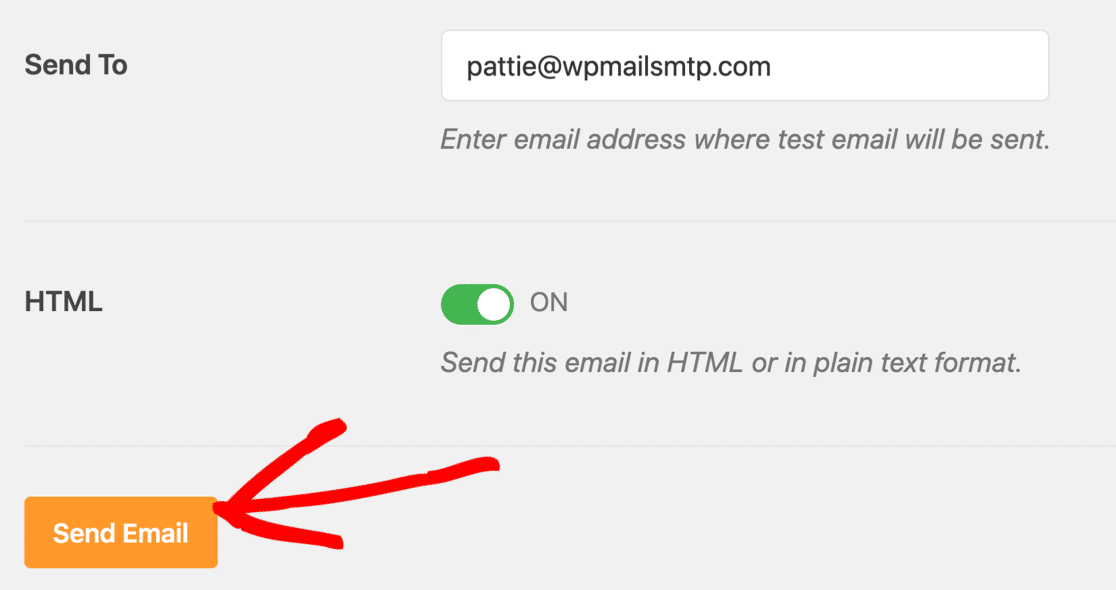
Remember how the Wordfence email test only told us the email was sent? Now you have access to a much better email test. With WP Mail SMTP, you’ll see full information about the actual delivery status of the email as well.
Additionally, WP Mail SMTP has its own Domain Checker that will spot potential problems with your DNS and warn you about them.

For example, here’s the message you’ll get if you have a missing DMARC record.

Now we have your mailer set up, it’s time to choose which alerts you want to receive.
3. Customize Email Alerts in Wordfence
In this step, we’re going to check the email alerts that Wordfence is sending. It’s a good idea to review these settings if you’re not receiving email alerts (or you’re getting too many).
To do that, open up the All Options page again.
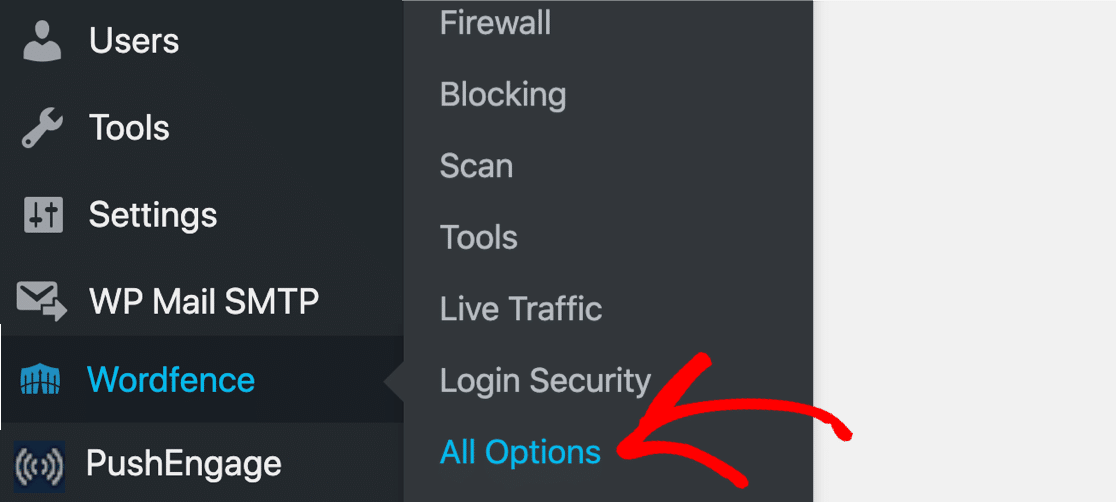
Let’s look at the Email Alert Preferences in the plugin.
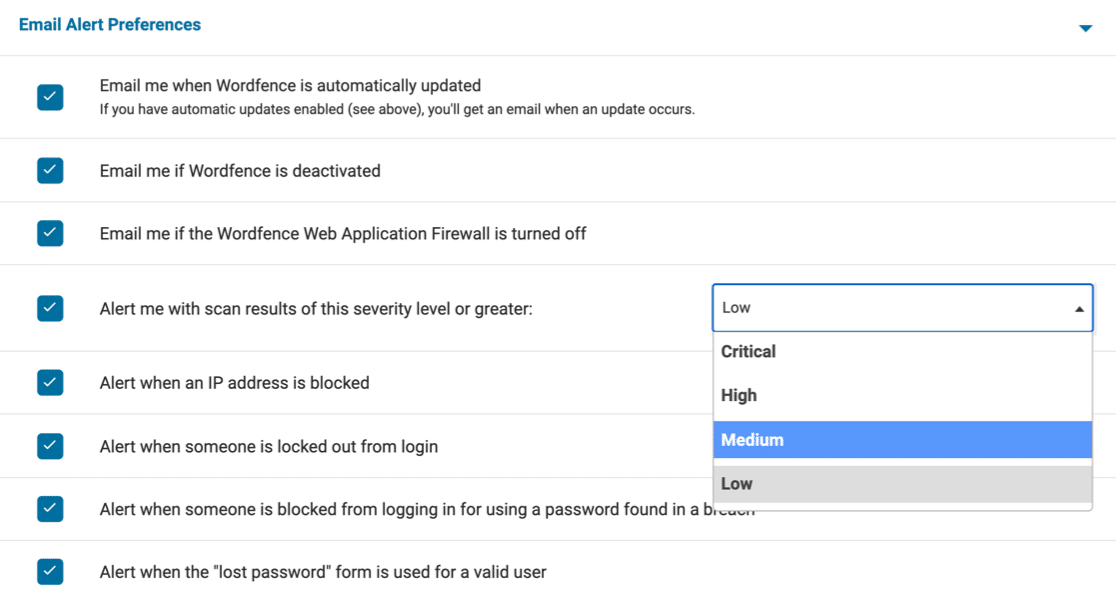
Some of these email alerts are important. For example, you’ll want to know if anyone disables Wordfence, so Email me if the Wordfence Web Application Firewall is turned off should normally be checked.
But you might want to disable some of the alerts that are less important, particularly if you have several sites all sending alerts.
Using the dropdown, you can choose the level of scan results you want to receive. Here are some examples of alerts at each level. This isn’t a complete list, but it should give you an idea of what this setting does.
| Scan Alert Severity | Alerts You’ll Get |
|---|---|
| Critical |
|
| High |
|
| Medium |
|
| Low |
|
Choose the alert level that matches the emails you want to receive. Don’t forget to Save your settings before moving on.
4. Control Other WordPress Alert Emails
WP Mail SMTP gives you an extra level of control over WordPress email alerts.
For example, if you get plugin updates from Wordfence after a security scan, you might not want to get plugin update emails from WordPress as well.
We’ll show you how to turn those core WordPress emails off. First, head to the Email Controls tab in your WP Mail SMTP settings.

Scroll down to Automatic Updates and turn plugin updates off using the switch.
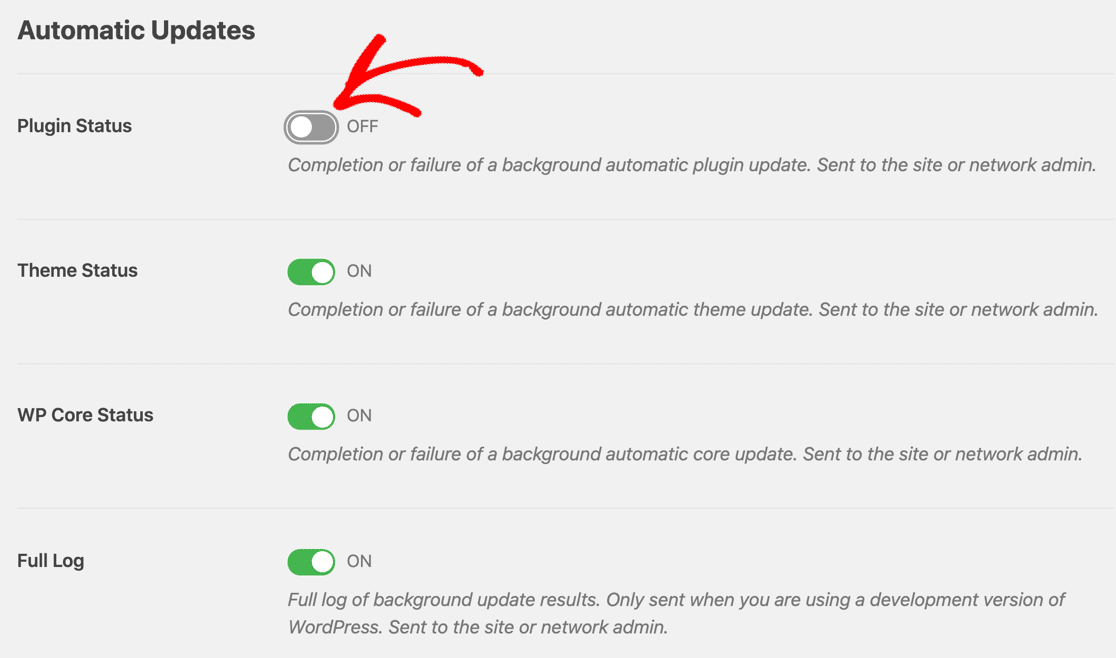
If you want, you can turn off automatic theme update emails and other alerts like:
- Comment moderation emails
- Notifications about email or password changes
- New user account email notifications
This extra control makes it easier to focus on the most important security alerts from Wordfence. And that’s it! You learned how to fix Wordfence not sending emails.
FAQ on Wordfence Plugin Problems
Let’s take a look at some other issues you might run into with Wordfence alerts.
How do I change the Wordfence alert email address?
You can change the Wordfence email under Wordfence » All Options. Wordfence uses the site admin email in WordPress by default, and sometimes that address doesn’t exist.
To change your Wordfence email address, open up the Wordfence » All Options page in your WordPress dashboard.

Scroll down a little and expand General Wordfence Options. You’ll see a field labeled Where to email alerts.
Delete the site admin email here and type in the email address you want to use.

How do I log Wordfence emails?
You can easily log Wordfence emails with WP Mail SMTP Pro. Head to the Settings page and then click the Email Log tab.
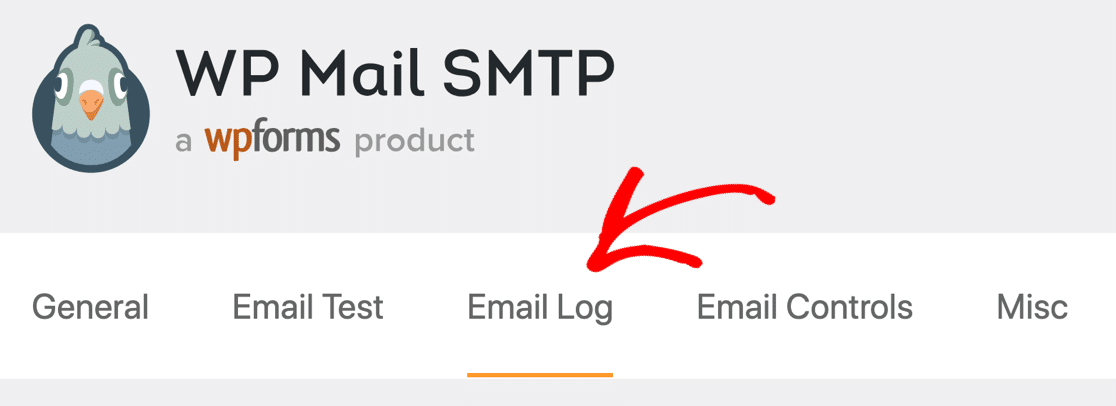
From here, turn on the options to Enable Log and Log Email Content.

Now you can track the alerts Wordfence is sending and open the emails in WordPress. Check out our guide to using the WordPress email log for more details.
Once you’ve read your Wordfence alerts, you can easily delete the logs if you don’t want to retain them after reading them.
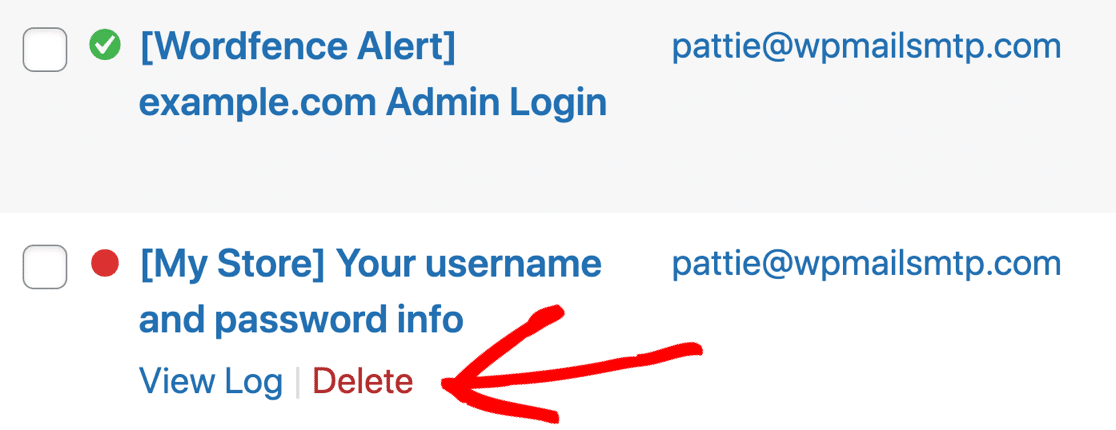
This can help you to track Wordfence problems right from your WordPress dashboard.
Why is Wordfence not sending any email alerts?
Most hosts block the default mail function WordPress uses. When that happens, Wordfence can’t send its alert messages, so nothing reaches your inbox.
Which SMTP plugin works best with Wordfence emails?
WP Mail SMTP pairs well with Wordfence. It links your site to a real mail server and makes sure alert emails leave your site without errors.
What Wordfence email settings should I check first?
Open Wordfence » All Options » Email Alert Preferences. Confirm the admin email is correct and that alerts are turned on. Save changes before testing.
Can Wordfence send emails through Gmail SMTP?
Yes. Set up WP Mail SMTP, choose Gmail as the mailer, and connect your Google account. Wordfence will then send its alerts through Gmail’s servers.
How do I fix the Wordfence API error that mentions email?
Install WP Mail SMTP and run the setup wizard. Once a working SMTP service is active, the API error linked to email delivery usually disappears.
Why do my Wordfence emails go to spam?
If you send mail through PHP, many filters mark it as junk. Using an authenticated SMTP service with WP Mail SMTP helps pass spam checks, so the alerts land in the inbox.
Can I test Wordfence email alerts before going live?
Yes. In WP Mail SMTP, use Tools » Email Test to send a test mail. If it arrives, Wordfence alerts should work as well.
Does Wordfence work with email logs for troubleshooting?
When you turn on Email Logging in WP Mail SMTP Pro, each Wordfence alert is recorded. You can see the status and resend failed messages from the log.
How often does Wordfence send scan or login alerts by email?
Wordfence sends an alert right after it spots a critical issue or a failed login. Regular scan results are emailed once the scan finishes, based on your schedule settings.
Next, Secure Your File Upload Forms
Did you know that WordPress limits the files you can upload in WordPress? Sometimes, this means your visitors won’t be able to upload important files.
Check out this guide on how to fix the “Sorry, this file type is not permitted for security reasons” error in WordPress. This guide shows you a completely safe way to allow the file uploads you need without any security risks.
To keep your site secure, we also strongly recommend that you avoid pirated software. Check out why you should never use WP Mail SMTP Pro Nulled.
Ready to fix your emails? Get started today with the best WordPress SMTP plugin. If you don’t have the time to fix your emails, you can get full White Glove Setup assistance as an extra purchase, and there’s a 14-day money-back guarantee for all paid plans.
If this article helped you out, please follow us on Facebook and Twitter for more WordPress tips and tutorials.

