Is your Getwid contact form block not sending emails from WordPress?
In this guide, we’ll show you how to solve the problem.
In This Article
Why Is My Getwid Form Not Working?
Your Getwid contact form is likely not sending email because of an issue with the WordPress wp_mail() function.
Most plugins use this function to send emails from WordPress. Unfortunately, it’s not too reliable. When WordPress uses wp_mail(), the emails are sent without the proper email headers.
There are other reasons for contact forms not working, but most sites have the same fundamental issues with WordPress’ use of email. Luckily, you can use WP Mail SMTP to bypass wp_mail() entirely and fix the emails from your site.
Step 1: Check Getwid Contact Form Settings
Before we go any further, let’s check that your Getwid form is set up correctly. There aren’t many options to look at here, but you’ll want to review the fields on your form at the very least.
Most Getwid forms have the following fields:
- Name
- Message
- Text
- reCAPTCHA
Let’s check reCAPTCHA since that can sometimes cause submissions to fail.
From the WordPress navigation menu, go to Settings » Getwid.
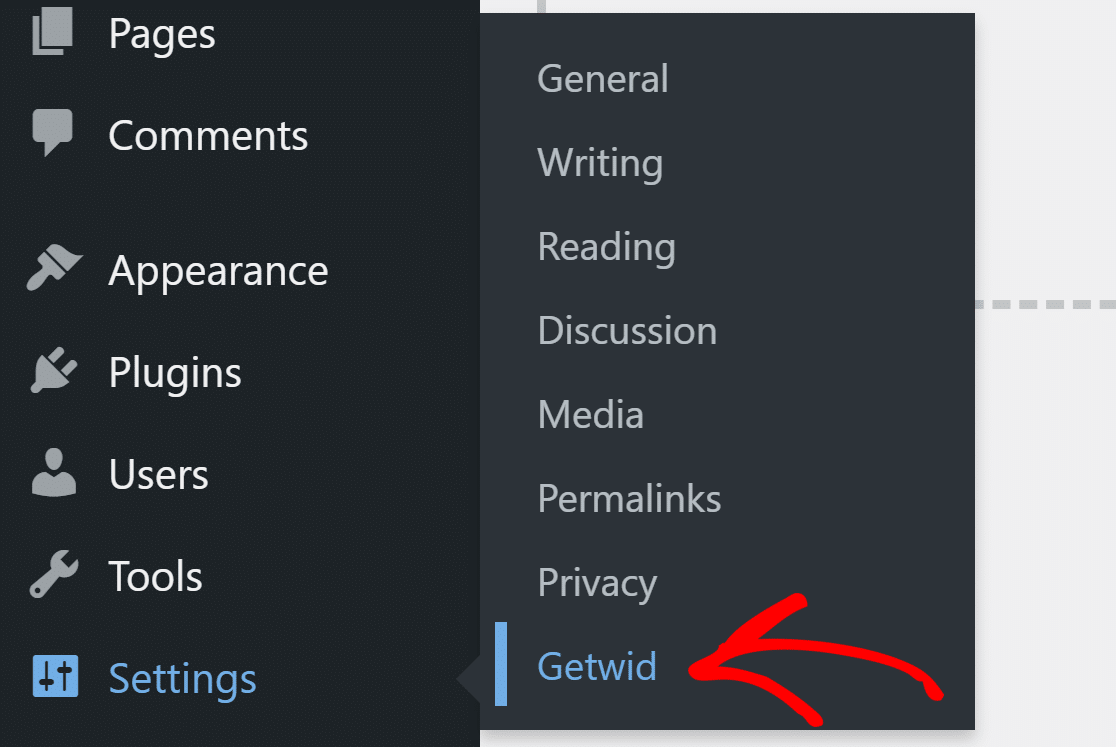
Under the General tab, make sure you have the correct Site Key and Secret Key for Google reCAPTCHA.

Assuming everything looks good with reCAPTCHA, let’s move on and fix the issues with wp_mail().
Step 2: Fix Your WordPress Emails
To bypass wp_mail() and fix the emails on your site, you’ll want to use WP Mail SMTP.
It redirects all WordPress emails through a 3rd party mailer service. And you can choose from a variety of free and low-cost options like SendLayer, SMTP.com, or Brevo.
Setting up the plugin is easy. There’s a Setup Wizard to guide you. However, if you’d prefer to have someone else set up WP Mail SMTP, you can add White Glove Setup to your purchase.

If you’d like to do it by yourself follow the steps below.
Install the SMTP Plugin
After purchasing WP Mail SMTP, go to your WP Mail SMTP account. Click the Downloads tab, then click on the orange Download WP Mail SMTP button to download the plugin file.
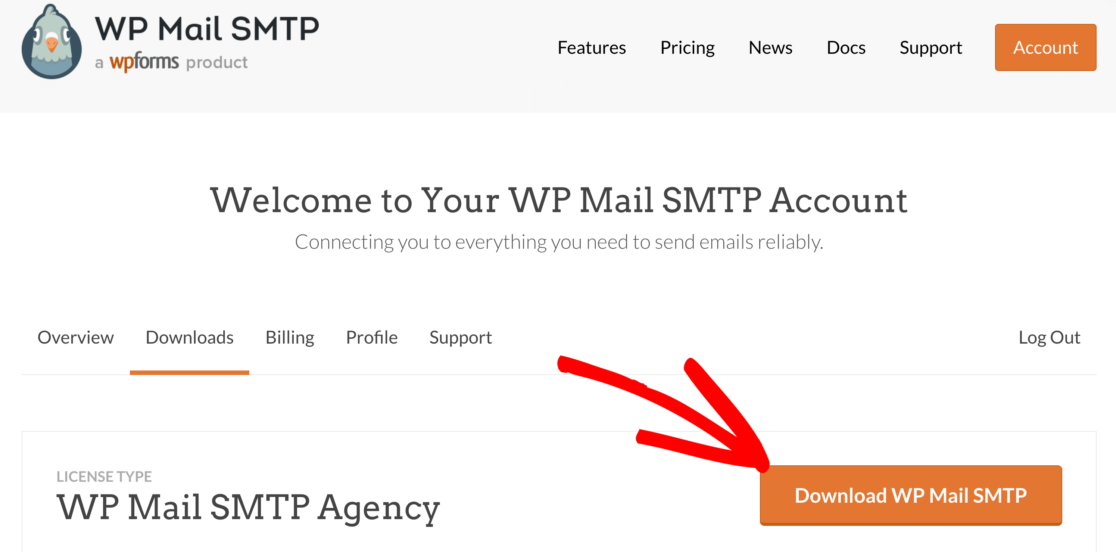
Switch to the WordPress dashboard and upload the zip file on the plugin page. If you need help with this, refer to this guide on installing a WordPress plugin.

After installing the plugin, activate it and the Setup Wizard will open.
Choose a Mailer Service
In this step, we’ll choose a mailer service that will add authentication to the emails sent from your website. Click on the Let’s Get Started button to begin.

WP Mail SMTP offers free and paid mailers.
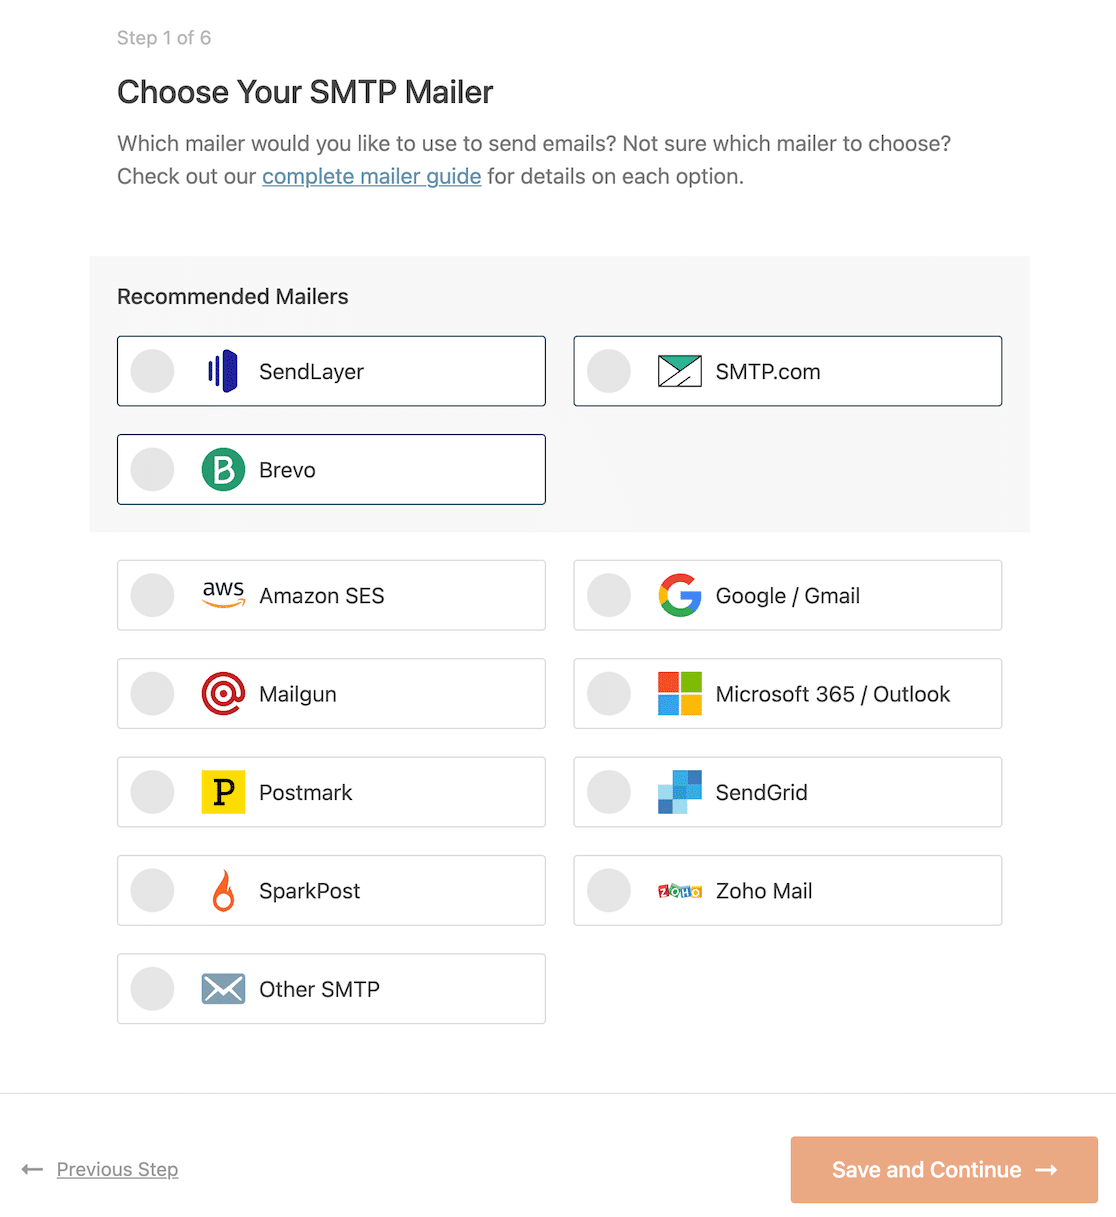
Once you choose the mailer service, click the below link to open the documentation guide and complete the steps on the mailer website.
- SendLayer
- SMTP.com
- Brevo
- Amazon SES
- Google Workspace / Gmail
- Mailgun
- Microsoft 365 / Outlook.com
- Postmark
- SendGrid
- SparkPost
- Zoho Mail
- Other SMTP
Switch back to this guide when you’re done setting up the mailer service.
Enable Email Logging (Optional)
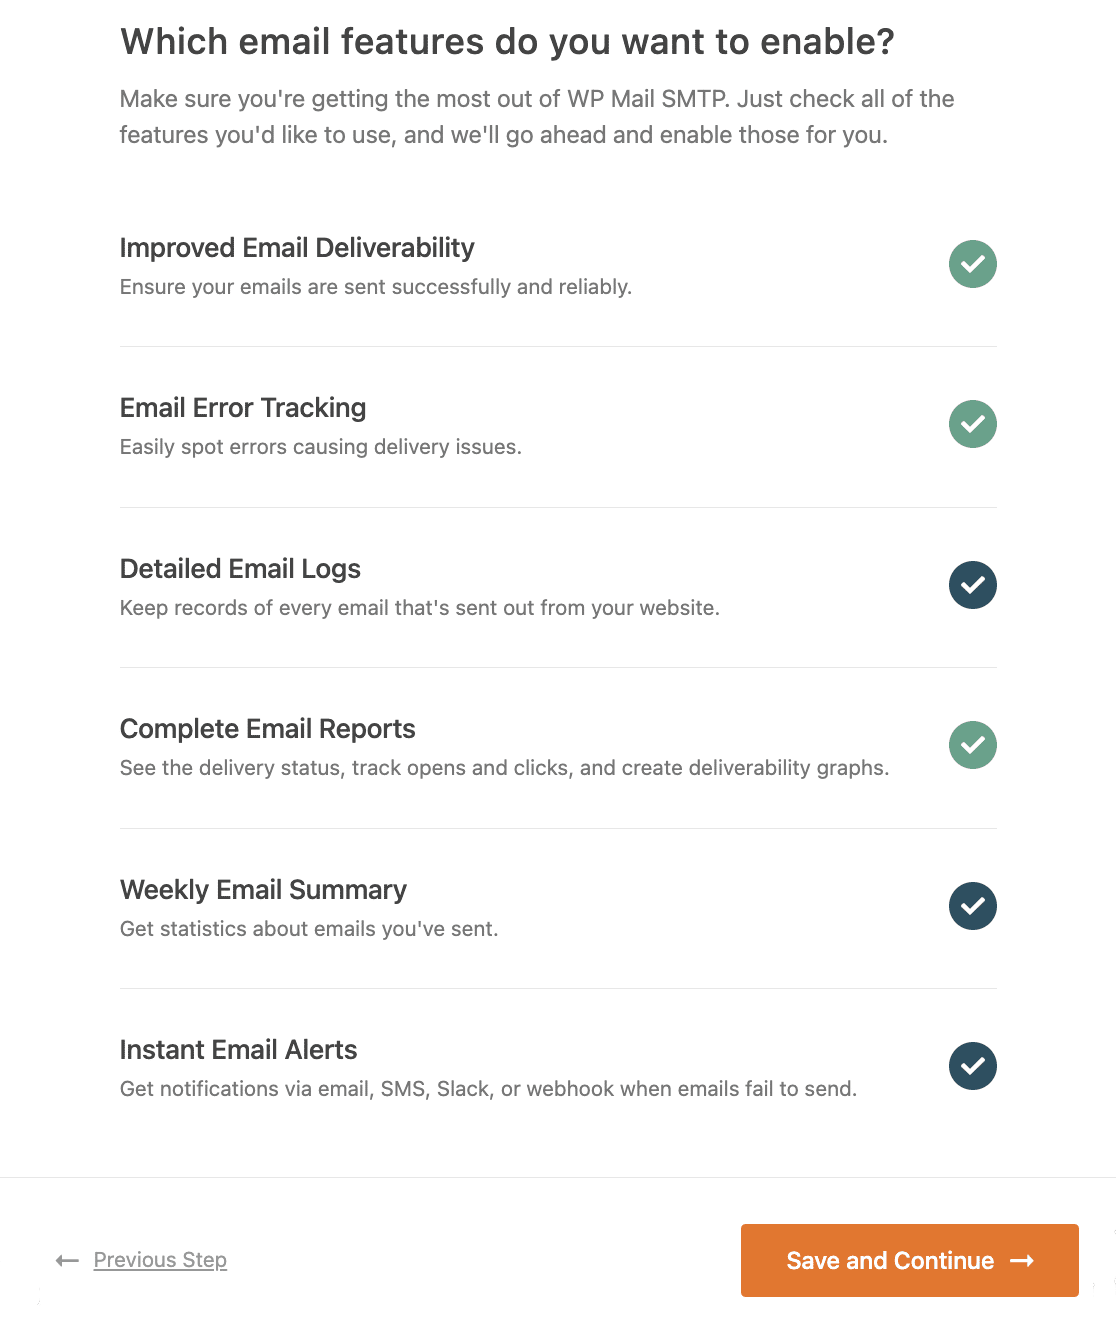
For this step, you’ll see two options enabled by default.
- Improved Email Deliverability: This will ensure all emails are delivered reliably.
- Email Error Tracking: This will detect any errors that might cause email delivery issues.
If you have the Pro version or higher, you can also turn on Detailed Email Logs to keep track of all emails that are sent out from your site.
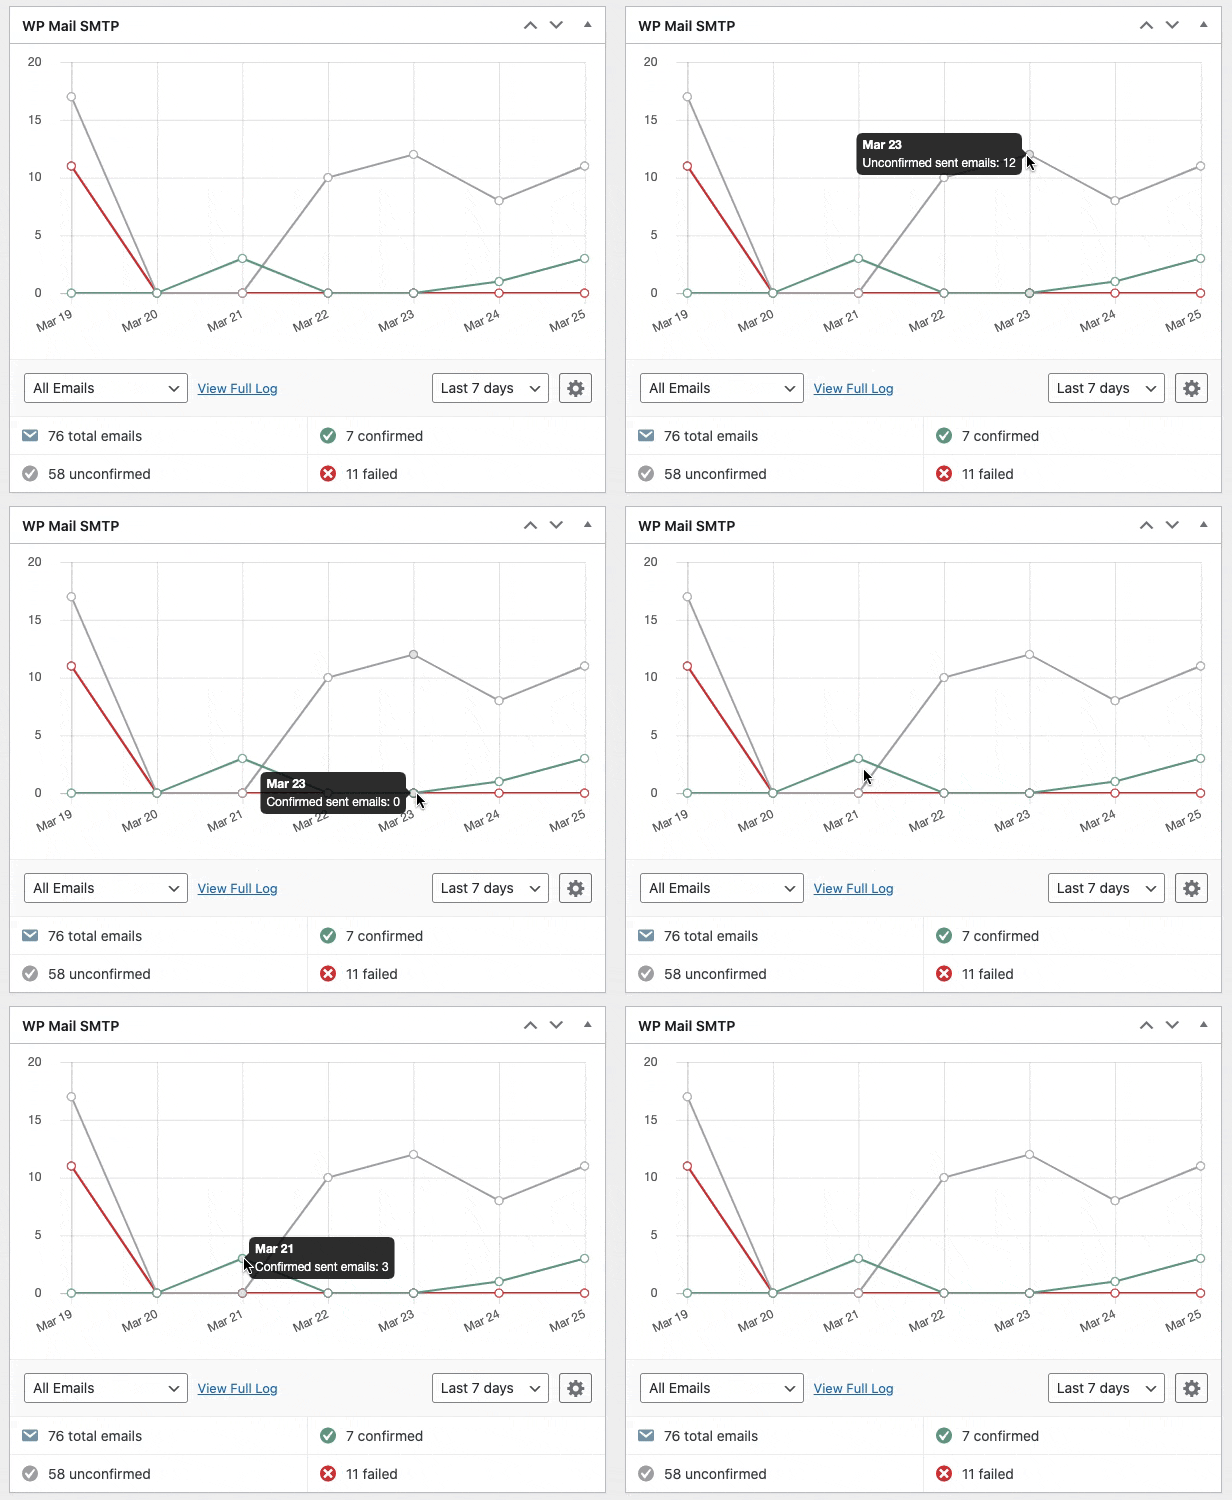
WP Mail SMTP also includes a dashboard widget that shows the log in the form of a chart. This makes it easy to spot any error in your emails.
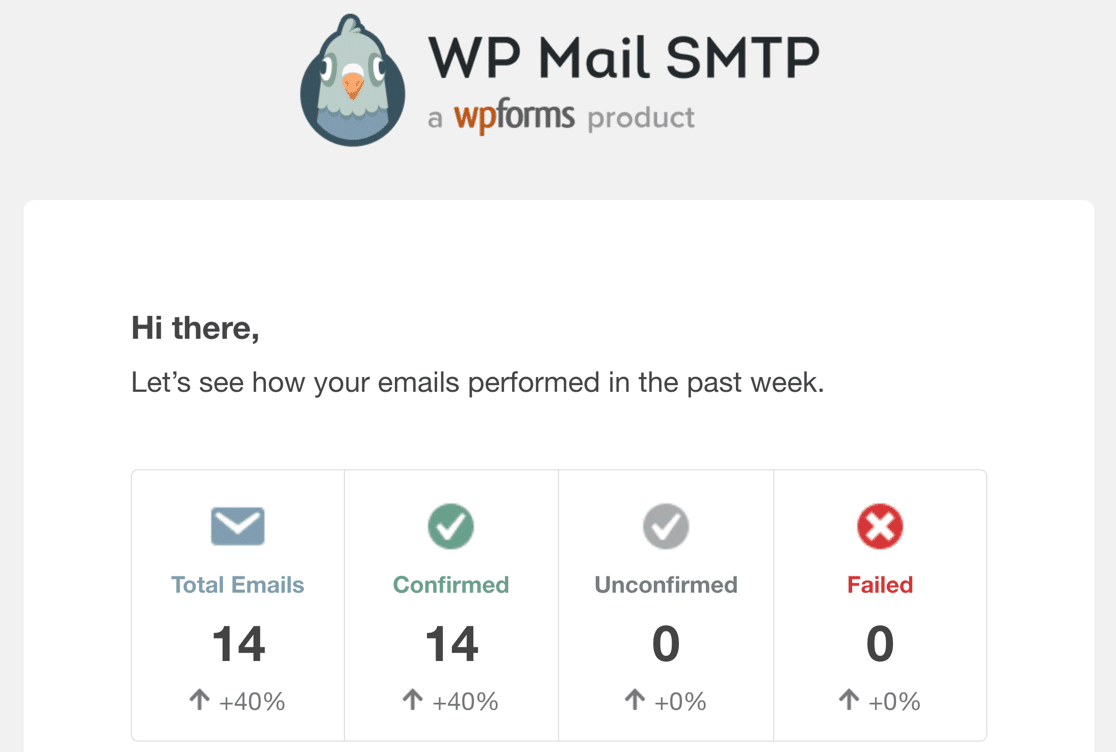
Turning on email logging automatically enables Complete Email Reports. You’ll also be able to choose if you want to receive a Weekly Email Summary with your latest email delivery stats.
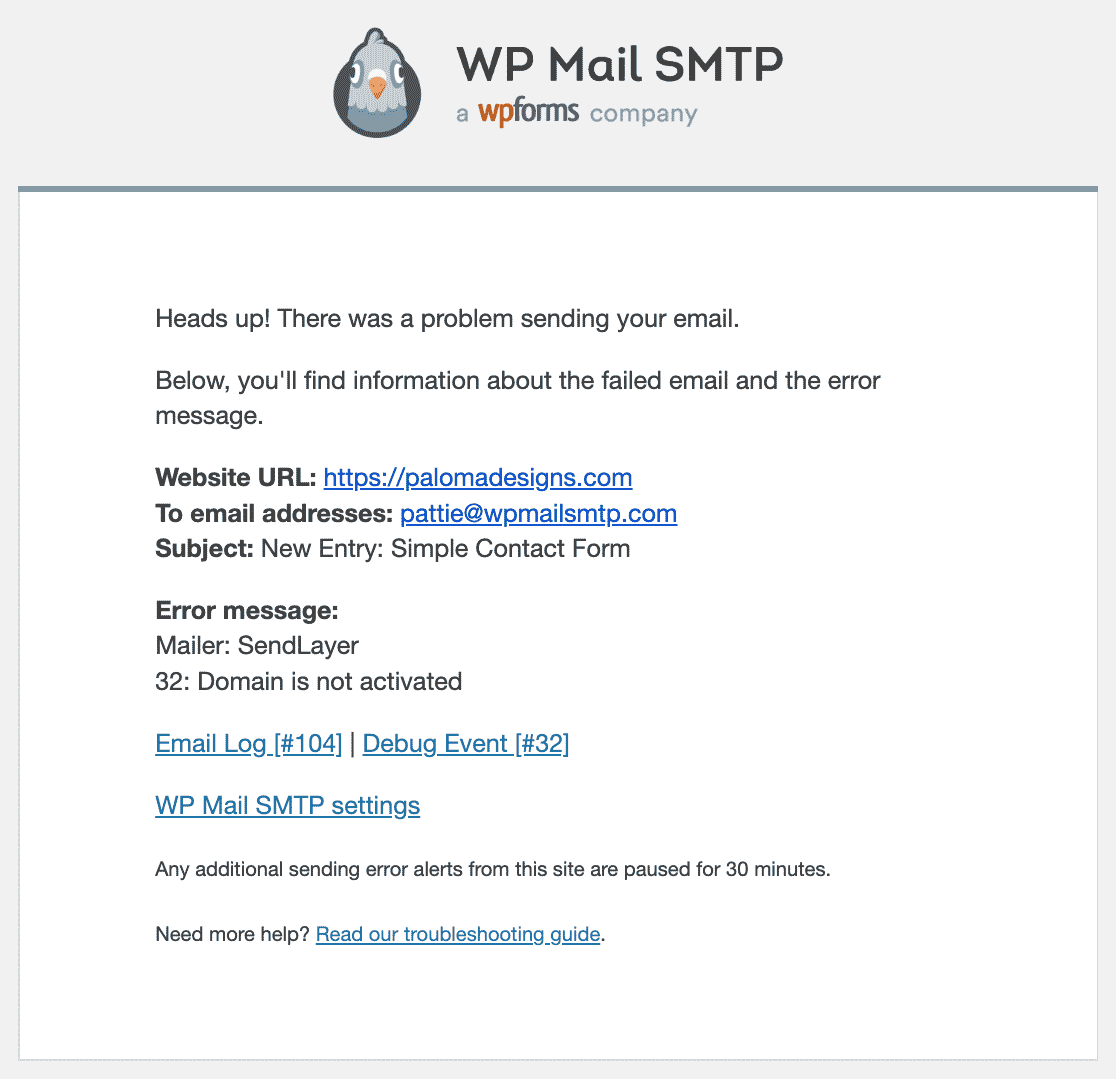
The other feature you can enable here is Instant Email Alerts. This will let you know whenever your site fails to send an email. That way you can quickly fix the problem and get your emails sending again.
Once you’re done here, go to the next step in the Setup Wizard. The options on this screen give you the chance to enable advanced email logging features.
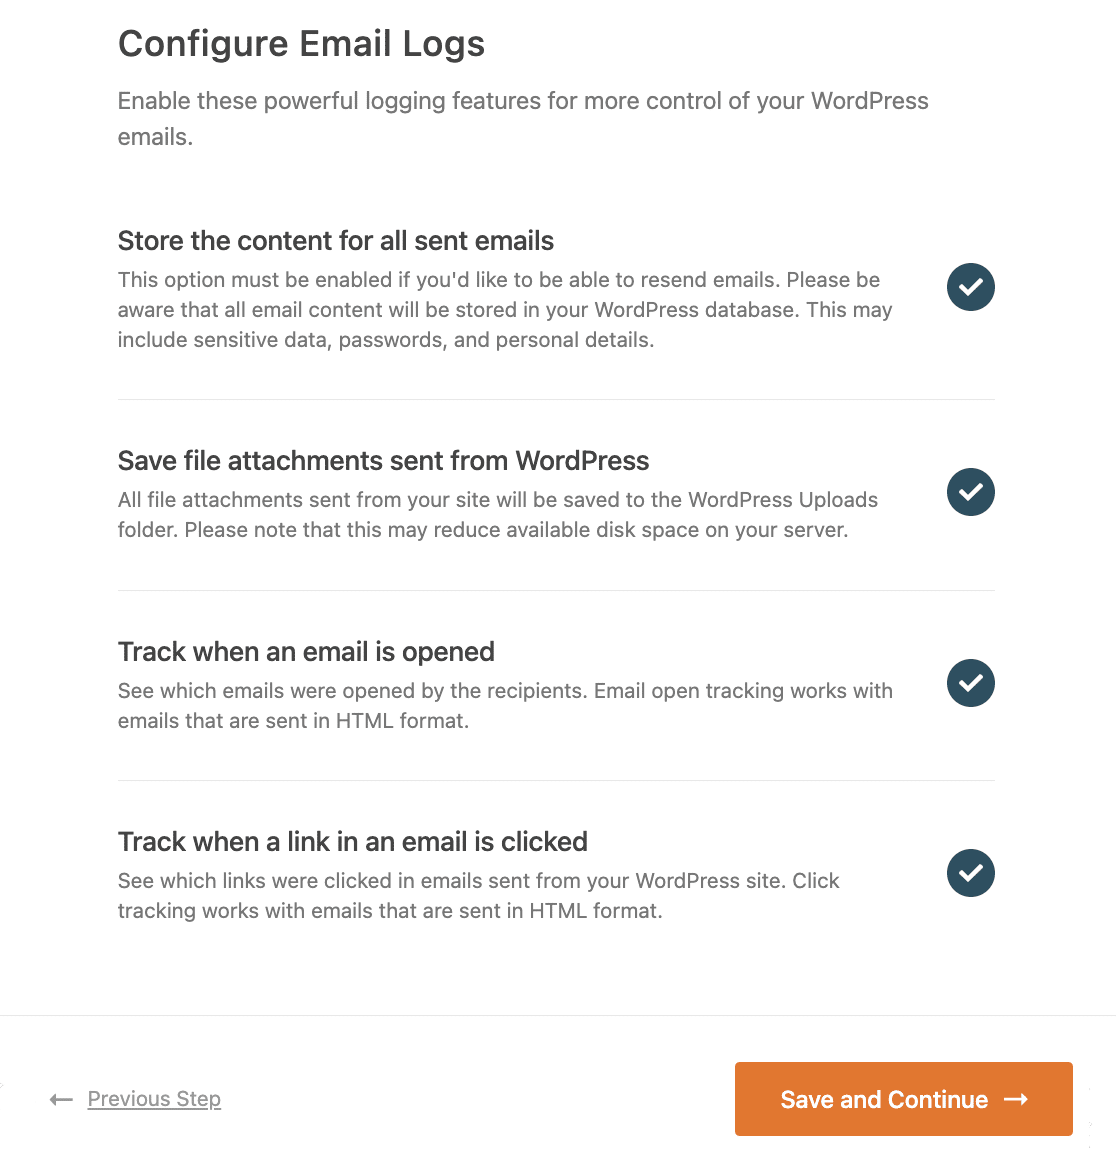
You can save all email content so you can resend or forward emails, save file attachments so youc an
Check out our guide to logging WordPress emails to see how this works.
For the last step, grab the license key from the WP Mail SMTP account and paste it into the box to enable extra features and future automatic updates.

You can now send a test email from WP Mail SMTP to check if everything’s working.
Step 3: Change the From Email in WordPress
Your emails might still go to the spam folder if they are sent from the default WordPress email address.
Getwid contact form does not have any settings to change that.
Luckily, with WP Mail SMTP, you can force all plugins on your website to send emails from a real address. This is applied to default notifications from WordPress as well.
Go to the WP Mail SMTP settings and under the General tab, scroll down to From Email. Enter the email address you’d like to send emails from.
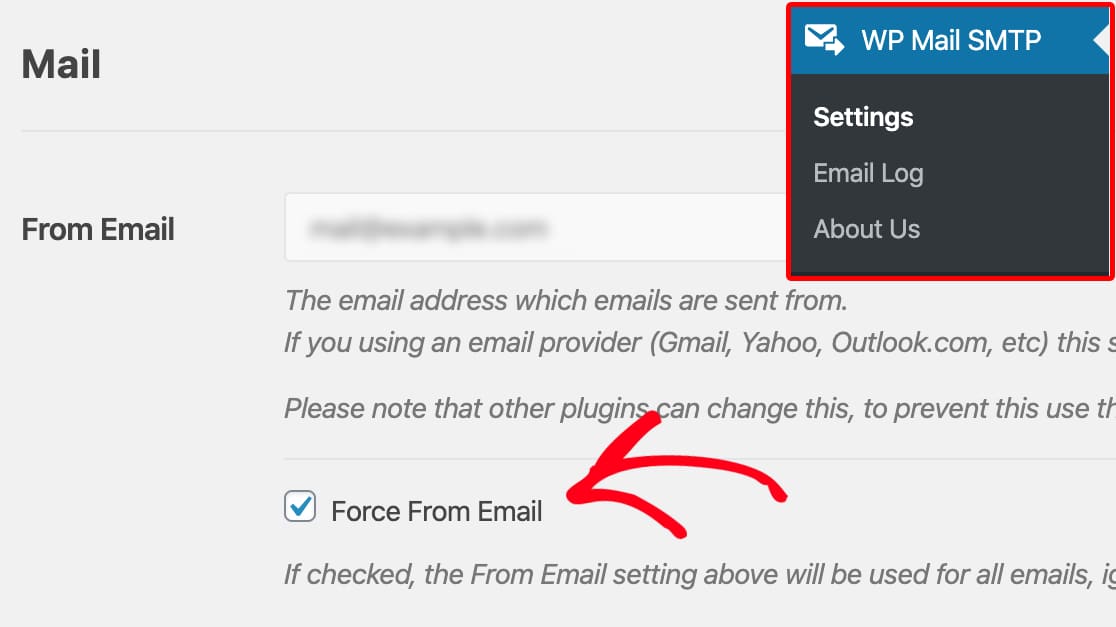
Make sure there is a checkmark for Force From Email to force all plugins to use this address.
This setting will be grayed out for some email providers, including Zoho Mail. You can still choose whether to Force the From Name if you want to.
That’s it! You’ve done everything to fix your Getwid contact form not sending email.
Ready to fix your emails? Get started today with the best WordPress SMTP plugin. WP Mail SMTP Elite includes full White Glove Setup and offers a 14-day money-back guarantee.
If this article helped you out, please follow us on Facebook and Twitter for more WordPress tips and tutorials.

