
AI Summary
WordPress doesn’t include an email error log by default. Without one, diagnosing sending failures means guessing at the cause or writing custom PHP code.
WP Mail SMTP adds this capability without any coding. The steps below show you how to enable it, read what it captures, and set up failure alerts.
Enable WordPress Email Error Log Now
Why Do You Need to Log Email Errors in WordPress?
Email error logs are important because they help you troubleshoot the exact issue preventing your emails from sending.
WordPress is notorious for email sending issues. Without an error log, diagnosing the cause means guessing.
By default, WordPress doesn’t have a native email error logging system. You can use third-party plugins to track and log email errors for debugging purposes.
Getting errors resolved quickly matters more now than it used to. Since November 2025, Gmail permanently rejects problematic mail with a 550 error rather than deferring it temporarily, and Microsoft has enforced the same since May 2025. A sending error won’t self-resolve if left unnoticed.
How to Enable the Email Error Log in WordPress
We’ll guide you through the whole process.
Let’s begin.
1. Install WP Mail SMTP
To start with, you’ll need to install WP Mail SMTP on your site. This plugin will log your email errors (in case there are any).
WP Mail SMTP primarily works to solve your email issues, so you likely won’t have any errors after installing the plugin on your site.
However, things can always go wrong and it’s always a good idea to log email errors.
To install the plugin on your site, first get a WP Mail SMTP plan. When you’ve purchased one, go to your WP Mail SMTP account dashboard.
Here, click on the Downloads tab and then press the Download WP Mail SMTP button.

While the plugin zip file is downloading, you can also obtain your account license key from this page. You’ll need this license key later on in the setup.

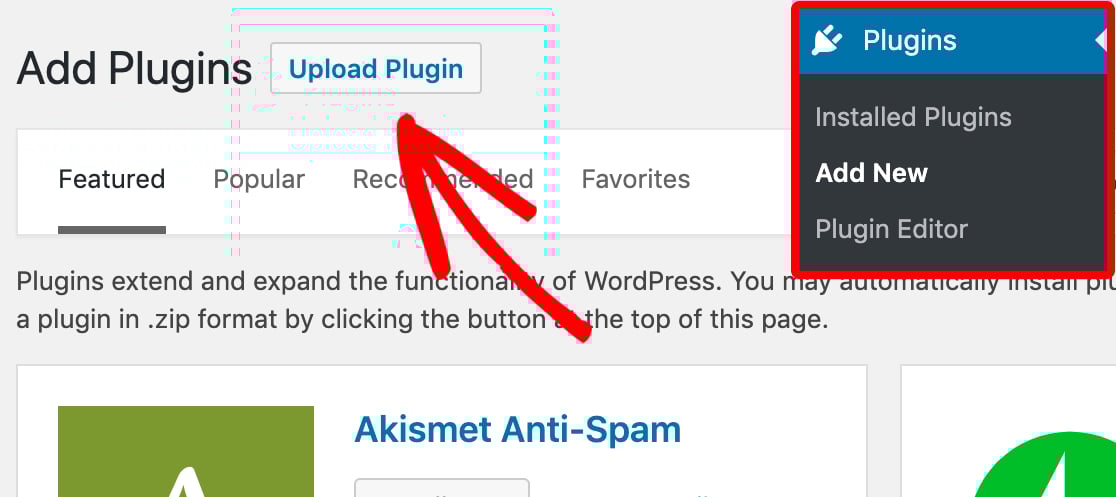
Once the zip file has finished downloading, go to your WordPress admin area. Then click on Plugins » Add New from the navigation menu on the left and press the Upload Plugin button.
Click on Choose File to open the file browser window. Then find and select the plugin zip file you just downloaded.
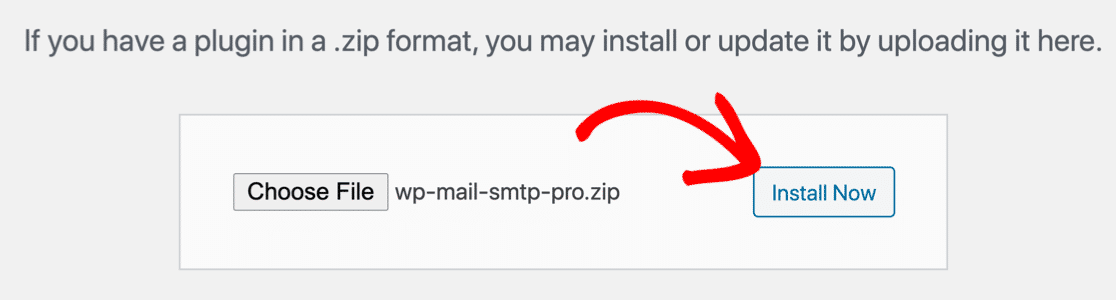
The plugin should install within a few seconds. Click on the Activate Plugin button to activate it.

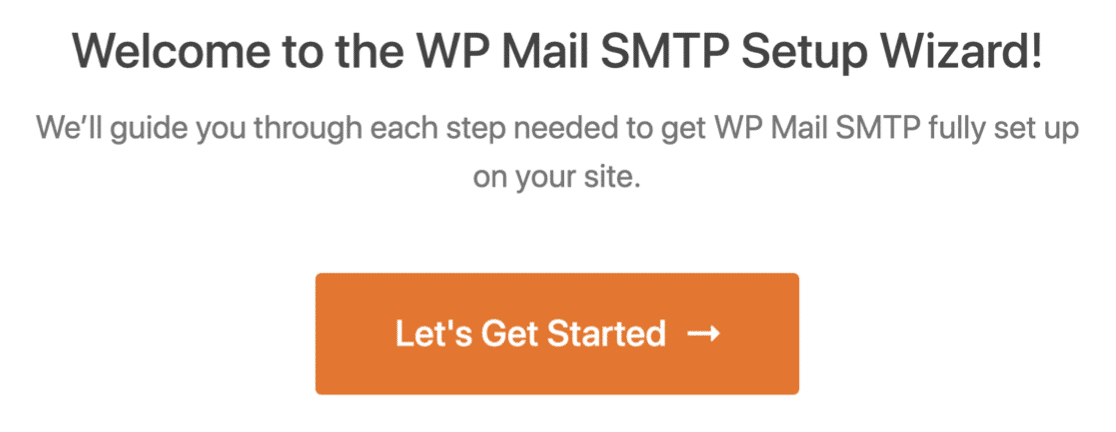
The activation should launch the WP Mail SMTP Setup Wizard automatically.
But if it didn’t start by itself, you can go to WP Mail SMTP » Settings and then press the Launch Setup Wizard button.

The Setup Wizard will guide you through the next steps.
2. Select a Mailer Service
For WP Mail SMTP to work, you need to connect your email account to a mailer service. The Setup Wizard walks you through it.
When the wizard starts, click on Let’s Get Started.
On the next screen, the wizard will require you to select a mailer.

We recommend SendLayer as a reliable and affordable mailer that connects with WP Mail SMTP in a few minutes.
If you’re not sure which mailer you want to use, check out this guide on the best transactional mailer services.
After making your selection, click the doc guide link for the relevant mailer from the table below:
When you’re finished connecting your mailer with WP Mail SMTP, return to this post for the next step.
Want to set up multiple mailers? You can do so in the Additional Connections settings, then select a Backup Connection and configure Smart Routing.
3. Enable WordPress Email Error Log
In WP Mail SMTP, the email error log (or Debug Events) is enabled by default as soon as you set up the plugin on your site.
To confirm that it’s enabled, go to WP Mail SMTP » Tools and then select the Debug Events tab from the horizontal navigation menu.
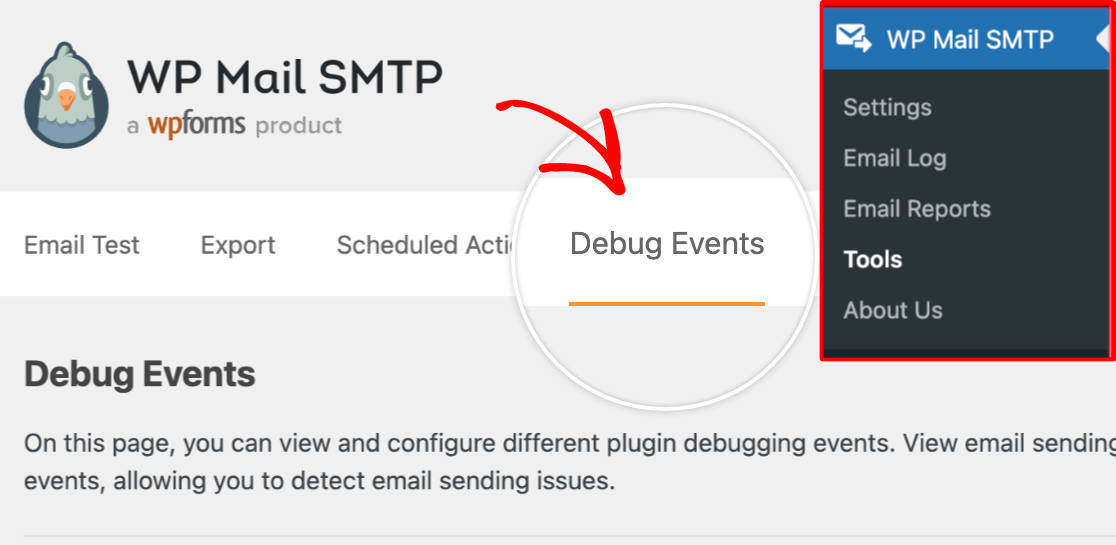
On this page, make sure that the Email Sending Errors option is enabled (it should be enabled by default).
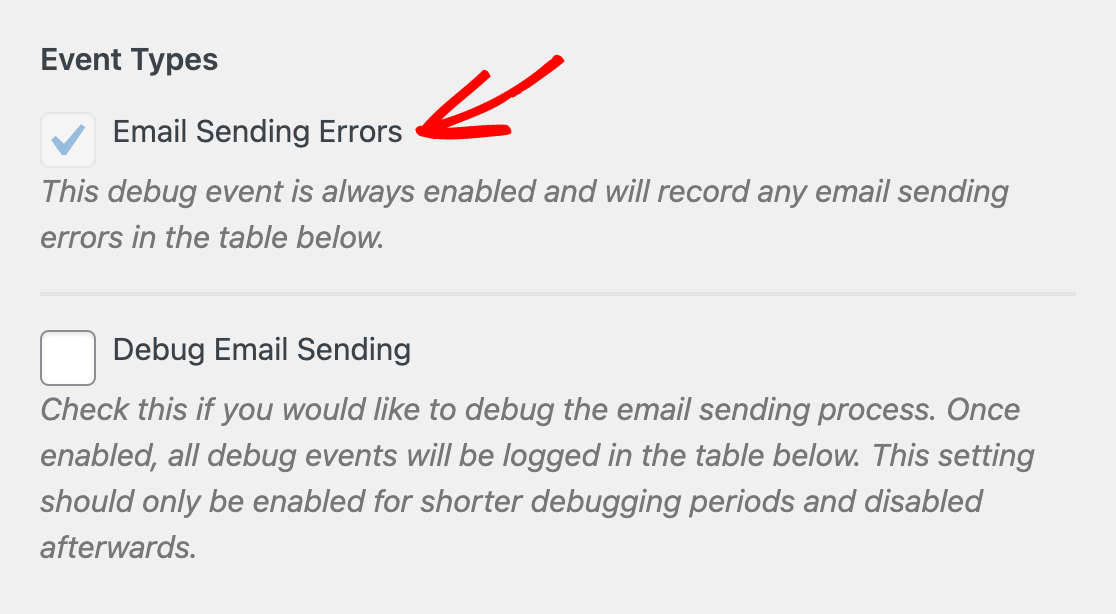
The Email Sending Errors option tracks your emails for errors and maintains a log of these errors as they’re detected on your site over time.
If you’d like to get deeper into troubleshooting a particular email issue, you can also enable the Debug Email Sending option. When enabled, this option will record all kinds of email sending events rather than only logging errors.
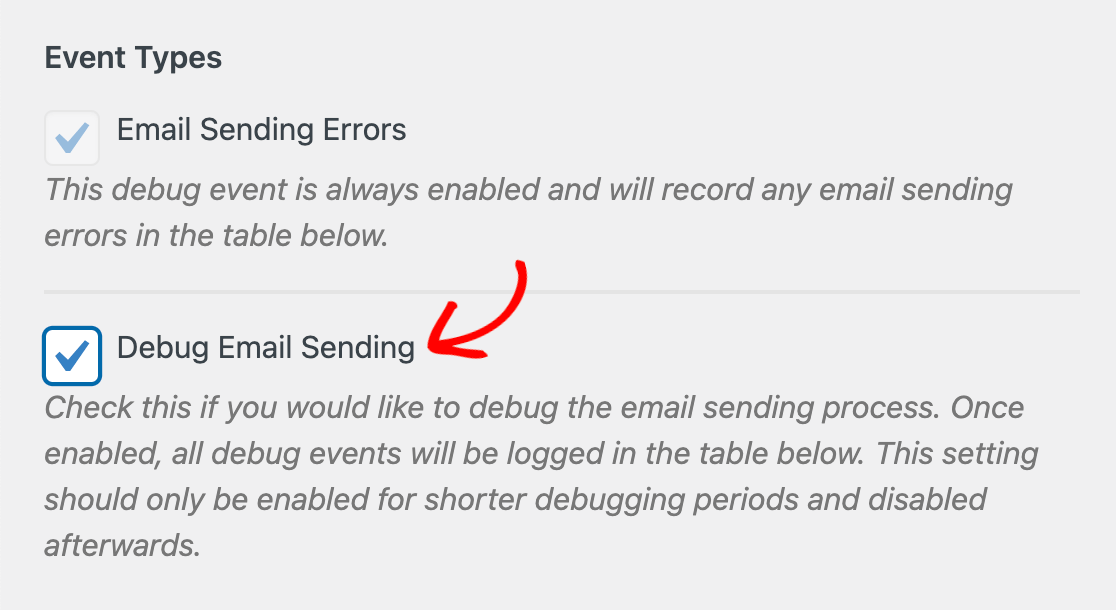
This can be helpful if you can’t fix your emails and need more detailed information that you can share with your developer or our technical support for further assistance.
We advise against keeping the Debug Email Sending option enabled for long periods of time.
It’s more secure to only enable this feature when you’re facing a persistent email problem and disable it once the problem has been solved.
4. View WordPress Email Error Log
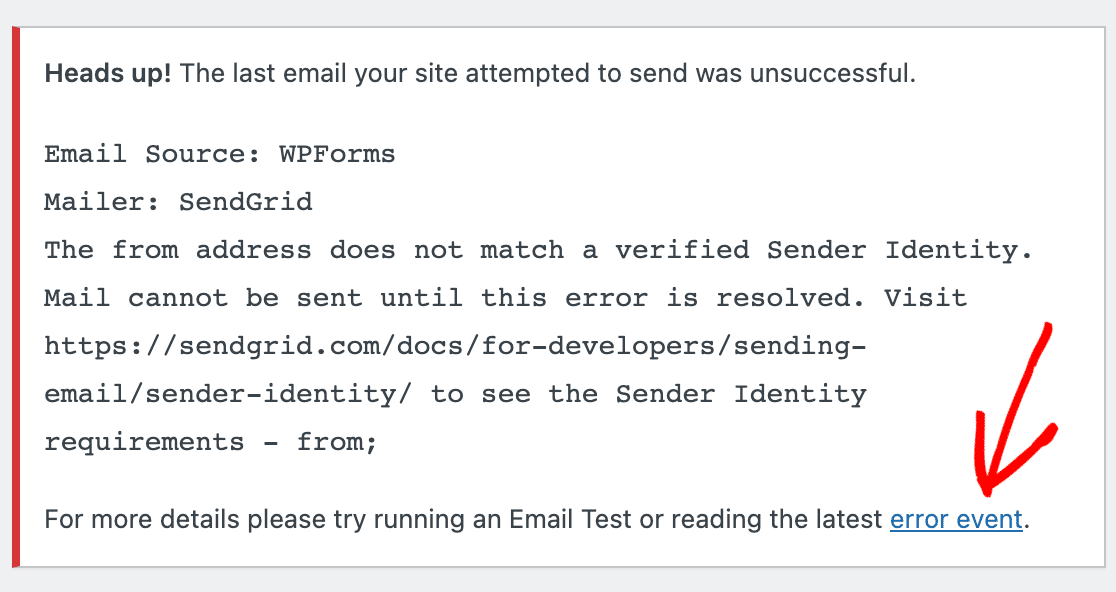
By default, WP Mail SMTP will display an alert message in your WordPress dashboard whenever it detects an email error event.
If you click the Error Event link in the debug notification, it will take you to the Debug Events page.
Another way to see the table of debug events is by navigating to WP Mail SMTP » Tools » Debug Events. You’ll find all event information on a table on the bottom of the page.
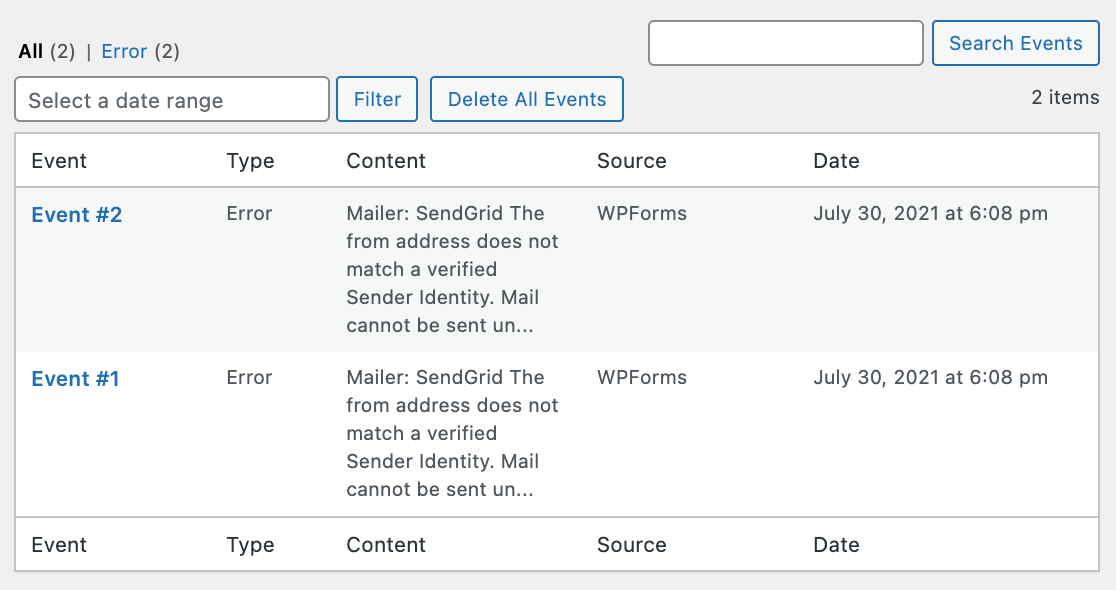
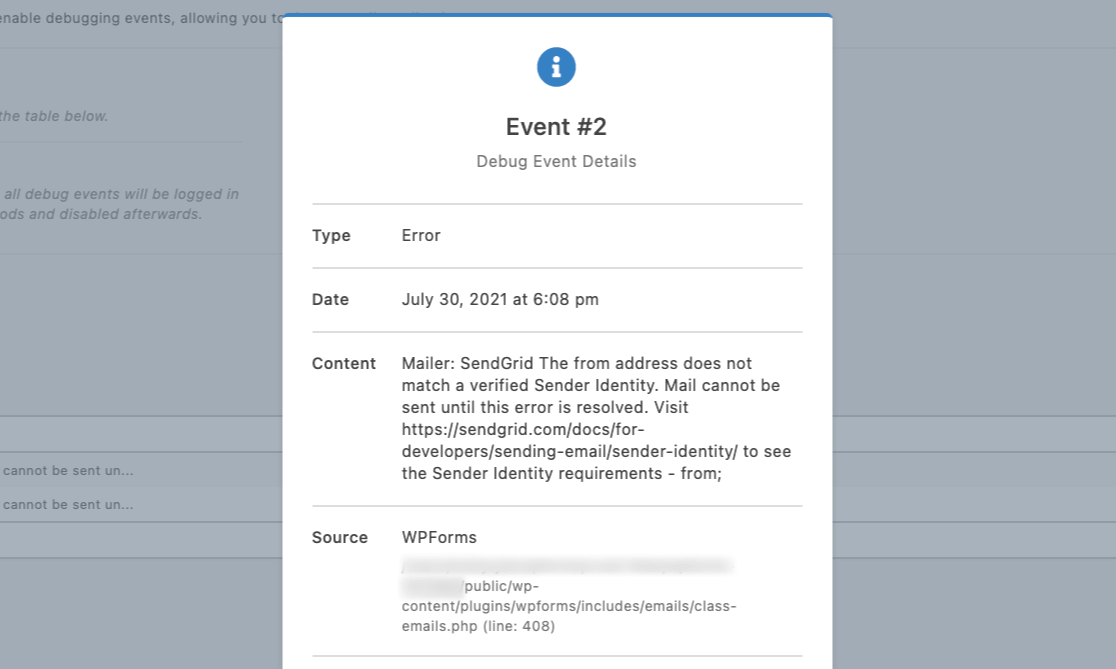
The Content column of each error event provides helpful context around the nature of the issue. Your developer should be able to fix the email error issue based on this information.
If you click on the Event#, it will expand into a box containing further details.
If these error logs don’t make sense to you, feel free to send these over to our support team. We’ll find the solution you need to fix your WordPress email sending issues.
5. (Optional) Enable Email Failure Alerts
With Email Failure Alerts, you’ll know the moment a message can’t be delivered, so you can fix the issue before it causes bigger problems.
In WP Mail SMTP, go to Settings » Alerts and choose the channels you want to use:
- Slack
- Discord
- Microsoft Teams
- SMS via Twilio
- Webhooks (for custom workflows)
- Push notifications

Once enabled, WP Mail SMTP will send you an instant notification whenever an email fails to send.
Pro tip: These alerts use a secure API connection, so they’ll still reach you even if your WordPress site can’t send emails at all.
Click Test Alerts after setup to confirm everything’s working, and you’re done.

And that’s it! You now know how to enable email error log in WordPress to make potential errors easier to diagnose.
FAQs About Email Error Logs in WordPress
Here are some of the most common questions we receive about logging email errors in WordPress.
Does WordPress have a built-in email error log?
No. WordPress core does not include an email error log feature. To track sending issues, you’ll need a plugin like WP Mail SMTP, which records email errors through its Debug Events feature (enabled by default).
What’s the difference between Debug Events and Email Logs in WP Mail SMTP?
Debug Events (available in the Lite version) record email sending errors and related events, helping you troubleshoot issues quickly. Email Logs (Pro feature) record the content, subject line, headers, attachments, and delivery status for every email sent.
How do Email Failure Alerts work?
Alerts notify you the moment an email can’t be sent. WP Mail SMTP supports multiple channels — Email, Slack, Discord, Microsoft Teams, SMS via Twilio, Webhooks, Push, and WhatsApp — so you can choose what works best.
Will I still get alerts if my site can’t send emails?
Yes. Email Failure Alerts use a secure API connection, meaning notifications can still be delivered even if your WordPress site itself is unable to send messages.
Next, Eliminate Contact Form Spam
Do you know that contact form spam is a fixable problem? See our guide on how to stop contact form spam for tips.
Also, you might want to check out our post on best WordPress SMTP plugins to see how WP Mail SMTP compares to other similar plugins.