
AI Summary
So you want to use your cPanel email service to send emails from your WordPress site?
With the WP Mail SMTP plugin, you can configure your site to use your cPanel email service to route the emails sent from your site, rather than the built-in mail function which can be unreliable.
I’ve gone through the steps myself and put together this guide on how to set up cPanel emails with WordPress SMTP. Now you can avoid hunting through documentation and get your email set up quickly and easily.
How to Set Up cPanel Emails with WordPress SMTP
In This Article
Step 1: Create an Email Account in cPanel
First, log in to your cPanel account through your hosting provider.
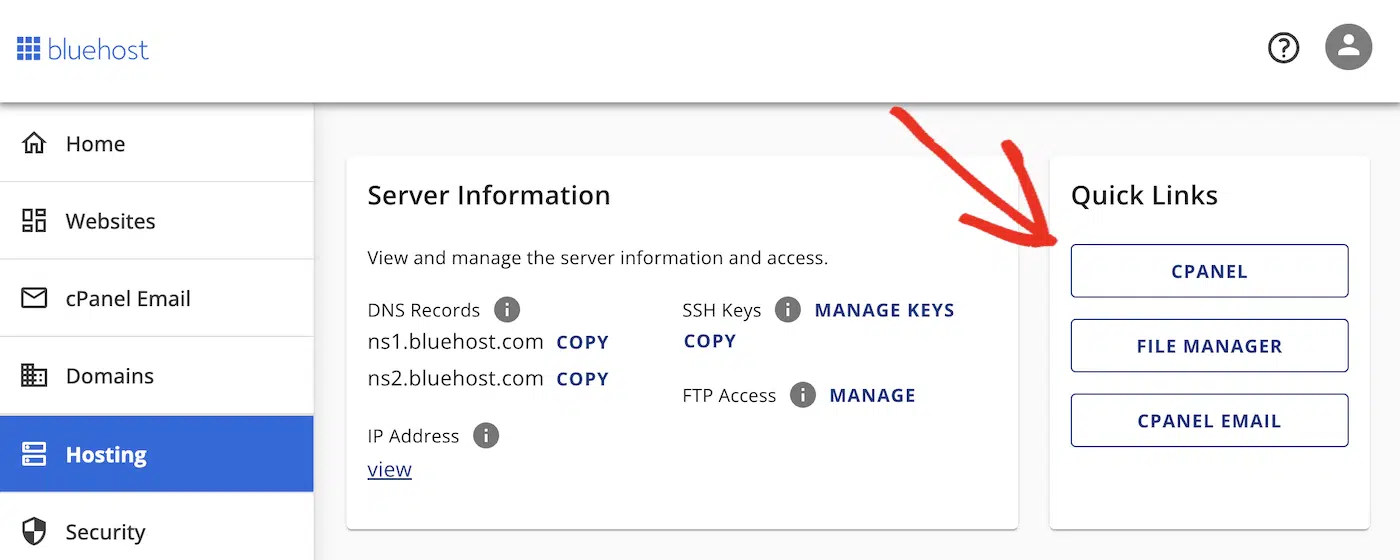
If you don’t see a link to access cPanel, you can consult your hosting documentation. For example, on Bluehost, you can acces cPanel by clicking on Hosting in the menu, and scrolling down to the Quick Links section.
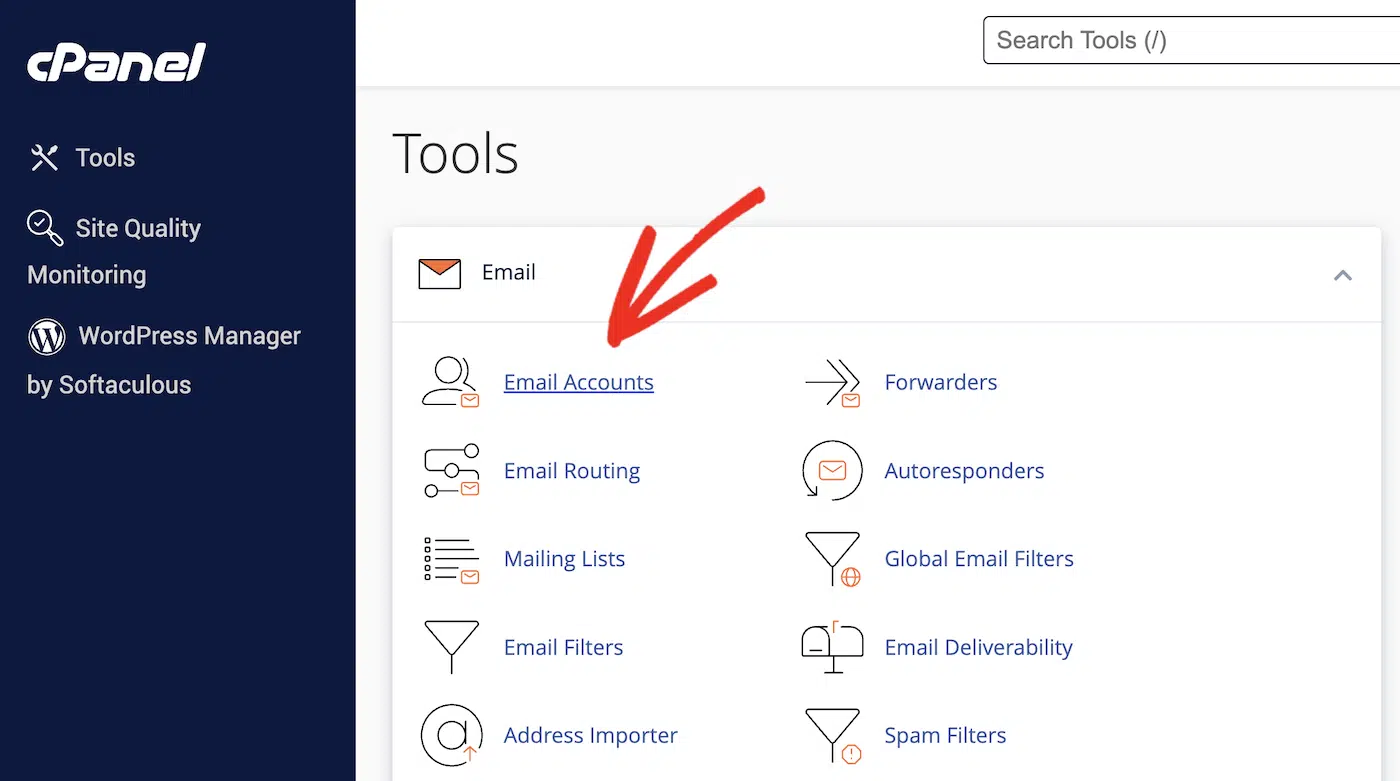
Locate the “Email” section and click on “Email Accounts.”
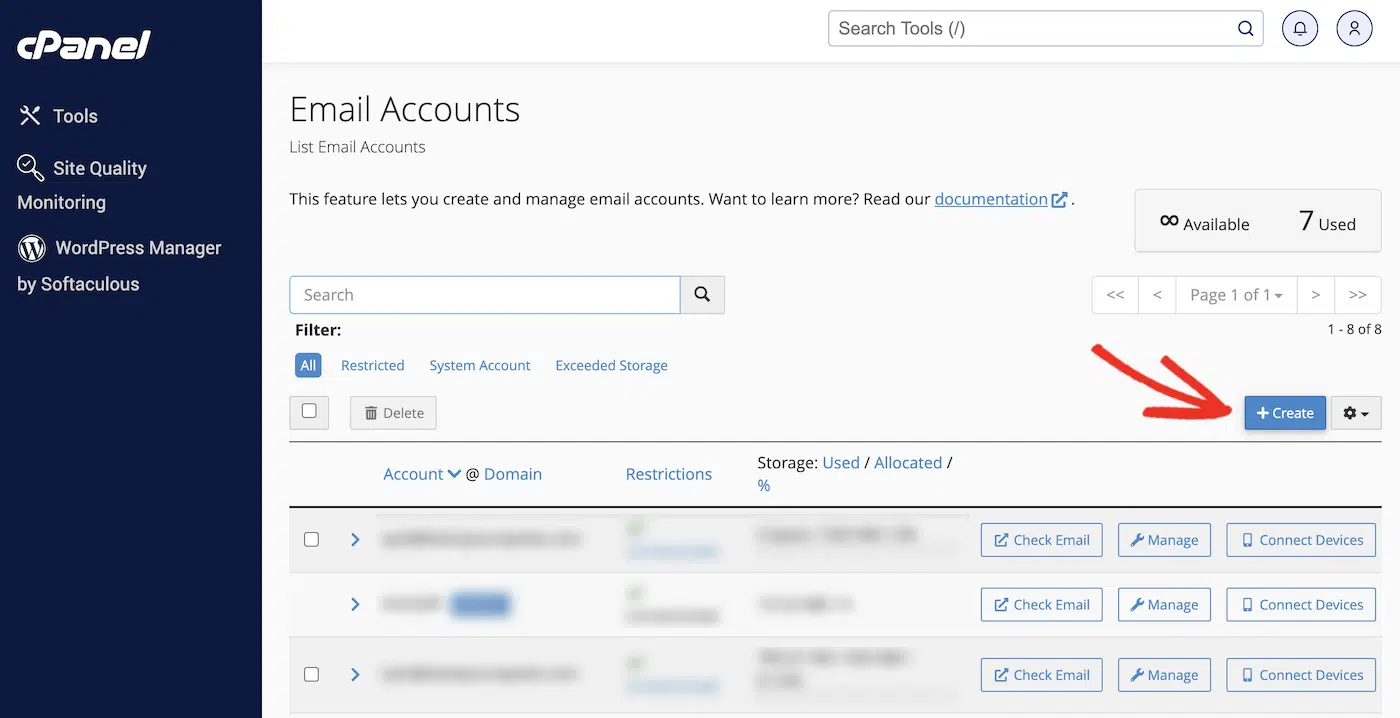
If you want to create a new email account for your WordPress site, click the Create button.
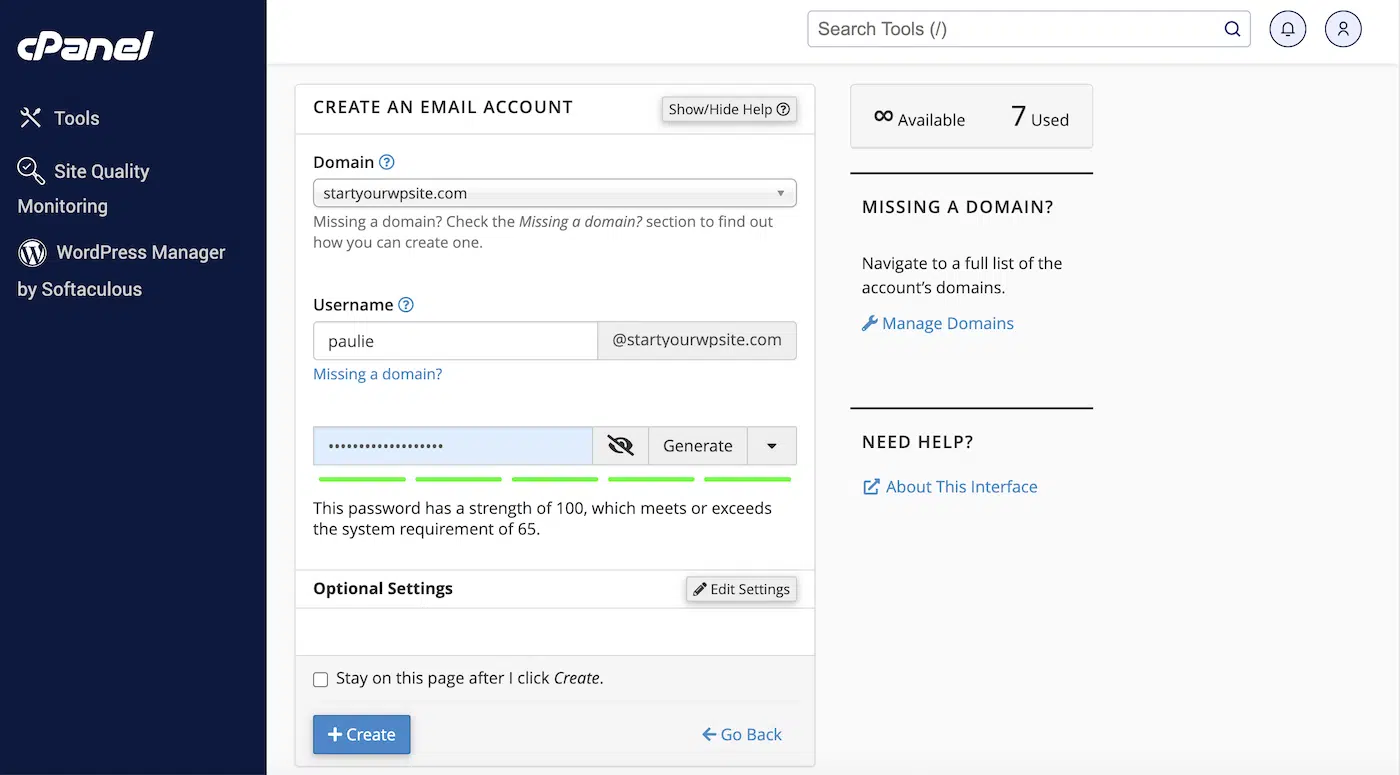
Select a domain for your new email account, fill out the username and password, and click the Create button again. Make sure to keep a note of the password you use, as you’ll need it again later.
Once the account is created, click the Connect Devices button to access the SMTP credentials for your new email account. You’ll need to put these credentials in your WordPress SMTP settings later.

Scroll down to Mail Client Manual Settings
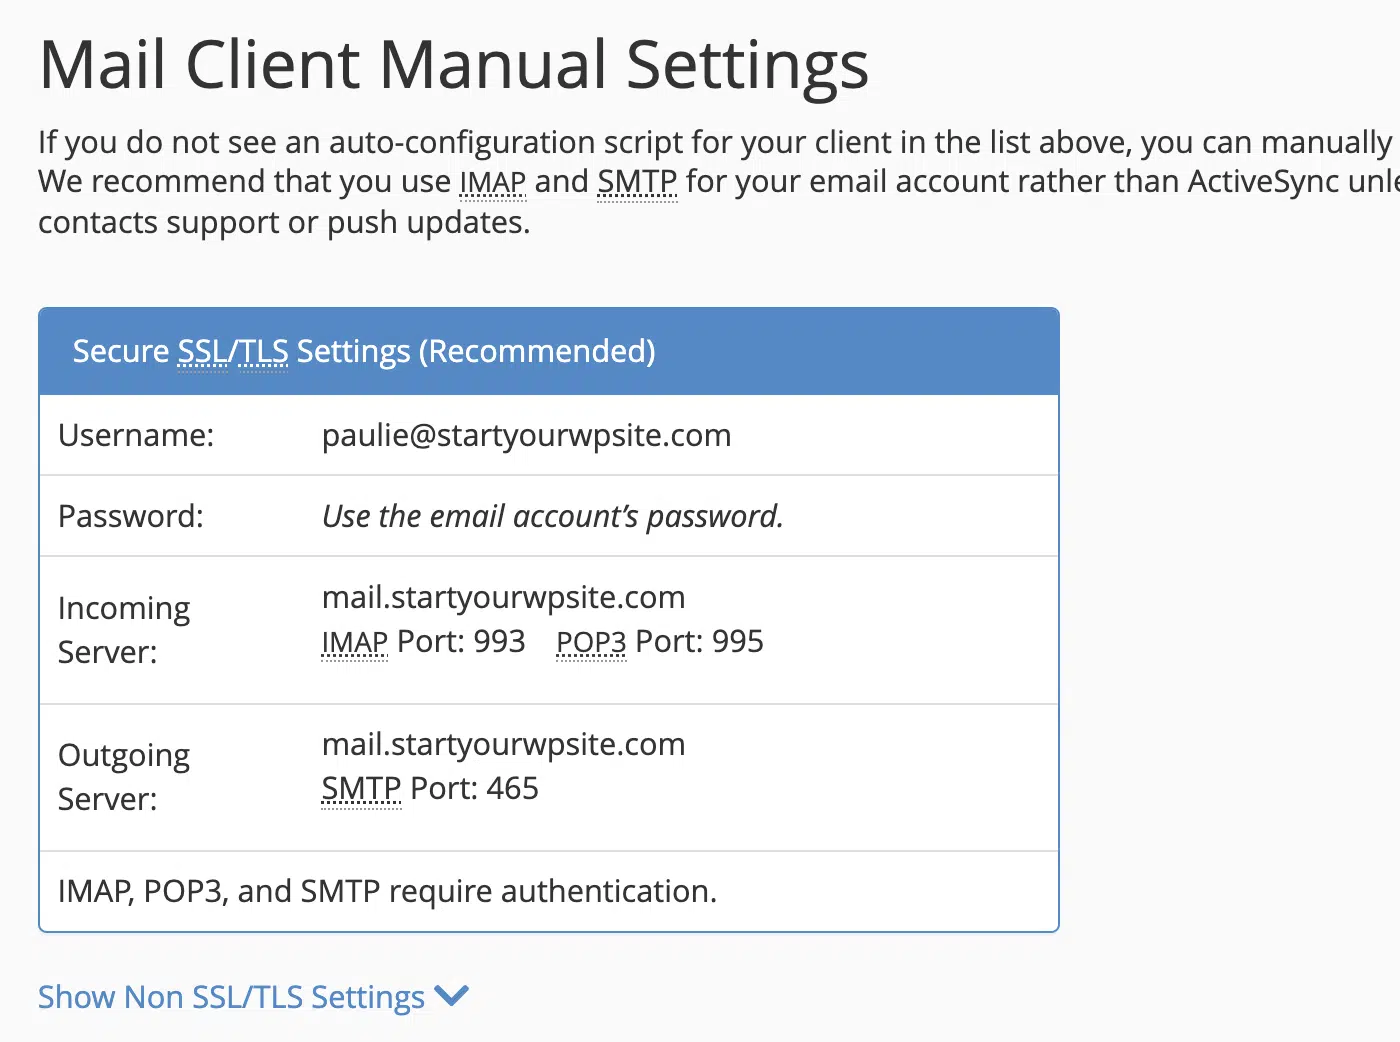
Take note of the SMTP details, including the username, password, outgoing server, and the SMTP port.
Step 2: Install and Activate the WP Mail SMTP Plugin
To enable your WordPress site to send emails with SMTP, you’ll need to install an SMTP plugin.
Log in to your WordPress dashboard and navigate to Plugins » Add New.

In the search bar, type “WP Mail SMTP” and click the Install Now button.

After installation, click the Activate button to enable the plugin.
Step 3: Configure WP Mail SMTP Settings
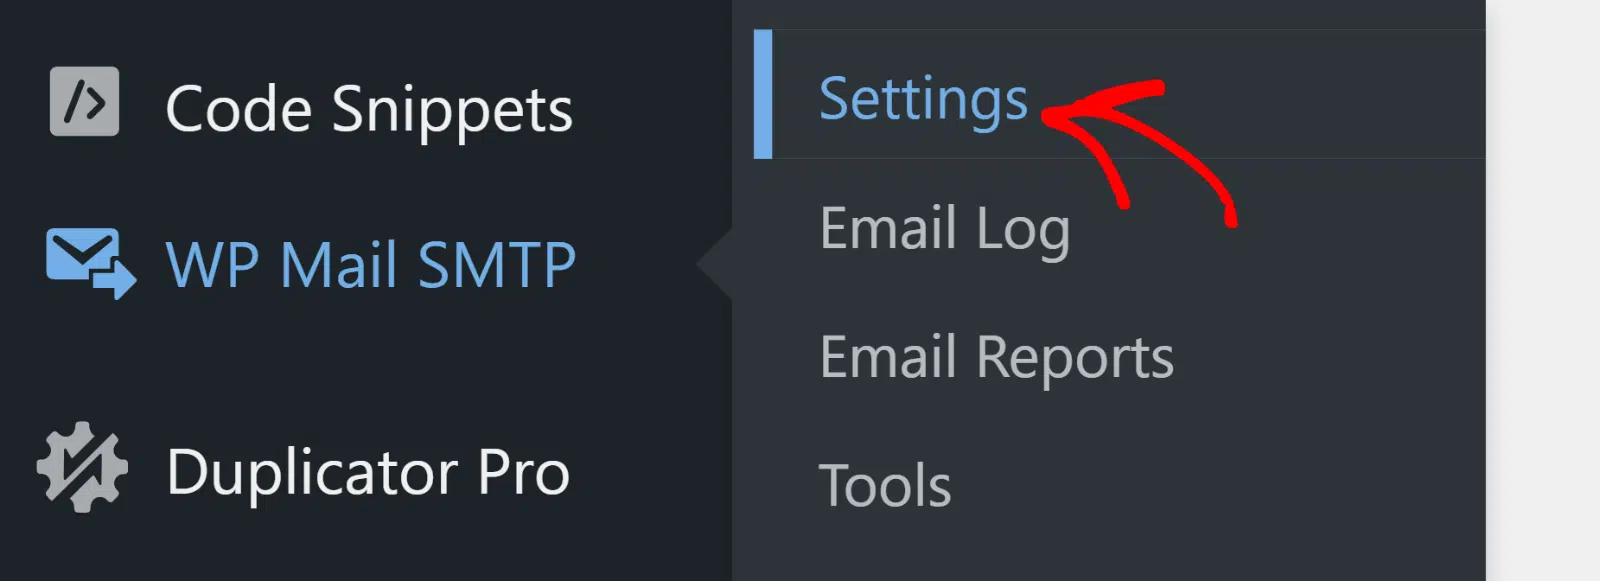
After activating the plugin, navigate to WP Mail SMTP » Settings in your WordPress dashboard.
In the General Settings tab, scroll down to the Primary Connection section and set the From Email to the email address you just created in cPanel.
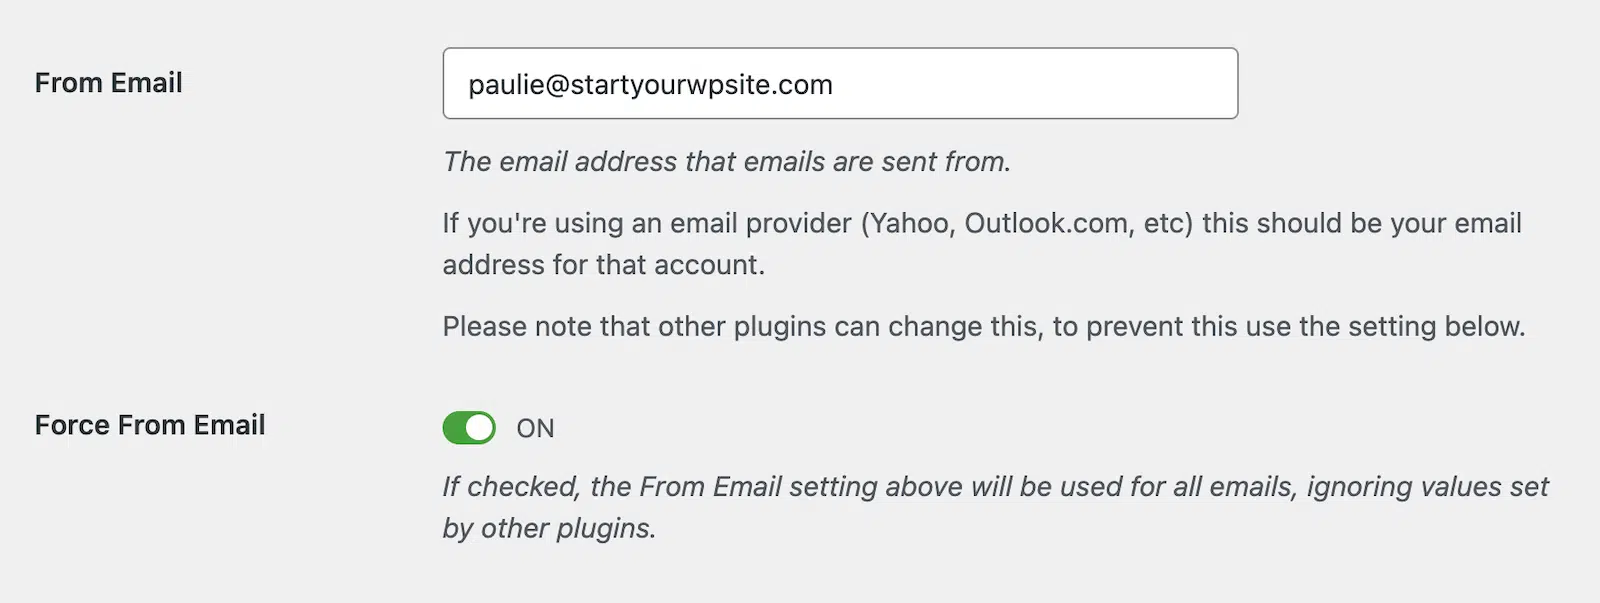
It’s recommended to also set the Force From Email setting to ON to ensure other plugins do not override this email address.
You can also set the From Name to the name you want the emails from your site to appear from.
In the Mailer section, select Other SMTP to manually enter SMTP details.
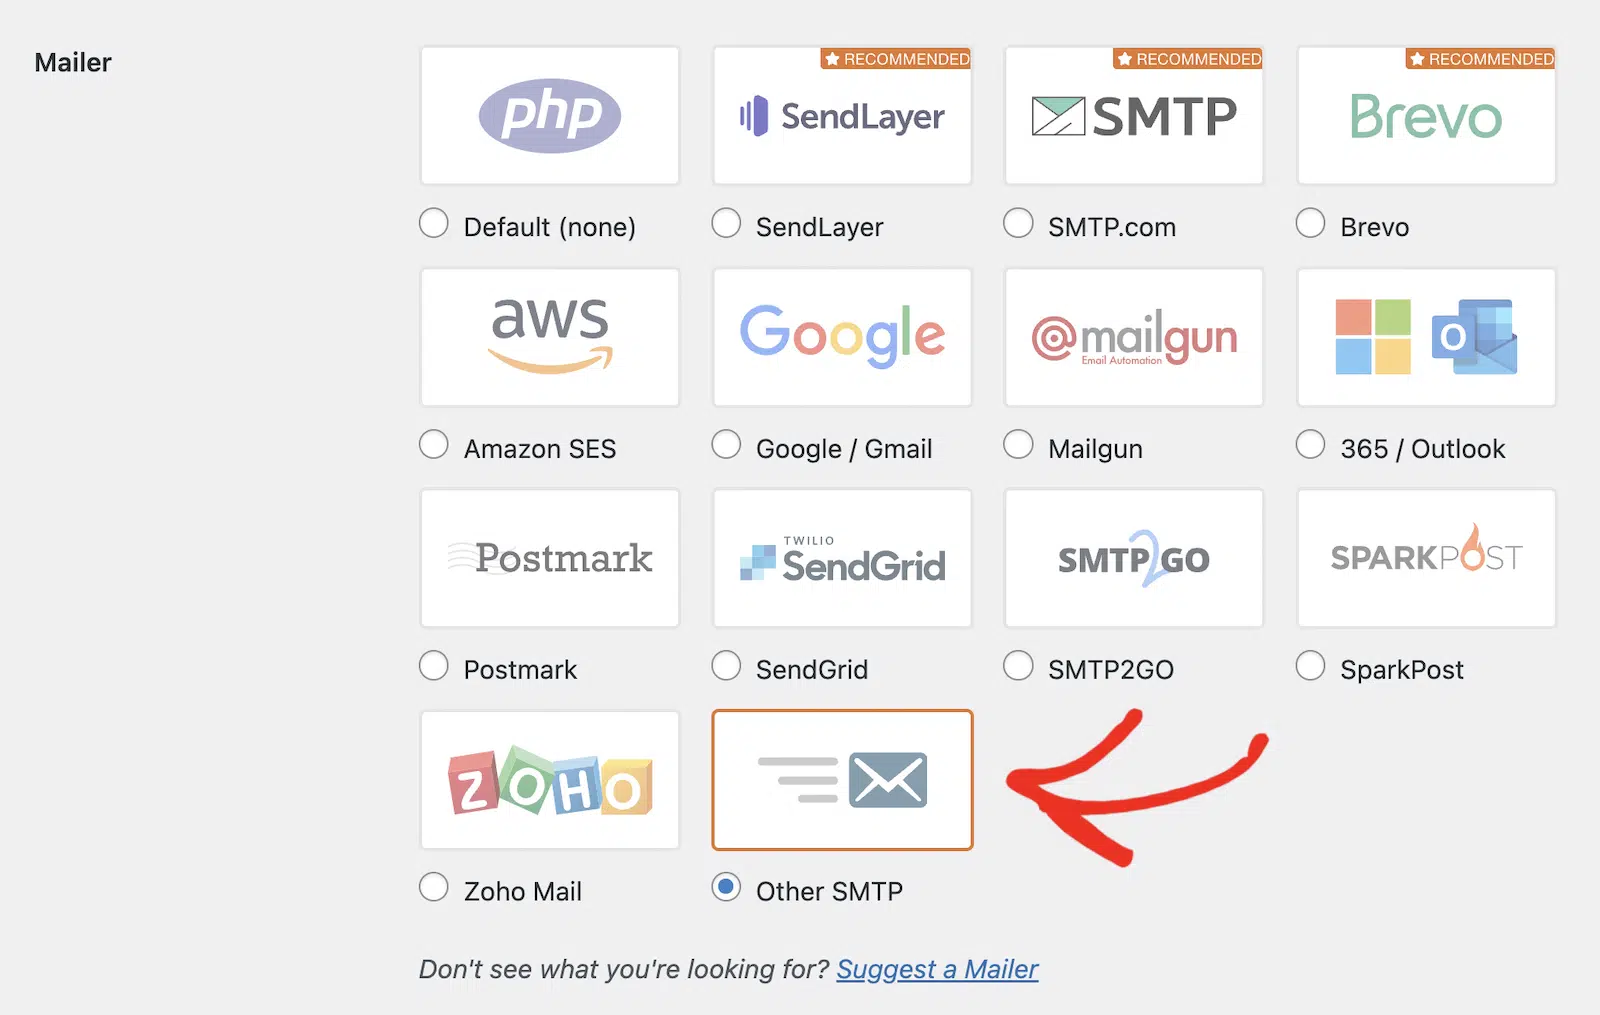
Note: The Other SMTP mailer is less secure than other mailer options in WP Mail SMTP because it stores your email login and password in your WordPress dashboard. Other WordPress administrators have access to this, so whenever possible, we recommend using one of WP Mail SMTP’s more secure mailers.
After selecting Other SMTP, you’ll see a new section appear to fill in the SMTP credentials you copied from cPanel earlier.
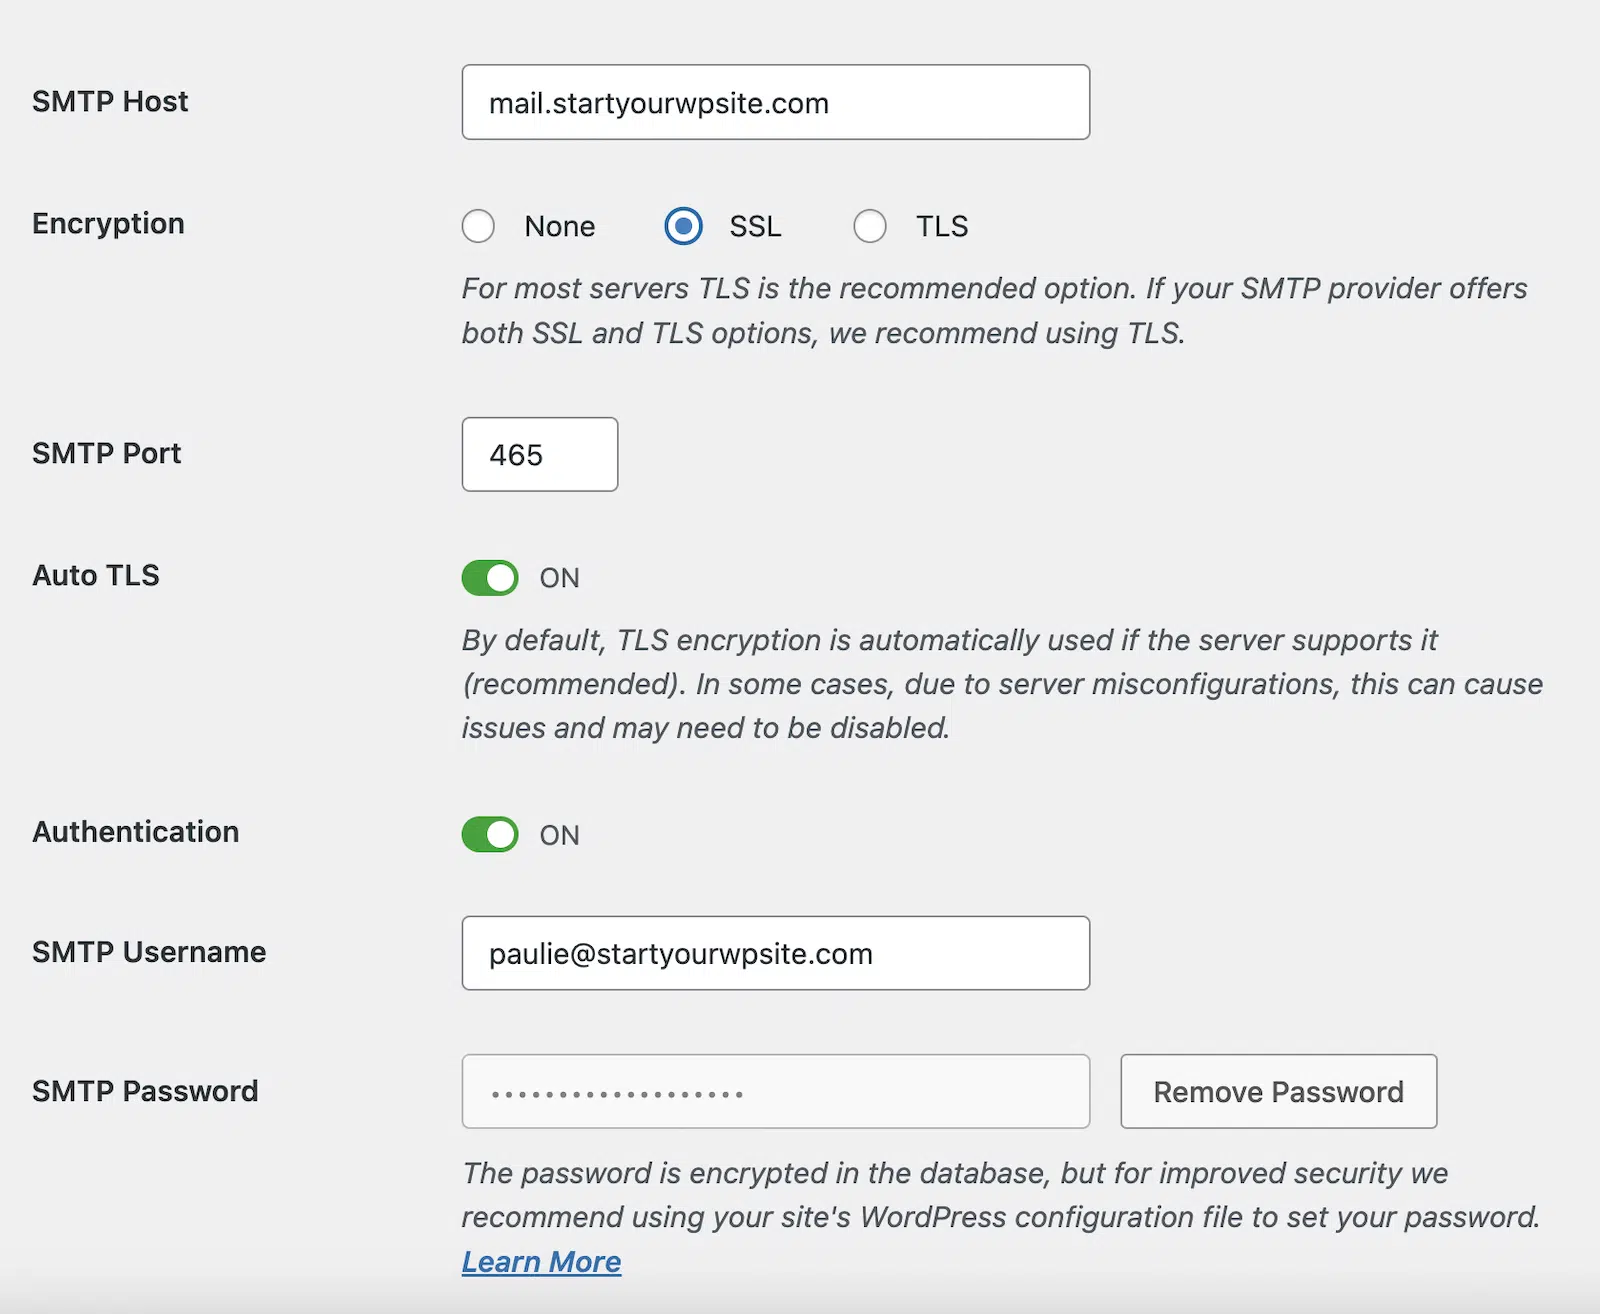
- SMTP Host: Enter the outgoing server from cPanel (usually something like mail.yourdomain.com).
- Encryption: SSL
- SMTP Port: 465
- Auto TLS: ON
- Authentication: ON
- SMTP Username: Enter the email address you set up in cPanel.
- SMTP Password: Enter the password you created for your new cPanel email account.
Remember to click the Save Settings button at the bottom of the page to save your SMTP configuration.
Step 4: Test the SMTP Configuration
Now you’ve set up your cPanel email with WordPress SMTP, you need to test everything is working correctly and you receive emails from your site as expected.
Navigate to WP Mail SMTP » Tools » Email Test.
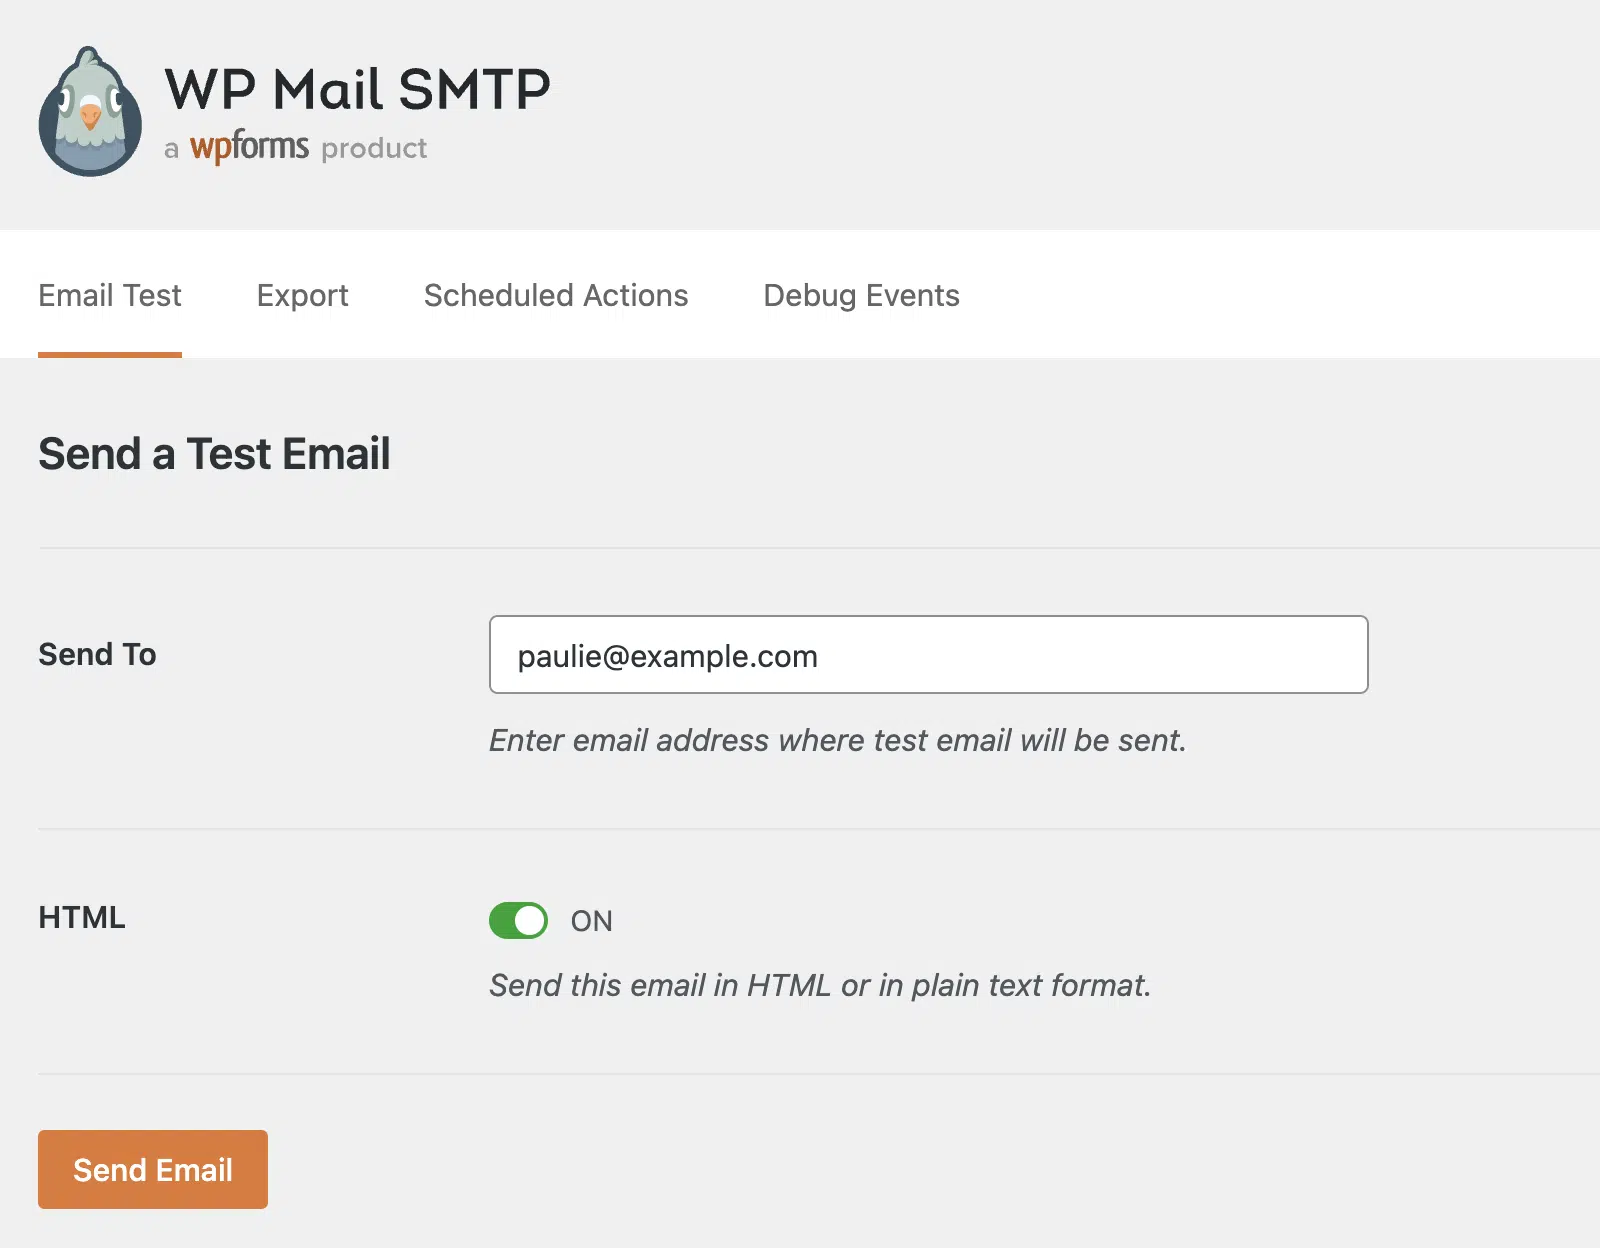
Enter an email address where you want to send a test email and click the Send Email button.
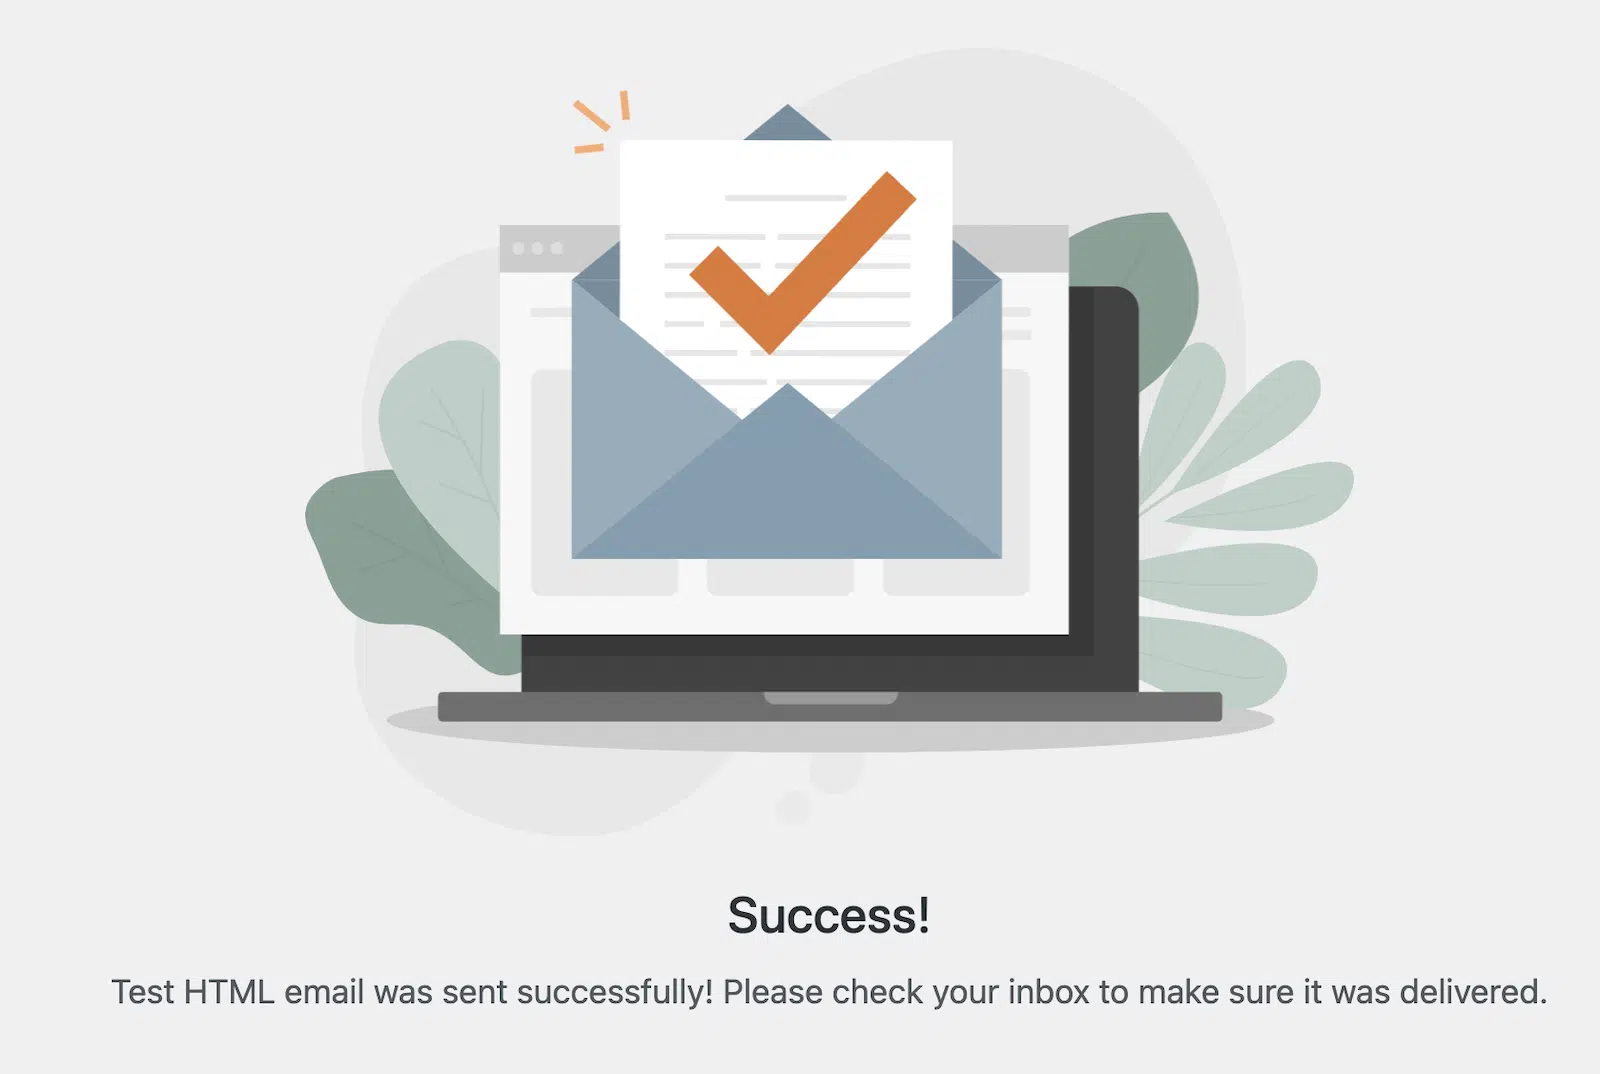
If everything worked ok, you should see a message that the test email has been sent.
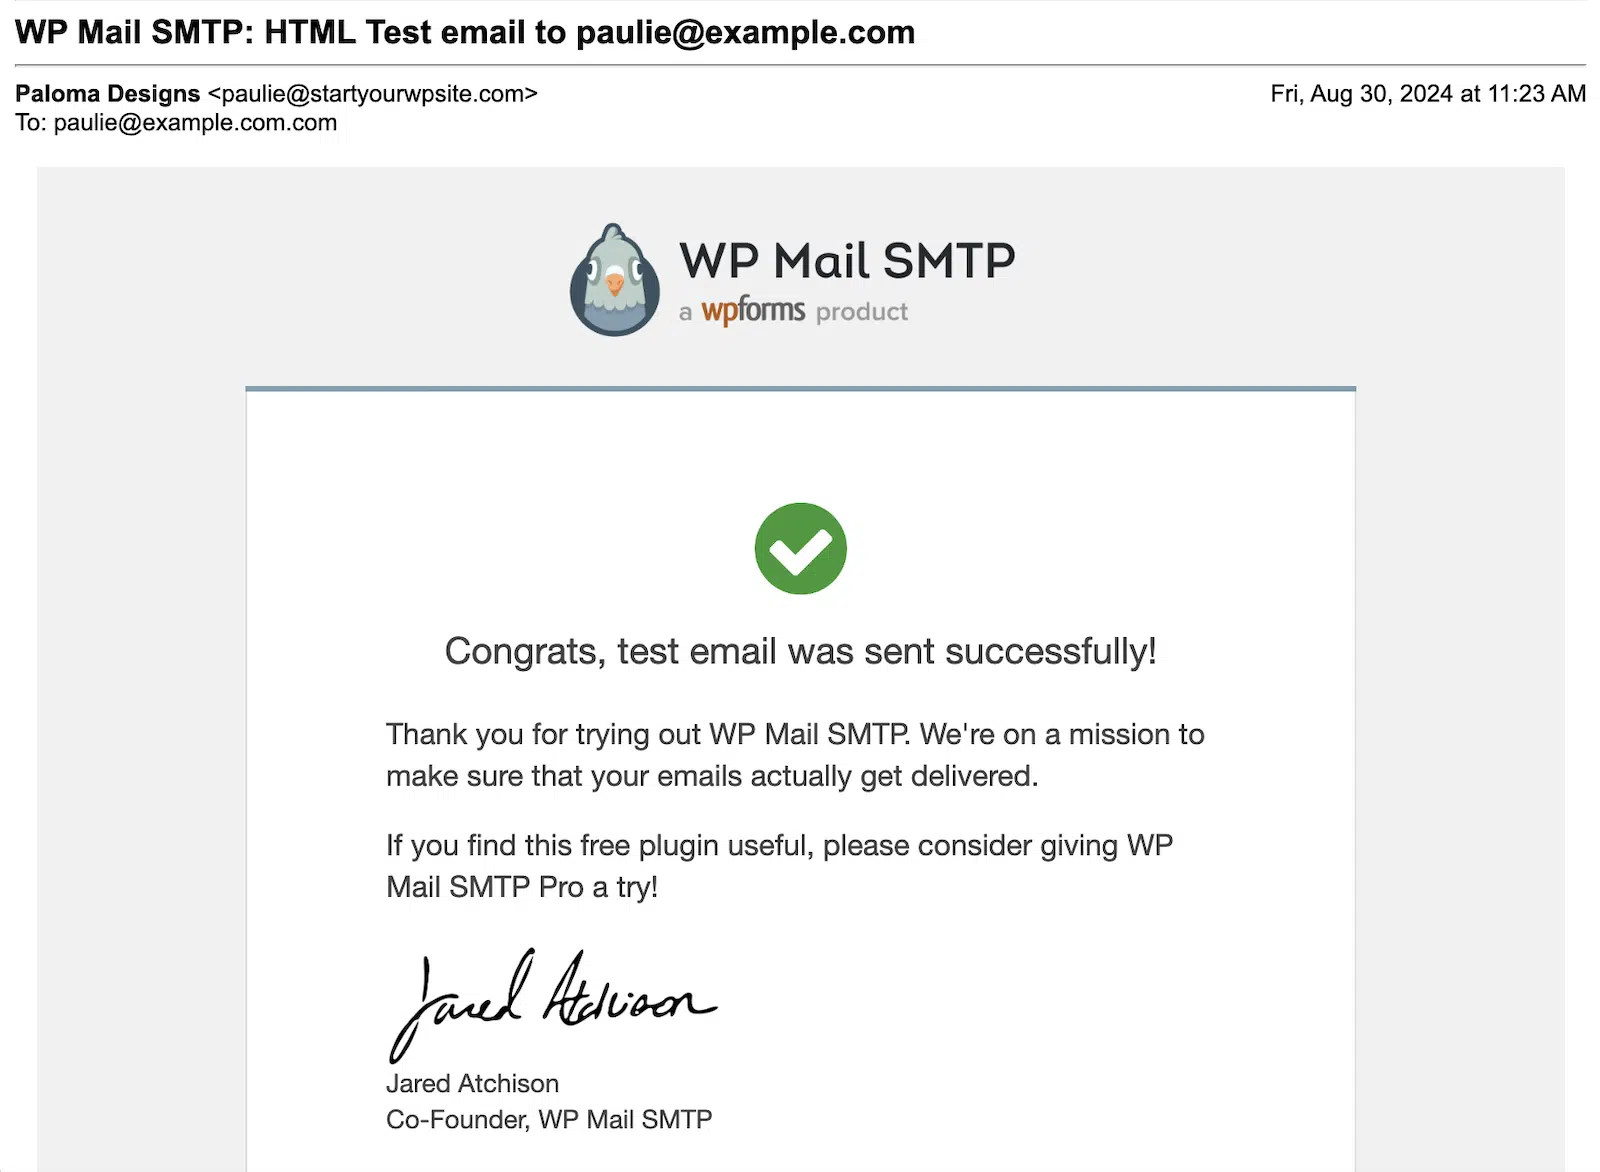
Check the inbox of the email address you entered to ensure the test email was successfully delivered.
If you see an error message that the test email failed, go back to your SMTP settings and double-check you entered everything correctly.
Step 5: Set Up Email Authentication if Necessary
If you got a message that the test email was sent, but deliverability should be improved, you may need to set up email authentication DNS records for your domain.
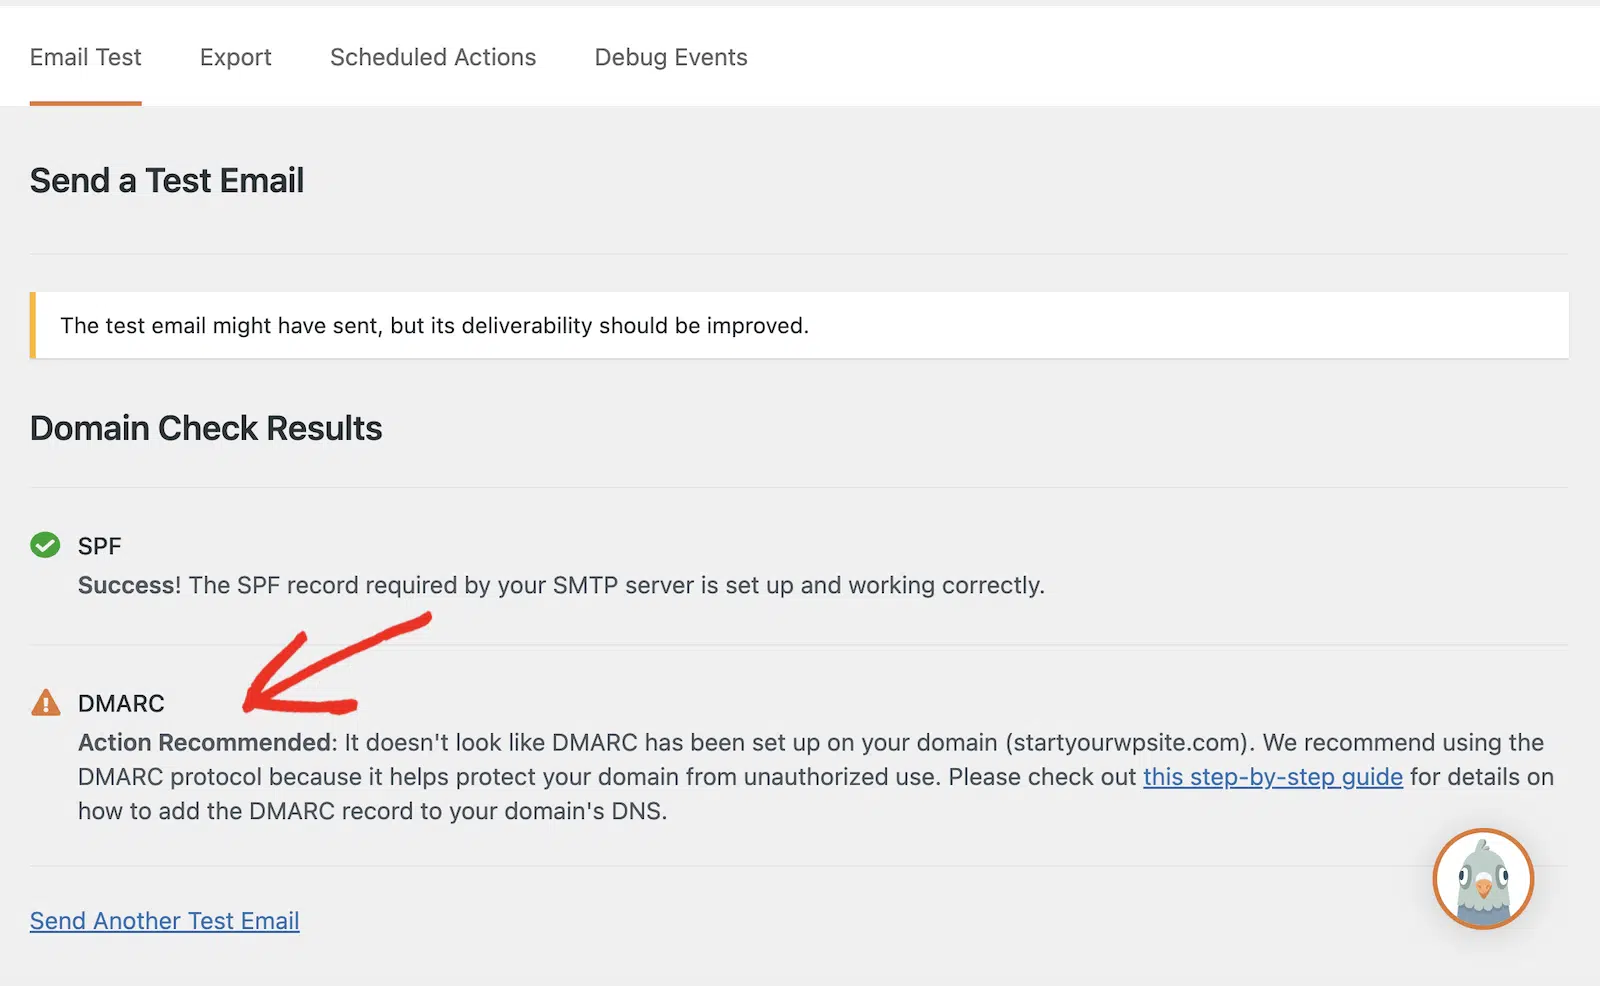
For example, you can see in the screenshot above that when I sent a test email with my cPanel email account, I go a warning that DMARC hadn’t been set up on my domain.
If you see similar warnings when you send a test email, you can fix this by adding the missing authentication records to your DNS records.
While you can choose to ignore these warnings if you wish, it’s not a great idea as your deliverability could be affected. This means that emails might not reach the inbox of the intended recipient, even if your site sends them without issues.
Adding DNS Records in cPanel
In cPanel, you can access your DNS records in the Zone Editor.
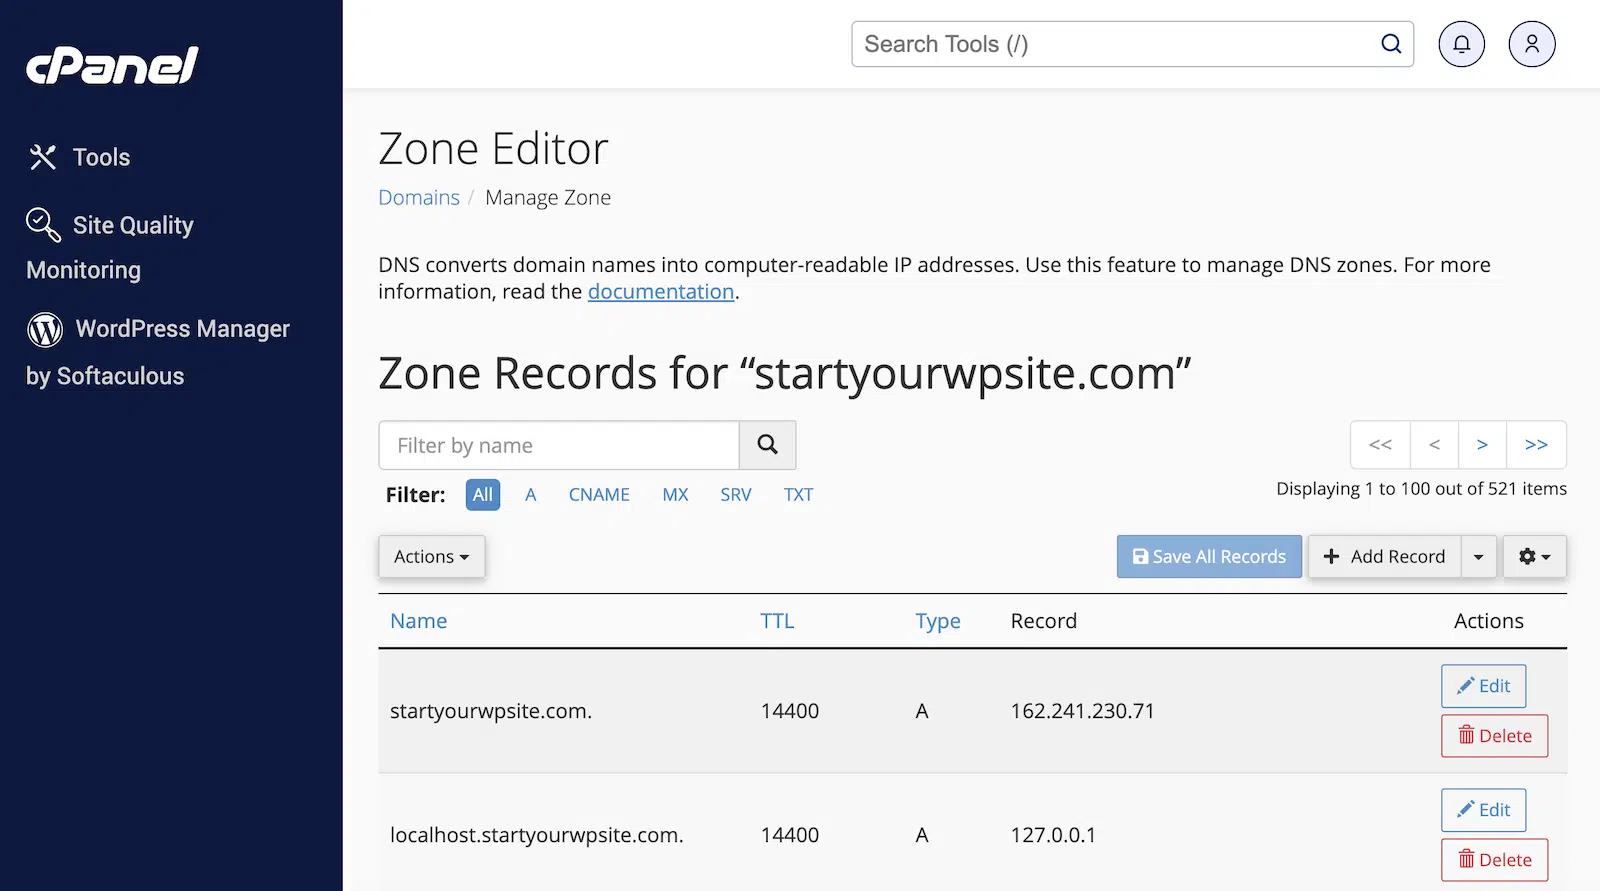
To add the missing DMARC record, click the Add Record button.
You can see a full guide here on how to create a DMARC record. I used the basic DMARC record example in this article and edited it to add my site email address.
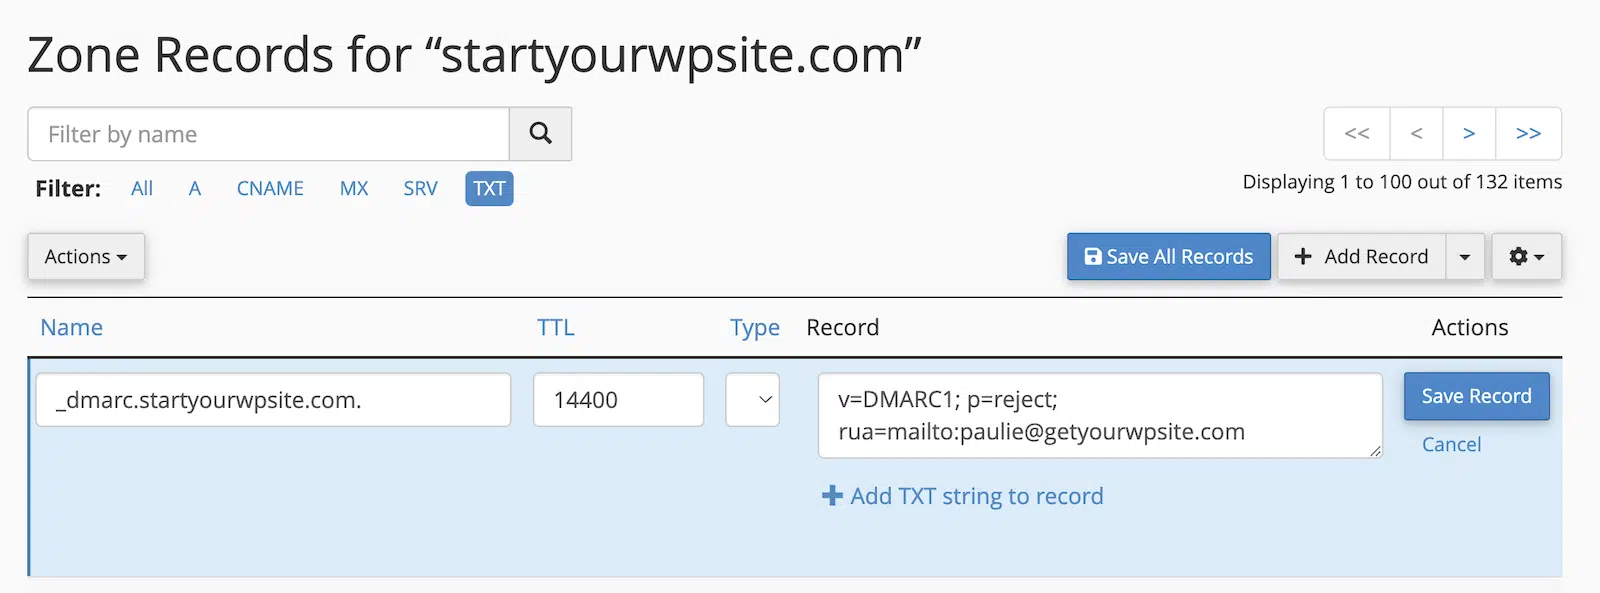
Enter the DMARC record for your domain as follows:
- Name: _dmarc.yourdomain.com
- TTL: Leave as default
- Type: TXT
- Record: v=DMARC1; p=reject; rua=mailto:[email protected]
Remember to change the domain and email address to your own domain and site email, and click the Save Record button once you’re done.
Your new DNS record won’t be visible immediately. You may have to wait up to 48 hours for it to propagate across the internet. But in most cases, the changes should be active within a few minutes.
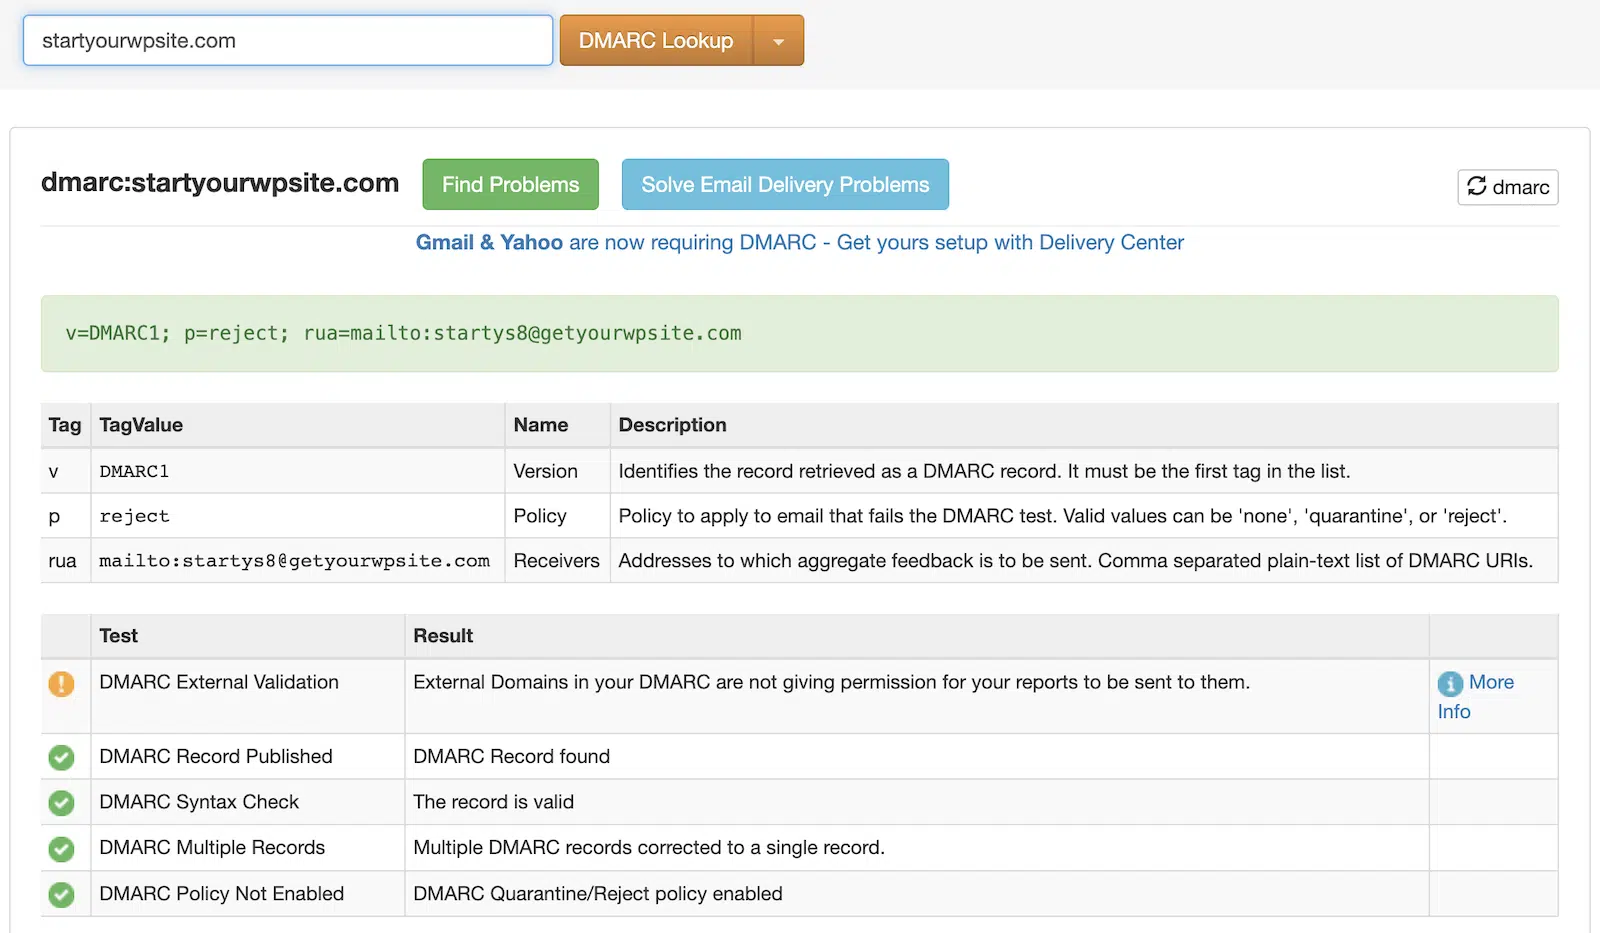
You can check if your DMARC record is active by using a tool like MXToolbox.
Just enter your domain and you can see immediately if your domain has a valid DMARC record.
Now you can send your test email again and you should see a message that it was successful.
Finally, check your inbox to make sure the test email was delivered.
And that’s it! You’ve now successfully set up your cPanel email with WordPress SMTP.
Frequently Asked Questions (FAQs)
Here are some common questions and answers about setting up cPanel emails with WordPress SMTP:
Why should I use SMTP instead of the default PHP mail function?
Using SMTP instead of the default PHP mail function provides more consistent and reliable email delivery and emails are less likely to be marked as spam. SMTP also offers more detailed error messages, making it easier to troubleshoot issues.
Can I use my existing cPanel email account, or do I need to create a new one?
You can use an existing cPanel email account if you already have one set up. However, it’s often recommended to create a dedicated email account for your WordPress site (e.g., [email protected]) to keep your site emails separate from your personal or business communications.
What should I do if the test email fails to send?
If your test email fails to send, double-check all SMTP settings to ensure they match the information provided by cPanel, verify that your cPanel email account is working by logging into webmail, and temporarily disable your WordPress security plugins to see if they’re interfering with the SMTP connection. You can also try the suggestions in our guide to common WP Mail SMTP issues.
Is it safe to use my cPanel email password in the WordPress SMTP settings?
While it’s generally safe to use your cPanel email password in the WordPress SMTP settings, it’s important to realize your email login and password will be visible to other WordPress administrators. For this reason, if other users have access to your WordPress site, we recommend using one of WP Mail SMTP’s more secure mailers rather than the Other Mailer option.
How can I troubleshoot email deliverability issues?
To troubleshoot email deliverability issues, set up email authentication (SPF, DKIM, and DMARC records) as mentioned in the article. You can also use email testing tools like mail-tester.com to check your email’s spam score and ensure your email content isn’t triggering spam filters. If you’re having ongoing issues, monitor your email sending reputation using tools like Google Postmaster Tools.
Can I use this setup to send bulk emails or newsletters?
While this setup can handle transactional emails from your WordPress site, it’s not recommended for sending bulk emails or newsletters. For large-scale email campaigns, consider using a dedicated email marketing service that specializes in handling high volumes of emails.
Next, Understand Spam Rate Thresholds
If your WordPress site emails are sending ok but aren’t appearing in inboxes, you may have an email deliverability problem.
Hitting spam rate thresholds is one factor that can prevent your emails from being delivered to the inbox.
Read our guide to find out what spam rate thresholds are and how you can avoid exceeding them.
Ready to fix your emails? Get started today with the best WordPress SMTP plugin. If you don’t have the time to fix your emails, you can get full White Glove Setup assistance as an extra purchase, and there’s a 14-day money-back guarantee for all paid plans.