AI Summary
Do you want to fix Limit Login Attempts Reloaded not sending email?
If a hacker’s trying to break in to your site, it’s super important that those alerts are working so you know about it.
In this article, we’ll show you how to fix the problem in a few simple steps.
Why Limit Login Attempts in WordPress?
Hackers sometimes try to break into WordPress websites by trying to log in over and over again.
They might try to guess your password manually, but most use software programs to automatically try different combinations. This is called a ‘brute force’ attack, and it means the hacker could try thousands of different logins in minutes.
The Limit Login Attempts Reloaded plugin will detect suspicious login attempts and automatically lock that user out. That can help to avoid any impact on your site speed.
If you aren’t getting notifications when malicious visitors are locked out, we’ll show you how to easily fix Limit Login Attempts Reloaded not sending email.
How to Fix Limit Login Attempts Reloaded Not Sending Email
In This Article
Step 1: Check Your Limit Login Attempts Reloaded Settings
Limit Login Attempts Reloaded has 1 email setting. By default, it’ll send an email to the site admin address after 3 failed logins.
If you aren’t getting these emails, let’s first check that the email address is correct.
To start, log in to your WordPress dashboard. You’ll want to click on the Limit Login Attempts Reloaded icon on the left.
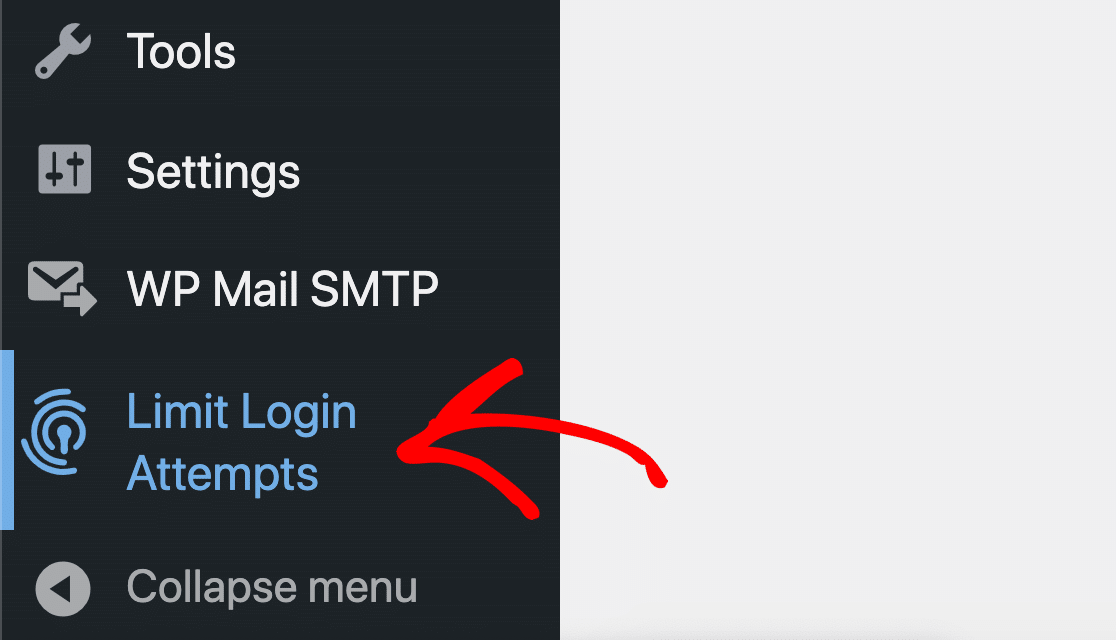
Next, click the Settings tab in the plugin.

Under General Settings, look for the Notify on lockout field. If you want, you can type in an email address here to override the site admin email.

You’ll also want to check the number of lockouts. If this is set too high, the email notifications might not be sent before the site slows down, so keeping the default value is best here.
If everything looks good, but you’re still not receiving emails from the plugin, we’ll show you how to fix it next.
Step 2: Install the WP Mail SMTP Plugin
Next, we’re going to install the WP Mail SMTP plugin on your site.
WP Mail SMTP is the best SMTP plugin for WordPress. It helps to improve email delivery when emails are generated and sent from your site.
Instead of relying on your web hosting server to send emails, it sends them through a separate email provider.
By doing this, you’ll make sure that your emails are delivered reliably.
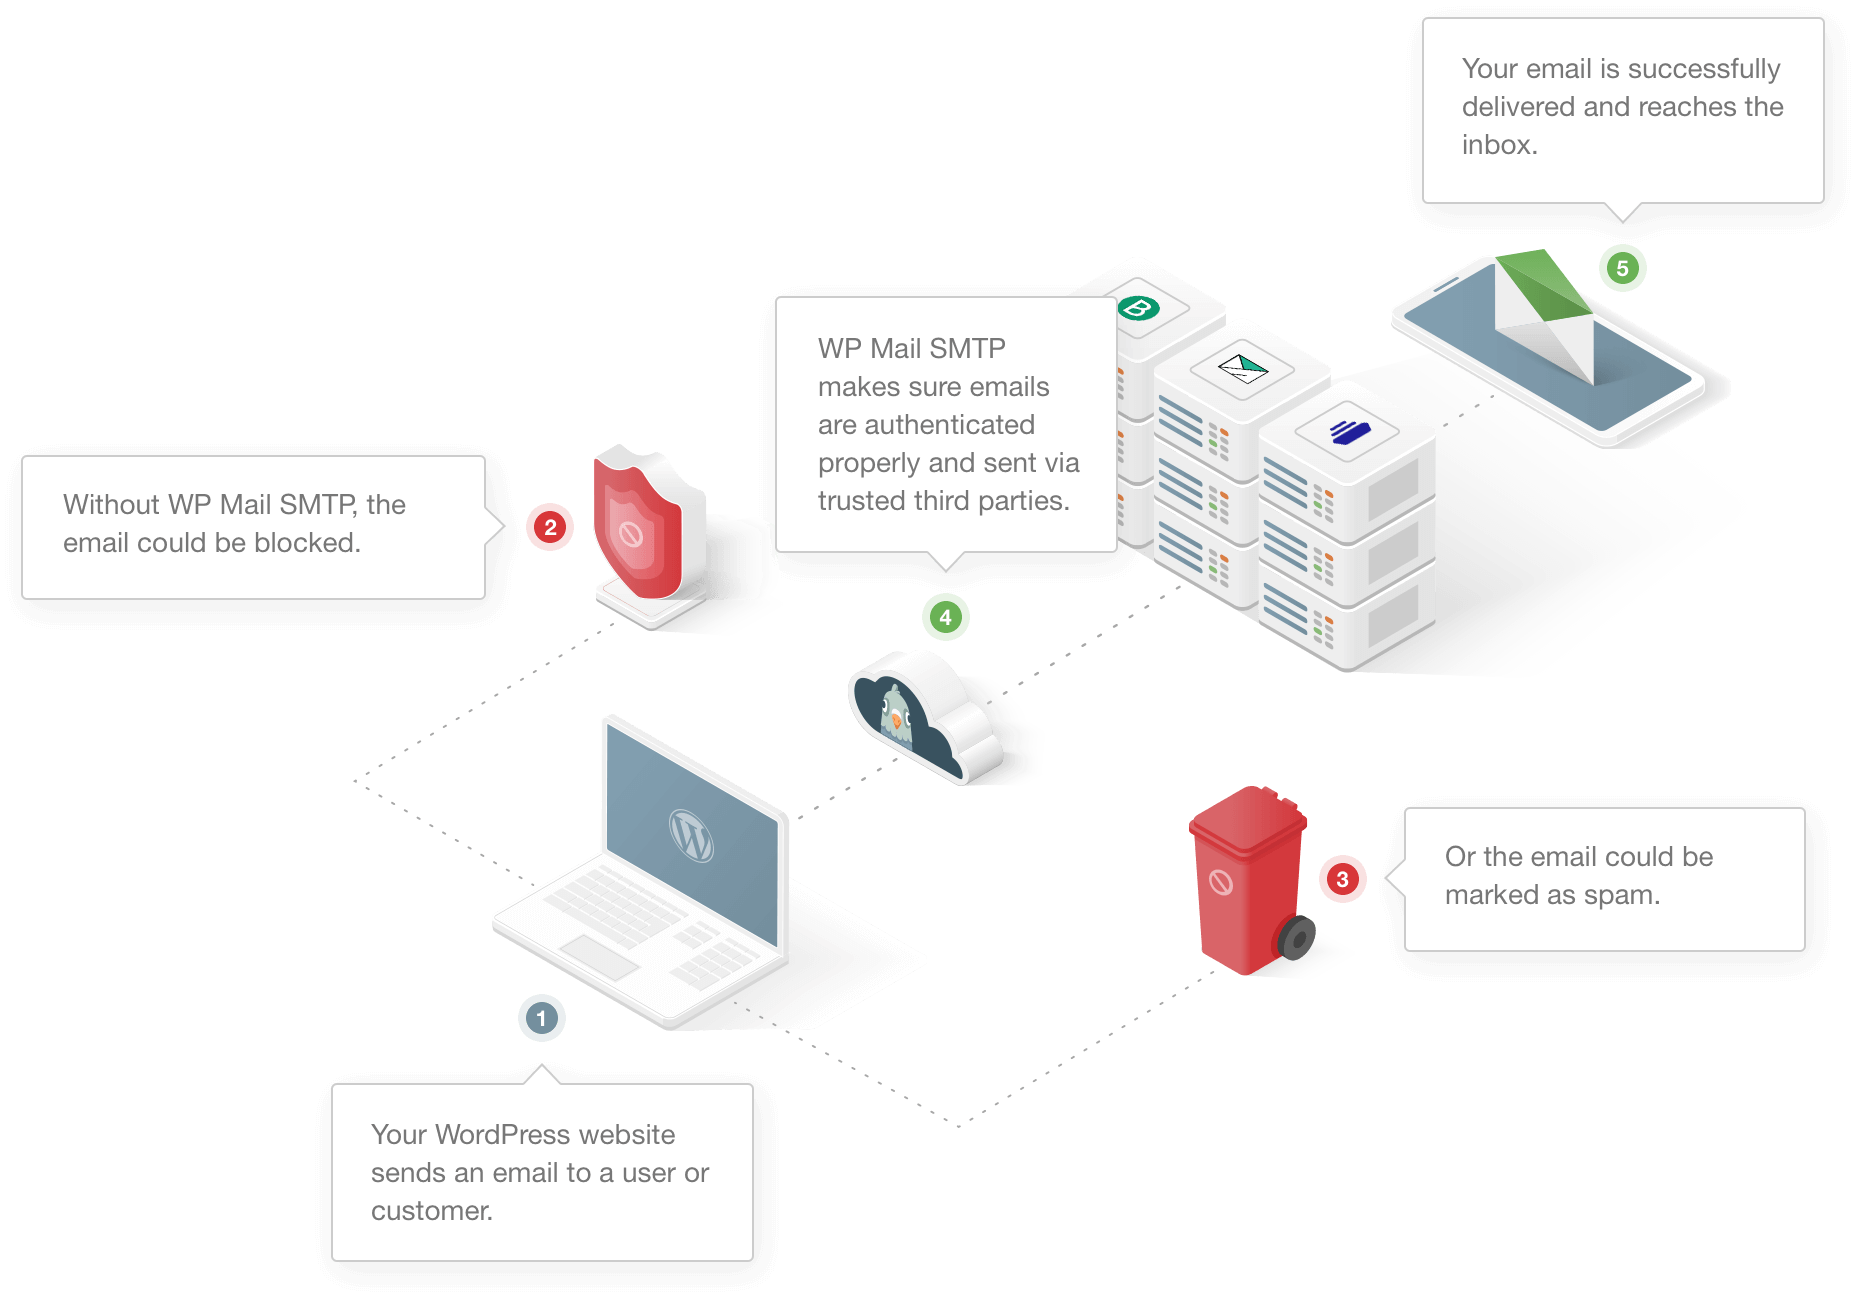
Sending through a 3rd party service adds important verification to the messages to make sure they aren’t treated as spam. That will solve the problem you’re having with Limit Login Attempts Reloaded not sending email.
It will also fix your contact form emails and WooCommerce order notifications.
To start, you’ll want to download the zip file from your WP Mail SMTP account. You’ll find it in the Downloads tab.
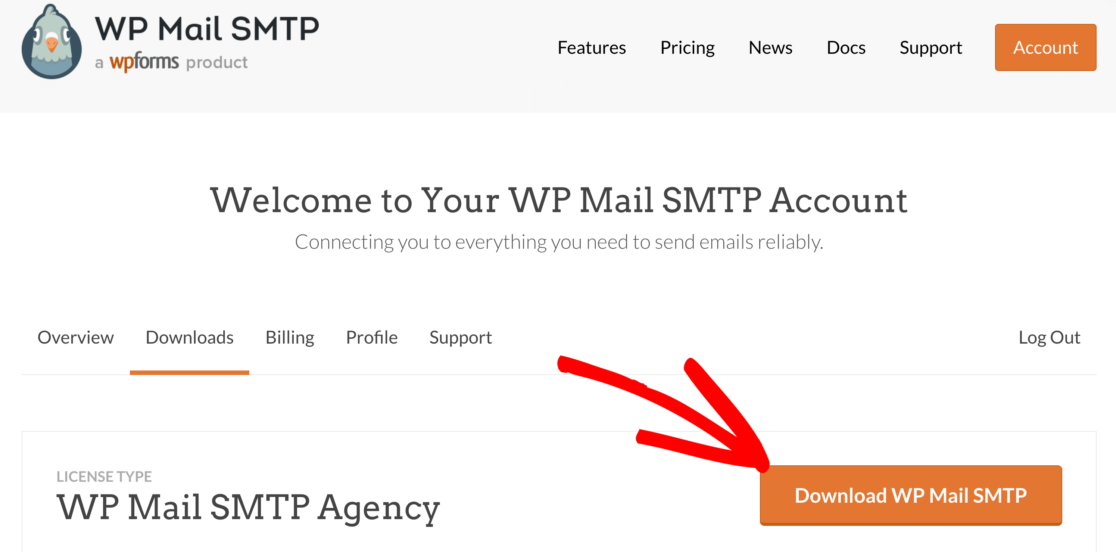
Next, open up the WordPress dashboard and upload the plugin to your WordPress site.
If you need help with this, jump over to this guide to installing a WordPress plugin.

Don’t forget to Activate the plugin. As soon as you activate it, the Setup Wizard will open.
If you want to pause here, you can come back and restart the wizard by clicking the Launch Setup Wizard button in your WP Mail SMTP settings.
Step 3: Set Up Your Email Service
Now let’s run the Setup Wizard to create the connection from your WordPress site to an email provider.
Remember: if you already have a provider set up, running the wizard a second time might erase your settings.
First, we’ll choose a mailing service. Click the Let’s Get Started button to do that.

Now it’s time to choose your mailer.
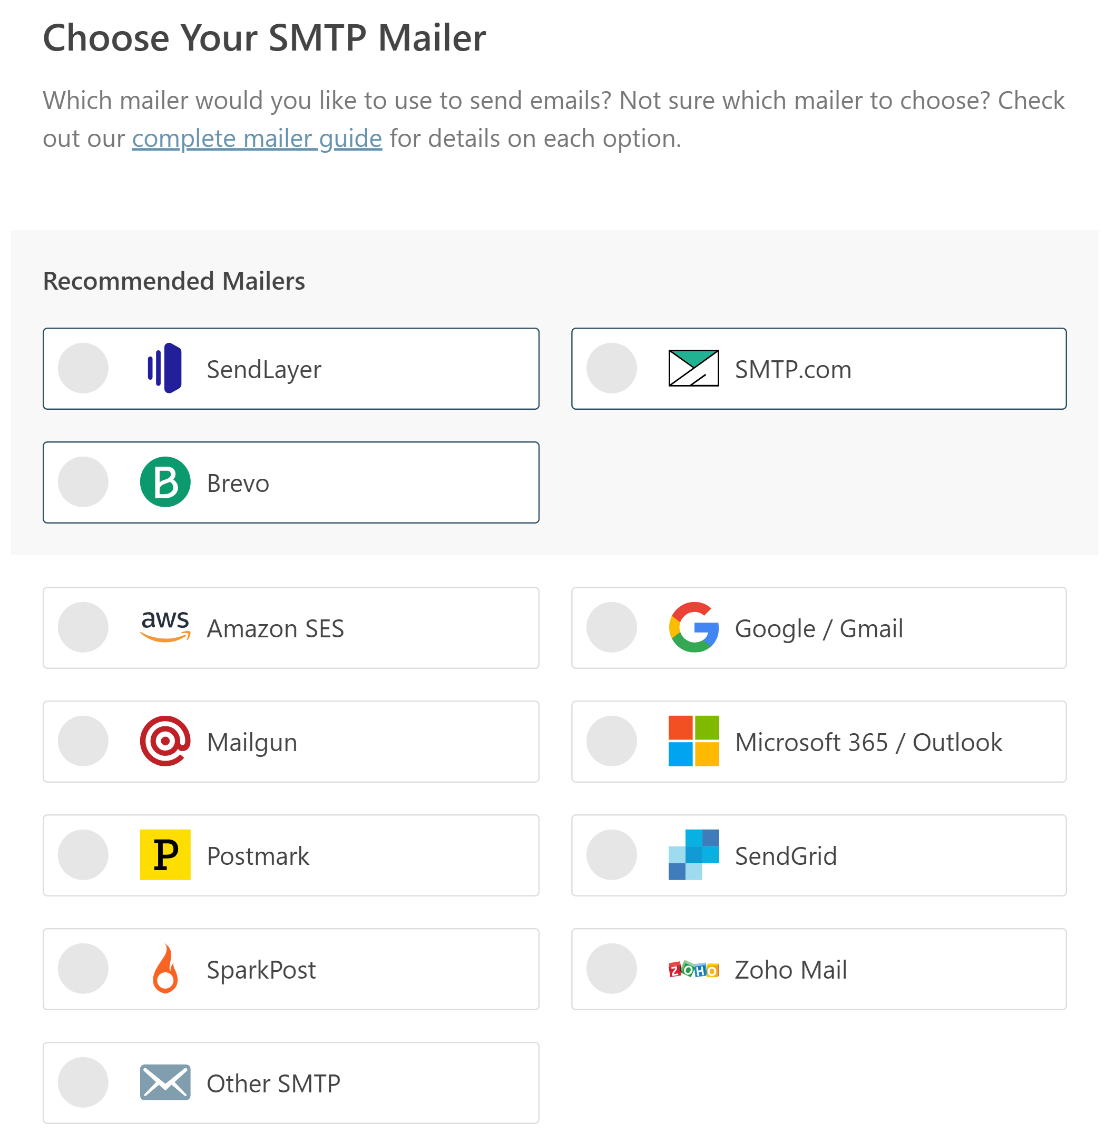
Not sure what to pick here? We have a few tips to help:
- For large sites, SendLayer, SMTP.com, or Brevo (formerly Sendinblue) are perfect. Any of these mailers can handle large numbers of emails generated from your site.
- WP Mail SMTP supports Gmail or Google Workspace accounts. This is a great choice for a small site. You can use a Gmail alias to send your WordPress emails too.
- Other SMTP lets you use any SMTP server that you have access to. Some providers will limit the number of emails you can send, but this is another great option if you’re just starting out.
Check out this complete guide to email providers to find out more about the pros and cons of each option.
When you’ve chosen your mailer, open up our documentation to complete the setup steps on the provider’s side:
- SendLayer
- SMTP.com
- Brevo
- Amazon SES
- Google Workspace / Gmail
- Mailgun
- Microsoft 365 / Outlook.com
- Postmark
- SendGrid
- SparkPost
- Zoho Mail
- Other SMTP
Want to set up multiple mailers? You can do so in the Additional Connections settings once you’ve finished the Setup Wizard. Then you can select a Backup Connection and configure Smart Routing.
When you’ve set everything up on your email service website, come back to this guide to enable email logging on your site.
Step 4: Turn on Email Logging (Optional)
At the end of the wizard, WP Mail SMTP will ask you which features to enable. By default, 2 will already be turned on:
- Improved Email Deliverability
- Email Error Tracking
To fix Limit Login Attempts Reloaded not sending email, you’ll want to have both enabled.
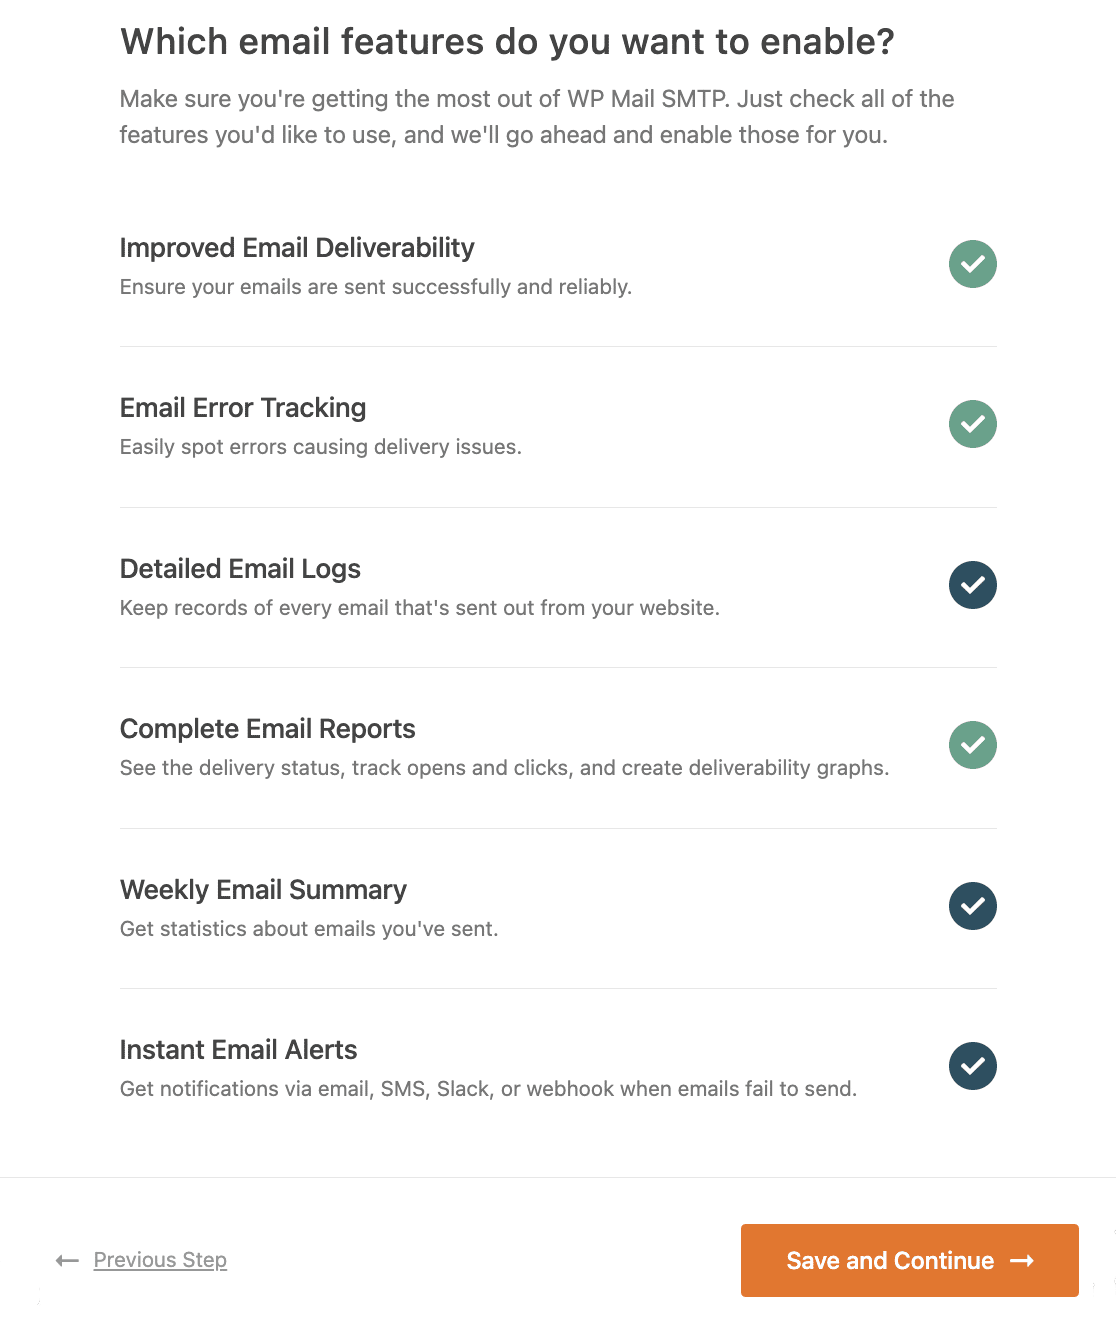
If you have WP Mail SMTP Pro, you can also turn on the Detailed Email Logs here.
Detailed Email Logs will track your WordPress sent emails so you can easily see the status of each one in Complete Email Reports. (This setting won’t save the content of the email, but there’s a separate setting if you want to do that.)
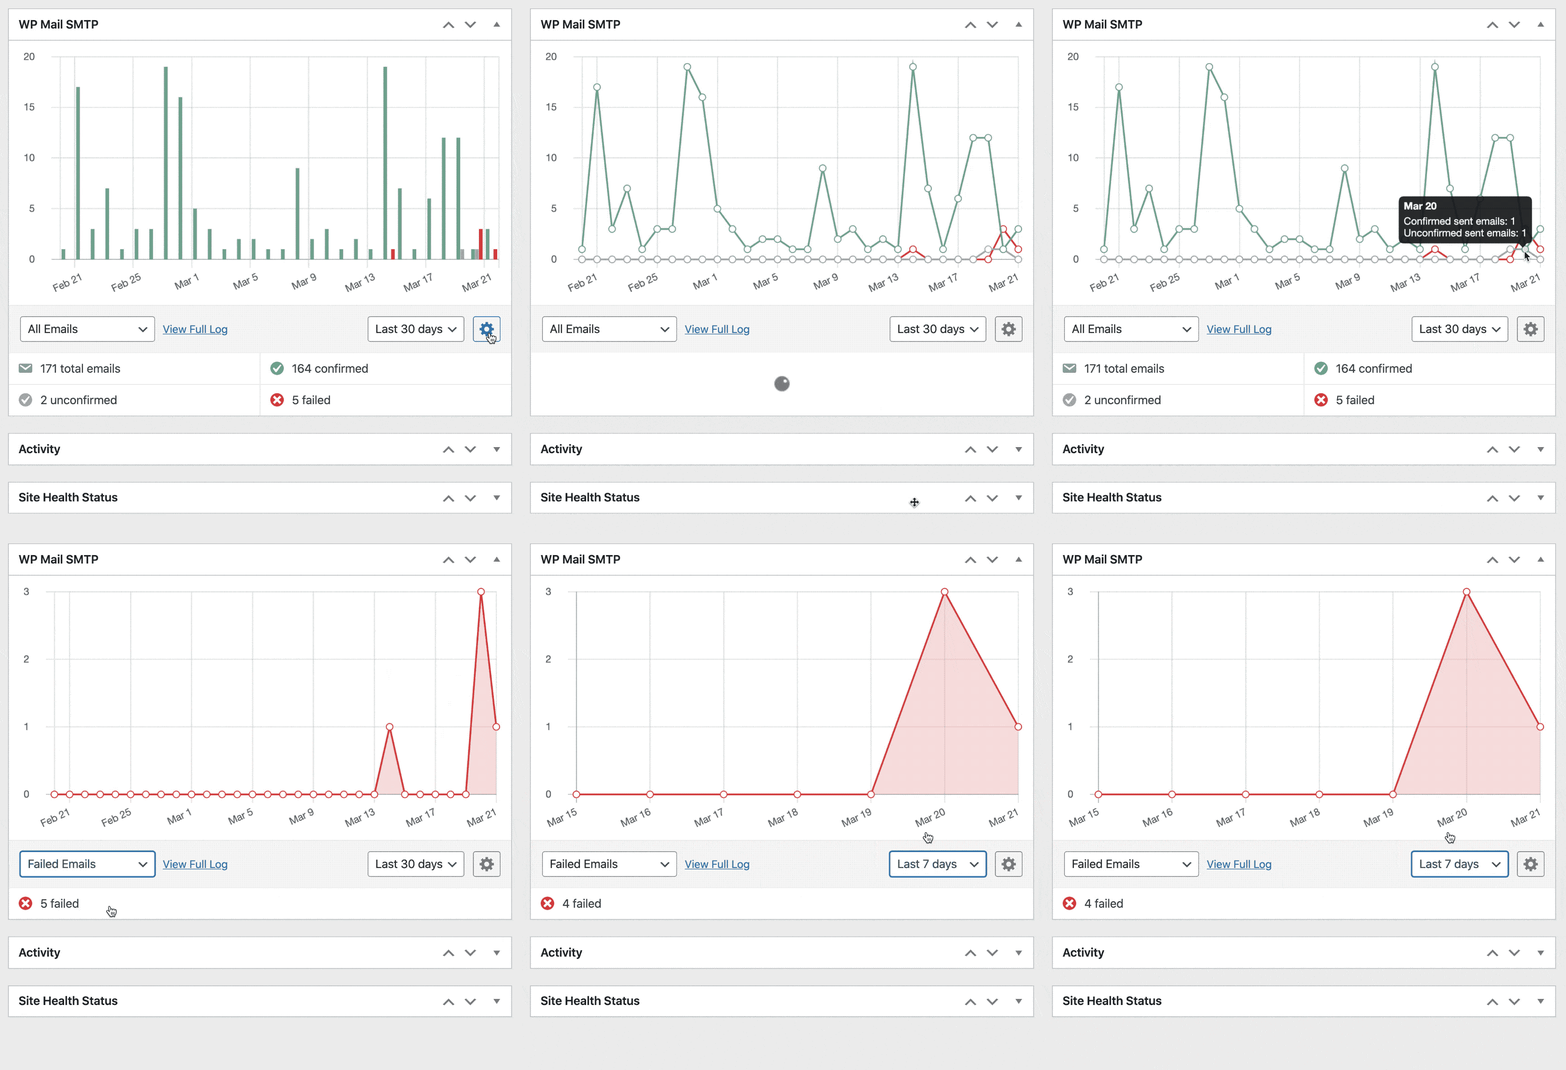
Even better, the Pro version also includes a helpful dashboard widget for your WordPress site. The widget shows sent and failed emails on a chart. That makes it easy to spot issues with your emails quickly.
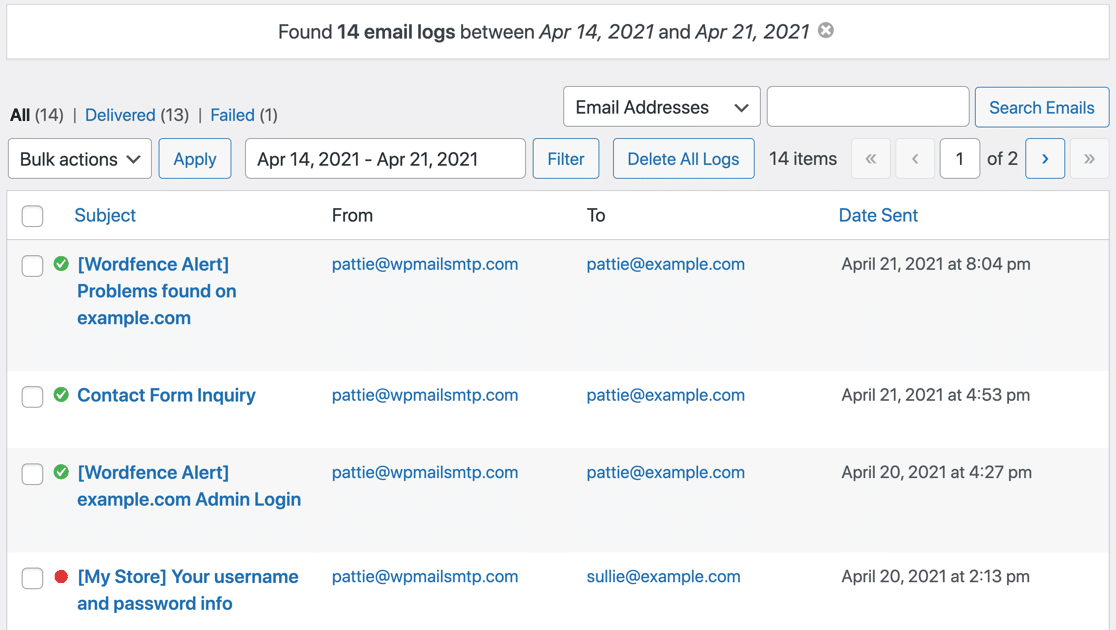
If logging is enabled, you can also review the log file in your WordPress dashboard.
Our log screen lets you search for different types of sent emails and notifications so you can quickly check the status.
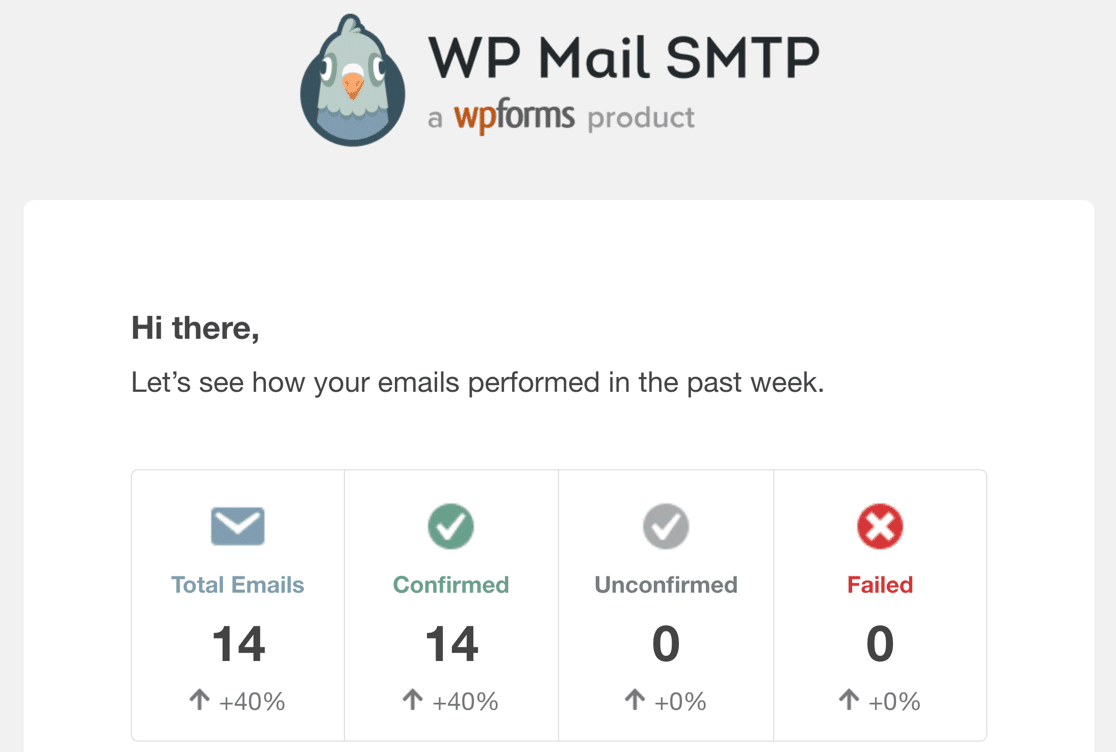
The Weekly Email Summary delivers an overview of your latest logs to your inbox each week.
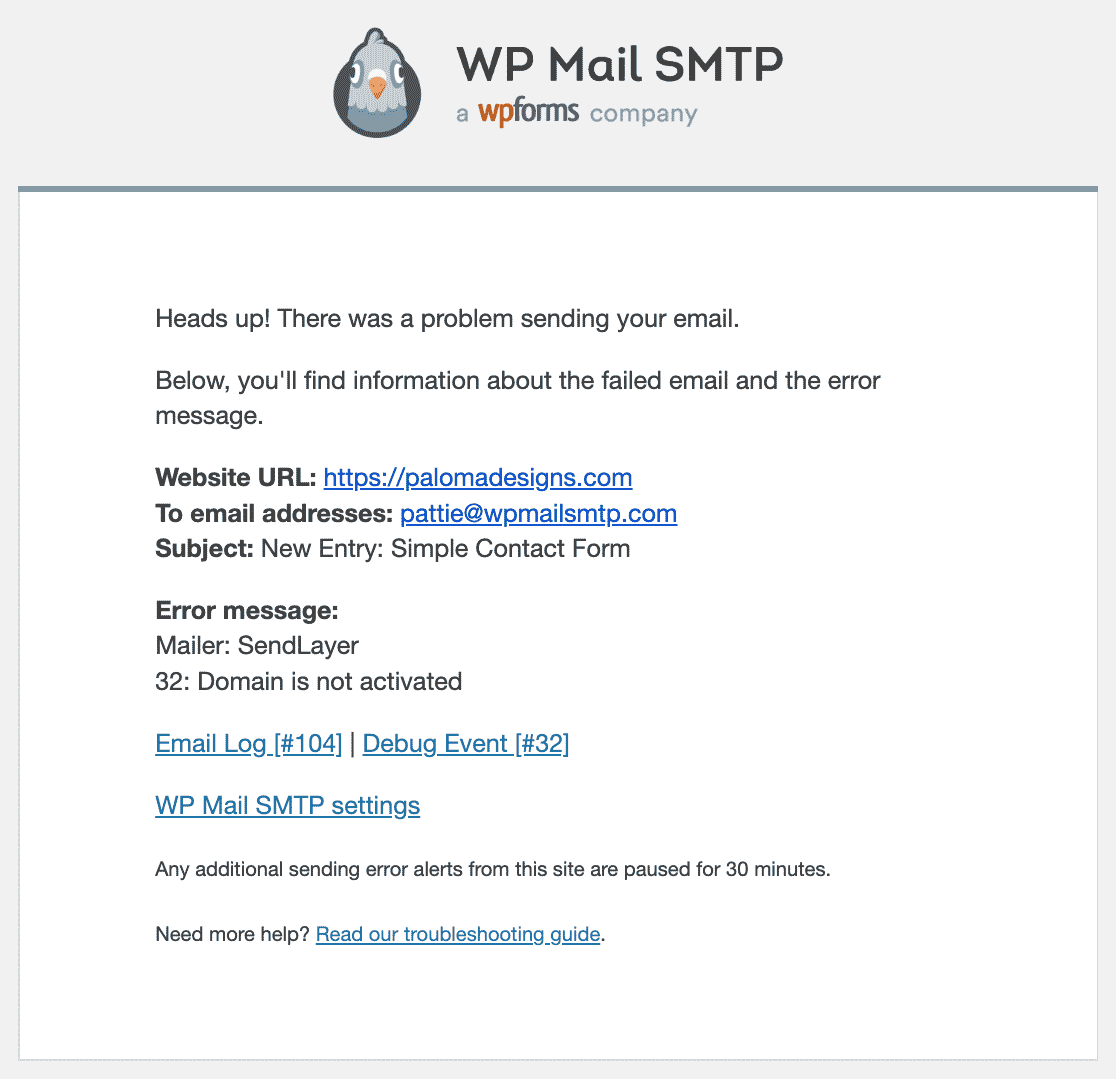
And Instant Email Alerts let you know if your site fails to send an email.
On the next screen you can enable more email logging features.
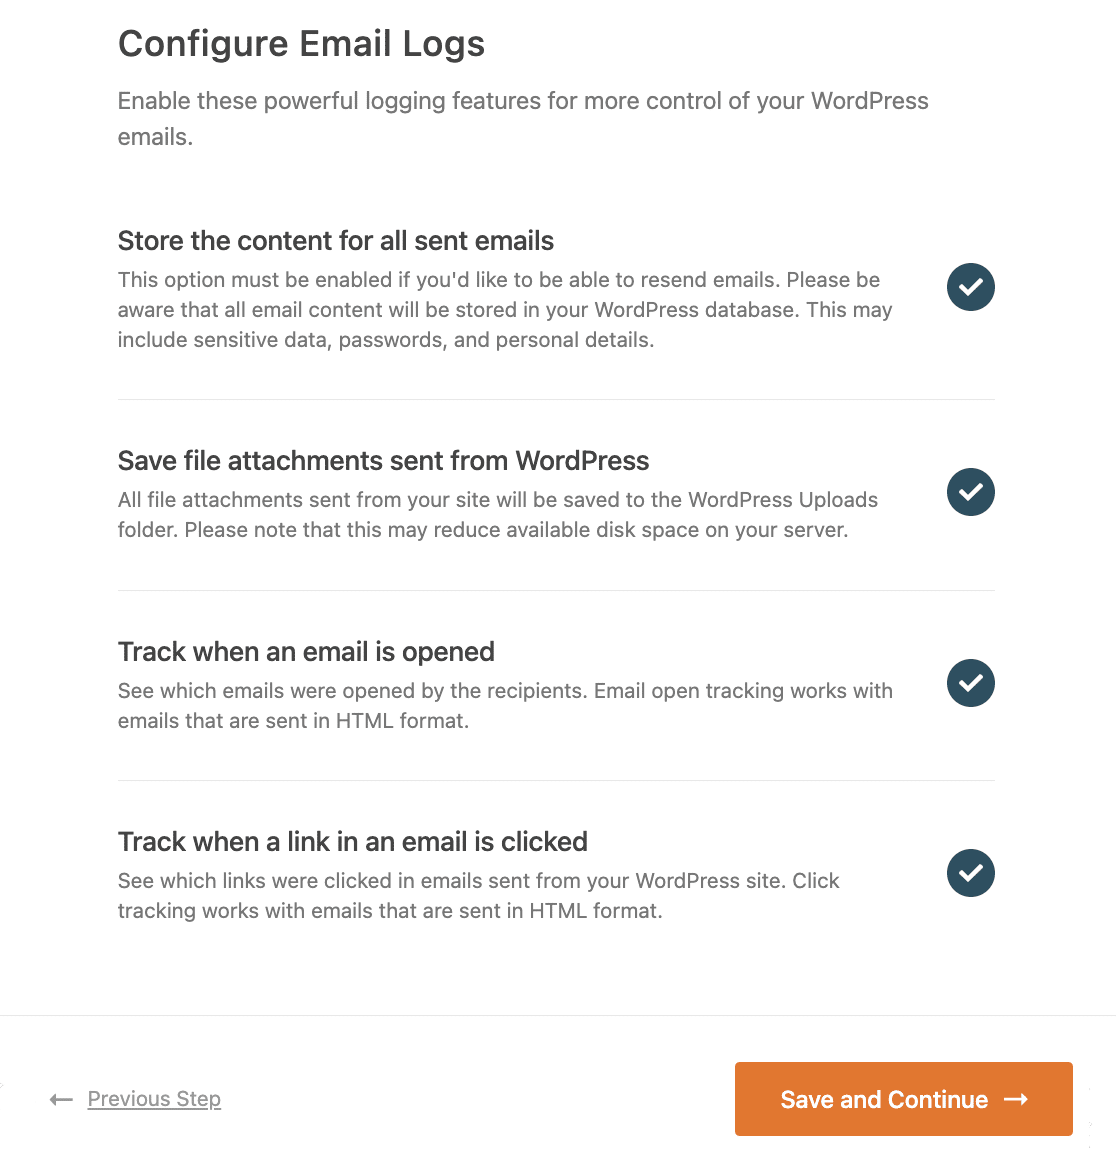
These options let you save email content and attachments and track email opens and link clicks.
Want to see more? Check out this guide on how to log your WordPress emails.
And that’s it! Now you’ve got all the info you need to fix Limit Login Attempts Reloaded not sending email.
Next, Set Up a DMARC Record
Now you’ve fixed Limit Login Attempts Reloaded not sending email, you’ll want to check that your DNS is set up correctly. For example, the email provider you’ve chosen may require you to set up a DMARC record for your domain.
If you don’t have one, you’ll see this message in WP Mail SMTP:

DMARC is an important DNS record that tells the email server how to handle emails marked as spam. For more details, read our guide on how to create a DMARC record.
Ready to fix your emails? Get started today with the best WordPress SMTP plugin. If you don’t have the time to fix your emails, you can get full White Glove Setup assistance as an extra purchase, and there’s a 14-day money-back guarantee for all paid plans.If this article helped you out, please follow us on Facebook and Twitter for more WordPress tips and tutorials.

