AI Summary
Is Forminator not sending emails? If you’re not getting notifications, you could miss important contact form messages.
I’ve seen this happen more than once, and the reasons can vary. Sometimes it’s a mistake in the form settings, and sometimes, your web host blocks WordPress emails without telling you.
So, in this guide, I’m going to show you to fix this with SMTP in WordPress and also run through your Forminator email settings to check if you don’t have any conditions set up that are preventing notifications from being sent.
Fix Your Forminator Emails Now! 🙂
Why Is Forminator Not Sending Emails?
WordPress’ wp_mail() function isn’t super reliable. It’s very common to have issues with contact form plugins not sending emails, or even WooCommerce order emails going missing.
The WP Mail SMTP plugin solves that by routing emails through a dedicated email provider. It’s easy to set up and works well even if you’re not technical.
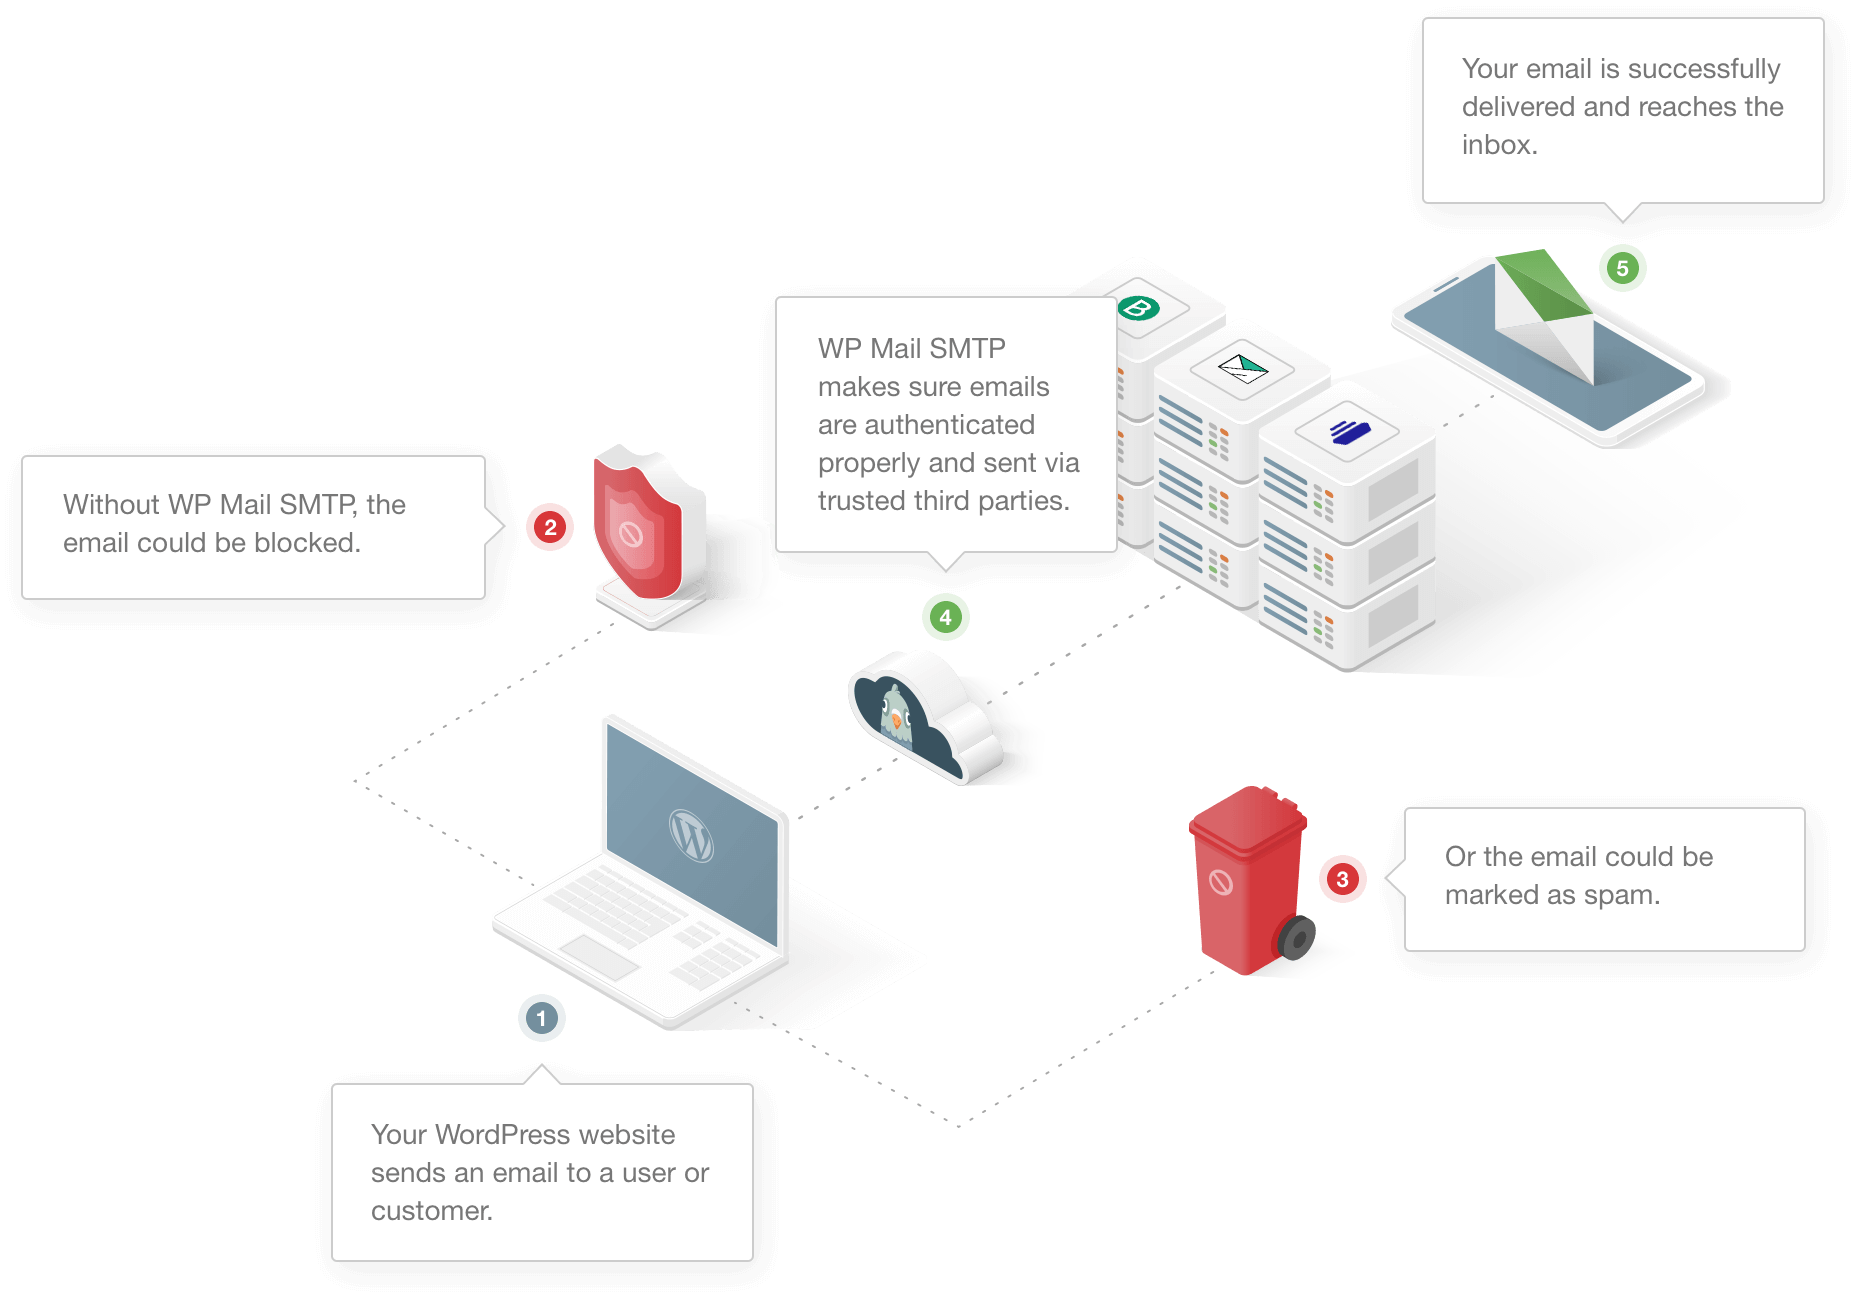
With WP Mail SMTP, you can choose from free or paid providers and automatically send all of your WordPress emails using their API. That means they’ll reach the destination server reliably.
WP Mail SMTP has a Setup Wizard to make this easy, even if you’ve never done it before. I’ll show you how in the steps below, but before that, let’s troubleshoot why Forminator is not sending emails in the first place.
How to Fix Forminator Not Sending Emails
- Step 1: Check the Default From Headers in Forminator
- Step 2: Check Your Form Notification Settings
- Step 3: Install the WP Mail SMTP Plugin
- Step 4: Set the Default Sender Address in WordPress
- Step 5: Track and Monitor Your Forminator Emails
Step 1: Check the Default From Headers in Forminator
First, let’s check the default sender settings in Forminator. These are the From headers that Forminator adds to email notifications by default.
In this guide, we’re just going to use a basic contact form as an example. To start, log in to your WordPress dashboard. Look to the left-hand menu and click Forminator » Settings.
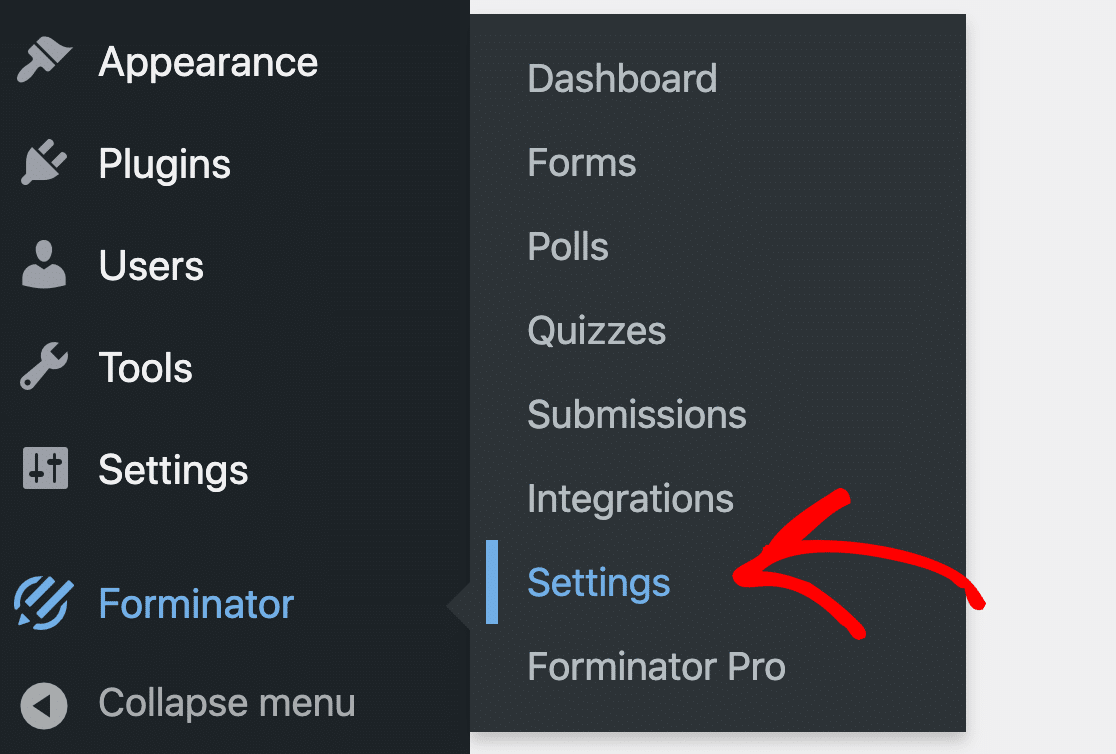
Scroll down a little on the General settings page until you see the From Headers. By default, Forminator will use the sending address [email protected], and it will use your site’s title as the sender name.

Using a sender that doesn’t exist can cause email deliverability issues, so it’s a good idea to change this default setting. If you want, you can also override this on each form. Let’s check that setting next.
Step 2: Check Your Form Notification Settings
In addition to the default sender, you can also set up email settings for each individual form in Forminator. To open the form builder, look to the left-hand menu again and click Forminator » Forms.
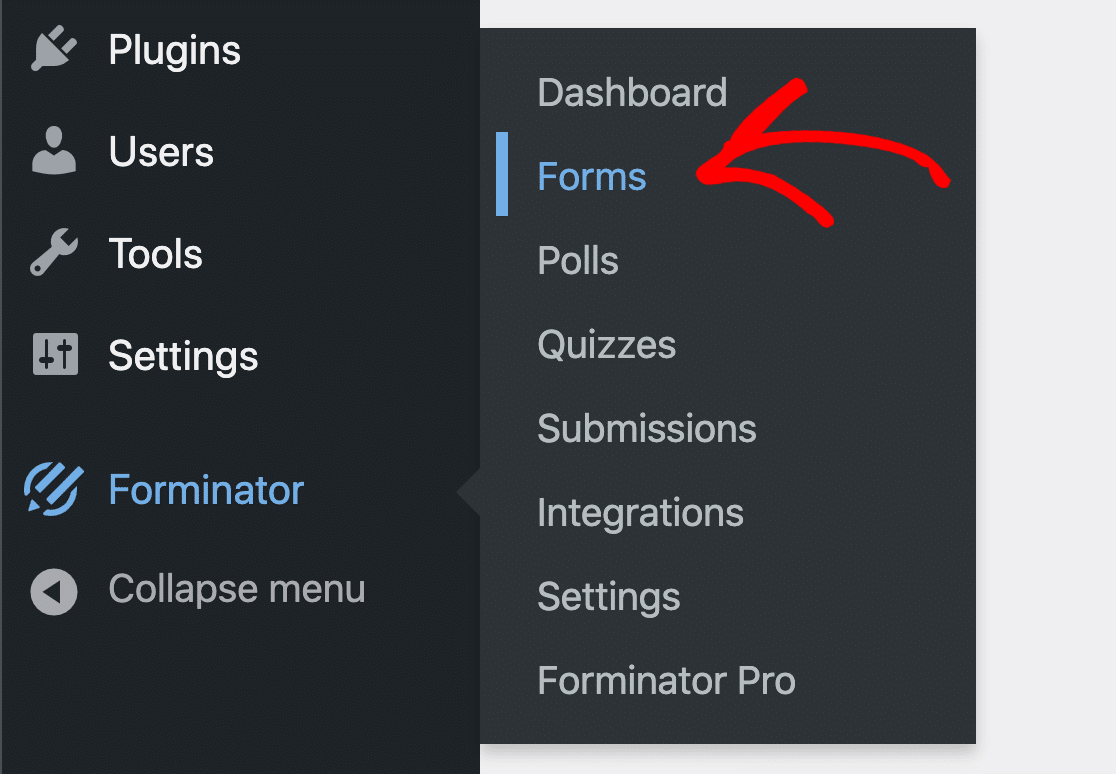
Click Edit next to the form you’ve created.

On the left-hand side, click Email Notifications. (If you have your view zoomed in, you’ll want to click this in the Navigate dropdown at the top.)
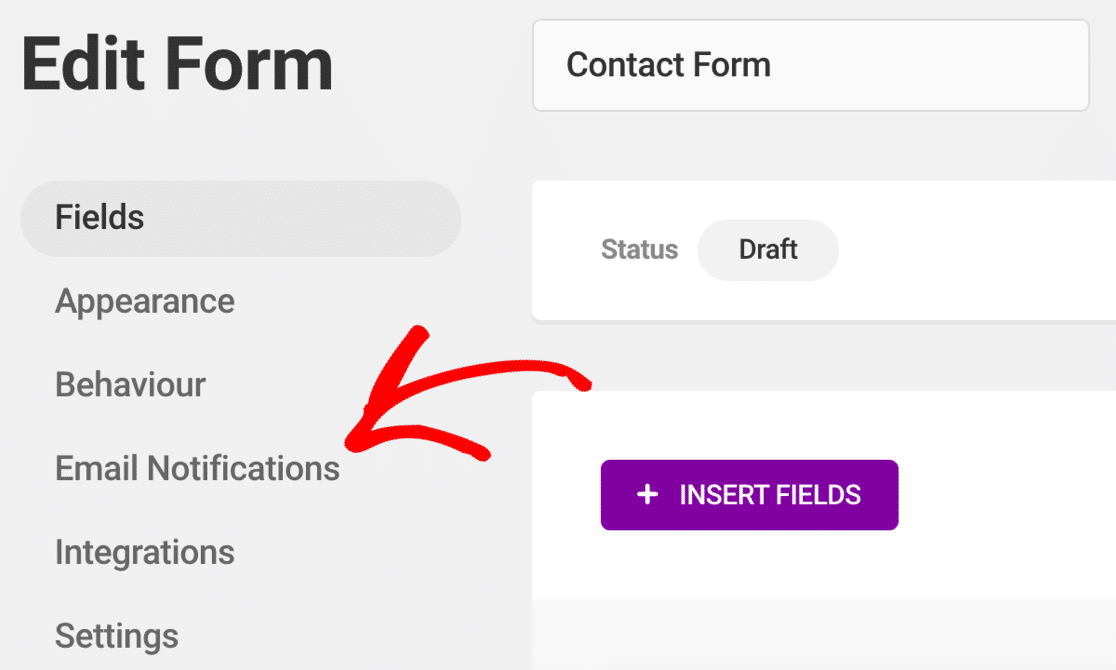
The Email Notifications list shows all of the notifications that will be sent when you get a new form submission. Keep in mind that the Admin Email line here isn’t the admin email in WordPress.
It’s simply the title of the notification that’s created by default. Click anywhere on this line to open up the settings.

On advanced forms, you might have to run through these steps for each notification on your form. First, let’s check out the Recipients tab.
This is the email address that’ll receive the default form notification. You’ll normally want to set this to your business email address. If you want, you can change the setting here.
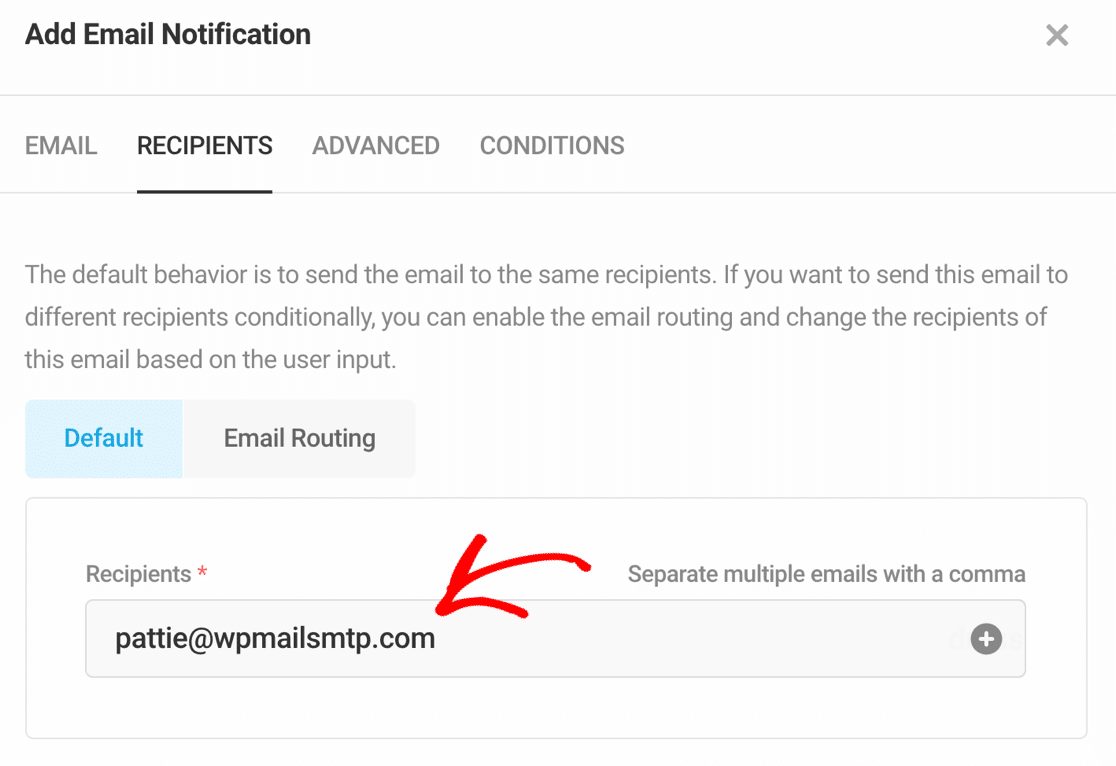
Be sure to separate email addresses with commas if you want to send emails to more than 1.
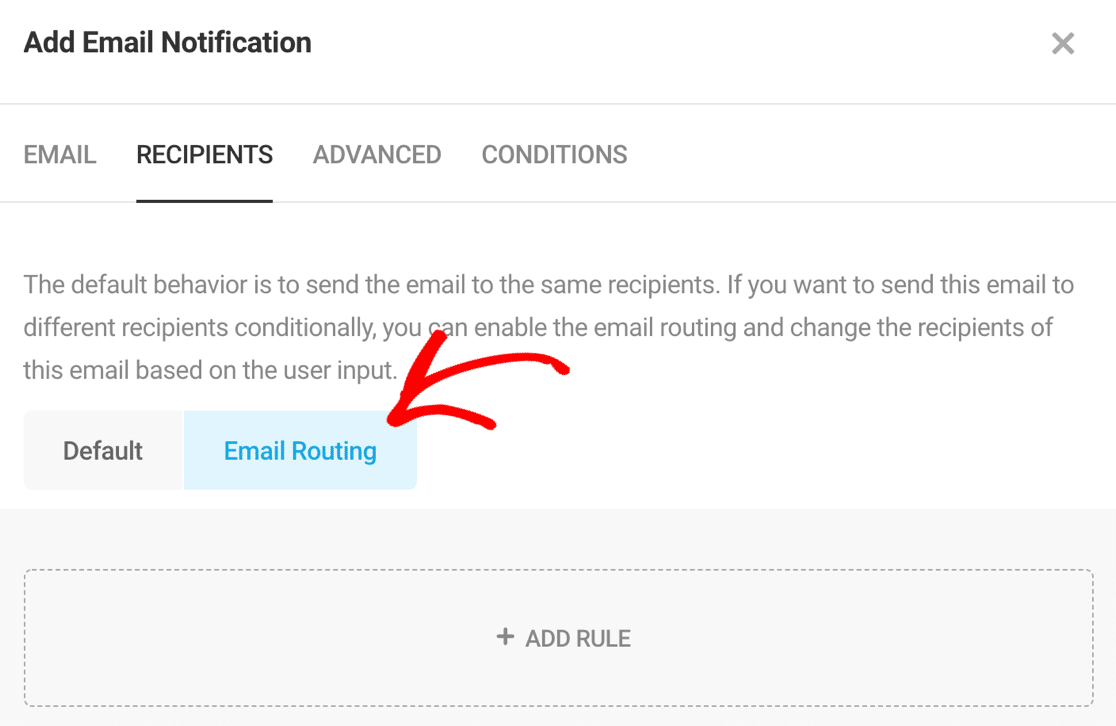
Next, under Email Routing, you can set up conditional notifications. These are notifications that will send only if certain conditions are met.
For example, you might want to send a notification based on the content of 1 of your fields. Check your rules here if you have any.
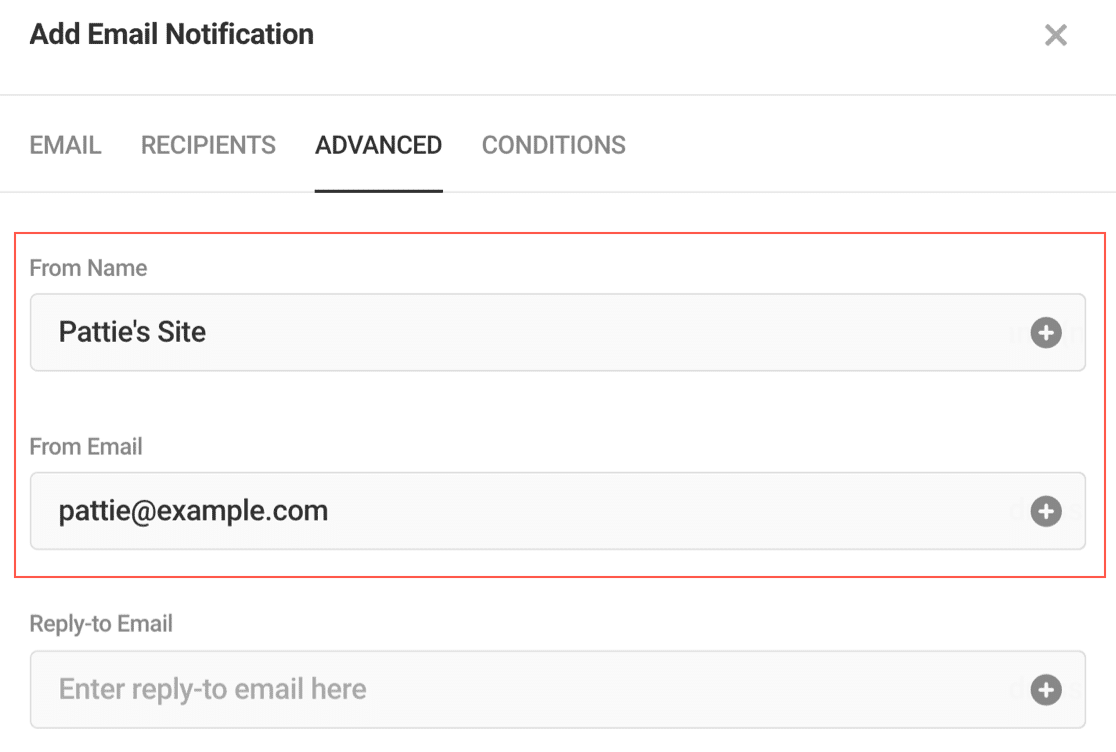
Next, let’s click the Advanced tab. This page includes the main form notification settings. You can customize:
- Email sender (From Email and From Name)
- Reply-to email
- CC
- BCC
Go ahead and change these settings if you need to. Remember that the From Name and From Email here will override the defaults we looked at in Step 1.
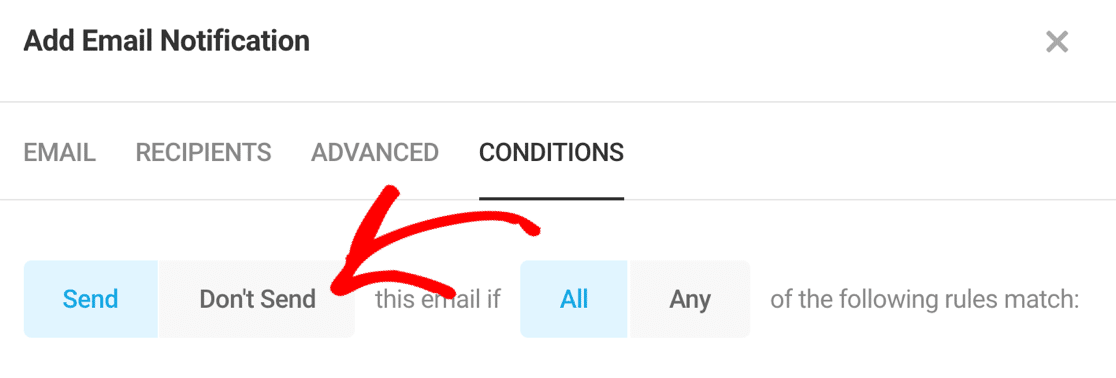
Moving on, let’s look at the Conditions tab. On this tab, you can control if an email is sent or not based on the contents of the message.
This is a little different from the Recipients setting because you can actually block email sending completely here.
While troubleshooting your form, you’ll want to remove any Don’t Send conditions temporarily and re-test your form to see if that fixes Forminator not sending emails.
If everything looks good, we can move on and install WordPress SMTP on your website.
Step 3: Install the WP Mail SMTP Plugin
WP Mail SMTP is the best SMTP plugin for WordPress. It lets you easily solve email deliverability issues by sending WordPress emails through reliable mailers like SendLayer.
With WP Mail SMTP, you can also use an external mail server that you already have access to using the Other SMTP setting. So if your site doesn’t send tons of emails, you can use the SMTP server provided by your ISP or hosting provider.
Getting Started
To begin, you’ll want to download the WP Mail SMTP plugin. To do that, log in to the WP Mail SMTP website using the user account details you received when you signed up.
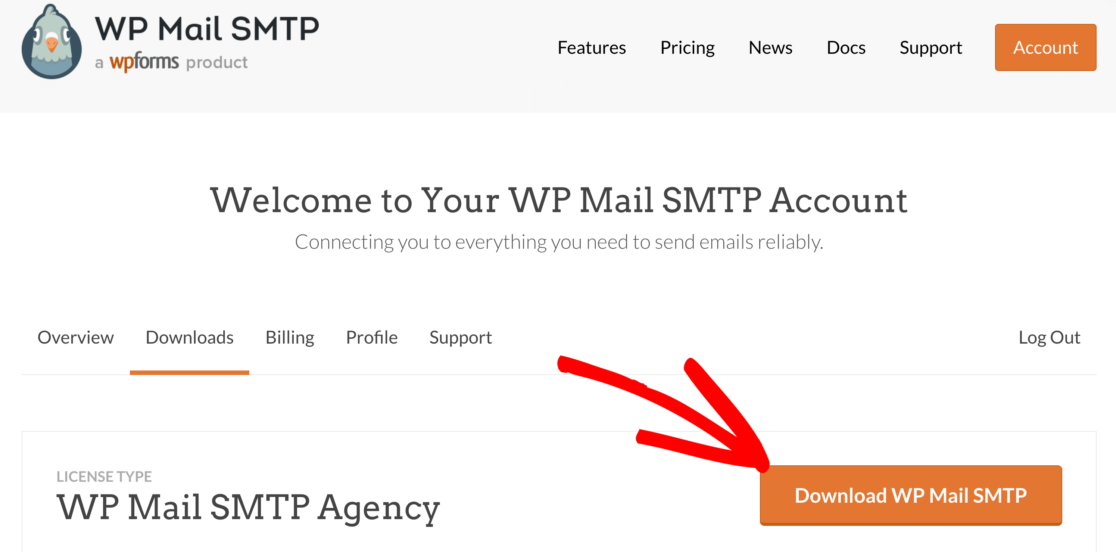
You’ll find the latest version of the plugin in the Downloads tab. Upload the plugin to your WordPress site and activate it. If you need help with this, jump over to this guide to installing a WordPress plugin.

As soon as you activate WP Mail SMTP you’ll see the Setup Wizard open up in your browser. If you need to start the wizard manually at a later time, you can open it up by clicking the Launch Setup Wizard button in the WP Mail SMTP settings.
Need a hand?
Our Elite license includes White Glove Setup for Sendlayer, SMTP.com, or Brevo (formerly Sendinblue).
Set Up SMTP for Forminator
In this step, let’s choose a mailer service to fix Forminator not sending email. First, click the Let’s Get Started button in the wizard.

On the next screen, you’ll see a list of email providers. If you’re not sure which email provider to pick, we recommend SendLayer, SMTP.com, or Brevo.
All 3 of these mailers are reliable and will work just fine with any kind of website. For other options, check out our list of mailers, along with some information on pricing.
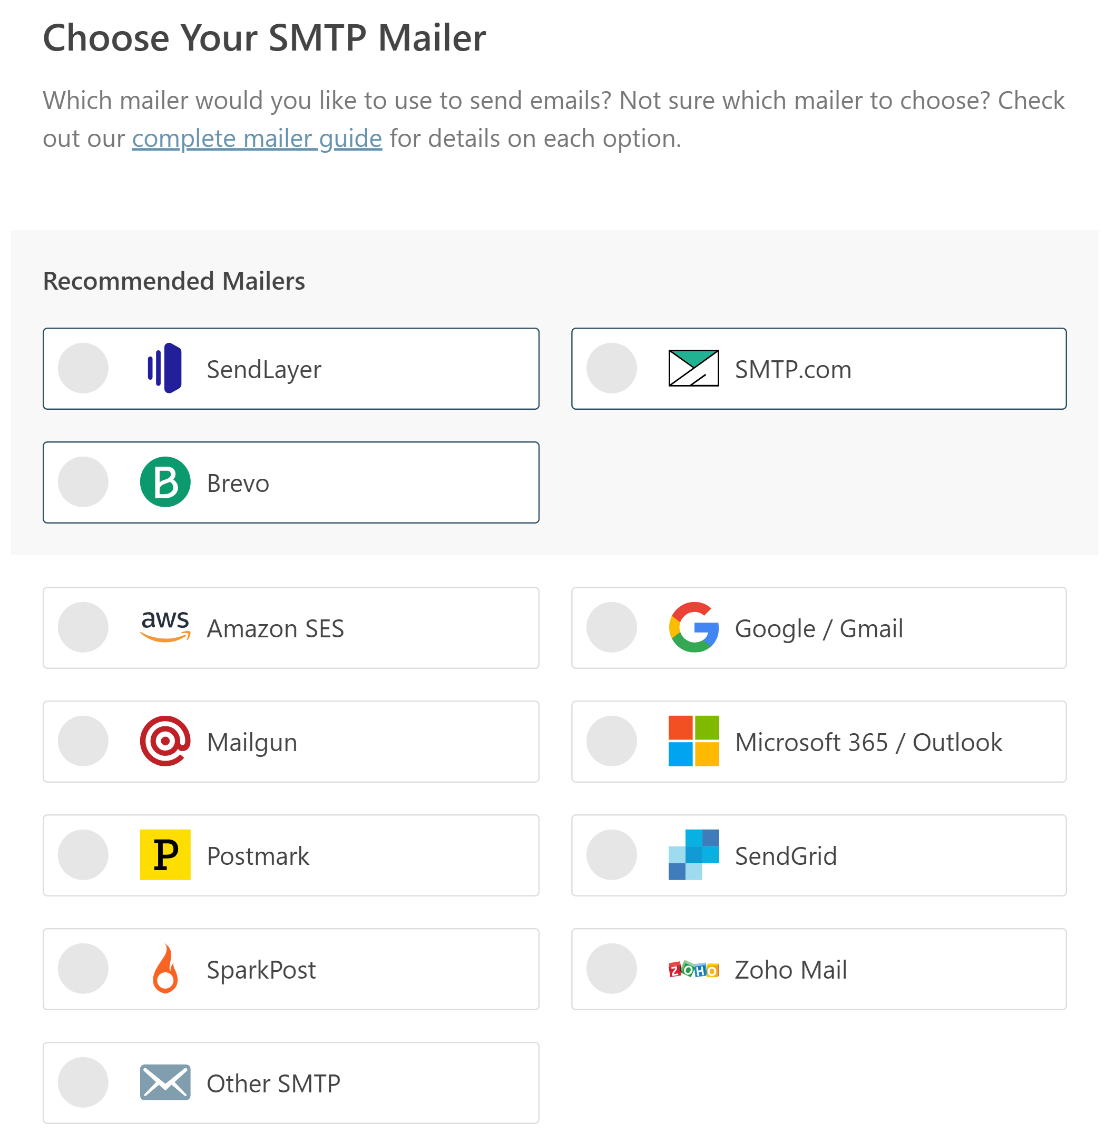
When you’ve chosen your mailer, open up the documentation below in a new tab. The doc will show you exactly what you need to do on the email provider’s side to get everything working:
| Mailers available in all versions | Mailers in WP Mail SMTP Pro |
|---|---|
| SendLayer | Amazon SES |
| SMTP.com | Microsoft 365 / Outlook.com |
| Brevo | Zoho Mail |
| Google Workspace / Gmail | |
| Mailgun | |
| Postmark | |
| SendGrid | |
| SparkPost | |
| Other SMTP |
If you want to set up multiple mailers, you can do so in the Additional Connections settings once you’ve finished the Setup Wizard.
Then you can select a Backup Connection and configure Smart Routing. Just 1 more thing. At the end of the wizard, 2 settings will be automatically enabled for you.
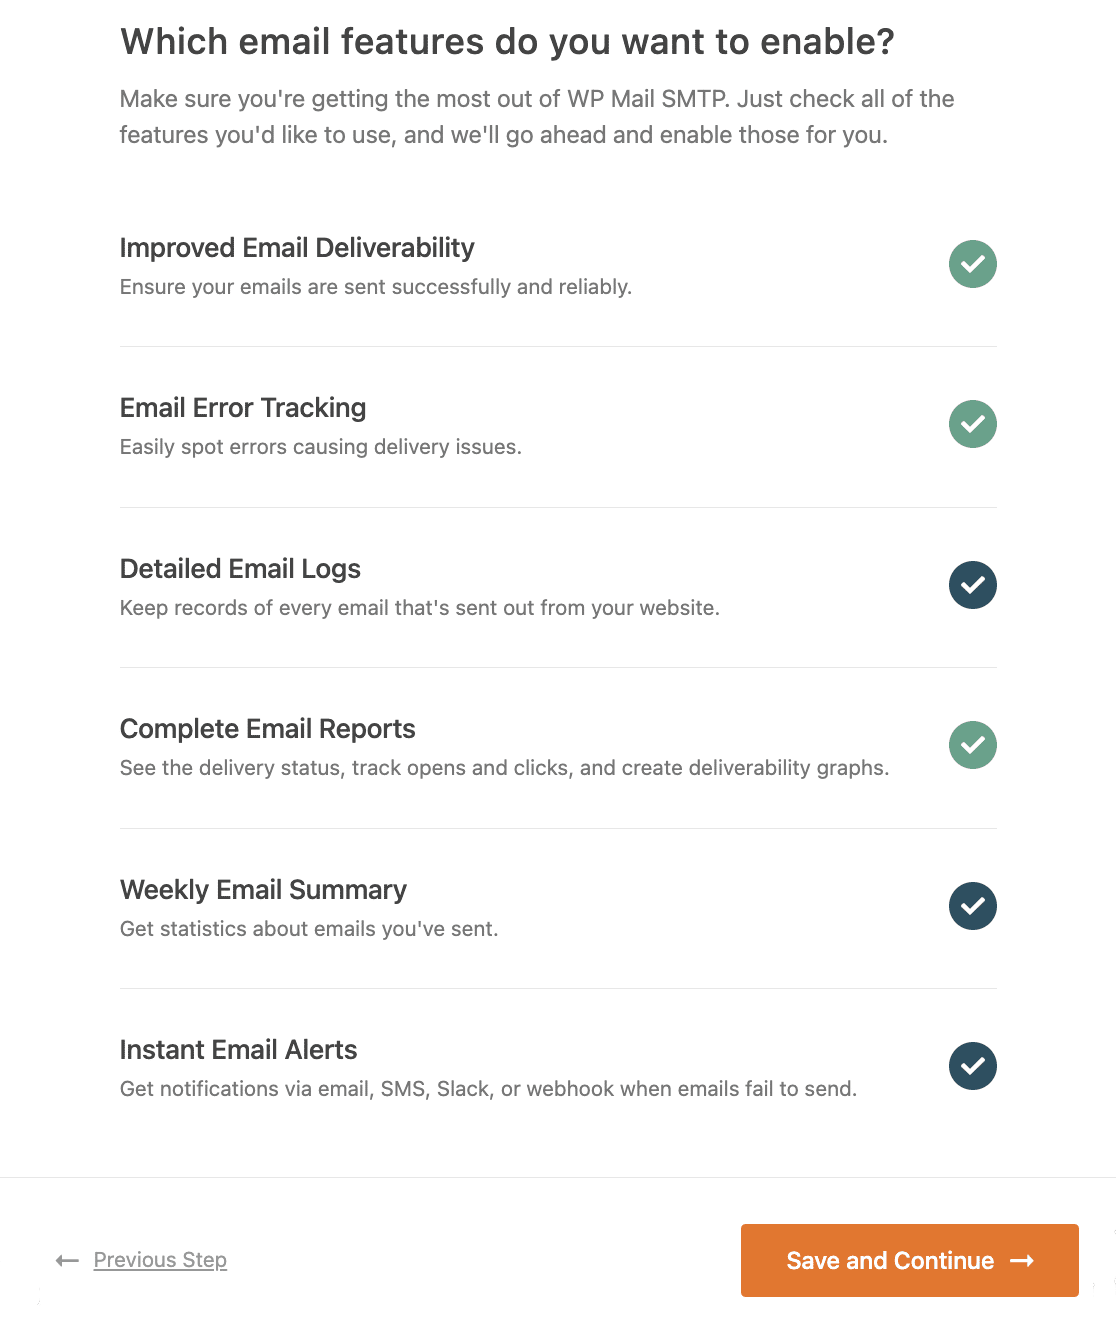
- Improved Email Deliverability
- Email Error Tracking
These 2 settings will solve your email issues and help you track problems with your SMTP settings. If you want, you can also turn on Detailed Email Logs.
This will allow you to see the email headers, subject line, and other information for each message sent in Complete Email Reports.
And if you enable Weekly Email Summary, you’ll get a weekly report with these details in your inbox.
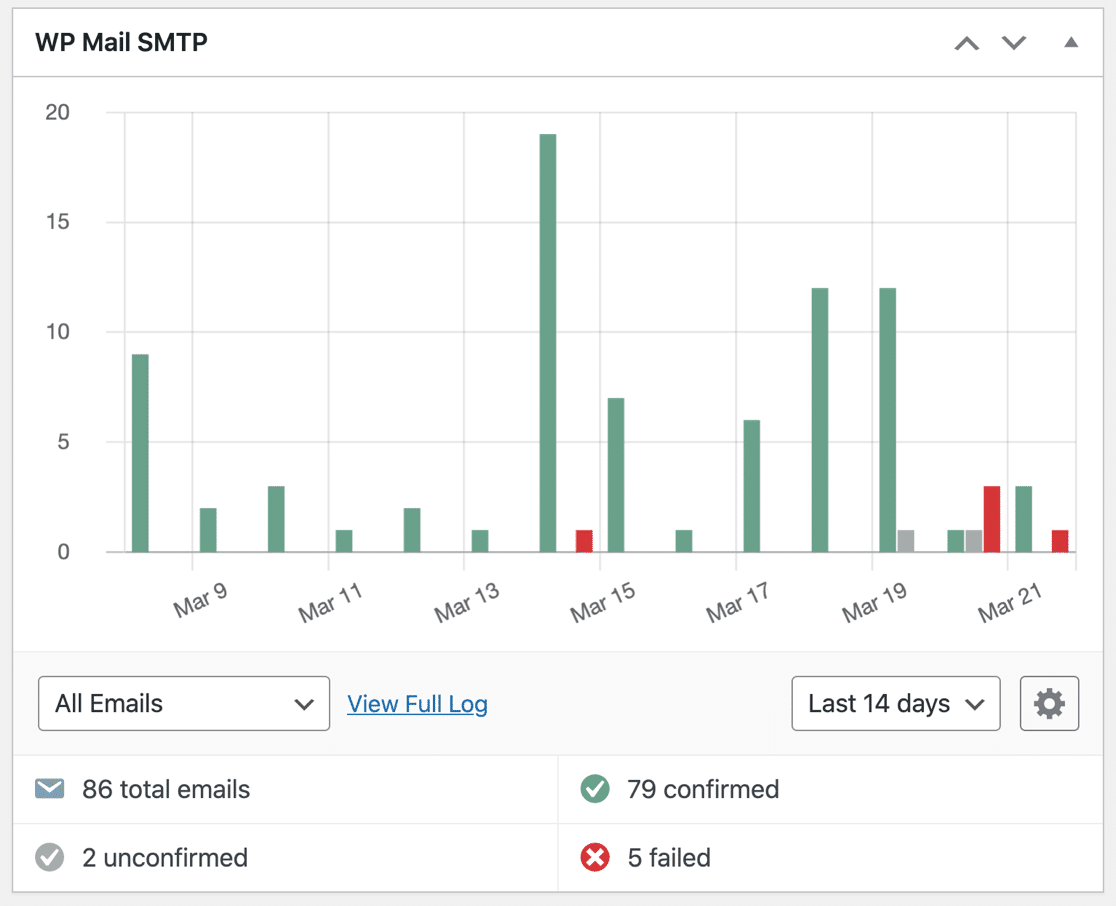
In WP Mail SMTP Pro, email logging is shown in a chart on your WordPress dashboard. So it really helps to keep track of your emails to make sure everything’s working, without the need for a separate email logging plugin.
At this stage you can also enable Instant Email Alerts, which let you know if your site fails to send an email.
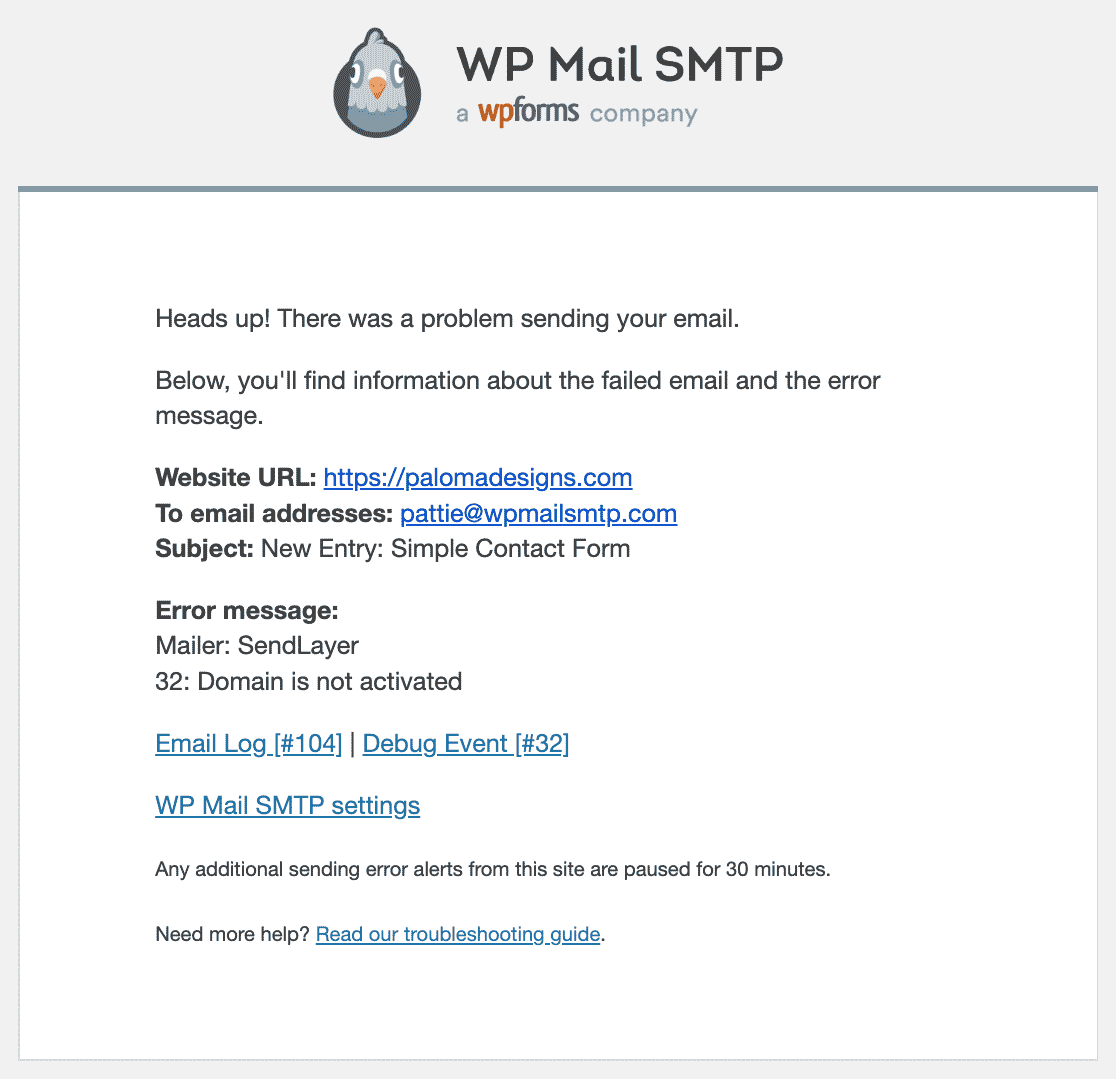
The email alert will include the error message and other information to help you fix the problem and get your emails sending again. On the next screen, you can enable some advanced email logging features.
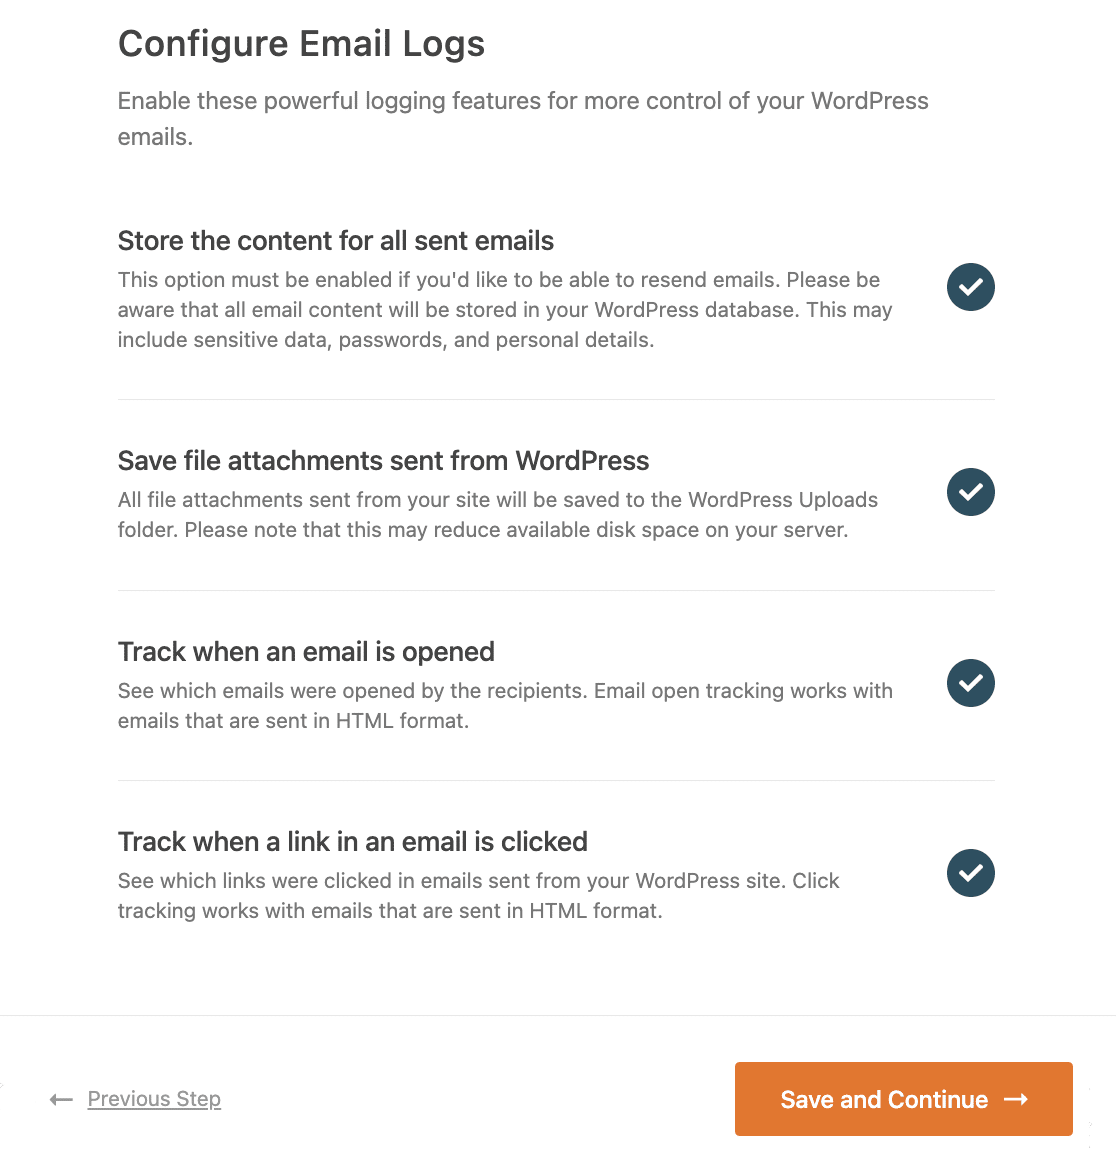
These options let you save the content of all your emails in your WordPress database, store email attachments in your site’s Uploads folder, and track user engagement such as opens and clicks.
When these options are enabled, you can also export or print your logs. If an email fails to deliver after configuring SMTP settings, you can easily resend it from the email log page.
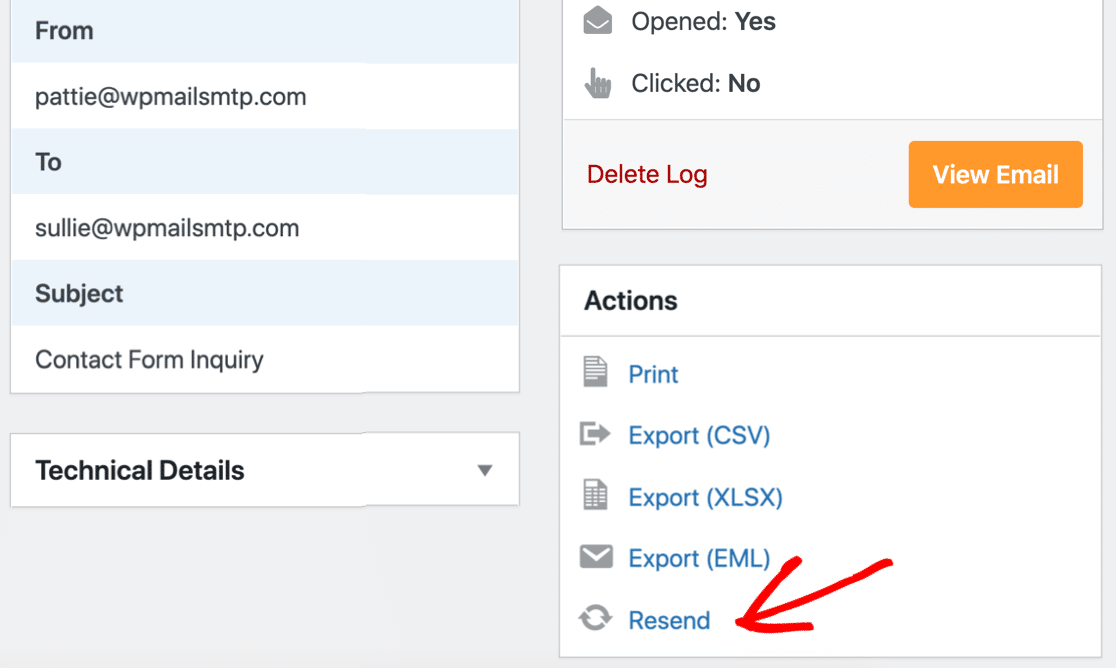
Check out our guide to logging WordPress emails to see the different ways you can track and log emails with WP Mail SMTP. Don’t forget to paste in your license key at the end of the wizard to activate all of the features and updates.

In the final step, I’ll show you how to set the sender address on all of your notifications.
Step 4: Set the Default Sender Address in WordPress
If you have lots of different forms or plugins sending email, it can be a hassle to go through and manually change the sender email in each one.
The Force From Email setting is a powerful feature that forces every plugin or form to use the same sender. If you check these boxes, all of the plugins on your website will use the same From name and email.
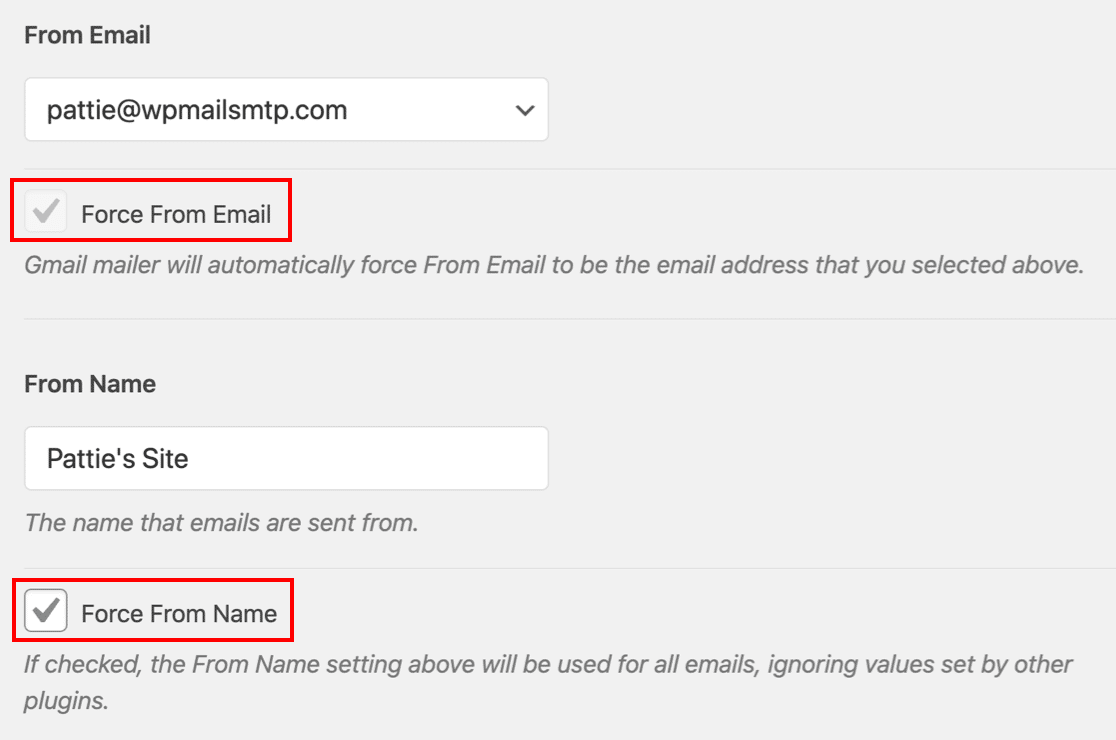
This overrides the ‘From’ details in the settings for each plugin or form. Some mailers need you to use this setting all the time.
So if you’ve chosen a mailer that only allows you to use 1 From email address, the plugin will automatically turn this setting on and gray out the checkbox.
Step 5: Track and Monitor Your Forminator Emails
Now you have WP Mail SMTP Pro, you’ve unlocked full email reporting and tracking for Fominator. To see statistics about email deliverability and open rates, check out your Email Reports.
You’ll find these under the WP Mail SMTP » Email Reports menu. The email report can be filtered to show statistics for any dates or subject lines.
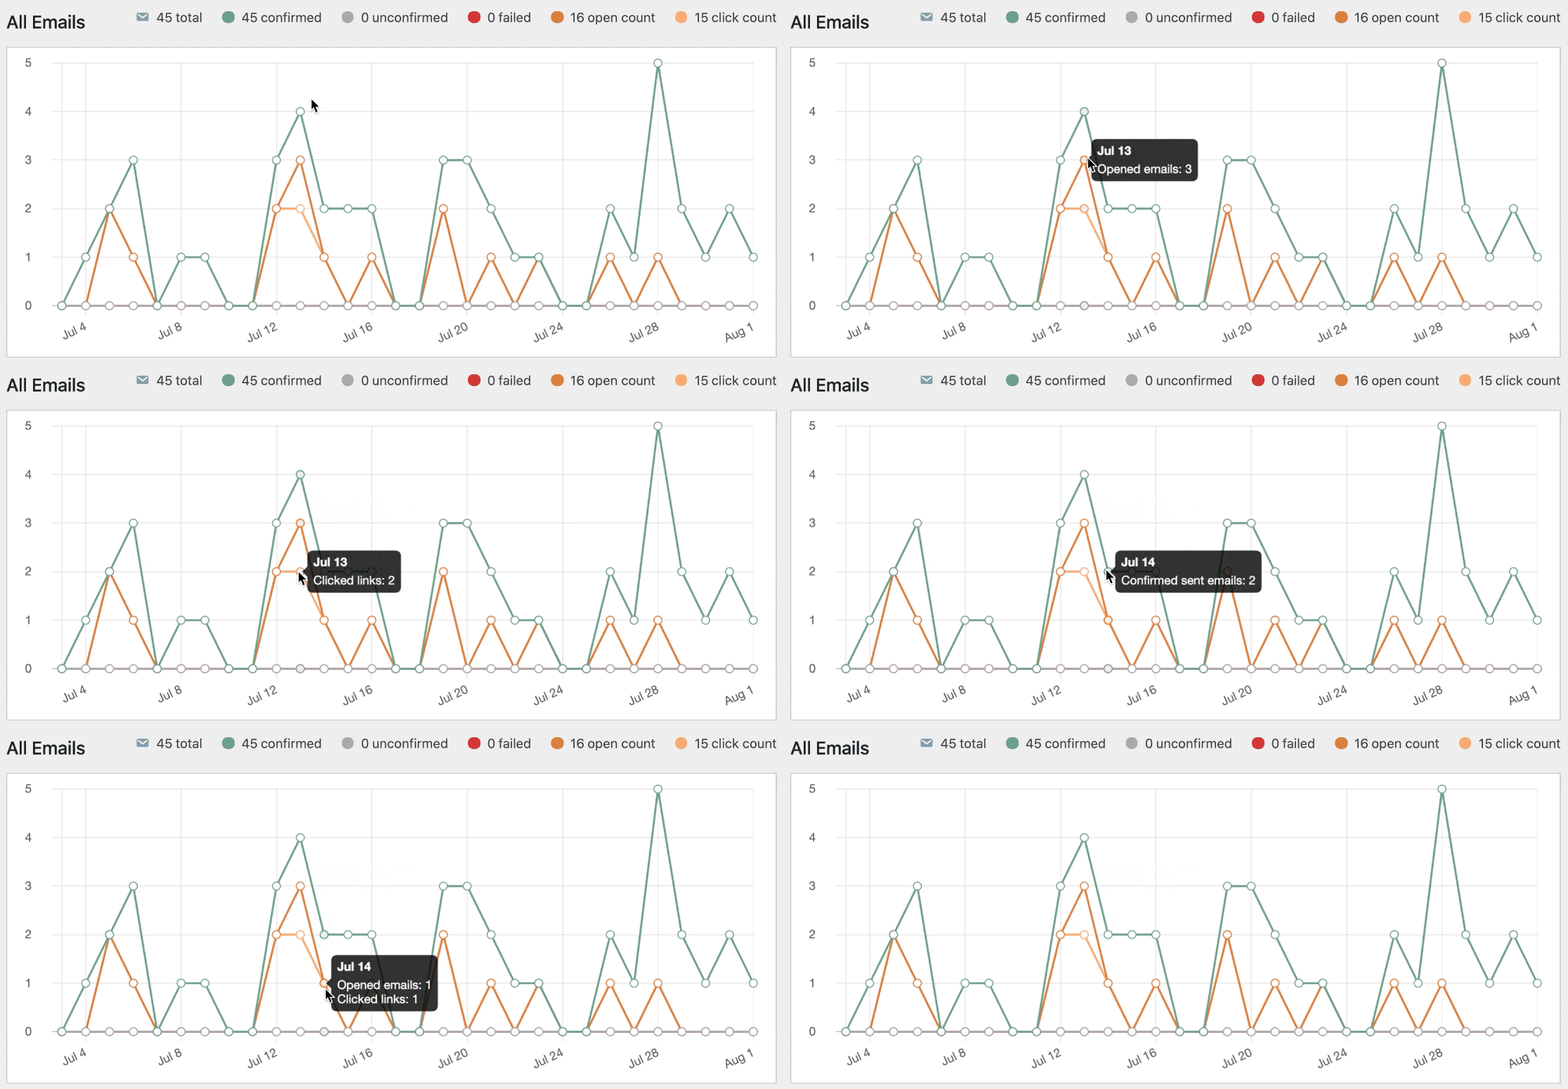
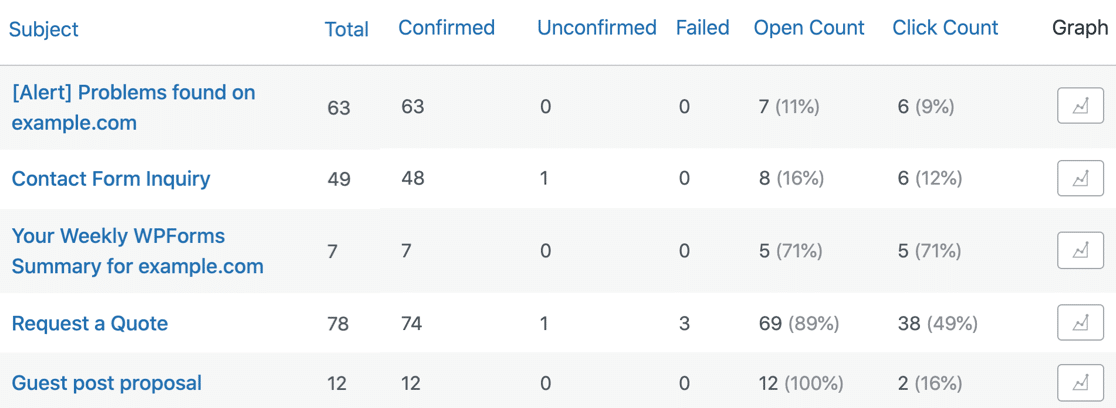
Underneath the email report, you’ll also see open rates and click-through rates for your Forminator emails.
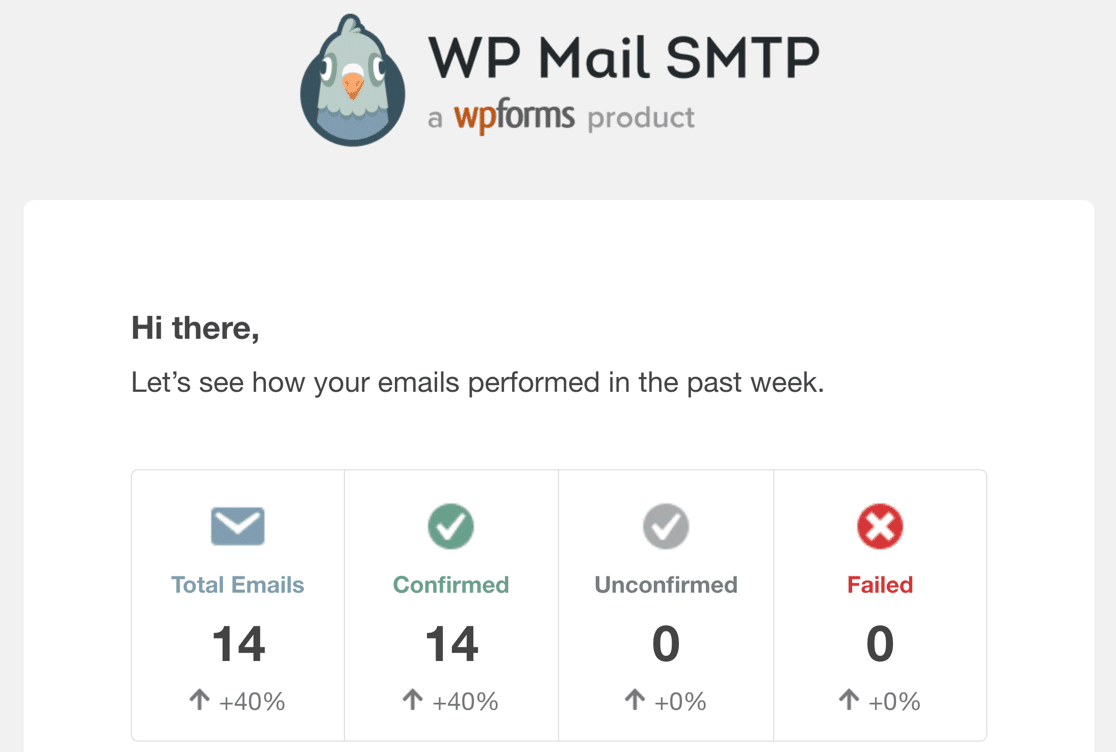
Every Monday, WP Mail SMTP will send you a Weekly Email Summary. This lets you keep an eye on Forminator emails without logging into WordPress.
And that’s it! Now you know how to fix Forminator email problems and monitor your email statistics. If you’re facing other issues, check out the table below.
Common Forminator Errors and Fixes
| Problem | What It Means | Quick Fix |
| Emails not sent | Server blocked PHP mail | Use WP Mail SMTP |
| “Error occurred” message | Misconfigured notifications | Recheck notification settings |
| Emails sent but not received | Likely going to spam | Authenticate domain with SPF/DKIM |
| Works only sometimes | Hosting limits on PHP mail | Use SMTP instead |
Fix Your Forminator Emails Now! 🙂
FAQs on How to Fix Forminator Not Sending Emails
Forminator not sending emails is a popular topic of interest among our readers. Here are answers to some common queries about it:
How do I fix Forminator email notifications?
First, double-check the notification settings inside the form. Make sure the email address is entered correctly and that notifications are enabled. I also suggest testing with a basic Gmail address to rule out problems with the recipient.
Why are my Forminator email notifications not working?
It usually happens because your website isn’t allowed to send emails directly. Some hosting companies block WordPress emails, or the From address isn’t trusted by the server. I’ve seen this a lot, and it’s why using SMTP works better.
How do I set up SMTP with Forminator?
Install the WP Mail SMTP plugin, choose your email provider (like Gmail or Outlook), and follow the setup steps inside the plugin. Once it’s ready, Forminator will use SMTP for sending emails, which is much more reliable.
How can I fix Forminator email delivery issues?
Start by checking the spam folder and making sure your notification settings are correct. If nothing is wrong there, switch to SMTP using a plugin like WP Mail SMTP. That’s what I do on every site I manage.
How do I stop Forminator from showing ‘An error occurred while processing the form’ error?
That error often shows up when there’s a mail issue or a server block. Try turning off email notifications and testing the form. If the error disappears, set up SMTP to fix the mail problem and get rid of the error.
Next, Check Out This Forminator Alternative
Forminator lets you publish forms using shortcodes. That doesn’t give you too many options. For example, it doesn’t show a live preview of your form on the page.
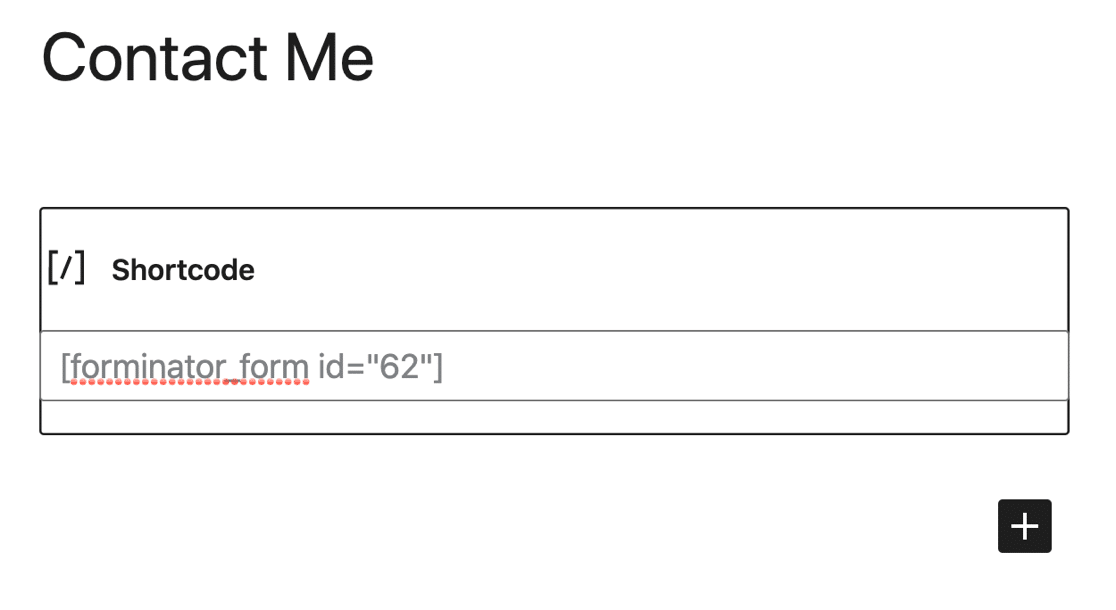
If you want an easier way to publish your WordPress forms, we highly recommend switching to the WPForms plugin, which lets you easily publish posts in different ways, including:
- Embed wizard for posts or pages
- Shortcodes and block editor support
- A module that lets you easily make an Elementor contact form
- Support for easy embedding in Divi and SeedProd
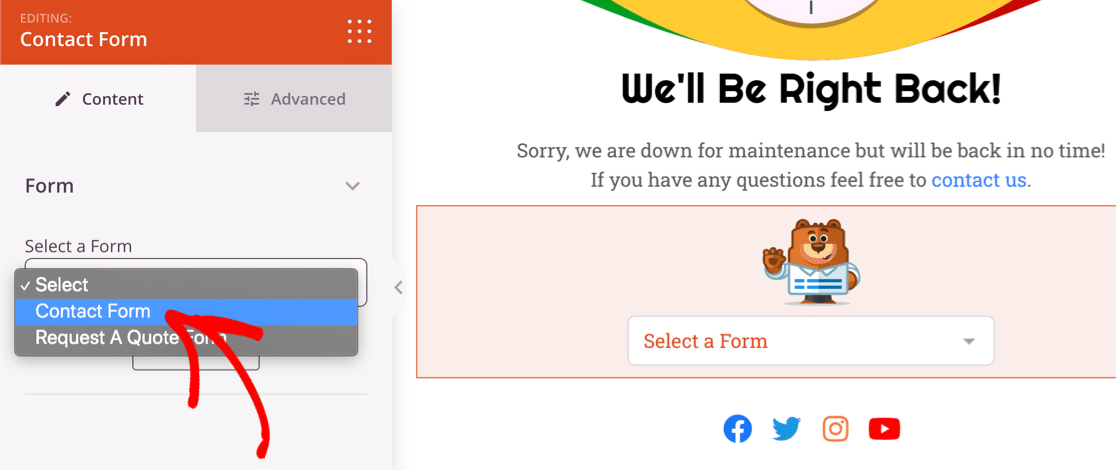
WPForms also has tons of ways to stop contact form spam, including reCAPTCHA and hCaptcha support. You can easily see which version of WPForms would work best for your site by reading this article on WPForms Lite vs Pro!
Fix Your Forminator Emails Now! 🙂
Ready to fix your emails? Get started today with the best WordPress SMTP plugin. If you don’t have the time to fix your emails, you can get full White Glove Setup assistance as an extra purchase, and there’s a 14-day money-back guarantee for all paid plans.
If this article helped you out, please follow us on Facebook and Twitter for more WordPress tips and tutorials.

