AI Summary
Do you want to configure WordPress email on Amazon Lightsail? Lightsail is easy to use, but getting your email working can still be a tricky extra step.
That’s because Lightsail doesn’t support email sending. You need to connect your WordPress site to a proper mailer to get things working the right way.
In this article, I’ll show you the easiest way to get emails working on your Lightsail WordPress site using the WP Mail SMTP plugin!
Fix Your Lightsail Emails Now! 🙂
Does AWS Lightsail Have Email?
No, Lightsail doesn’t have a way to send emails by default. It’s similar to a basic VPS, so email service isn’t included unless you set up Amazon SES as well.
The good news is that it’s easy to use WP Mail SMTP to send WordPress mail with a plugin. Using WP Mail SMTP means you can use a ton of different email providers, and you don’t need to set up Amazon SES if you don’t want to.
How To Set Up WordPress Emails on Amazon Lightsail
I’ll walk you through the process of setting up Lightsail email in WordPress using a mail server of your choice. If you’re having trouble with an EC2 instance, please see our guide on AWS not sending email on EC2 instead.
1. Create Your Amazon Lightsail WordPress Site
First, we’re going to create your Lightsail instance and install WordPress. Log in to Amazon AWS as a Root User.
Once you’re logged in, search for Lightsail in the search bar at the top. In the search results dropdown, click the Lightsail icon here to open up the dashboard.

If you’re new to Lightsail, click Let’s Get Started. If you already have Lightsail instances, you’ll see a Create Instance button here instead.
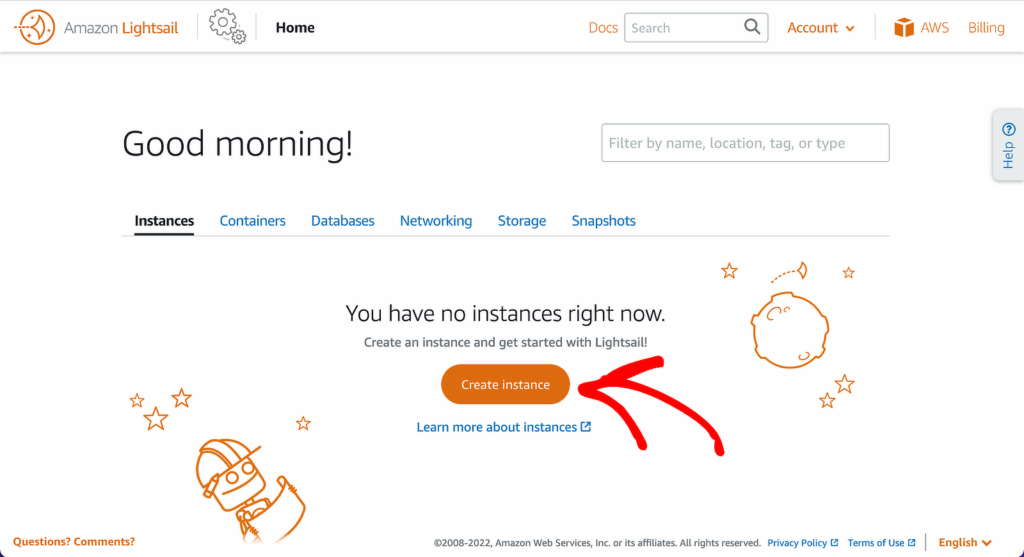
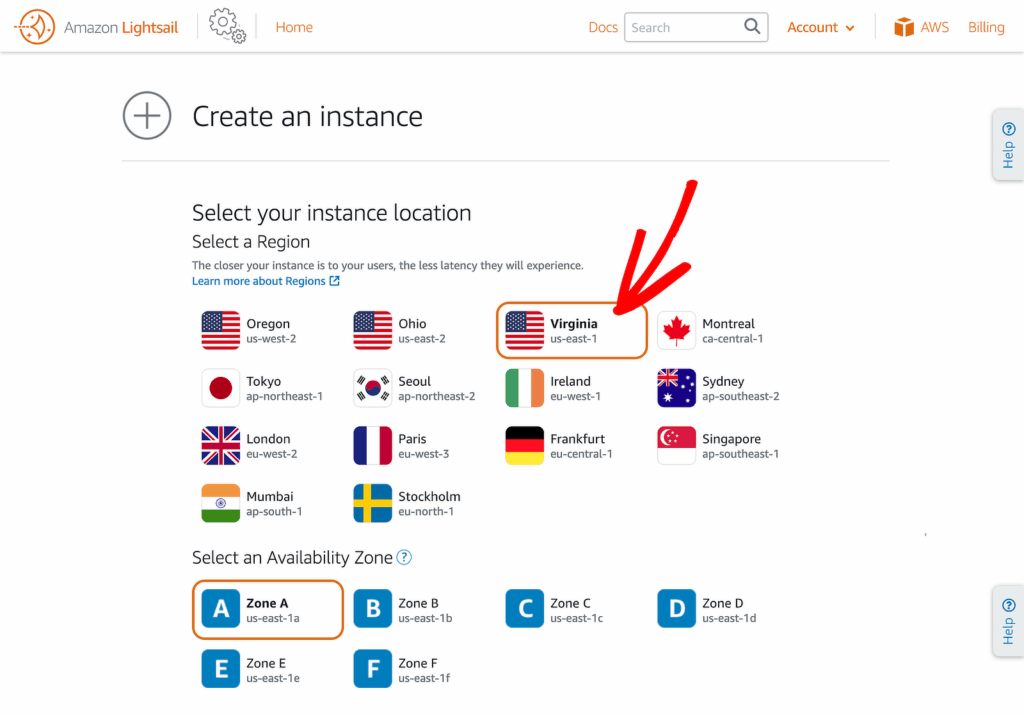
First, you’ll want to select the Instance Location. Your closest region may already be selected for you, along with the Availability Zone, but feel free to explore different options.
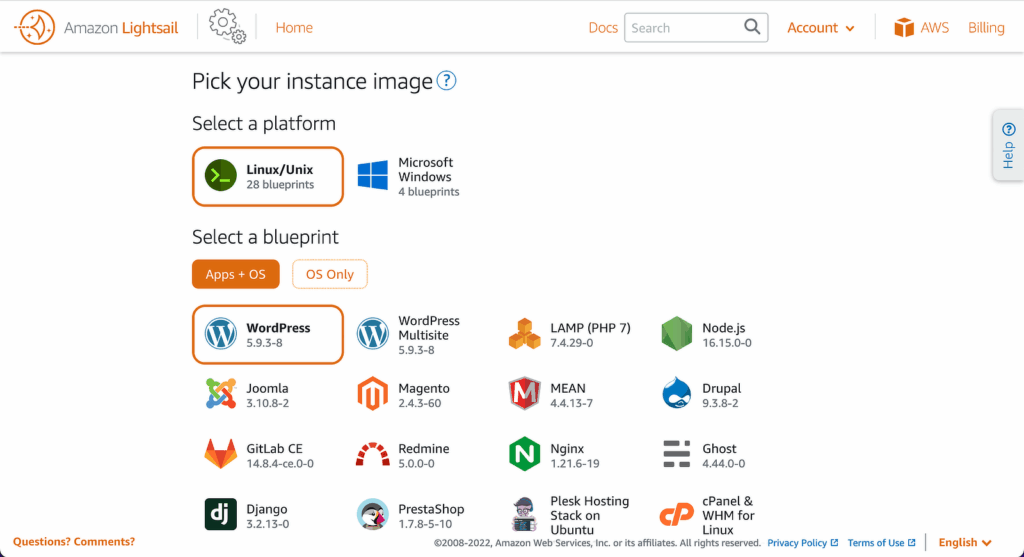
Next, you’ll want to pick an instance image. For WordPress, select Linux/ Unix. Scrolling down, you can also select the blueprint for your site.
This means you’ll choose the application that you want to run on your Lightsail instance. You can select WordPress or WordPress Multisite here, depending on the type of site you want to create.
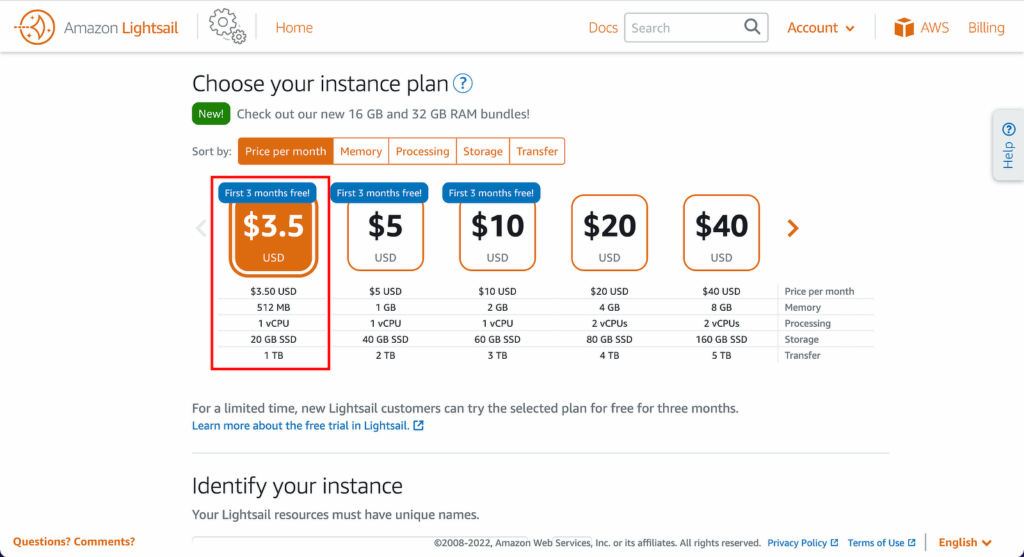
If you want, you can enable snapshot backups in the next section. Next, Lightsail will ask you to choose a plan. Choose a configuration that best suits your requirements.
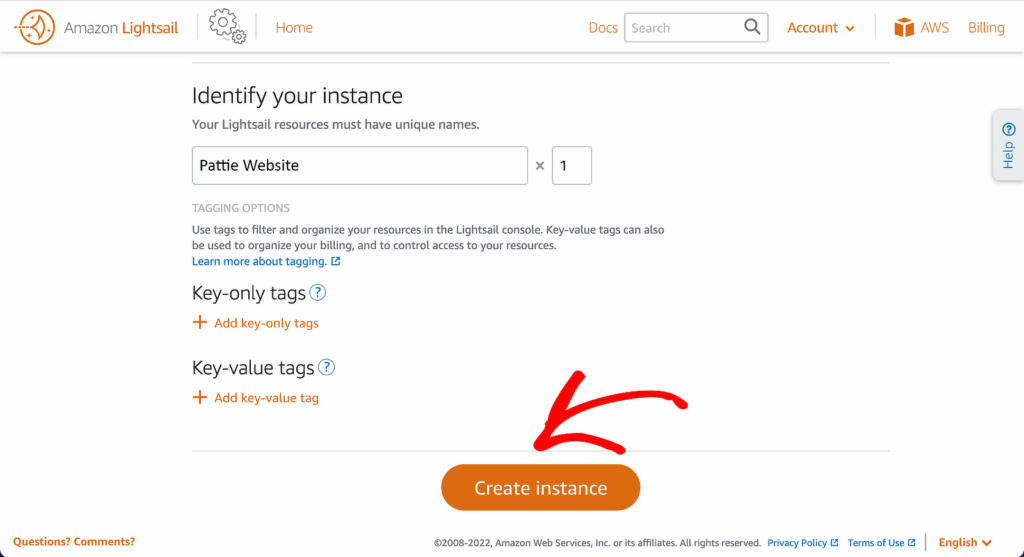
And once you’ve done that, you can type in a name for your new instance. Then, click Create Instance to complete the setup.
2. Get Your WordPress Password in Lightsail
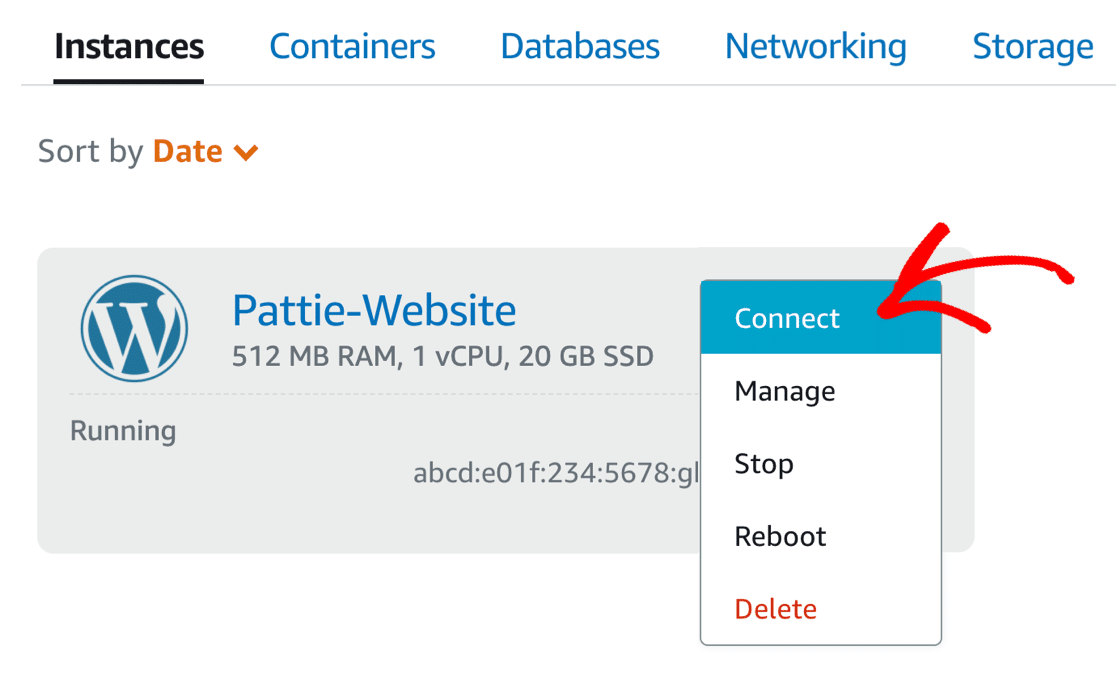
Now we need to do 1 extra step to grab your WordPress admin password in Lightsail. When your instance shows the word Running underneath the WordPress icon, click the 3-dot menu and click Connect.
It takes a little time for Lightstail to complete the instance setup. If you get an error message at this point, try again in a few minutes.
At the terminal prompt, type in cat bitnami_application_password and press enter. Your WordPress site admin password will appear in the line underneath. We marked it here with a red square:

Make a note of your password now. You’ll need it to log in to WordPress in Step 4. Once you’ve done that, close the popup window.
Next, we’re going to assign a static IP and set up your DNS Zone. This will allow you to associate a domain name with your WordPress site, and it’ll also let us set up the DMARC, SPF, and DKIM records when we install WP Mail SMTP.
3. Set Up Static IP and DNS Zone
Before we log in to WordPress, we need to set up the static IP and DNS zone for your website. This will allow you to create the DNS records you need to stop WordPress emails from going to spam.
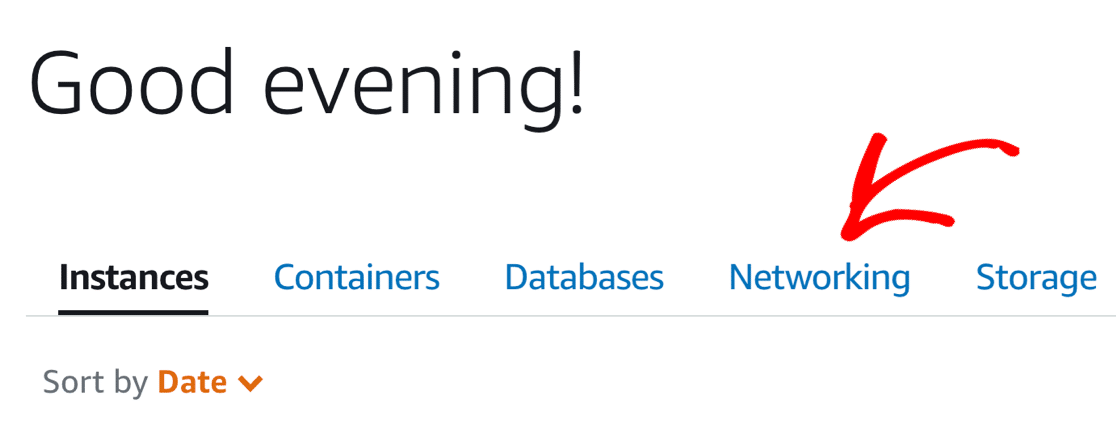
To start, click the Networking tab right above your instance. And then click on Create Static IP button that you can attach to your instance.
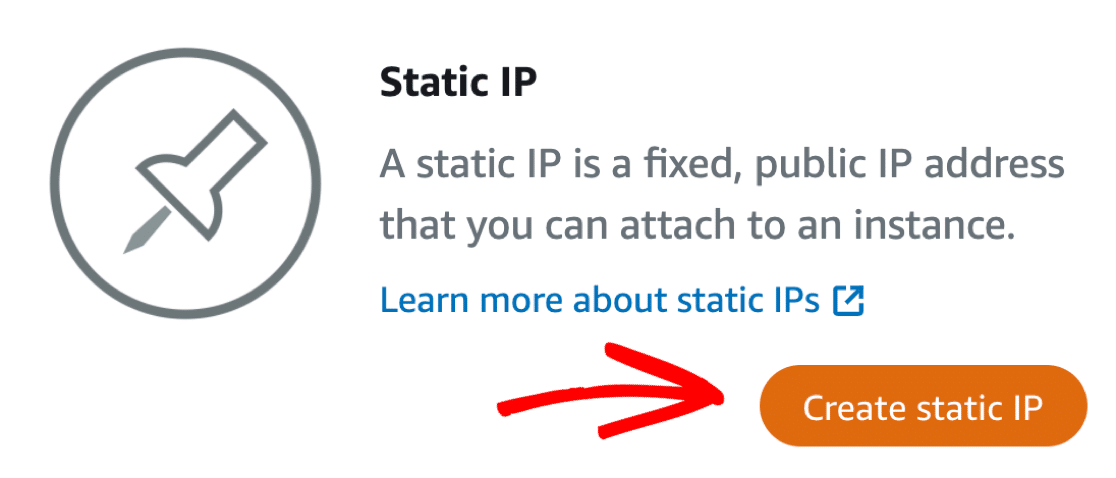
In the dropdown, select the site (instance) you just created. Finally, give your static IP a unique name and hit Create.

When you head back to the Lightsail homepage, you’ll see a pin to show that your static IP is working. Make a note of the static IP so you can refer back to it in a moment.
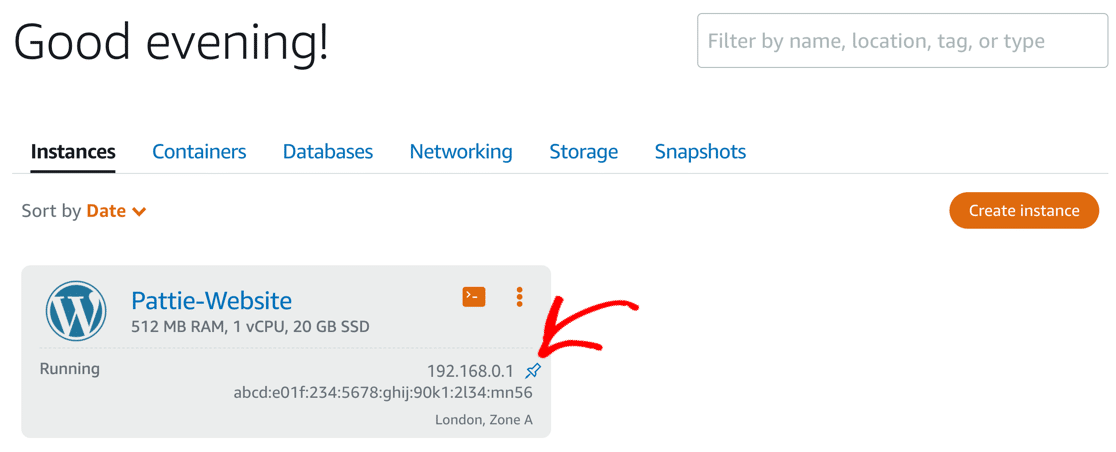
Now we can create your DNS zone. This is an important step because you’ll add new DNS records for your WordPress email provider here.
Go back to the Networking tab and click Create DNS zone. On the next screen, type in your domain name.

Now, scroll all the way down and click Create DNS Zone again. You’ll see a list of name servers on the next screen.
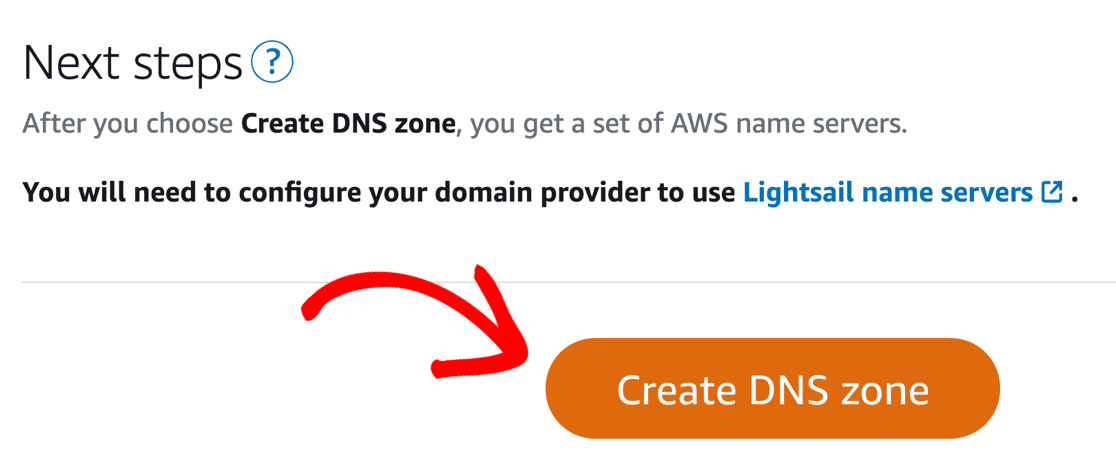
To use your domain with your new Lightsail instance, head to your domain registrar and enter these name servers into the settings.
This change will likely take at least an hour to propagate. In some cases, it can take up to 48 hours.
In the meantime, we can access your site using the static IP to continue setting up your WordPress mail on Amazon Lightsail.
4. Log In to Your WordPress Site on Lightsail
To log in without your domain name, refer back to the IP address that was assigned to your site when you created the static IP.
Browse to the IP you were given with /wp-admin at the end, for example:
You’ll see the regular WordPress login screen. To log in to the WordPress admin area, enter the following details:
- Username: user
- Password: the password we copied from the terminal window in Step 2.
You won’t be able to update your WordPress site admin email yet because you won’t receive the site admin verification email. So let’s fix your emails on Lightsail first.
5. Install or Update WP Mail SMTP
WP Mail SMTP is the best SMTP plugin for WordPress. And the Lite version will be installed on the Bitnami instance that you’ve set up, so it’s super easy to get started.
But before we start, you’ll want to make sure you’re running the latest version of WP Mail SMTP. To check the WordPress plugins that need to be updated, go to Plugins » Installed Plugins.

Scroll down and click update now to get the latest version of WP Mail SMTP. Allow a few seconds for the update to complete.

You might want to review the other plugins that are installed here. You can remove anything that you don’t need.
Next, if you have a Pro license for WP Mail SMTP, you can activate your Pro features in a few clicks. Head to WP Mail SMTP » Settings and paste in your license key.
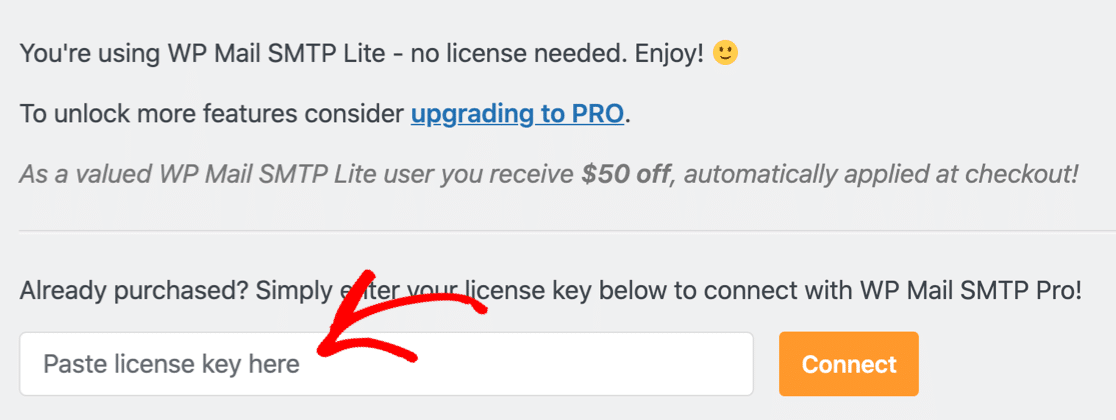
Now WP Mail SMTP is updated, and you’ve upgraded to Pro, it’s time to set up your WordPress email on Lightsail.
6. Connect to Your Email Service Provider
WP Mail SMTP makes it easy to connect with any supported email provider. If you don’t already see the Setup Wizard, you can click the Launch Setup Wizard button on the plugin settings page now.

When the Setup Wizard opens, click Let’s Get Started to choose a mailer. Now you’ll need to decide which mailer to use with your Lightsail WordPress site.

For a small site or a test server, any mailer option will likely work fine. But if you expect your site to send a large number of emails, we highly recommend that you choose a transactional email provider.
SendLayer, Brevo (formerly Sendinblue), or SMTP.com are all great options. You can also use Amazon SES if you’re using WP Mail SMTP Pro. Go ahead and select the mailer you want to use from the list.
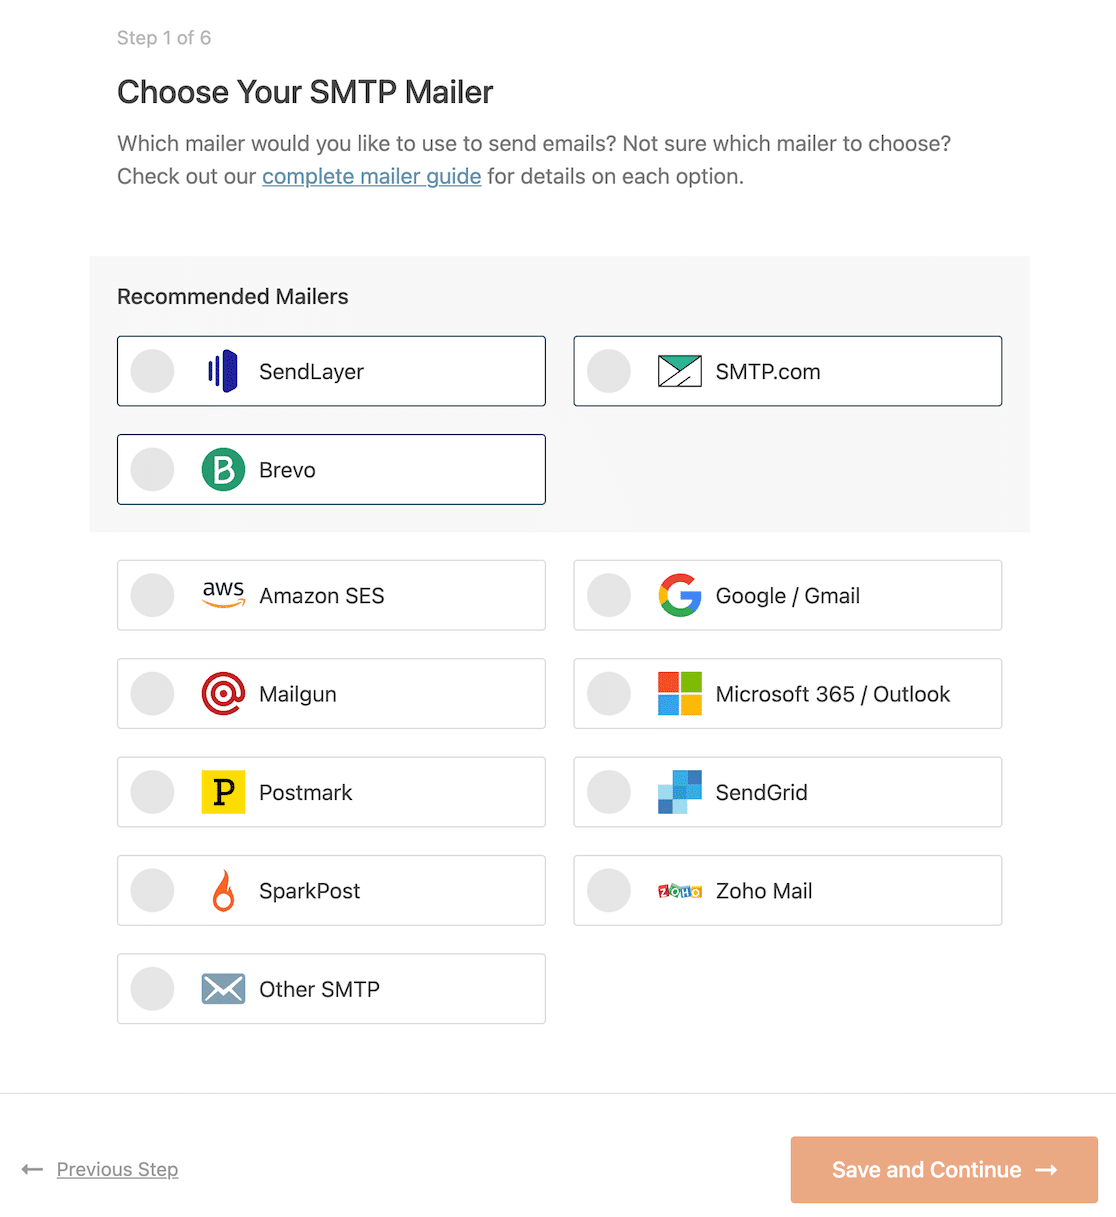
When you’ve chosen your mailer, click the link below to jump to our documentation.
Our docs will walk you through the process of setting up your account and connecting your email provider to your Lightsail WordPress site.
Need a hand?
Our Elite license includes a full White Glove Setup service for SendLayer, SMTP.com, or Brevo.
| Mailers available in all versions | Mailers in WP Mail SMTP Pro |
|---|---|
| SendLayer | Amazon SES |
| SMTP.com | Microsoft 365 / Outlook.com |
| Brevo | Zoho Mail |
| Google Workspace / Gmail | |
| Mailgun | |
| Postmark | |
| SendGrid | |
| SparkPost | |
| Other SMTP |
Some email providers will ask you to set up DNS records so that your emails from WordPress are authenticated.
It’s important to add the new records to the DNS Zone we created in Lightsail. This will stop your WordPress emails from going to spam.
7. Enable WordPress Email Logging (Optional)
At the end of the Setup Wizard, you’ll have the option of enabling extra features that’ll help you to track email deliverability. First, we recommend that you enable Detailed Email Logs.
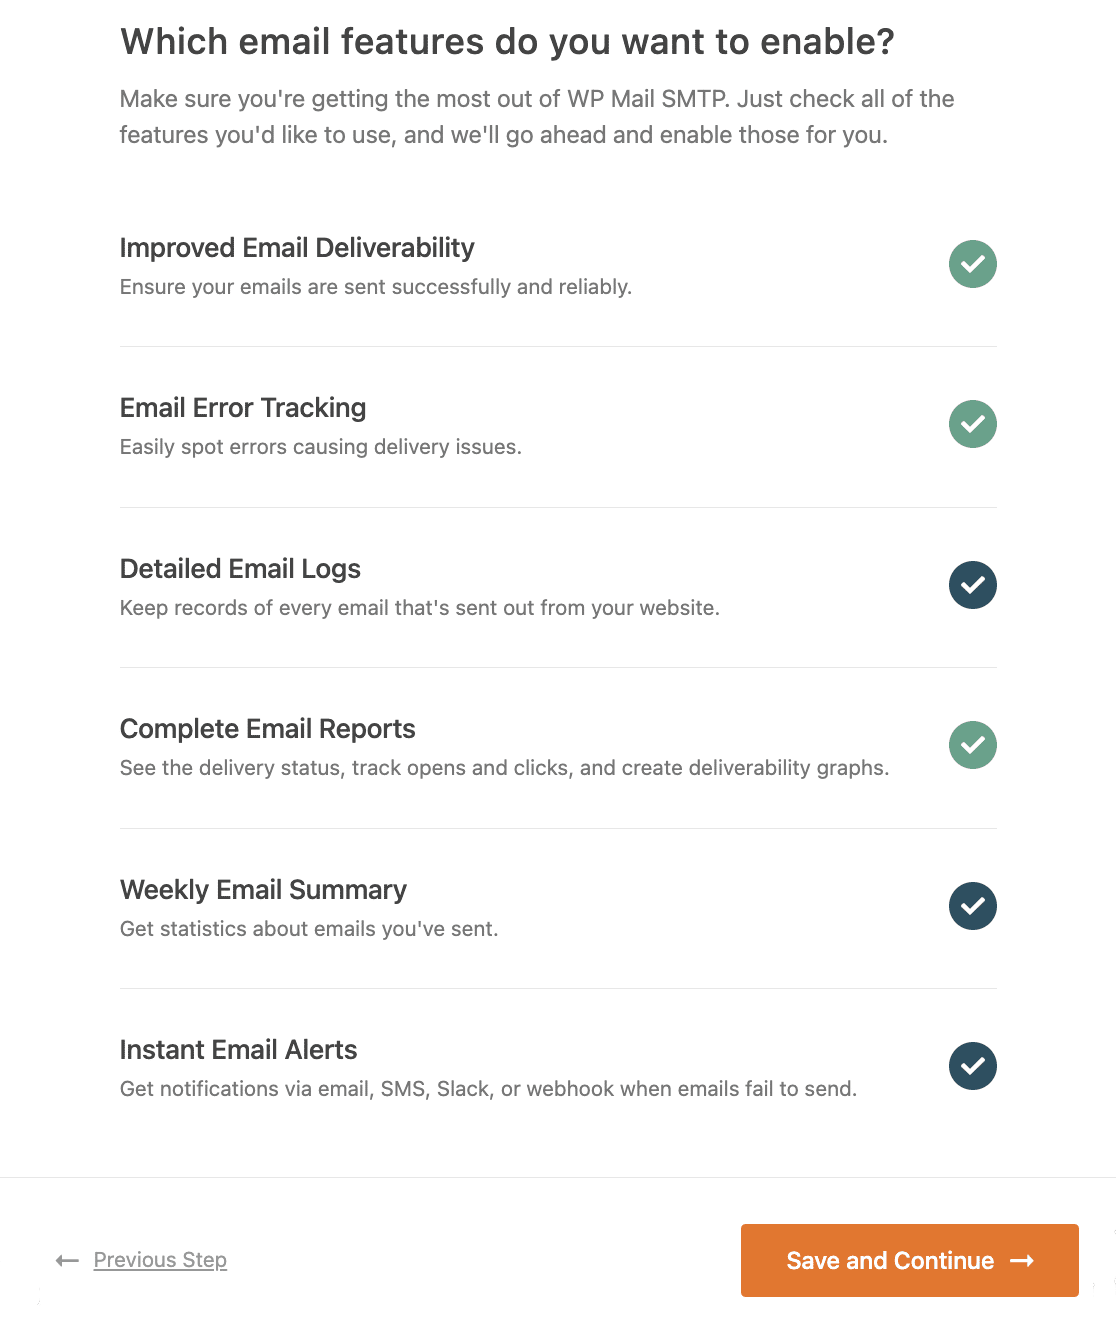
Detailed Email Logs will track your emails and show you if they were Failed or Sent. If your email provider supports it, it’ll also tell you if the emails were Delivered.
When this option is turned on, Complete Email Report will also be enabled. You’ll have the choice of whether you want to receive a Weekly Email Summary with an overview of your recent logs.
The last option here is to enable Instant Email Alerts. This feature notifies you when an emails fails to send so you can fix the problem. On the next screen, you can configure some additional email log settings:
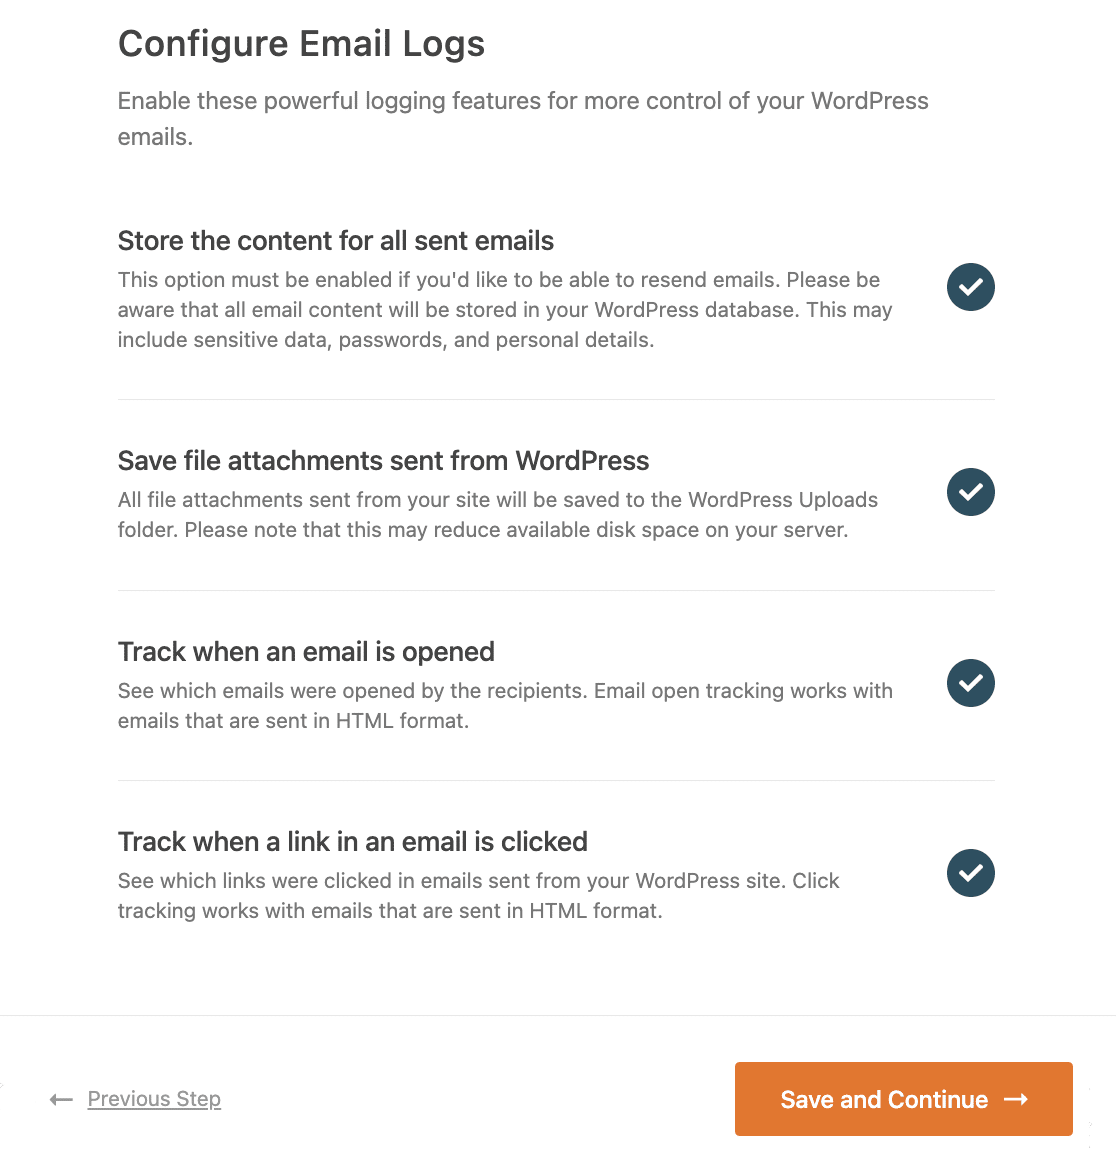
These features will let you resend emails, save WordPress email attachments, and track opens and clicks on your WordPress emails.
You can also find these additional email logging features on the plugin’s Settings » Email Log page. Check out how email logging works in our article on how to log your WordPress emails.
When you finish up the wizard, WP Mail SMTP will send you an automatic test email to confirm everything’s working.
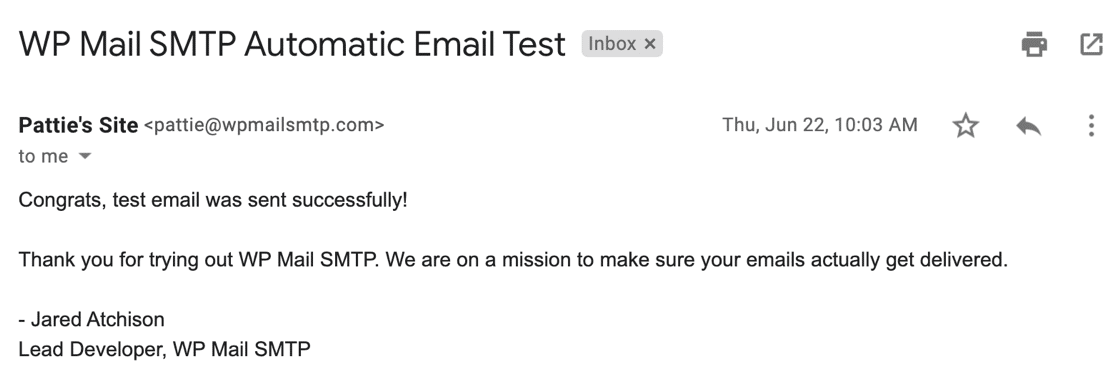
And that’s it! You’ve set up WordPress email on Lightsail! Now you can reset the site admin email address for your Lightsail instance.
FAQs on How To Set Up WordPress Emails on Amazon Lightsail
Configuring WordPress emails on Amazon Lightsail is a popular topic of interest among our readers. Here are answers to some common queries about it:
Why is WordPress not sending emails on Lightsail?
Amazon Lightsail blocks email ports by default to prevent spam. That means WordPress can’t send messages unless you connect it to an external email service or SMTP provider.
Can I use SMTP with AWS Lightsail?
Yes, you can. I’ve set up SMTP on Lightsail many times using a plugin like WP Mail SMTP. It lets you send emails through a trusted provider instead of relying on Lightsail’s blocked mail ports.
What is the best email service for Lightsail WordPress?
I usually go with SendLayer, Gmail, or SMTP.com. They’re easy to connect using WP Mail SMTP and work well with Lightsail.
Does Amazon allow sending email from Lightsail?
Amazon doesn’t stop you from sending email completely, but it blocks the standard mail ports. You’ll need to either request a port unblock or use an outside SMTP service.
Can I use Lightsail as an email server for WordPress?
Not really. Lightsail isn’t meant to be a full email server. I’ve found it much easier to connect WordPress to a proper SMTP mailer instead of trying to make Lightsail handle emails itself.
How do I set up SMTP on Lightsail for WordPress?
Start by installing WP Mail SMTP. Then, pick your mail provider and follow the setup steps inside the plugin. I usually test the connection right away to make sure everything’s working.
Next, Set Up Your DNS Zone on Lightsail
Have you added all of your email provider’s DNS records to your new Lightsail DNS zone? This is a super important step. Check out our guide on how to create a DMARC record to get started.
Ready to fix your emails? Get started today with the best WordPress SMTP plugin. If you don’t have the time to fix your emails, you can get full White Glove Setup assistance as an extra purchase, and there’s a 14-day money-back guarantee for all paid plans.
If this article helped you out, please follow us on Facebook and Twitter for more WordPress tips and tutorials.

