AI Summary
Do you want to send WordPress emails with Postmark?
Postmark is a transactional email provider that offers speedy delivery. So if you need emails to arrive fast, it could be a great match for your website.
In this article, we’ll walk you through the process of setting up Postmark using WP Mail SMTP.
What Is the Postmark API?
The Postmark API delivers and sends emails from your website. It’s more secure than regular SMTP and unlocks some useful additional features. For example, the API lets you track whether an email was delivered and opened.
WP Mail SMTP supports the Postmark API, which means that you don’t need to enter your Postmark username and password in WordPress. You’ll simply copy an API key into the plugin’s settings page to make the connection instead.
And if your host blocks external SMTP connections, you can use this tutorial to get around that restriction.
How To Send WordPress Emails With Postmark
Let’s get your Postmark WordPress connection set up quickly and easily.
Here’s a quick overview of the steps we’re going to work through:
- Install the WP Mail SMTP Plugin
- Create Your Postmark Account
- Validate Your From Address
- Enter Your Postmark WordPress Settings
- Select a Message Stream
- Enable Email Logging and Tracking in WordPress
Let’s get started by installing WP Mail SMTP on your site.
1. Install the WP Mail SMTP Plugin
If you want to use Postmark in WordPress, you need WP Mail SMTP. It’s the best SMTP plugin for WordPress and makes the whole process super easy. WP Mail SMTP makes it super easy to fix your email issues such as with wp_mail not working.
The Postmark mailer is available in the Lite and Pro version of WP Mail SMTP. We recommend that you use the Pro version so that you can use all of the email logging and tracking tools we’re going to cover later.
To download the Pro version, head to your WP Mail SMTP account. Click on the Downloads tab and download the latest version to your desktop.
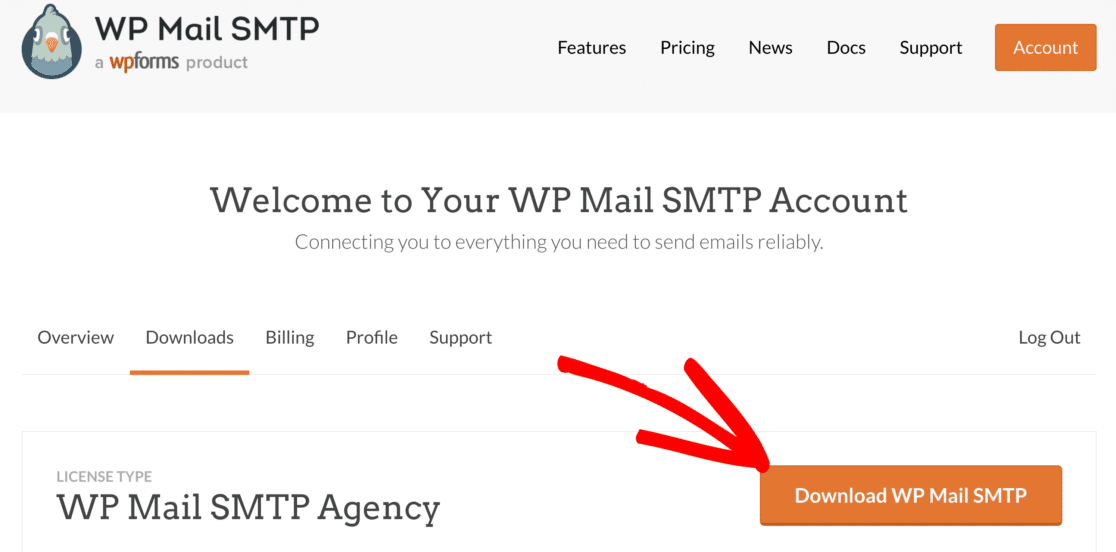
Next, open up your WordPress dashboard and upload the zip file to install the plugin.
If you need help with this part, jump over to this guide to installing a WordPress plugin.

Once the plugin has been uploaded, hit Activate. This will start the WP Mail SMTP Setup Wizard in your browser.

Using an API sounds complicated, but our Setup Wizard makes it easy. In fact, there’s only one connection key to paste in.
Before we hit Let’s Get Started, let’s open up a new tab and create the API key you’ll need to copy.
2. Create Your Postmark Account
In this step, we’ll switch over to the Postmark website to create your new account. We recommend opening up a separate tab for this step.
If you’re testing out Postmark in WordPress, you can start with the free trial that allows you to send up to 100 emails every month. This could be a great option if you want to use WordPress SMTP on localhost while you build your site.
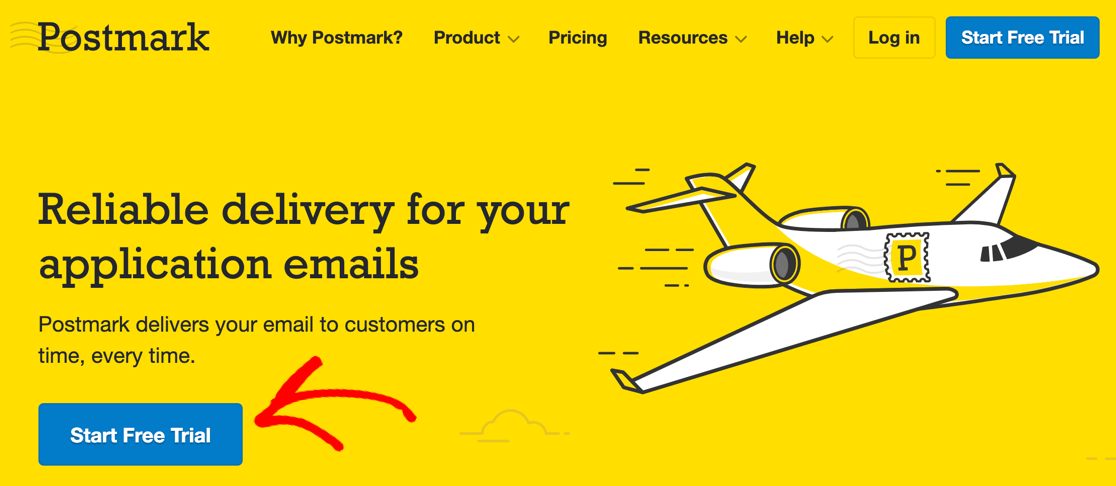
If that sounds right for you, click on the Start Free Trial button on the Postmark homepage.
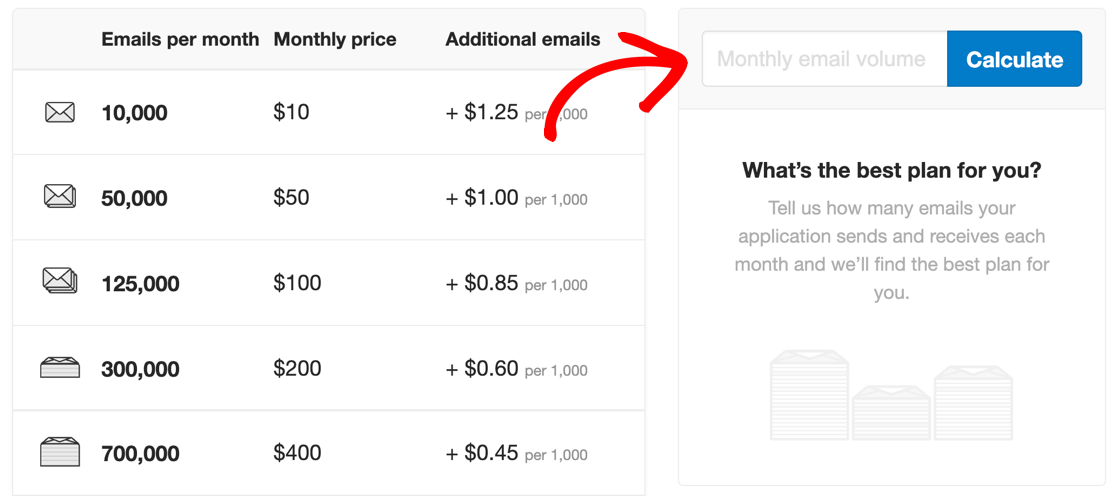
If you need a higher sending limit, you can use the calculator on the Postmark pricing page to find the ideal price plan.
Type in your monthly email volume and hit Calculate to get a recommendation.
Once you’ve selected your plan, Postmark will prompt you to sign up for an account. Once you’ve done that, it’ll send you 2 confirmation emails.
Open up the email with the subject Confirm Sender Signature and click the blue button.
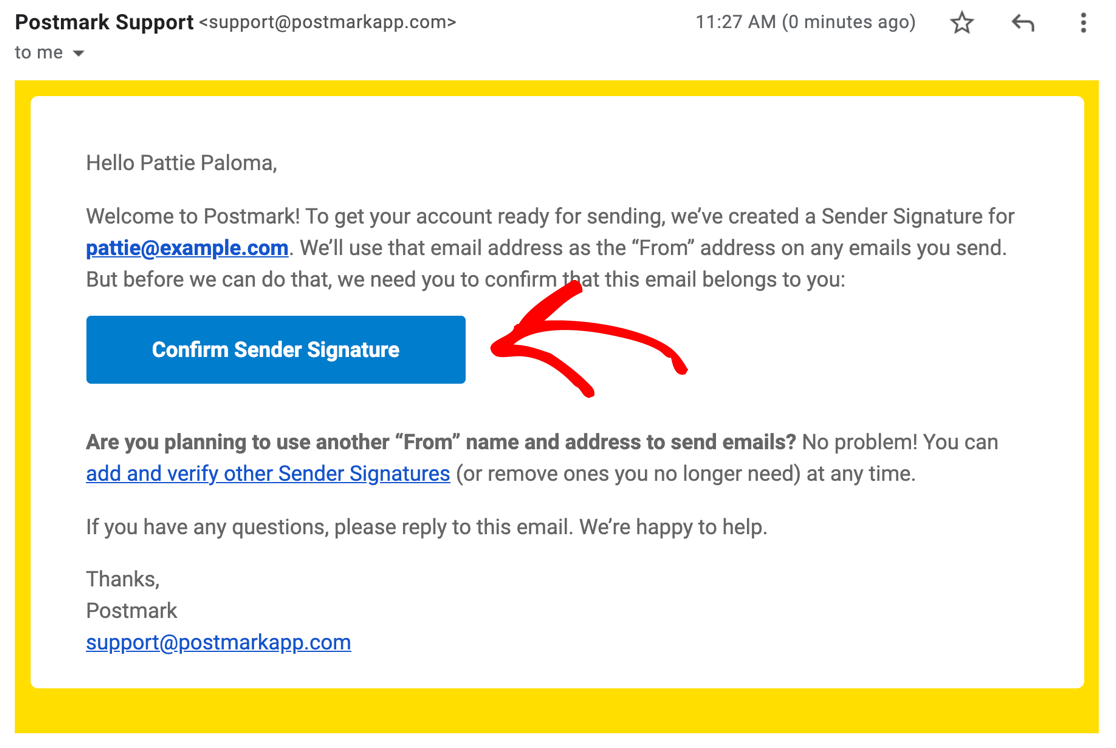
Clicking on this button does 2 things:
- It activates your account with Postmark
- It also verifies your account email as a ‘From’ address, which Postmark calls a Sender Signature.
Don’t worry: you don’t have to send emails from the address you signed up with. You can add more Sender Signatures later.
Before you can use all the features in Postmark, you’ll need to fill in a little more information. To do that, click on the blue Request Approval button.

To complete the form, you’ll need to tell Postmark:
- How many emails you plan to send each month
- Why you chose to sign up with Postmark
- What kinds of emails you intend to send
- How you’re obtaining email addresses
Approvals are processed manually, so it may take a little time for your account to be fully set up. It took around 24 hours for us to receive the confirmation email.

While you’re waiting, let’s go ahead and set up more sender addresses in Postmark.
3. Validate Your From Address
The From address you set up in Postmark is super important. This will be the email address you use as the sender in WordPress as well.
On the Sender Signatures page, you can validate individual email addresses or entire domains.

If you’re not sure what to do, we recommend that you validate your entire domain. That means you can use multiple ‘From’ addresses in different plugins or contact form notifications without creating each one individually.
Go ahead and click Add Domain to start.
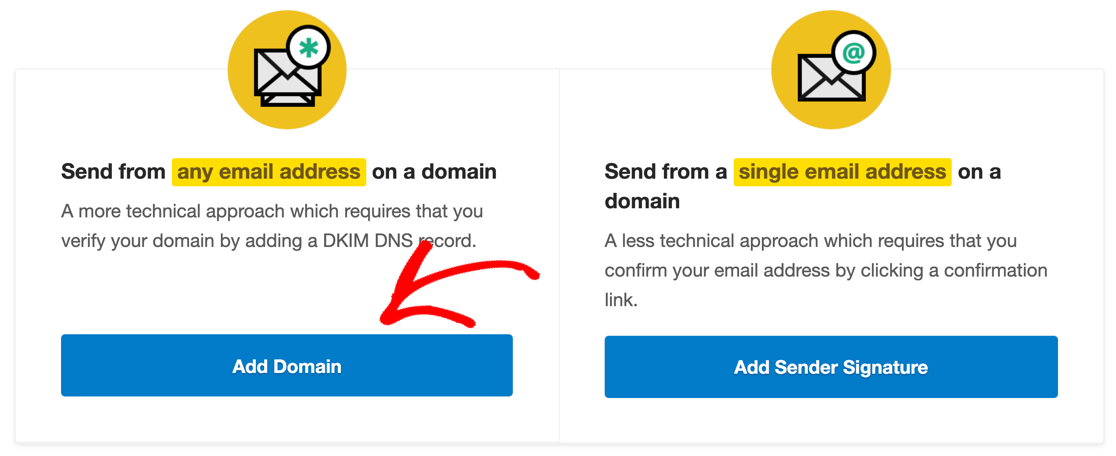
Once you’ve added your domain, you’ll need to open a 3rd browser tab and navigate to your domain provider so you can edit your DNS. Your DNS records likely exist in one of the following places:
- Your web hosting control panel: If you bought your domain and hosting together, or your host gave you a free domain, your DNS settings are likely controlled in your hosting account.
- Your domain registrar’s control panel: If you purchased your hosting and domain separately, log in to the provider you bought the domain from.
- Your CDN if you’re using a service like Cloudflare.
You’ll need to edit your DNS zone, then copy and paste the DKIM record and Return-Path that Postmark provides. If you’re not sure what this means, check out our article on What Are DMARC, SPF, and DKIM?
Once you’ve added those records to your DNS, hit Verify to confirm.
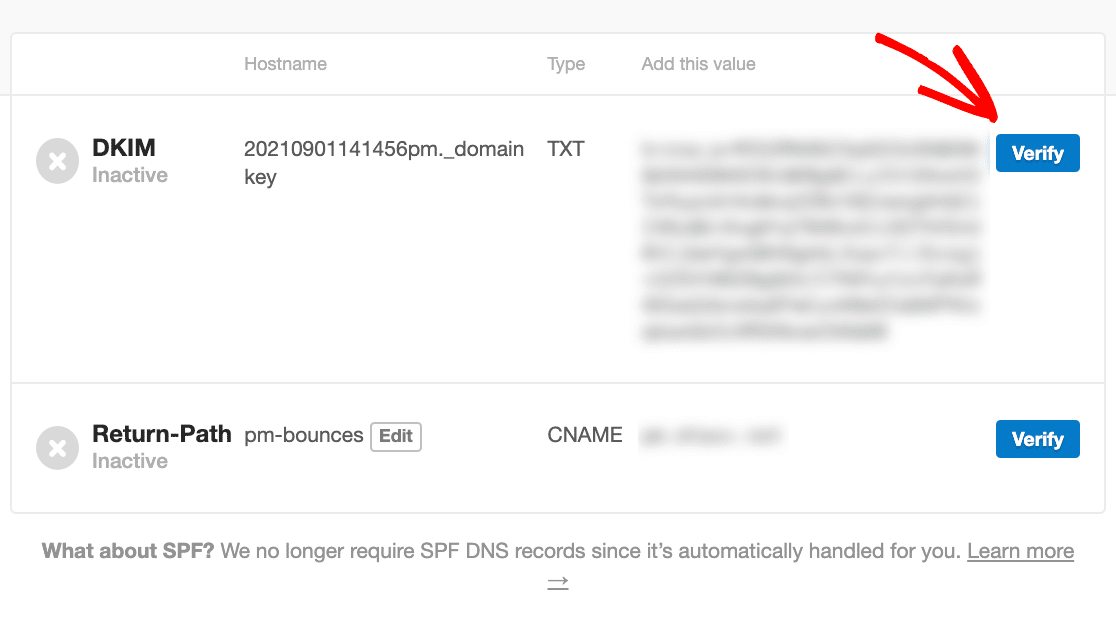
Now you’ve validated your domain, we can complete your Postmark WordPress connection.
Keep the Postmark website open because we’ll need to copy your API key in a second.
4. Enter Your Postmark WordPress Settings
WP Mail SMTP makes it easy to set up the Postmark API in WordPress.
To pick up where we left off, let’s switch back to the tab where we installed the plugin in Step 1.
We’re ready to click Let’s Get Started to begin the Setup Wizard.

In the next step, select the Postmark mailer from the grid.
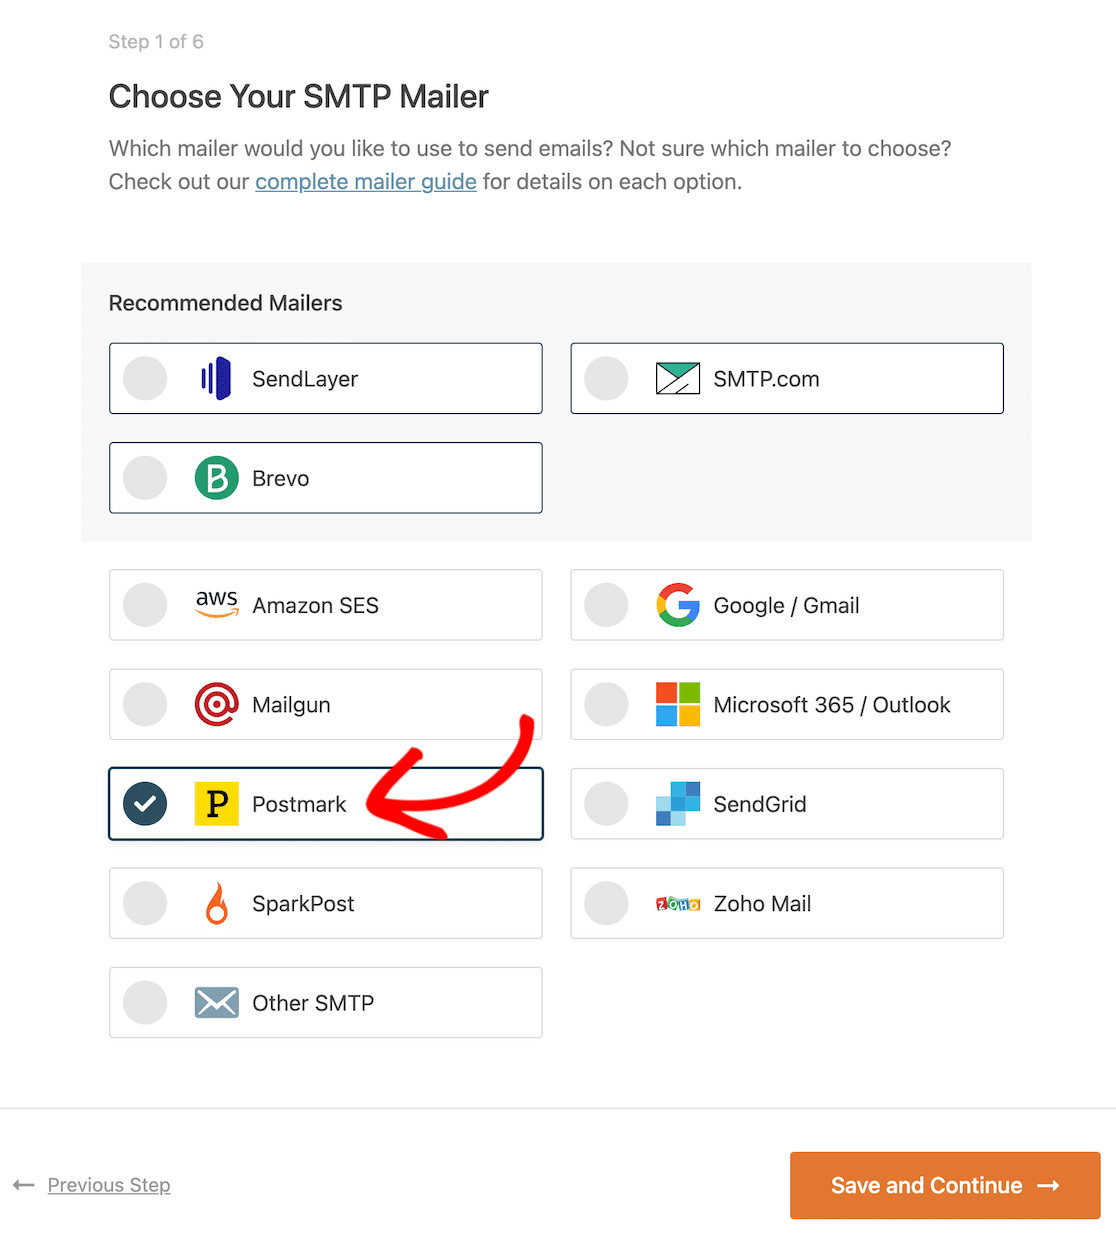
On the next screen, WP Mail SMTP will prompt you to enter your Postmark API key.
You can grab this from the Servers page in your Postmark account.

In Postmark, Servers are like folders: they let you monitor and organize emails from different sites in one Postmark account. This is super helpful since you don’t have to set up lots of Postmark accounts to keep all of your statistics separate.
If you’re just starting out, don’t worry about this too much. Postmark has already created a default called My First Server, so let’s go ahead and click that.

And now we need your API key. Go ahead and click API Tokens from the tabs at the top.

To copy your API key, move your mouse over the field. Click on the key to copy it to your clipboard.

Now switch back to your other tab and paste it into the Server API Token field in WP Mail SMTP.

That’s all there is to it! Your Postmark WordPress connection is almost complete.
In the next step, we’ll finalize your settings so you can start sending email.
5. Select a Message Stream
Message Streams are an important feature in Postmark. They allow you to separate different types of email for optimal sending.
If you’re just starting out, it’s fine to leave the Message Stream ID field blank. WP Mail SMTP will automatically use the Default Transactional Stream.
For more advanced usage, you can set a specific Message Stream for your WordPress emails if you want to.
Before you go ahead, let’s pause to understand the different types of emails that WordPress sends:
- Transactional emails are emails that need to be delivered almost instantly. For example, most users who request a password reset expect that email to arrive right away. WooCommerce order emails are also transactional emails because they’re time-sensitive, so most WooCommerce users pick a transactional email provider to make sure customers don’t have to wait for them.
- Bulk emails are not time-sensitive. For example, if you use a WordPress newsletter plugin, you likely send newsletters to a large group of people, but the sending of those emails might be staggered or slightly delayed. In Postmark, these emails are called Broadcast Emails.
So by specifying a Message Stream, you can tell Postmark to deliver your emails as transactional or broadcast emails. To use this option, click on the Message Stream you want to use in your Postmark dashboard and copy its ID.

You can then paste that into the Message Stream ID field in WP Mail SMTP.
Finally, we can set the From Name and From Email that’ll be used to send emails. If you want, you can force these settings so that they apply across your entire site.
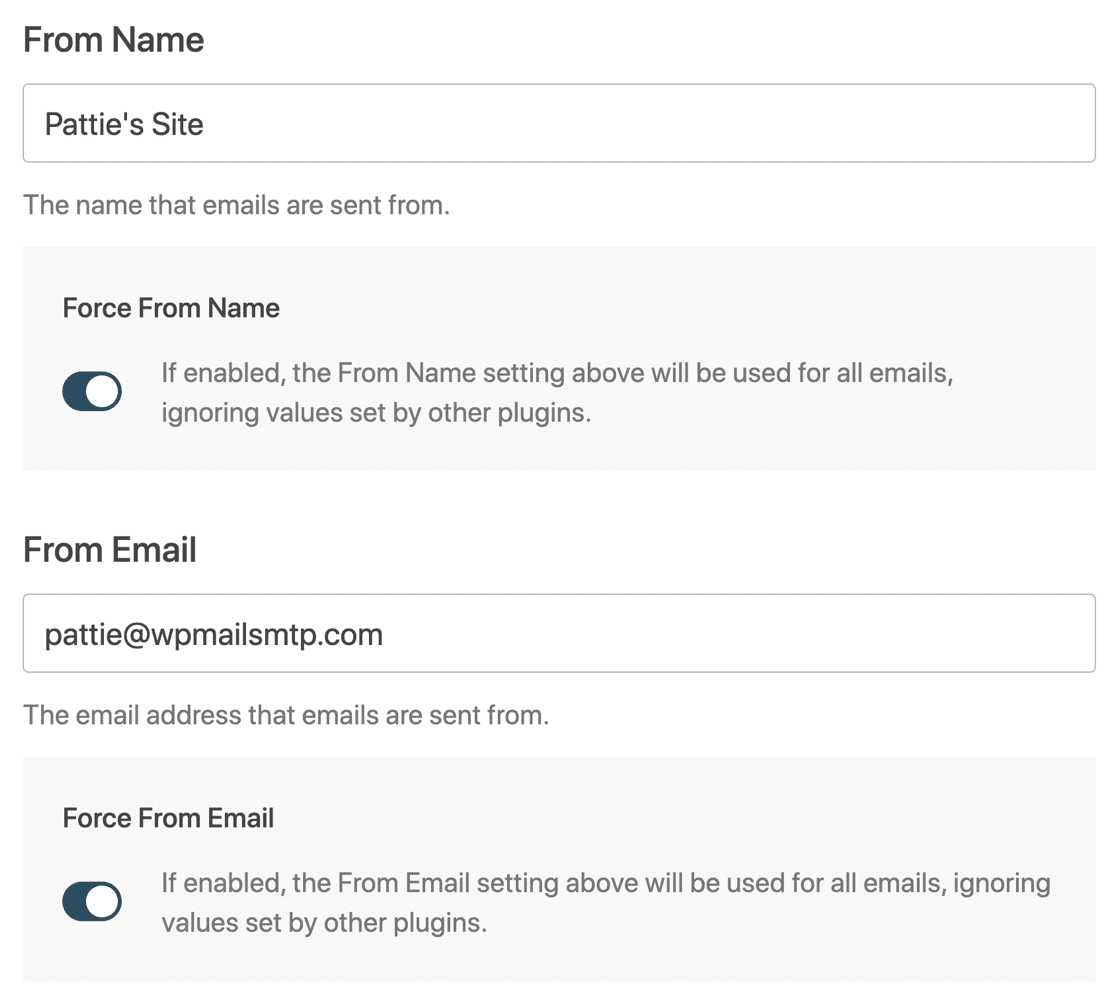
All set? Click Save and Continue to move on.
In the final step, WP Mail SMTP lets you enable email logging and Weekly Email Summaries. If these options aren’t already selected, go ahead and check them now.
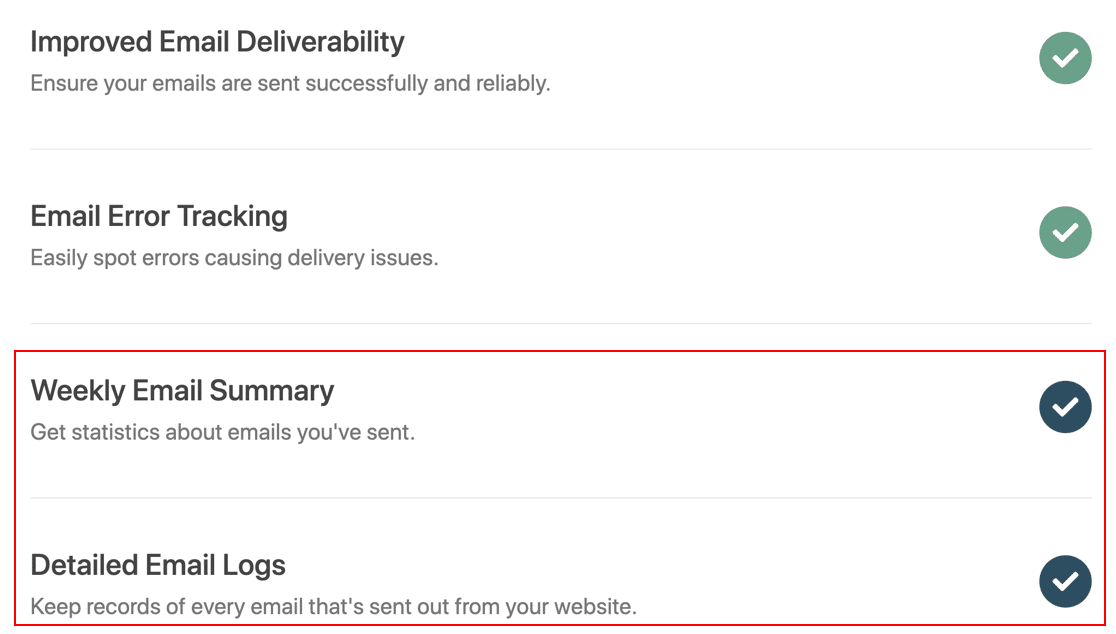
And that’s it! Click Save and Continue to move on to the final step. WP Mail SMTP will automatically send a test email so you can check that everything’s working.
In the last step, we’re going to show you how to make the most of our Pro features to monitor what happens after WordPress has sent an email.
6. Enable Email Logging and Tracking in WordPress
In the final step, we’re going to enable email logging and tracking in WordPress.
These 2 features are awesome because they allow you to see:
- The emails your site is sending out, including any attachments that were sent with them
- Whether the recipient interacted with the email (in other words, if it was opened or clicked).
To unlock these features, you’ll want to use our Pro version or higher.
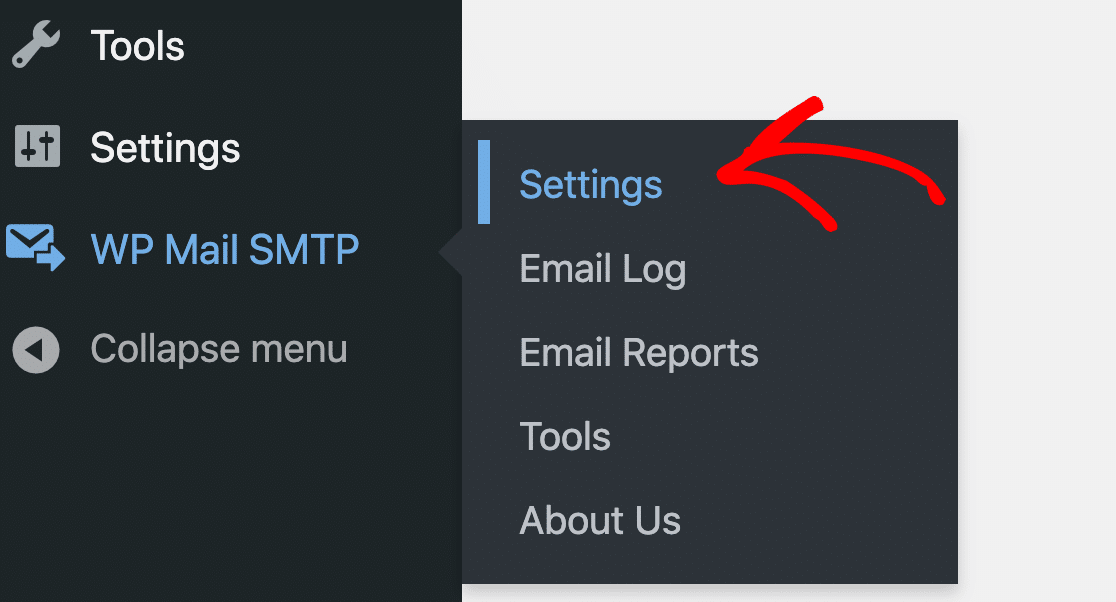
To start, head to WP Mail SMTP » Settings.
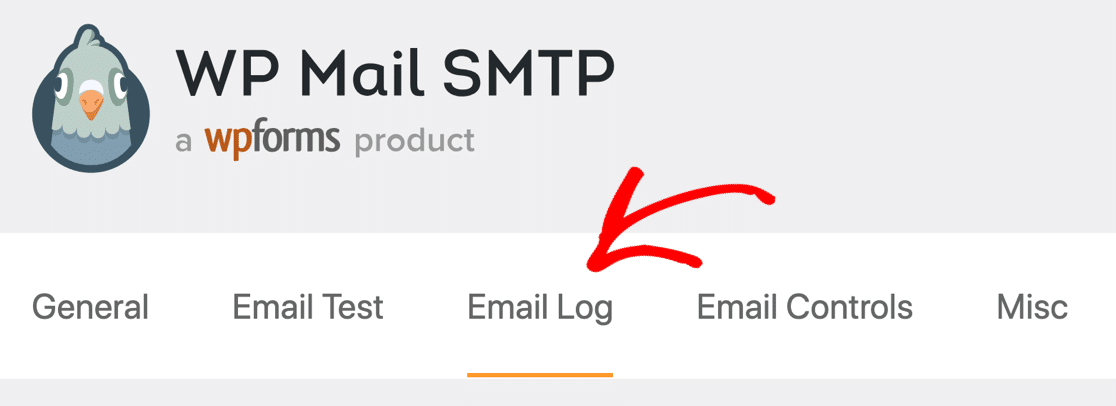
Then click on Email Log from the tabs across the top.
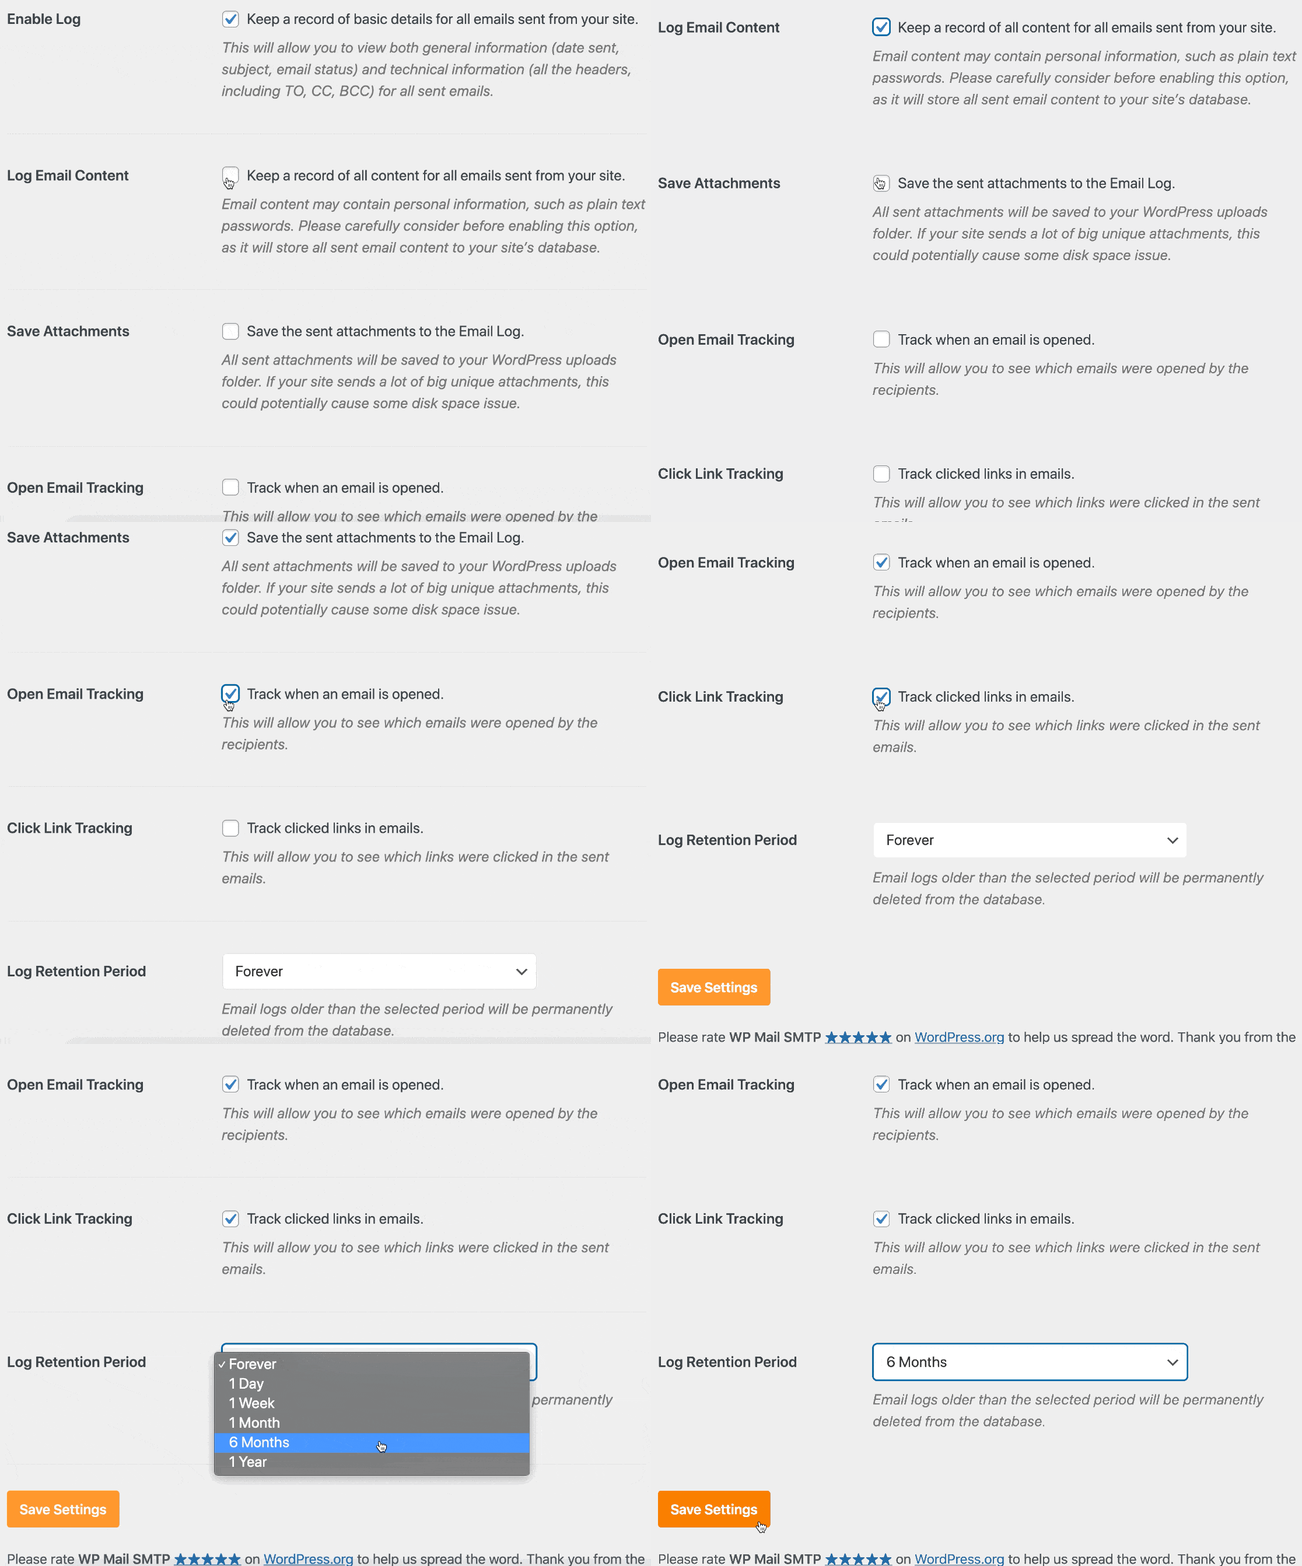
On the settings page, go ahead and click the checkboxes for all of these options:
- Log Email Content: Saves a copy of the entire contents of each email sent from your site
- Save Attachments: Saves a copy of any attachments that were sent with the emails
- Open Email Tracking and Click Link Tracking: Allows you to see when your WordPress emails were opened and whether any links were clicked.
You can also adjust the Log Retention Period if you want to control how much disk space is used.
At this point, you might want to submit the contact form on your website as a test. If you prefer, you could use the Test Email functionality in WP Mail SMTP to send an email to yourself.
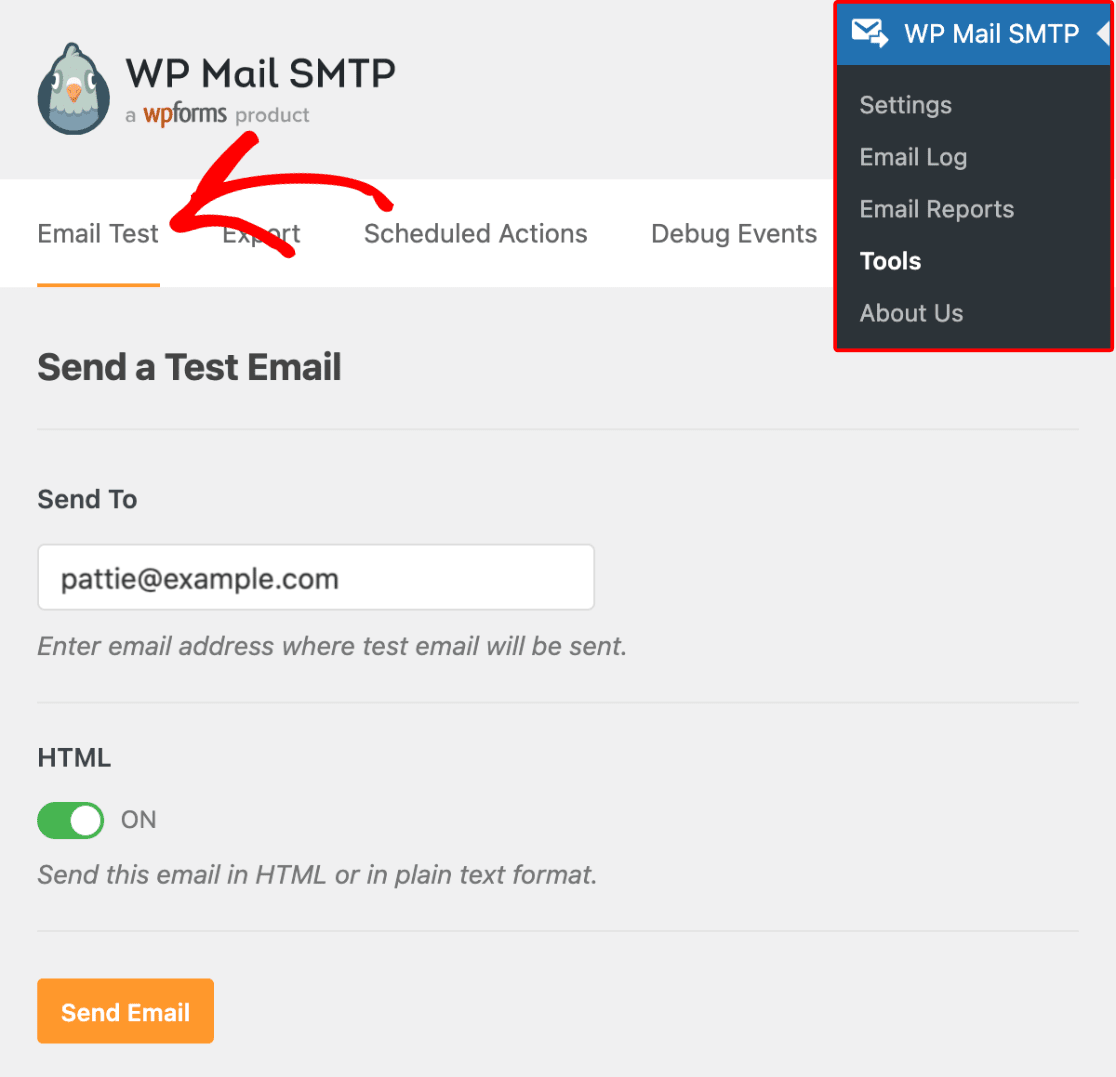
Once that’s done, we can review the email you sent in your new WordPress email log.
Click on WP Mail SMTP » Email Log to open it.
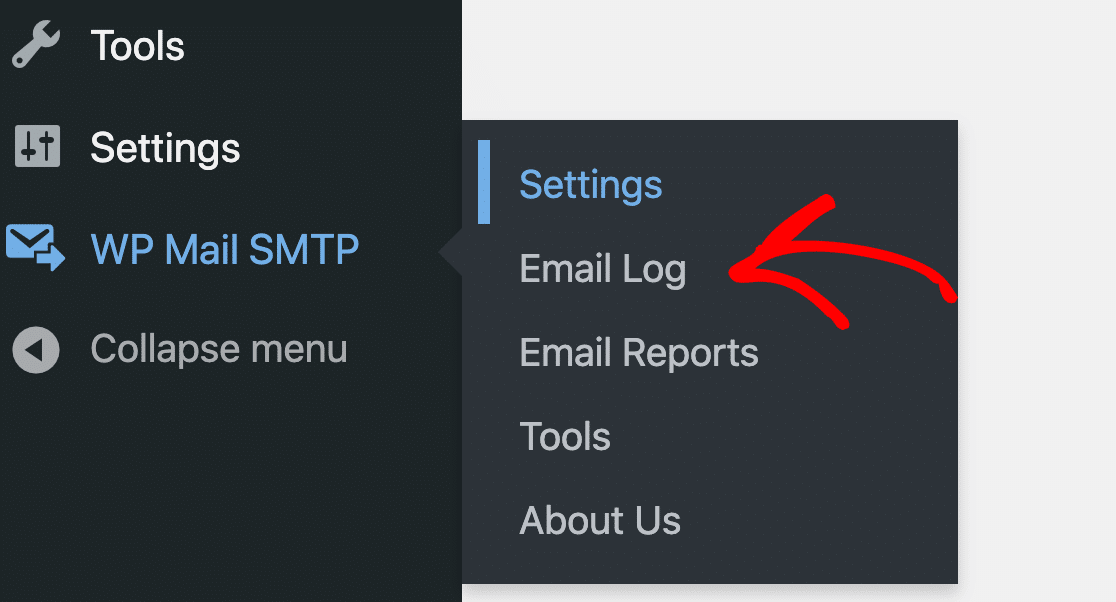
In your email log, WP Mail SMTP shows a list of sent emails, and you can click on any email to see:
- Headers and technical information
- Email content
- Delivery status
- Which plugin generated the email
- Whether the email was opened or clicked
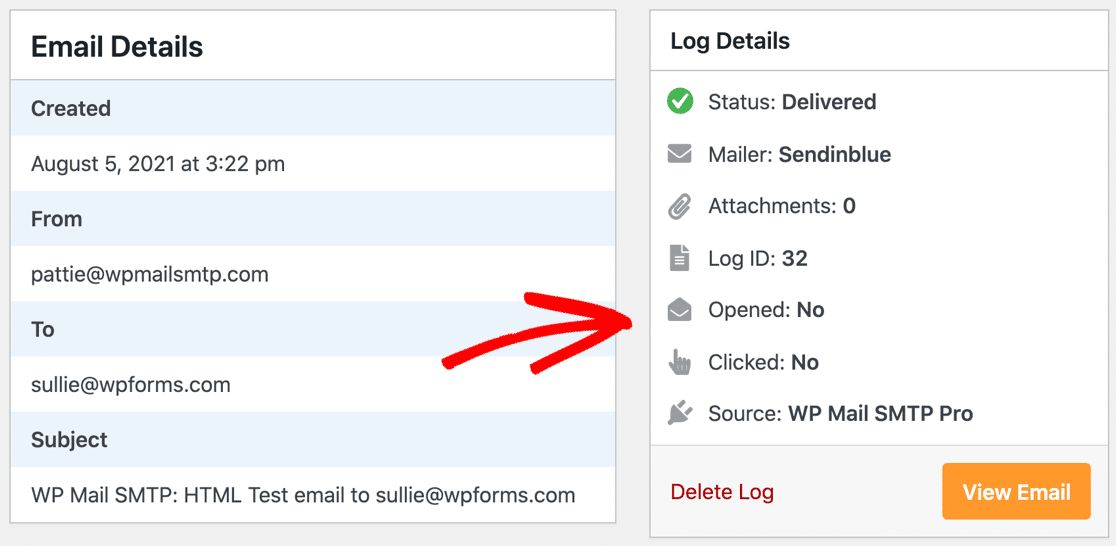
Now you’re logging all of your emails, you can see exactly what your WordPress site is sending through your Postmark account. Even better, you can monitor engagement and deliverability so you can be sure that your WordPress emails don’t go to spam.
If you’re usure if Postmark is the best fit for your needs, you may want to investigate some Postmark alternatives for transactional email. You may also want to check out our guide to the top WordPress email tracking plugins.
And that’s it! You’re all set up with Postmark in WordPress.
Next, Stop Contact Form Spam in WordPress
Are you getting spam emails through your WordPress contact forms? Some contact form plugins don’t offer great spam protection, but WPForms has a useful, free option that’s incredibly effective.
To stop spammers from using your forms, check out this article on How to Set Up hCaptcha on Your WordPress Forms.
You might also want to see our guide on how to create a custom WordPress sidebar without code.
Ready to fix your emails? Get started today with the best WordPress SMTP plugin. WP Mail SMTP Elite includes full White Glove Setup and offers a 14-day money-back guarantee.
If this article helped you out, please follow us on Facebook and Twitter for more WordPress tips and tutorials.

