Is WP Super Cache not sending email from your website?
WP Super Cache is a caching plugin, and if email from it doesn’t make it to your inbox, you can miss out on notifications from the Garbage Collector.
In this guide, we’ll show you to fix the problem of email deliverability so that you are always updated about the status of the cache from your website.
Fix Your WP Super Cache Emails Now
Why Do WP Super Cache Garbage Collection Emails Never Arrive?
WP Super Cache Garbage Collection emails sometimes don’t arrive because the emails are being filed as spam.
The plugin speeds up your WordPress website by serving a saved copy of your web pages to the visitor instead of requesting the content over and over again. This helps save server resources.
WP Super Cache periodically updates the cache copy so that users always get the updated version of your website. The Garbage Collector scans your website and deletes the old or stale content from your website. When it does that, it sends out an email notifying the admin about the update.

Sometimes, the email notifications don’t arrive. You might wonder if the plugin is actually working on your website.
The reason for this can be that your hosting is not configured to send emails. By default, WordPress uses the PHP mail() function to send emails from your website. This isn’t a reliable option and can cause issues with email deliverability.
Also, the emails from the website are sent without any verification. This can lead to them being marked as spam.
Now that we know the cause, let’s take a look at the possible solution to solve the email deliverability issue.
How To Fix WP Super Cache Not Sending Email
In This Article
Step 1: Check Email Settings In WP Super Cache
WP Super Cache sends out occasional emails when the Garbage Collector runs on your website.
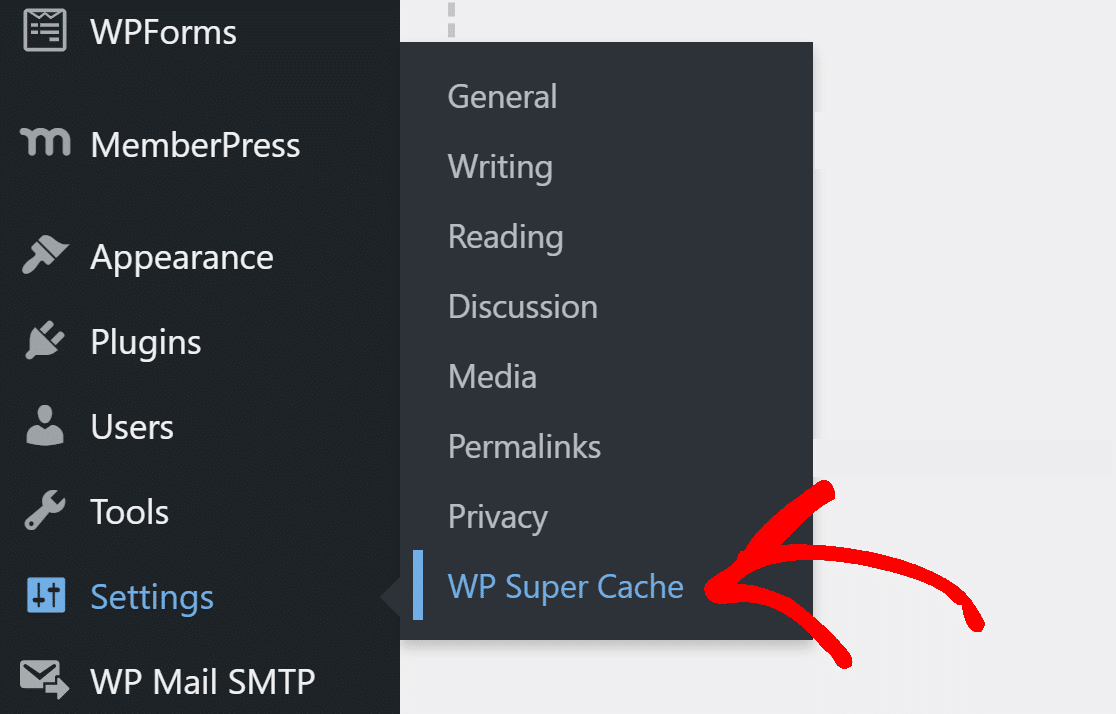
To make sure you get emails, go to Settings » WP Super Cache from your WordPress dashboard.
Garbage Collector only runs when you have the caching enabled. Under the Easy tab, make sure it is set to on.

Click on the Advanced tab.

Scroll to the Expiry Time & Garbage Collection section and make sure there is a checkmark next to the Notification Emails setting.

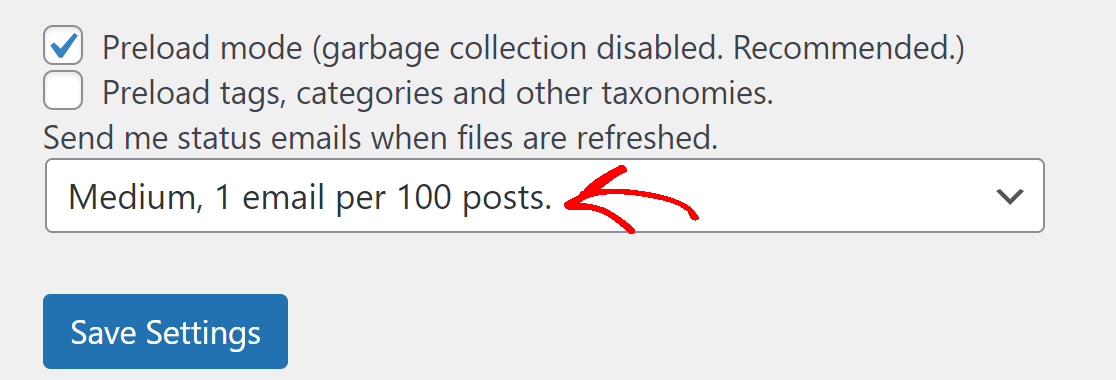
Similar to Garbage collector, WP Super Cache also sends out an email when it preloads the cache. To control email settings for it, go to the preload tab and tick the Preload mode option.
To set the email frequency, select the option you prefer from the dropdown. We recommend setting this to Medium since the plugin sends a lot of emails.
Now we have the right settings enabled for email, let’s install the WP Mail SMTP plugin to help with email delivery.
Step 2: Install WP Mail SMTP and Choose a Mailer
WP Mail SMTP is a WordPress plugin that changes the way emails are delivered from your WordPress site.
Instead of relying on the web server, WP Mail SMTP re-routes all of your emails through a dedicated external email provider.
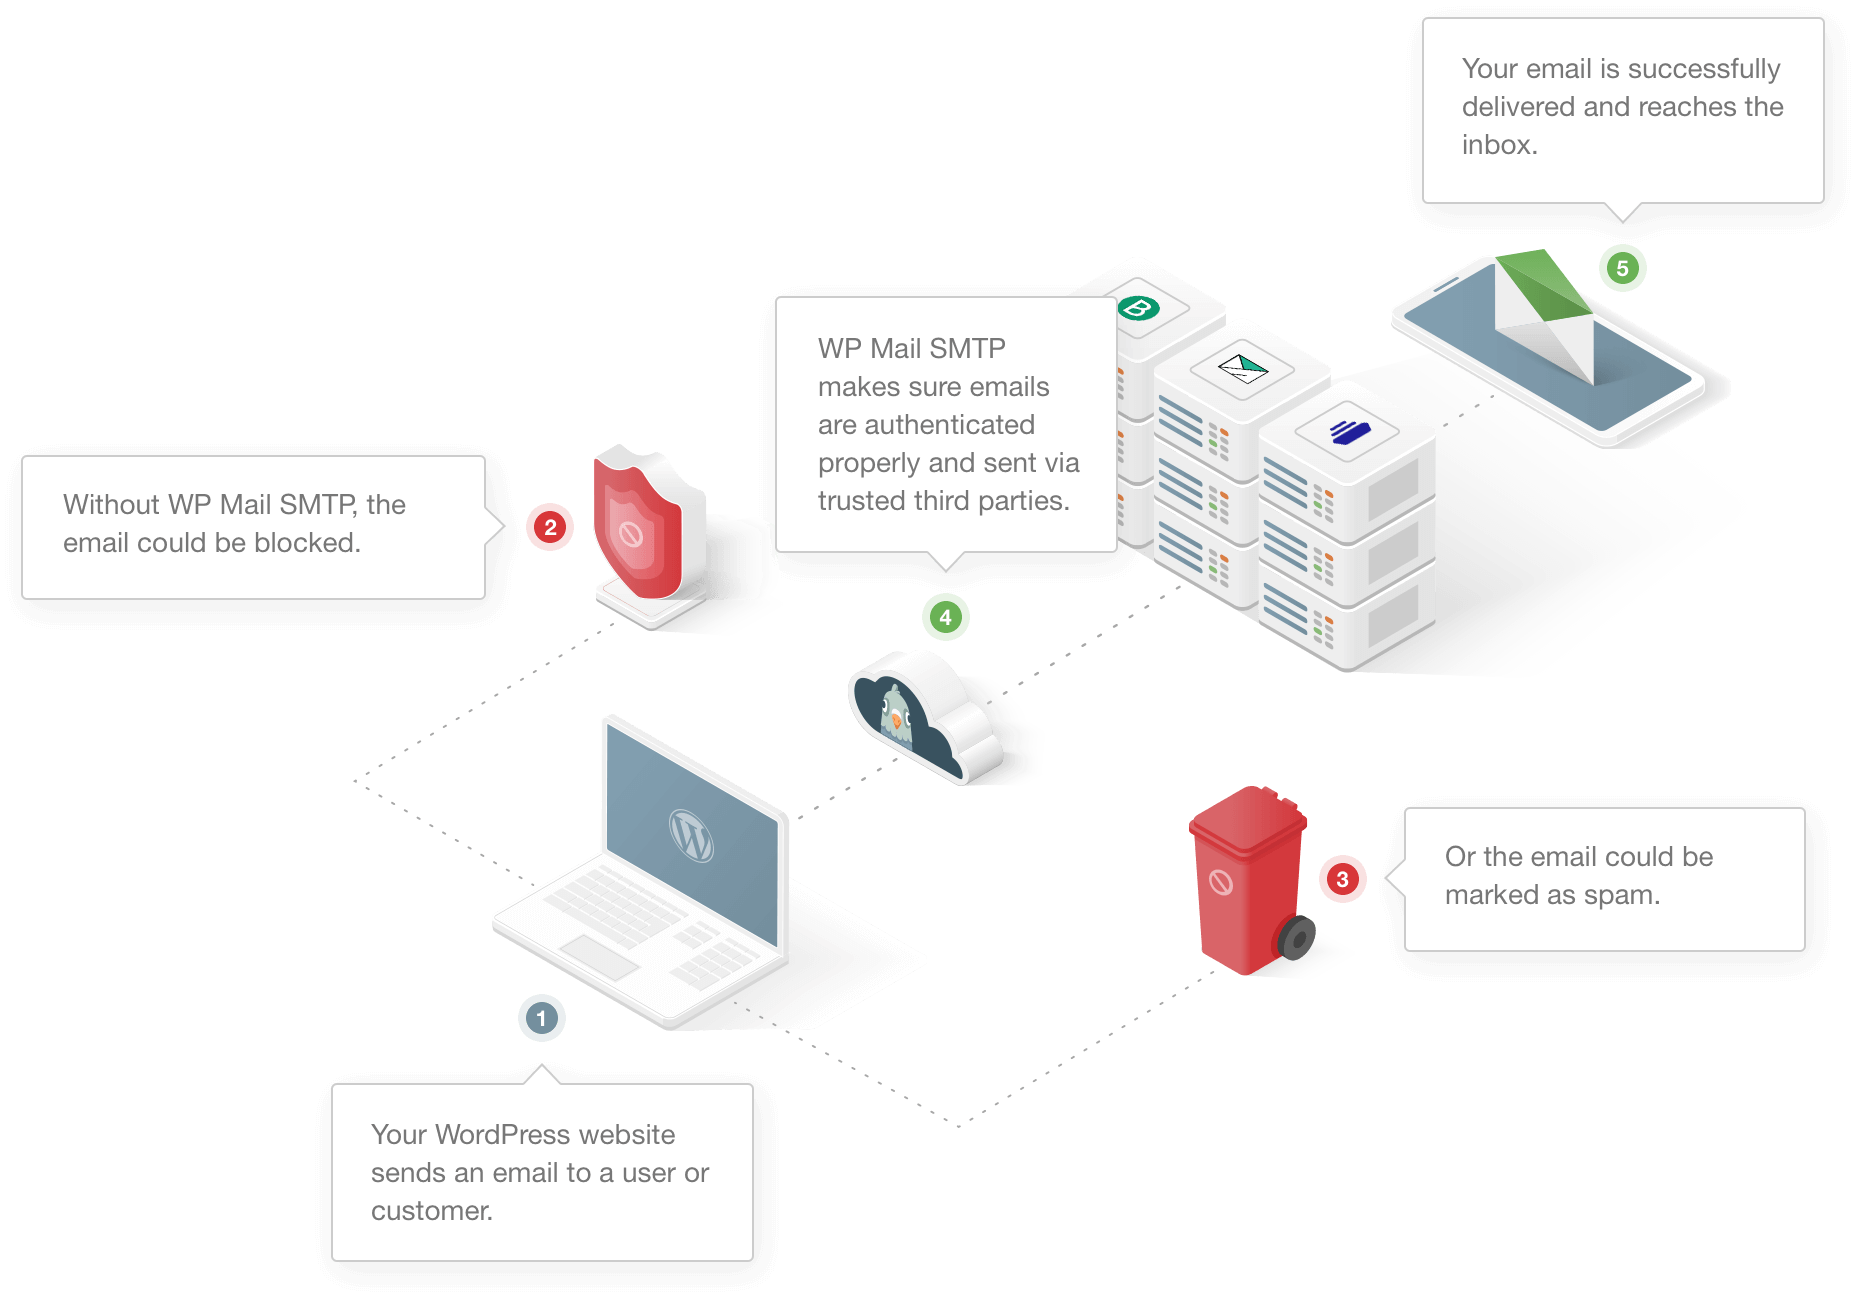
This will make sure all emails from your website are sent with authentication.
Let’s start by installing the plugin.
If you’d like someone else to set this up for you, the team offers a full White Glove Setup service. It’s included with the Elite license.
Install WP Mail SMTP
To start, download the plugin from your WP Mail SMTP account. You can find it under the Downloads tab.
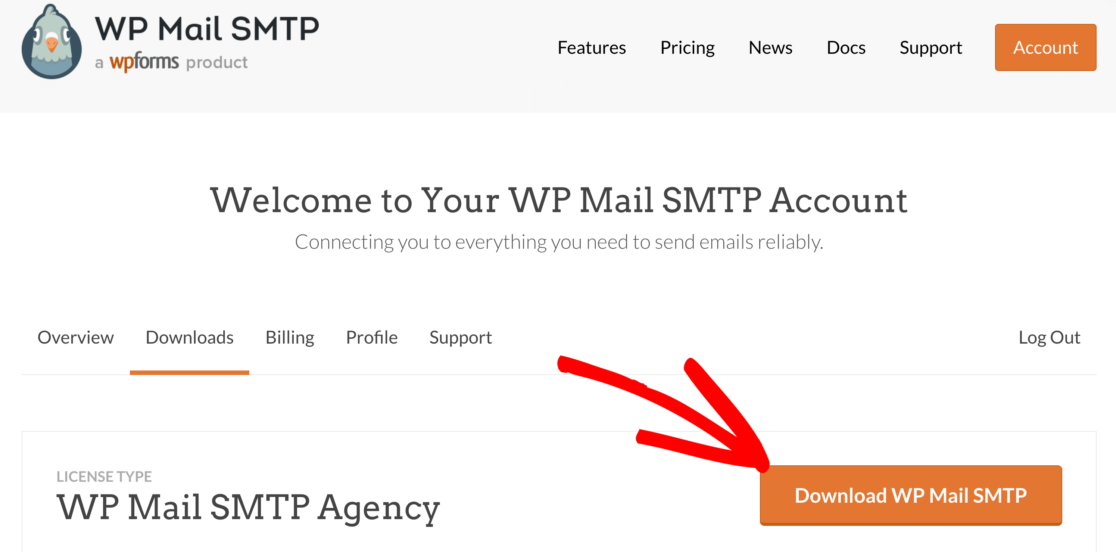
Now you’ll want to upload the zip file to your WordPress site. If you need help with this, jump over to this guide to installing a WordPress plugin.

After installing the plugin, don’t forget to activate it. As soon as you do that, the Setup Wizard will open up in your browser.
If you want to start the wizard manually at any time in the future, click on the Launch Setup Wizard button in the plugin settings.
Set Up Your Mailer Service in WordPress
Next, we need to choose a mailer service that’ll fix the WP Super Cache not sending email issue.
If you already have a mailer set up on your site, running the wizard again will reset the settings.
To start, click the Let’s Get Started button.

On the next screen, choose a mailer service you want to use from the list.
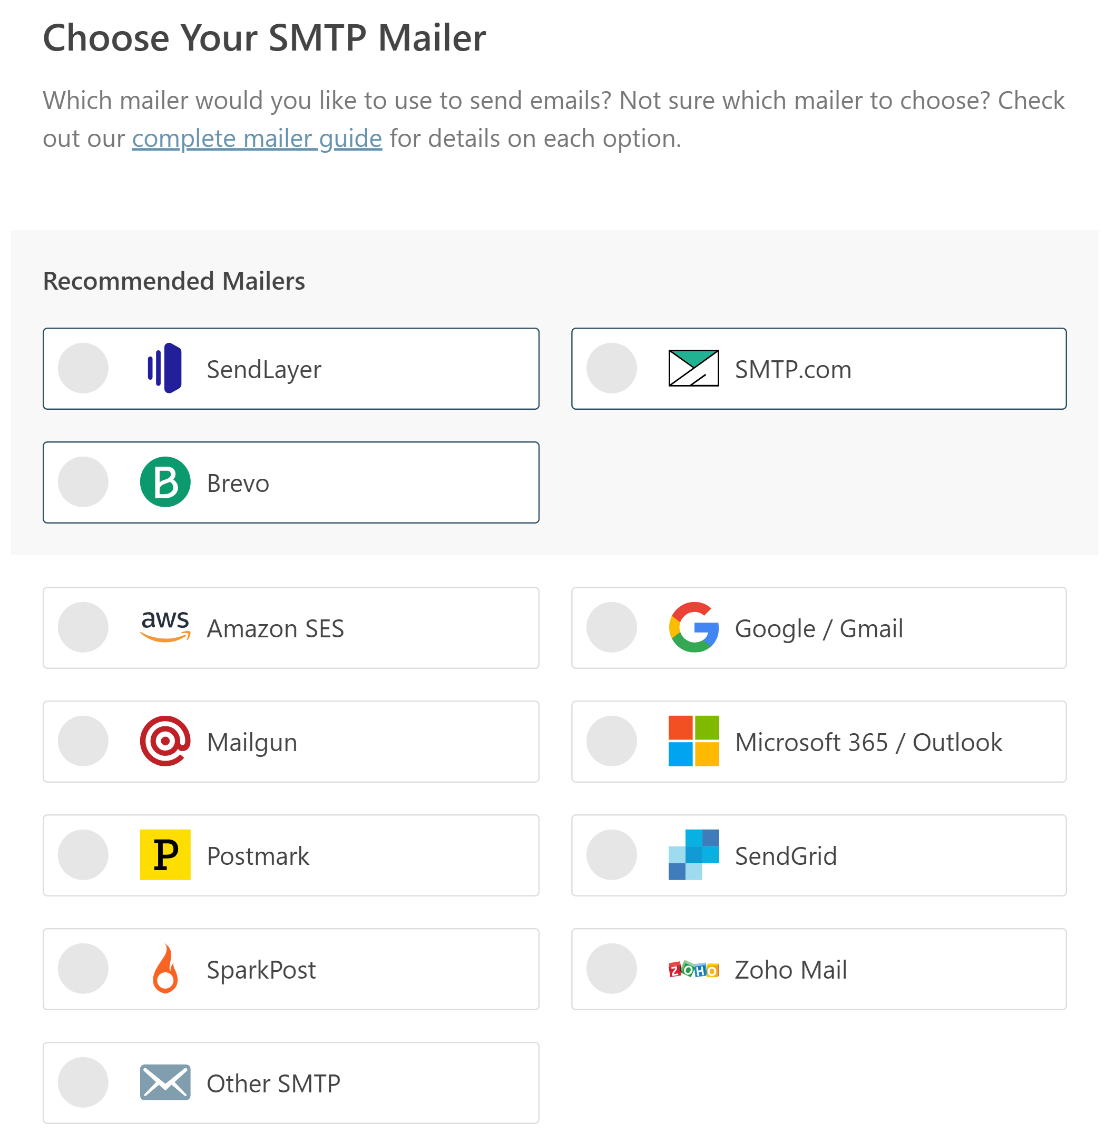
The service you pick here will depend on a few factors. You get free as well as paid options for your mailer service.
If your website sends occasional emails like the contact form submission, a free option will work just fine. Whereas, if you have an online store or site with high traffic, we recommend using a transactional email provider.
If you’re not sure which email provider to pick, we recommend SendLayer, SMTP.com, or Brevo (formerly Sendinblue). They are easy to use and offer reliable service.
Once you choose the service, click the below link to open the documentation to set up a mailer account:
- SendLayer
- SMTP.com
- Brevo
- Amazon SES
- Google Workspace / Gmail
- Mailgun
- Microsoft 365 / Outlook.com
- Postmark
- SendGrid
- SparkPost
- Zoho Mail
- Other SMTP
Want to set up multiple mailers? You can do so in the Additional Connections settings after you finished the Setup Wizard. Then select a Backup Connection and configure Smart Routing.
Switch back to this guide when you’re done setting up the mailer service.
Enable Email Logging (Optional)
For the final step, you’ll see 2 options enabled by default:
- Improved Email Deliverability
- Email Error Tracking
Both options are needed to fix the WP Super Cache not sending email issue.
If you want, you can also turn on Detailed Email Logs to keep track of all emails that are sent out from your site.
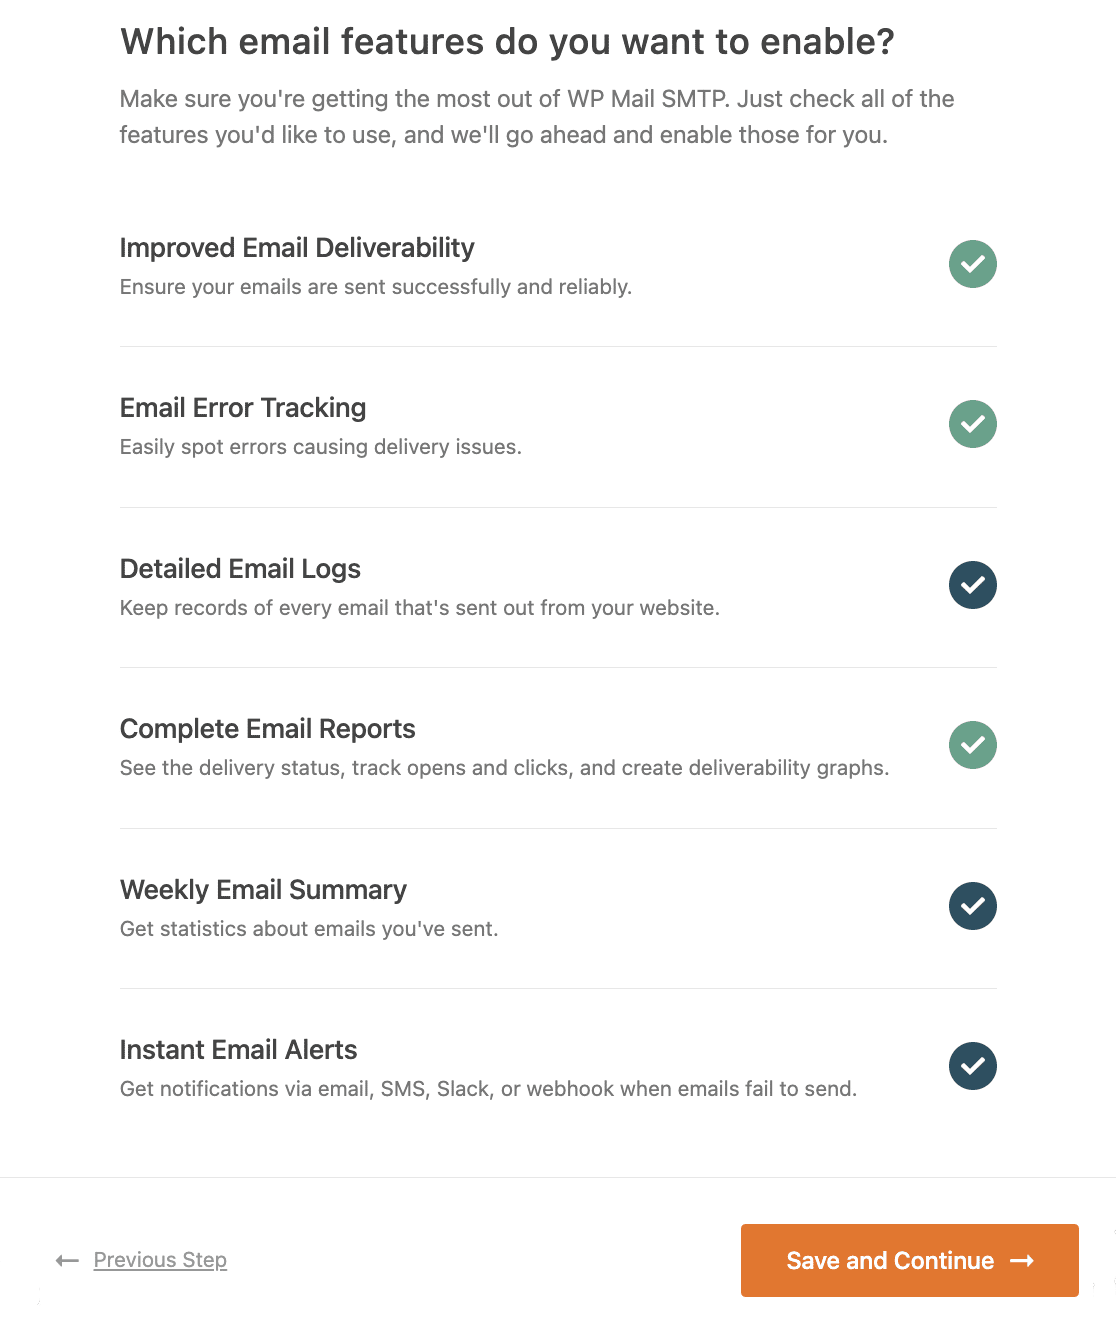
The email logs will let you see the delivery status of your emails and other details in Complete Email Reports (enabled automatically when you turn on email logging). The Weekly Email Summary will send you the past week’s email delivery stats.
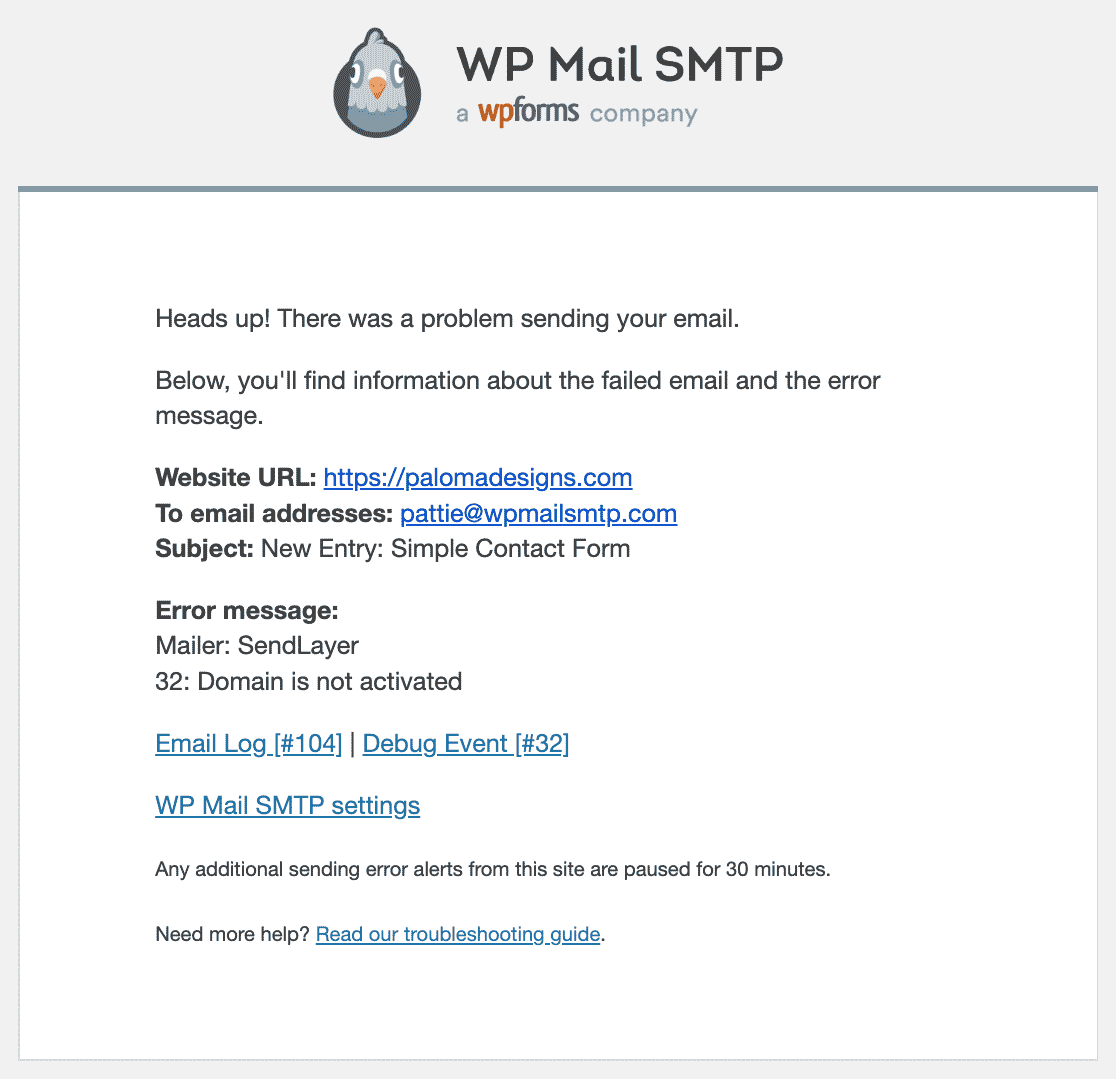
Another handy feature are the Instant Email Alerts. If your site ever fails to send an email, you’ll know right away. The notification will include details to help you troubleshoot the issue as well.
track email opens and link clicks, save attachments, and more. You can also print yo logs or export them to a spreadsheet if you want.
Check out our guide to WordPress email logging to find out what you can do with email logging in Pro.
To end the wizard, grab the license key from your WP Mail SMTP account and paste it here to enable extra features and automatic updates.

That’s it! You can send a test email from the WP Mail SMTP to confirm everything’s working.
Fix Your WP Super Cache Emails Now
Next, Check Your DNS Settings
If your DNS settings are not properly set up, you might still face issues with email deliverability. you might also see ‘be careful with this message’ warnings if you’re using Gmail.
You can remove such warnings by updating your DNS settings. The DNS settings are usually held by your hosting company or domain registrar. Start by creating a DMARC record for your domain.
Ready to fix your emails? Get started today with the best WordPress SMTP plugin. If you don’t have the time to fix your emails, you can get full White Glove Setup assistance as an extra purchase, and there’s a 14-day money-back guarantee for all paid plans.If this article helped you out, please follow us on Facebook and Twitter for more WordPress tips and tutorials.

