Is HappyForms not sending email when forms are submitted on your website?
Email delivery of contact form notifications is super important because visitors on your website reach out to you by filling out the form.
In this guide, we’ll show you how to fix the email deliverability issue with HappyForms using an SMTP plugin.
Fix Your HappyForms Emails Now
Why Are My Emails Not Sending?
By default, HappyForms relies on WordPress mailing capabilities. It uses the PHP wp_mail() function to send emails from your website. This isn’t a reliable solution as it’s tied to the server configuration which may vary from one hosting provider to another.
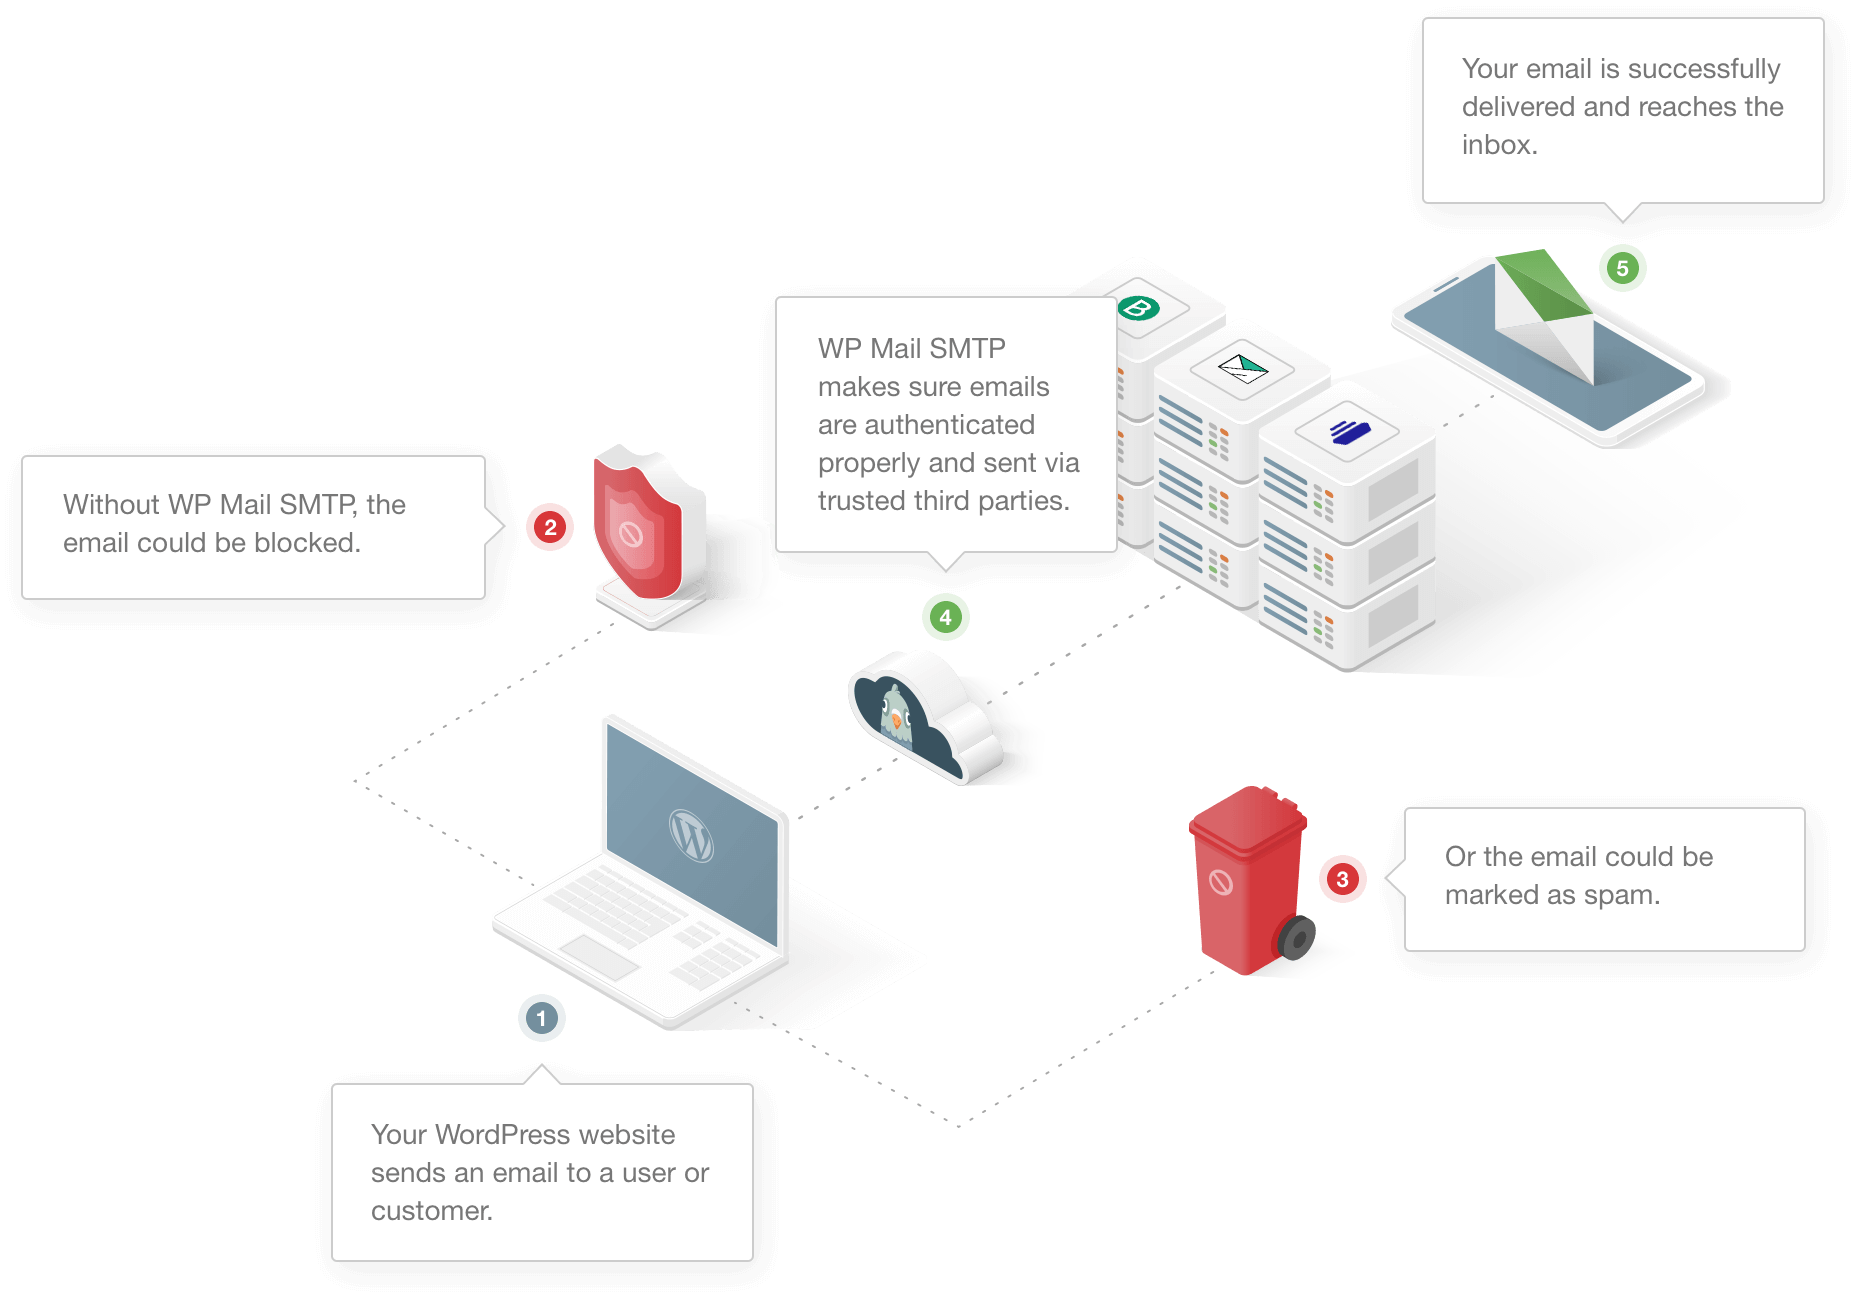
Some hosting companies completely disable the email service to prevent server abuse.
Another reason is that WordPress uses a default email address ([email protected]) to send all types of emails from your website. This isn’t a real email address on most websites.
Popular email client apps have built-in spam filters that detect such automated emails and mark them as spam.
Let’s look at some of the possible solutions to fix the HappyForms not sending email issue.
How To Fix HappyForms Not Sending Email Issue
In This Article
Step 1: Check HappyForms Email Settings
Every form created using HappyForms has its own settings. If you aren’t getting emails, a good starting point is to check if the form has the correct notification settings.
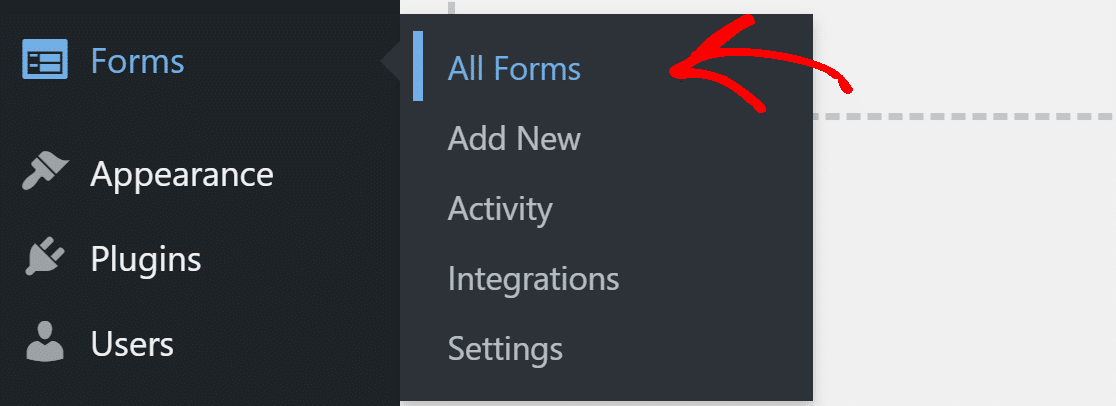
From the WordPress dashboard, click on Forms » All Forms and open a contact form that is not working.
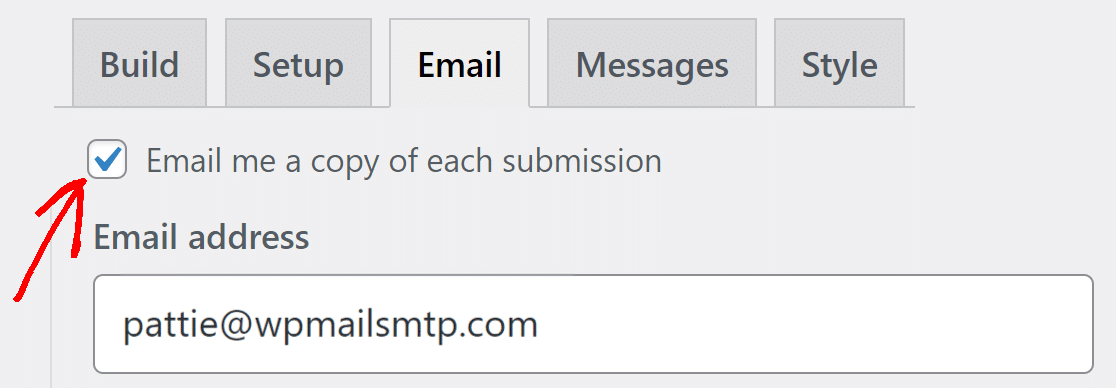
Switch to the Email tab and make sure the Email me a copy of each submission option is turned on.
Below it, enter an email address that you want to receive the form submissions. Make sure the email address you enter here is valid and you have access to it.
If you want to send a copy of the submission to additional recipients, enter their email address in the Email Bcc address field.
Next, to make sure your visitors also receive a copy of their submission, check the box that says Email respondent a copy of their submission. This will open up its settings.
In the From email address field, use an address that matches your domain. For example, since our domain is wpmailsmtp.com, we use [email protected] for all the contact forms on our website.
If you want people to reply to the same address, enter the same address in the reply field.

Now that we have the contact forms correctly set up, let’s install the WP Mail SMTP plugin to improve the email deliverability.
Step 2: Install the WP Mail SMTP Plugin
WP Mail SMTP is the best WordPress SMTP plugin. It improves email deliverability by connecting your website to an external email service.
This helps in bypassing the spam filters by adding authentication to your emails.
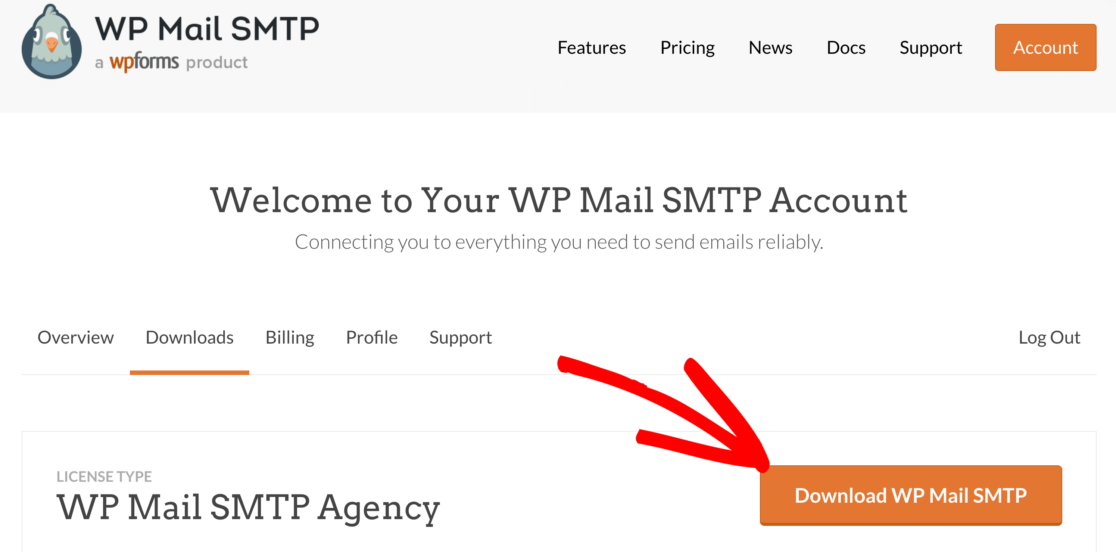
To start, go to the WP Mail SMTP account and download the plugin file. You’ll find it under the Downloads tab.
Next, open up the WordPress dashboard and upload the zip file to the Plugins page. If you need help with this, jump over to this guide to installing a WordPress plugin.

Once you’ve installed the plugin, don’t forget to activate it. As soon as you do that, the Setup Wizard will open in your browser.
If you want to pause here, you can come back and restart the wizard any time by clicking the Launch Setup Wizard button in the WP Mail SMTP settings.
Step 3: Choose an Email Service
In this step, we’ll run through the Setup Wizard and connect our website to an email service. This will fix the HappyForms not sending email issue.
Click the Let’s Get Started button to begin.

WP Mail SMTP lets you choose between free and paid email providers. The service you choose will depend on a few factors. Here are some tips to help you choose the best one:
- If you have a big website or website that sends a lot of transactional emails, we recommend SendLayer, SMTP.com, or Brevo (formerly Sendinblue). They are easy to use and offer reliable service.
- WP Mail SMTP supports Gmail or Google Workspace. This is a great option for a small site with fairly low traffic. You can also use a Gmail alias to send WordPress emails if you want to.
- You can use the Other SMTP option if your web hosting has a mailer service. Some providers will limit the number of emails you can send, but this is another great option if you’re just starting out.
You can also check out our complete guide on the email providers that WP Mail SMTP supports to know more about them.
Go ahead and select the email service you think is the best fit for your website.
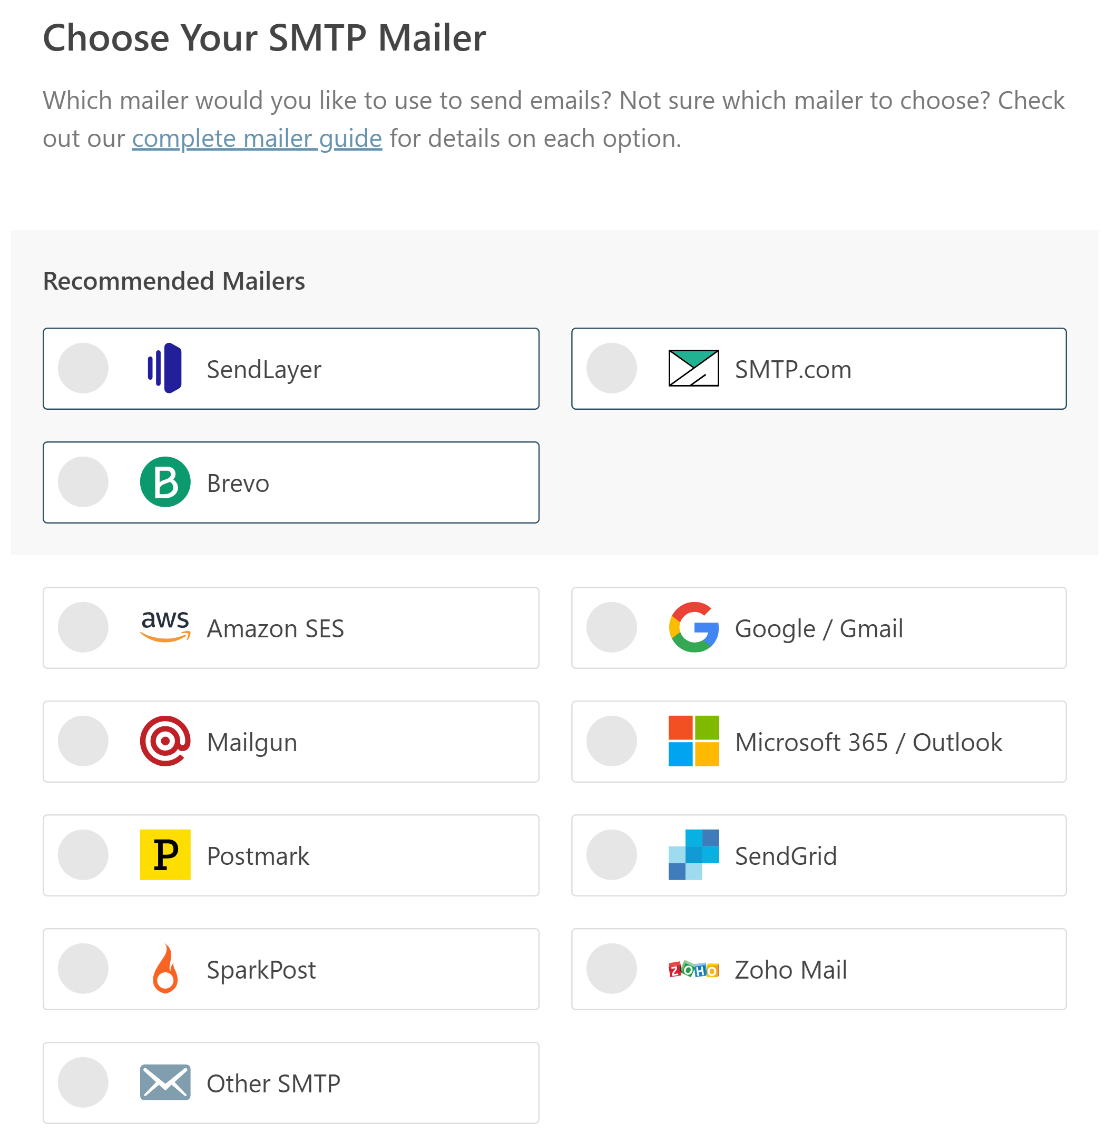
When you’ve chosen your mailer, open up our documentation and follow along to complete the setup steps:
- SendLayer
- SMTP.com
- Brevo
- Amazon SES
- Google Workspace / Gmail
- Mailgun
- Microsoft 365 / Outlook.com
- Postmark
- SendGrid
- SparkPost
- Zoho Mail
- Other SMTP
Want to set up multiple mailers? You can do so in the Additional Connections settings after you finished the Setup Wizard. Then select a Backup Connection and configure Smart Routing.
When you’ve set everything up, switch back to this guide to enable email logging.
Step 4: Enable Email Logging (Optional)
For the next step, WP Mail SMTP will ask you which email features to enable. You’ll have two options enabled by default.
- Improved Email Deliverability
- Email Error Tracking
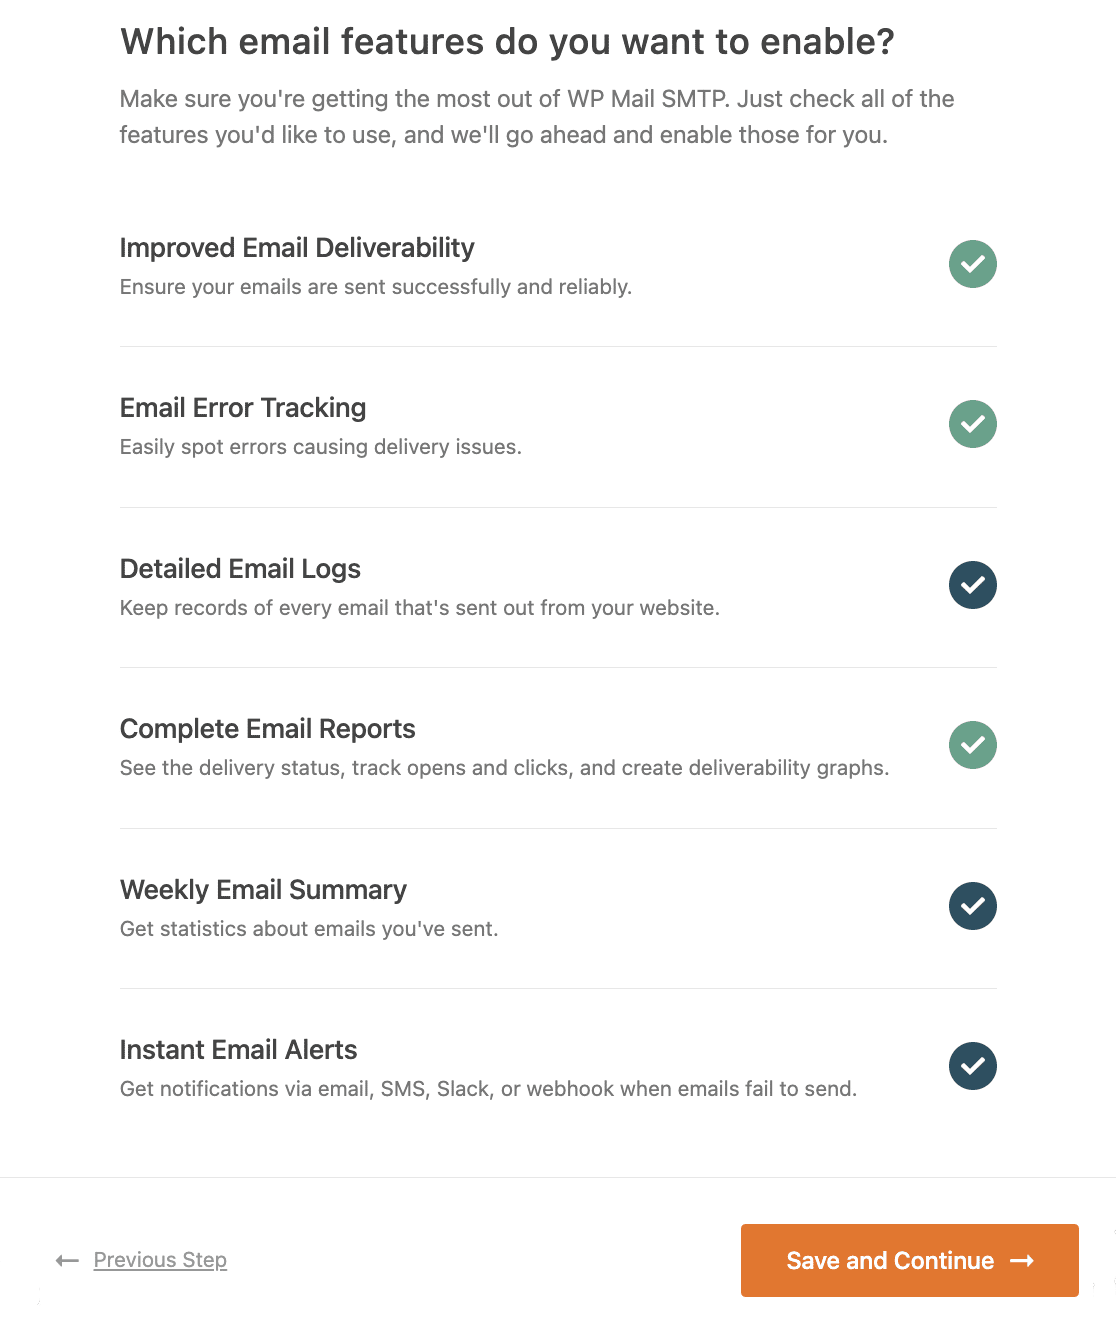
In our Pro version, the Detailed Email Logs will let you keep a track of all the emails that are being sent from your website. You’ll be able to see your emails’ delivery statuses in the WP Mail SMTP dashboard widget.
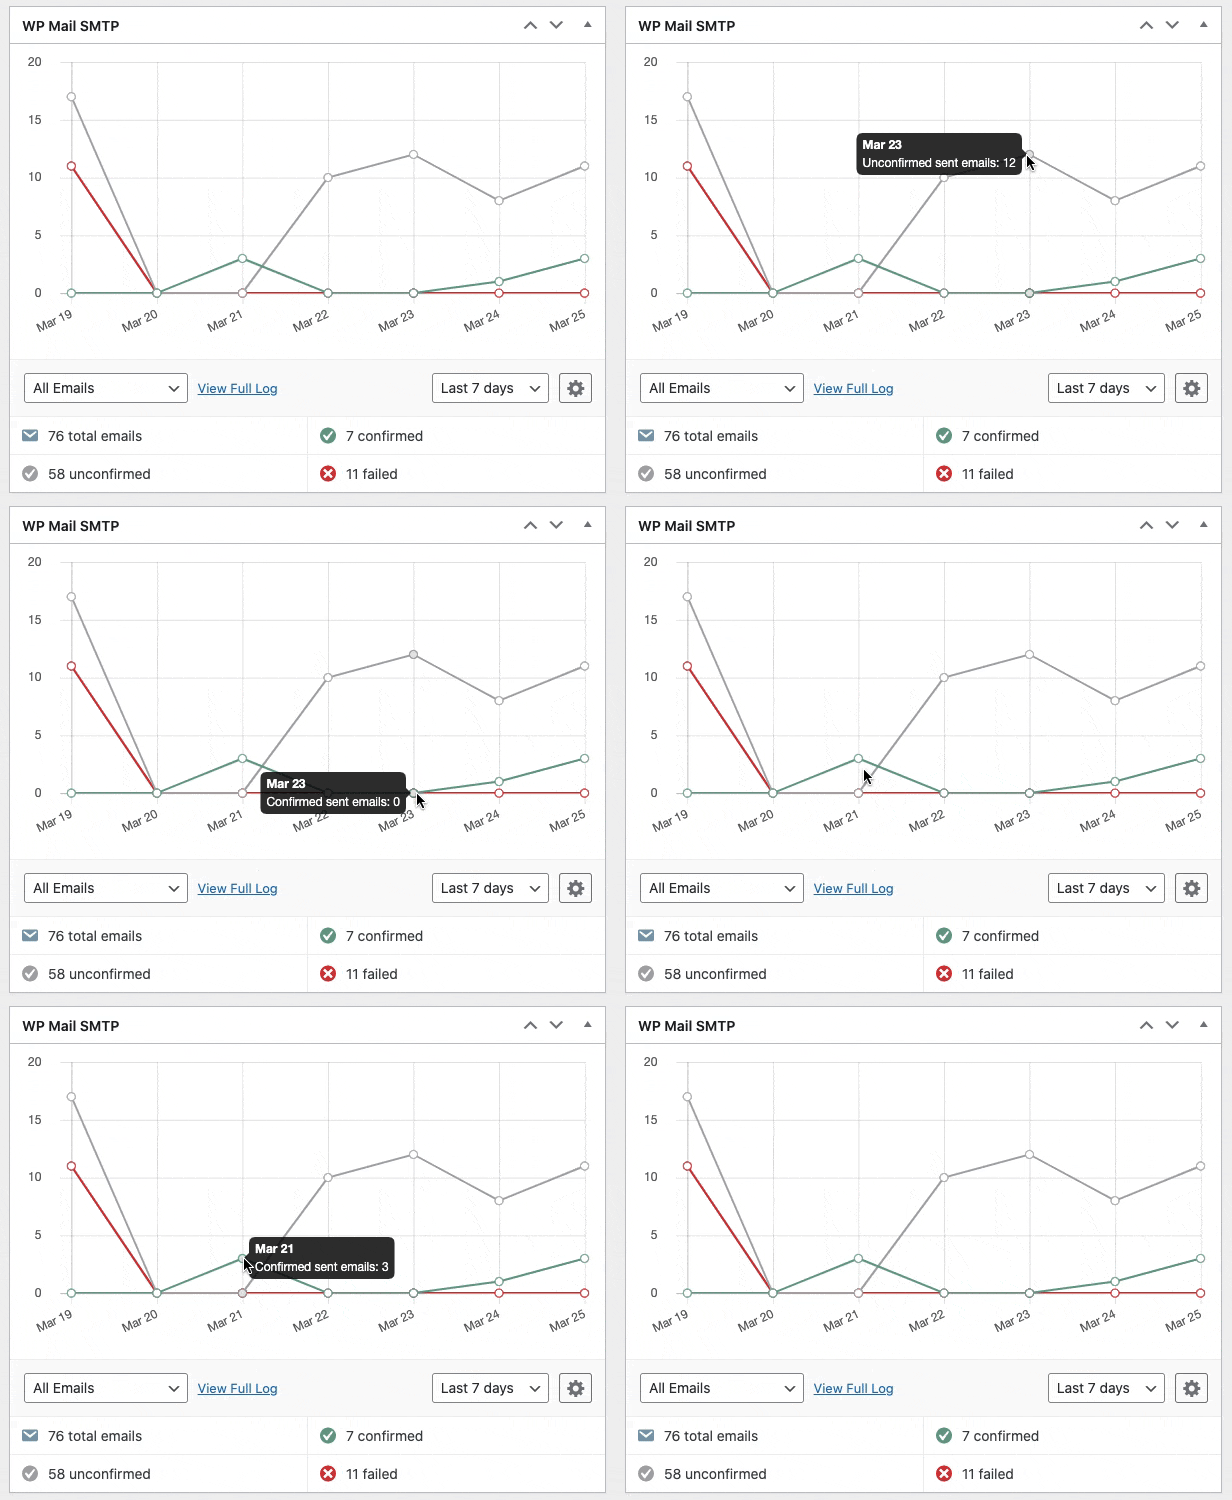
Turning on email logs also enables Complete Email Reports. If you want to see an overview of your logs in your inbox each week, turn on the Weekly Email Summary, too.
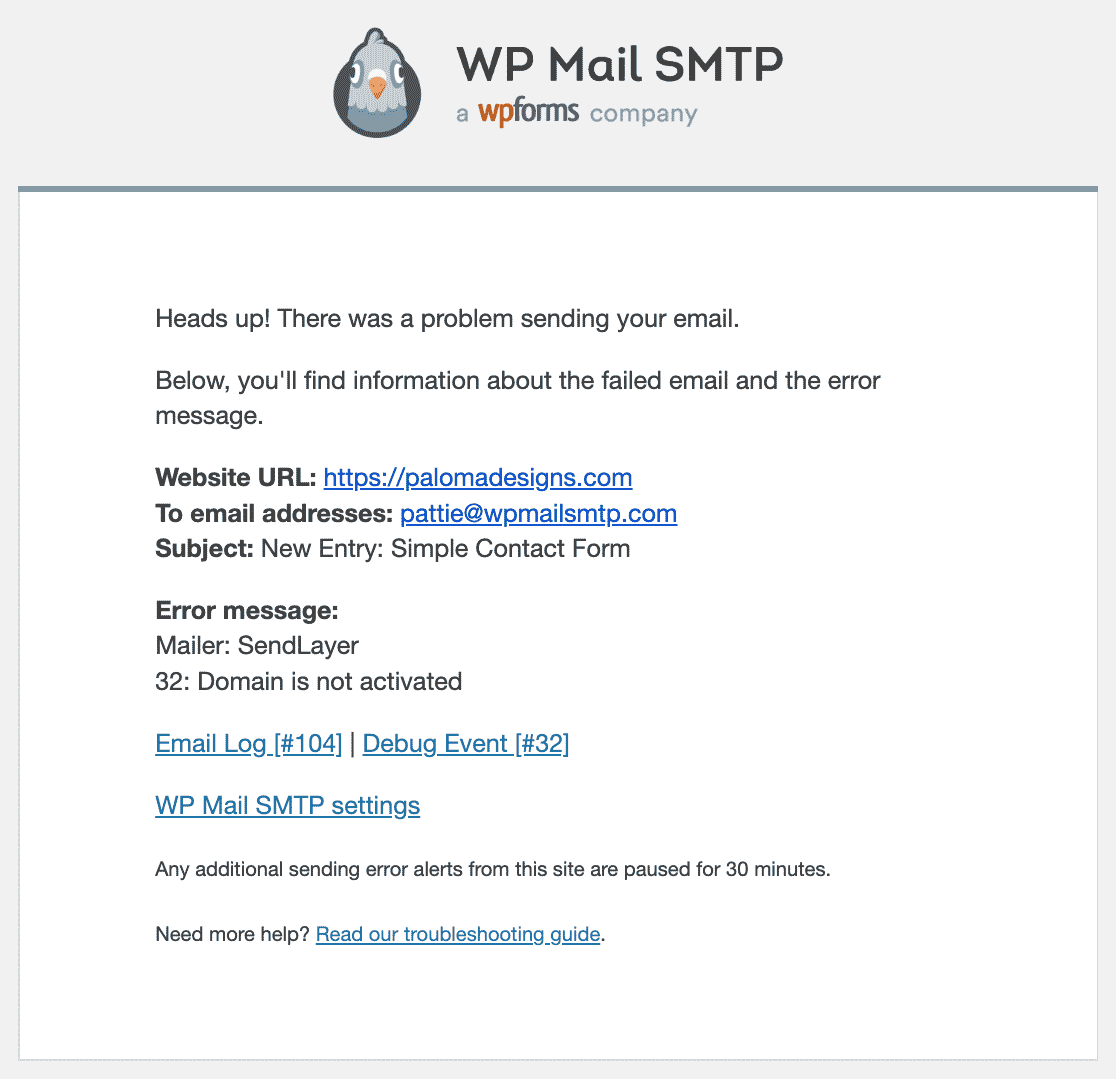
The other feature you can enable here is Instant Email Alerts. These are helpful if your site fails to send an email. What that happens, you’ll get a notification with details to help you fix the problem.
If you enabled email logging, then on the next screen you’ll have the option to configure some additional settings.
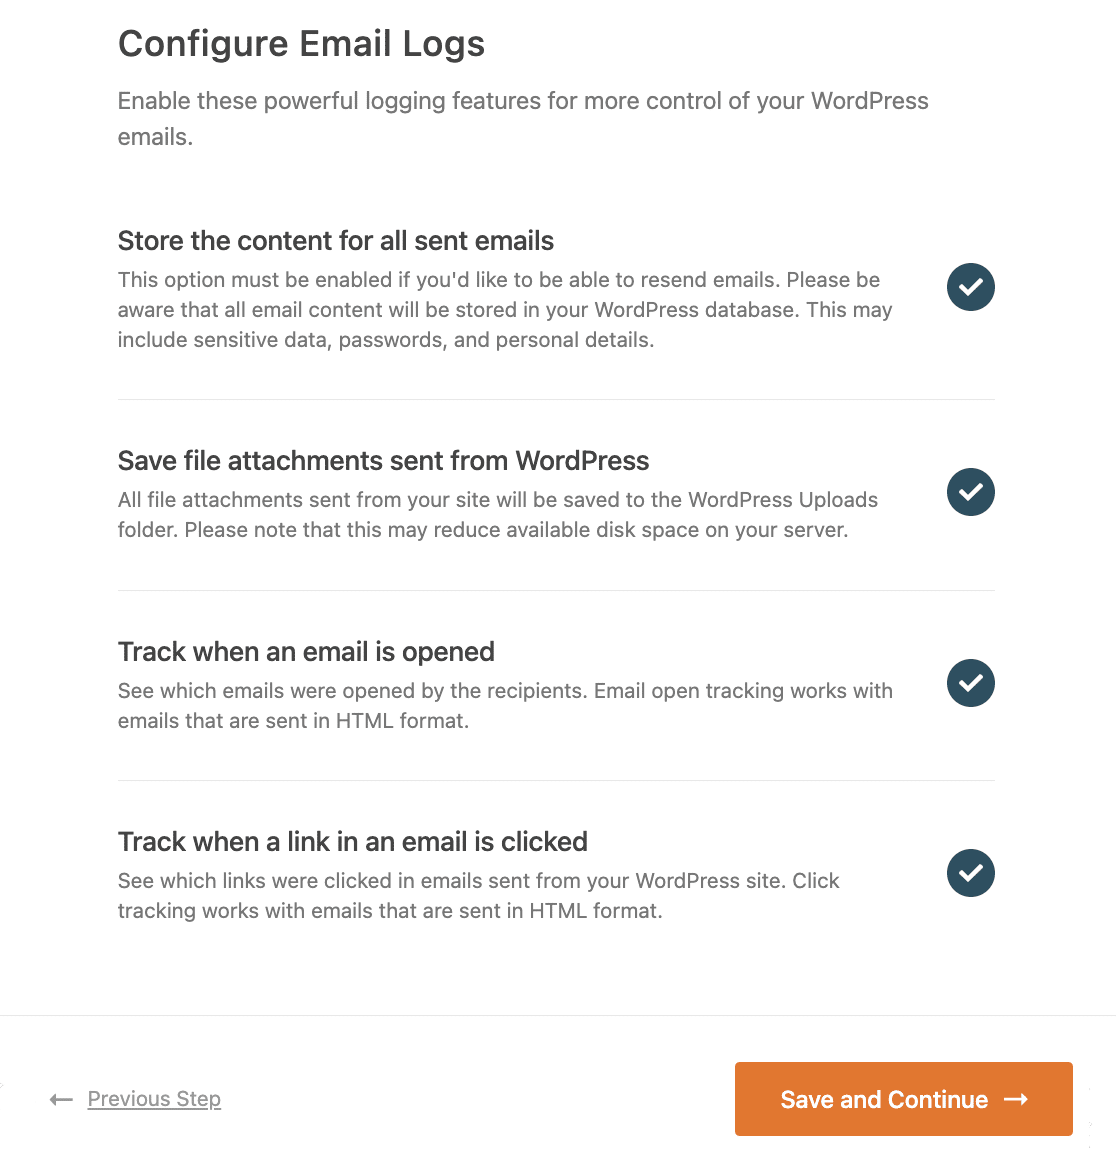
You can choose to save email content and attachments and to track user activit
Check out this guide on how to export and search email logs in WordPress.
For the final step, copy the license key from the WP Mail SMTP account and paste it here to enable future automatic updates.

That’s it. You have fixed the issue of HappyForms not sending email from your website. You can send a test email from WP Mail SMTP to confirm everything’s working.
Fix Your HappyForms Emails Now
Next, Create Contact Forms With WPForms
The free form builder plugin by HappyForms is basic and comes with limited options.
WPForms, on the other hand, comes with built-in advanced features such as spam protection, integration with popular email list builders, form templates, and many more. You can read this WPForms review to see a detailed breakdown of how it compares to HappyForms.
If this article helped you out, please follow us on Facebook and Twitter for more WordPress tips and tutorials.

