AI Summary
Setting up automated email workflows in WordPress has completely transformed my communication management. Instead of manually checking on specific emails, I now have workflows do the heavy lifting for me.
With tools like Uncanny Automator and WP Mail SMTP, creating these workflows is easier than ever. These plugins work together to help you automate actions based on specific triggers.
In this post, I’ll walk you through the steps to create your email workflow so you can start handling tasks automatically and stay on top of your notifications. Let’s get started!
Configure Your Website for Email Deliverability
Before setting up any automated email workflows in WordPress, the first step is to ensure your site is properly configured to send emails reliably.
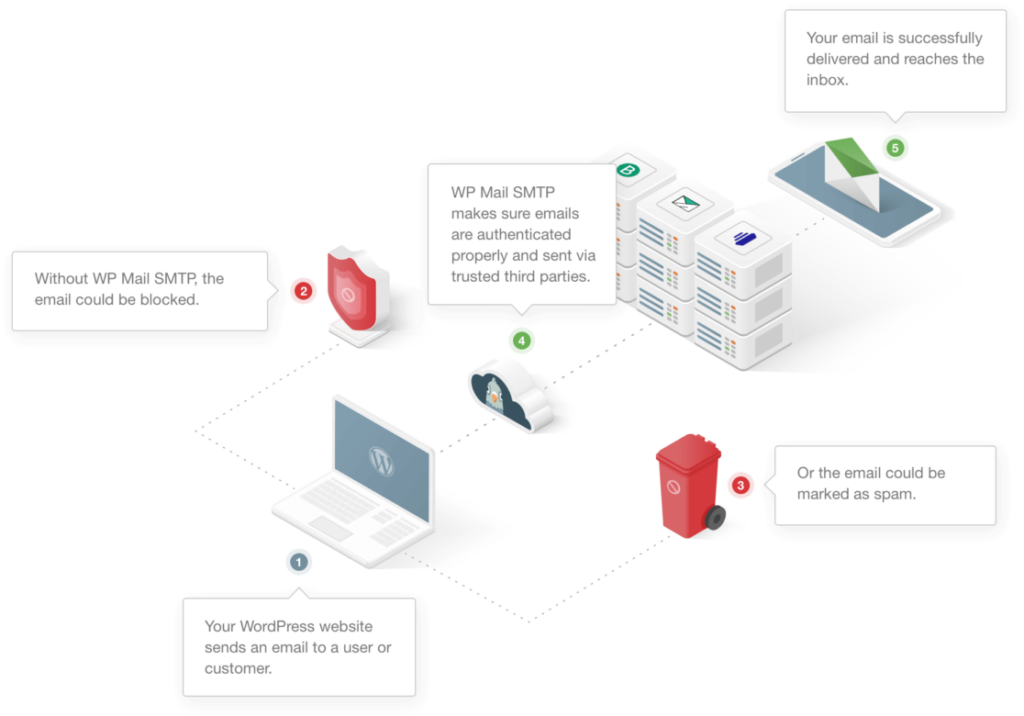
While WordPress has a built-in ability to send emails, it depends on the PHP mail function. Many hosting providers don’t fully support PHP mail, and even if your emails go out, they might end up in spam folders.
To solve this, I always recommend using the WP Mail SMTP plugin. It bridges the gap by routing emails through trusted third-party SMTP services like SendLayer, Gmail, or SMTP.com.
These services authenticate your emails by routing them through an SMTP server, giving them a much better chance of reaching the recipient’s inbox instead of being flagged as spam.
If you’re new to WP Mail SMTP, you’ll find it simple to set up. There’s a step-by-step guide that walks you through everything, from installation to configuring your SMTP mailer of choice.
Getting this part right ensures the automated workflow you create in the next steps will run smoothly without you worrying whether the emails are being delivered or not.
How to Set Up an Automated Email Workflow in WordPress
WP Mail SMTP already offers powerful features to help you stay on top of email activity. For example, you can set up alerts for failed emails and get notified instantly on Slack, Discord, Microsoft Teams, SMS, or even through Webhooks.
But what if you need more customization? That’s where the integration between WP Mail SMTP and Uncanny Automator really shines. With this combination, you can build detailed workflows that go beyond basic alerts.
For example, you could create triggers for specific email events, like notifying your team whenever an email with the word “canceled” in the subject line is opened. Let’s set this up for you!
Step 1: Install the Uncanny Automator Plugin
Uncanny Automator is a handy no-code automation tool that connects your WordPress site to more than 185 apps and services for managing email marketing, eCommerce, social media, or even CRM tasks.
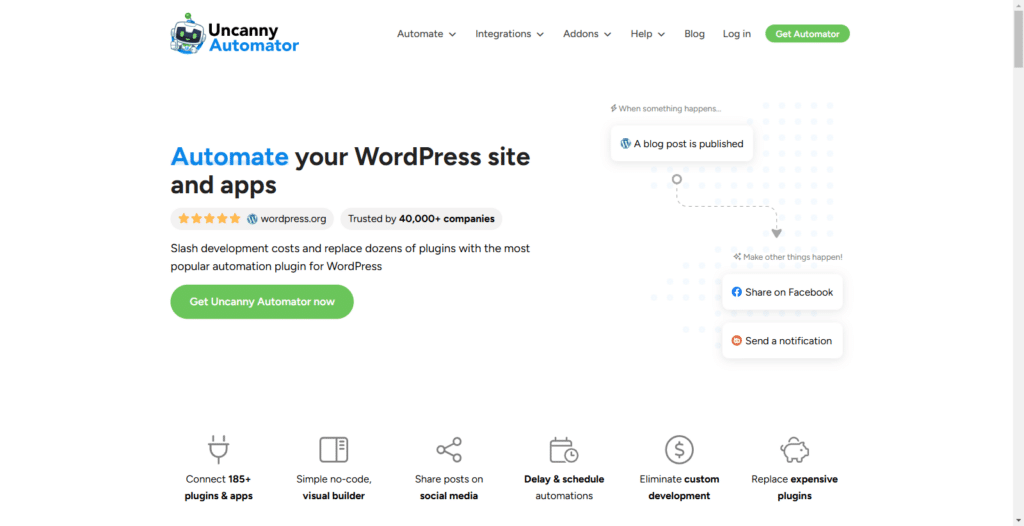
One of the features I find most helpful is the ability to send automated emails triggered by real-time actions on your WordPress site, giving you more control over how and when messages are sent.
To get started, go to your WordPress dashboard and click on Plugins » Add New. In the search bar, type “Uncanny Automator” and press Enter.
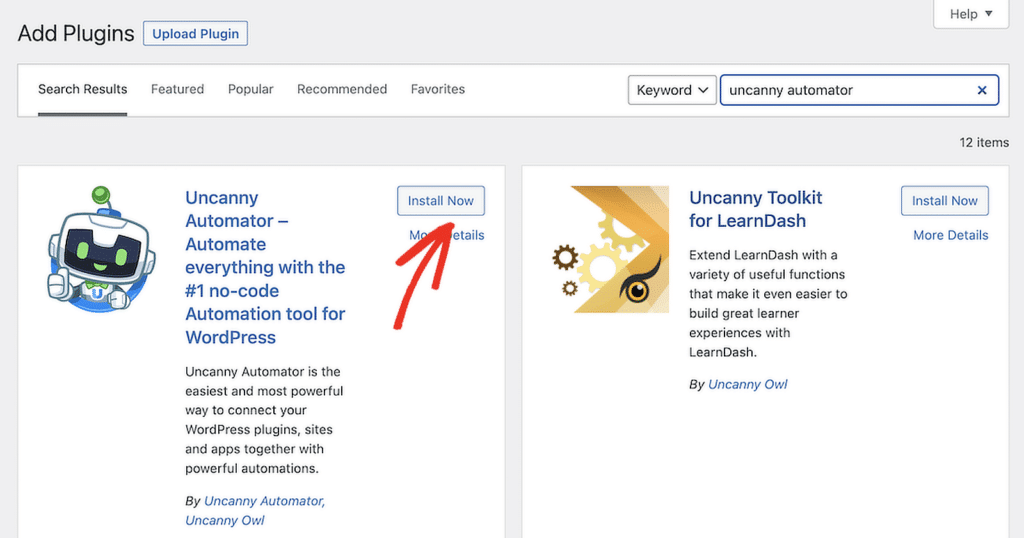
Once you see the plugin, click the Install Now button, and then Activate it. If you run into any issues, you can always refer to a detailed guide on how to install WordPress plugins.
Step 2: Sign Up for an Uncanny Automator Account
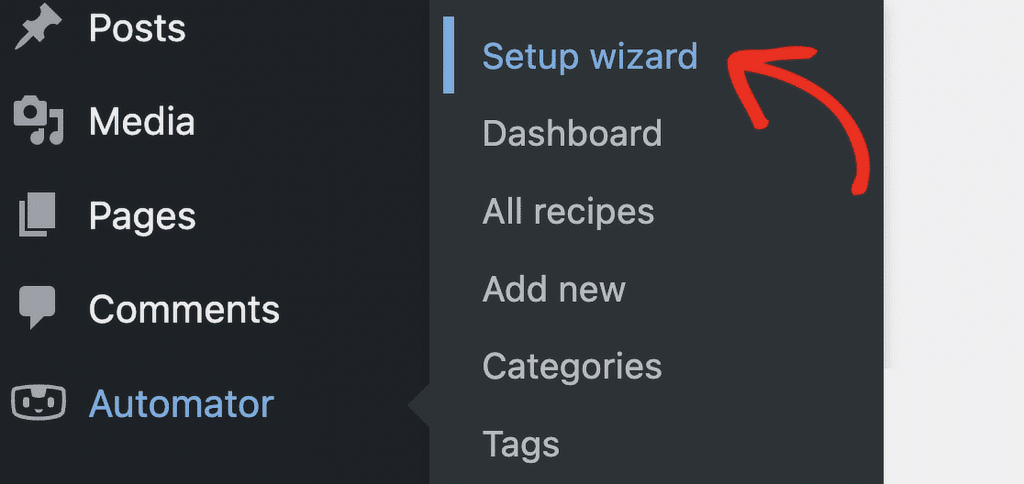
After activating the plugin, head over to the Automator » Setup Wizard in your WordPress dashboard to get started. The setup wizard makes the process simple and guides you step by step through the initial configuration.
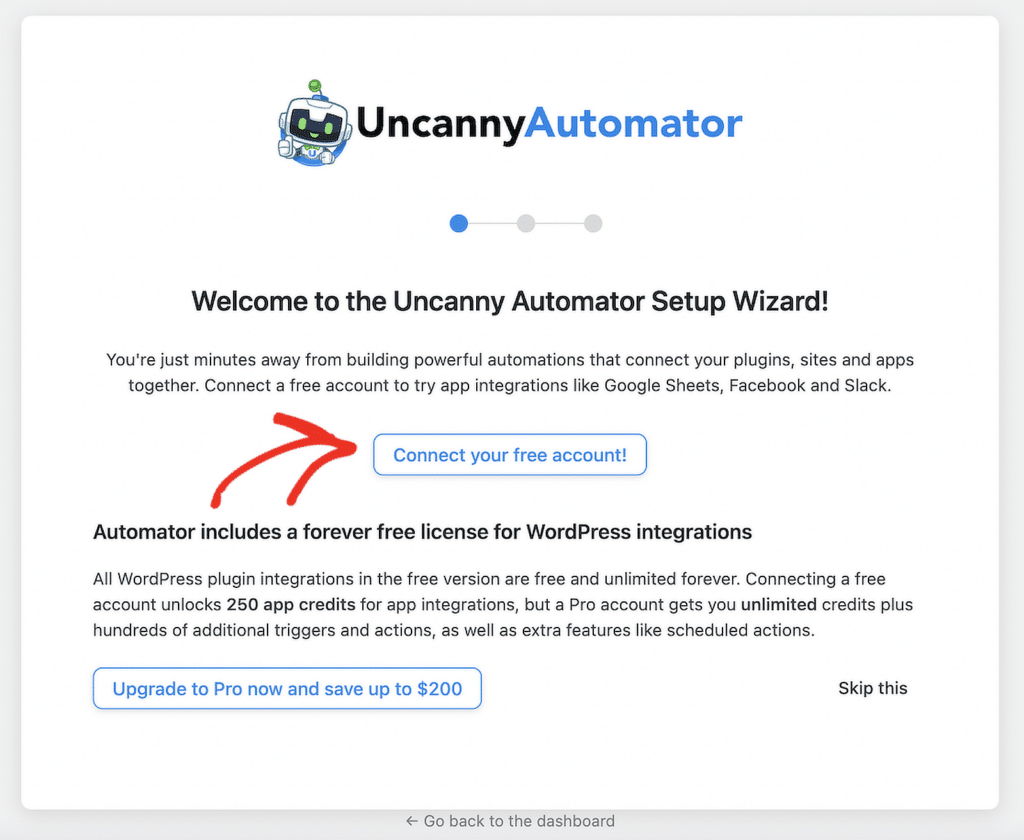
When the wizard opens, you’ll see an option to connect your free account. Clicking on it will redirect you to the Uncanny Automator website.
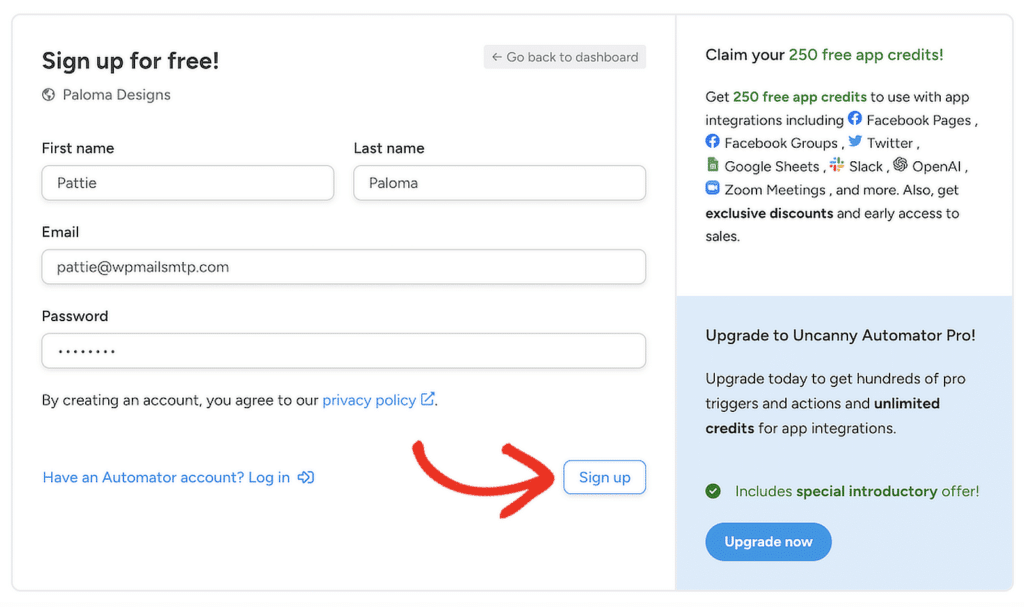
Here. you’ll need to sign up for an account. Just fill out the required details and hit the Sign Up button to complete the process.
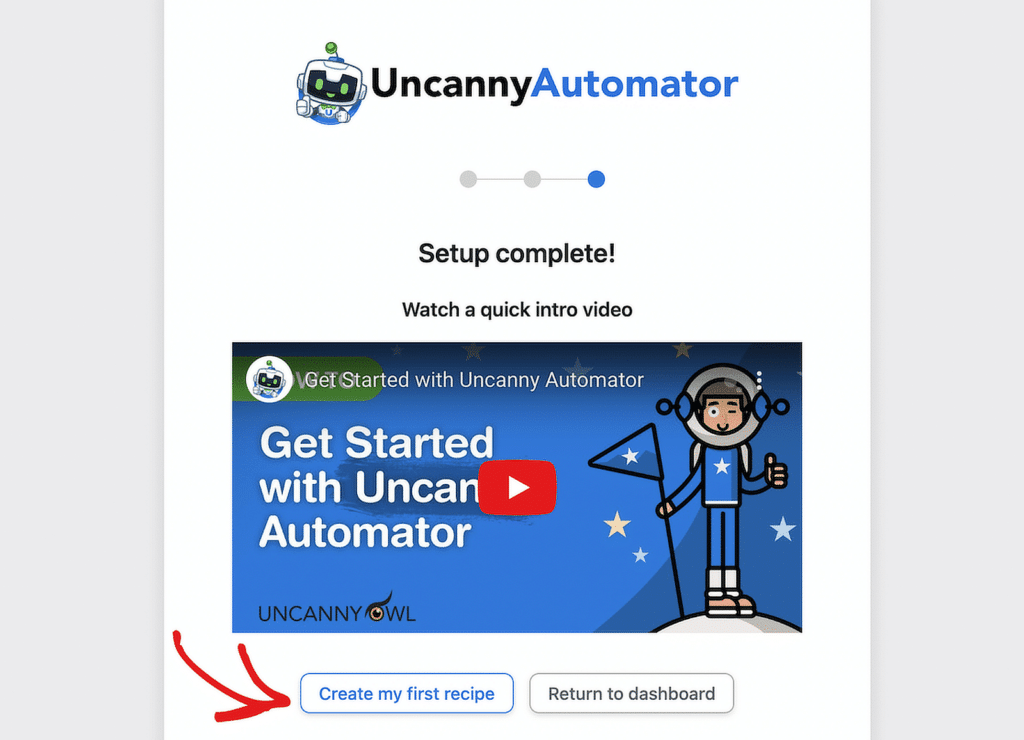
Once your account is set up, you’ll be given the option to return to your WordPress dashboard. From there, you can start creating your first automation recipe right away.
Step 3: Create an Uncanny Automator Recipe
“Recipes” in Uncanny Automator are essentially templates for creating automated workflows. You can design these workflows for either logged-in users or all users. For this guide, we’ll select the Everyone option.
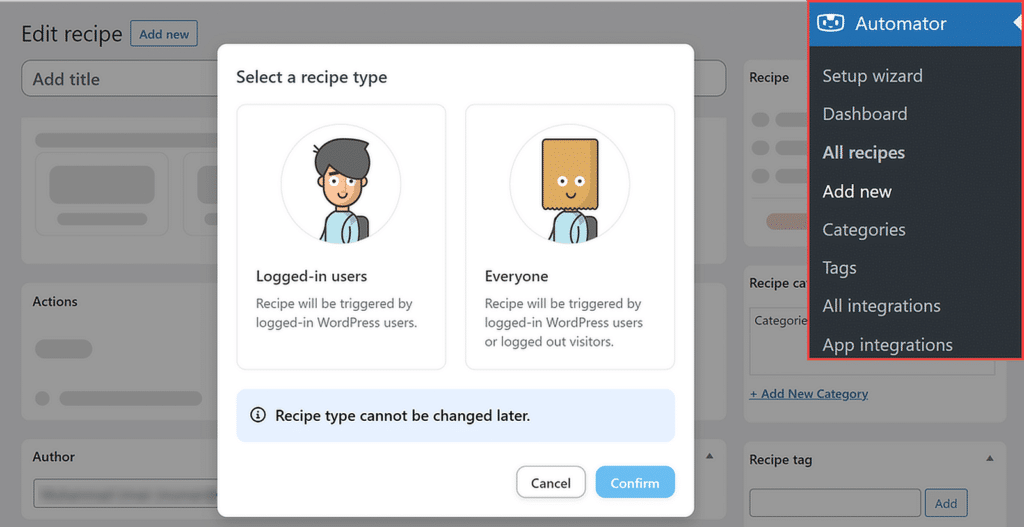
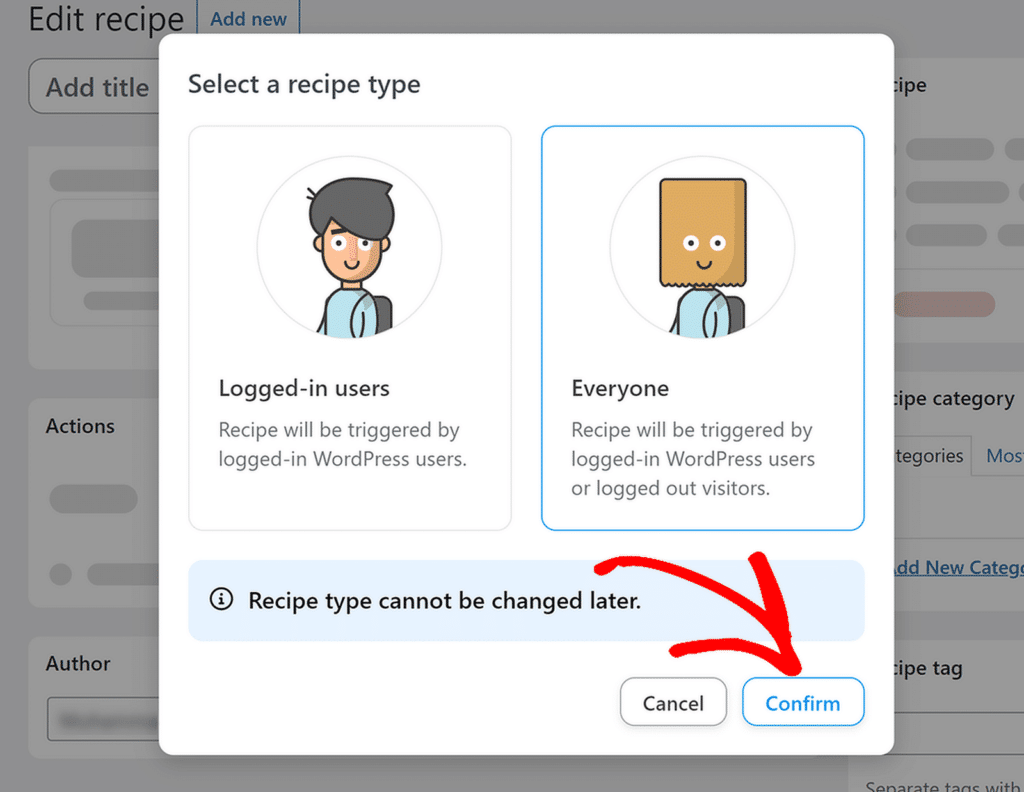
Once you hit the Confirm button, you’ll land on a page where you can customize your recipe. The first step is to name your recipe. Just type it into the field at the top of the page to keep things organized.
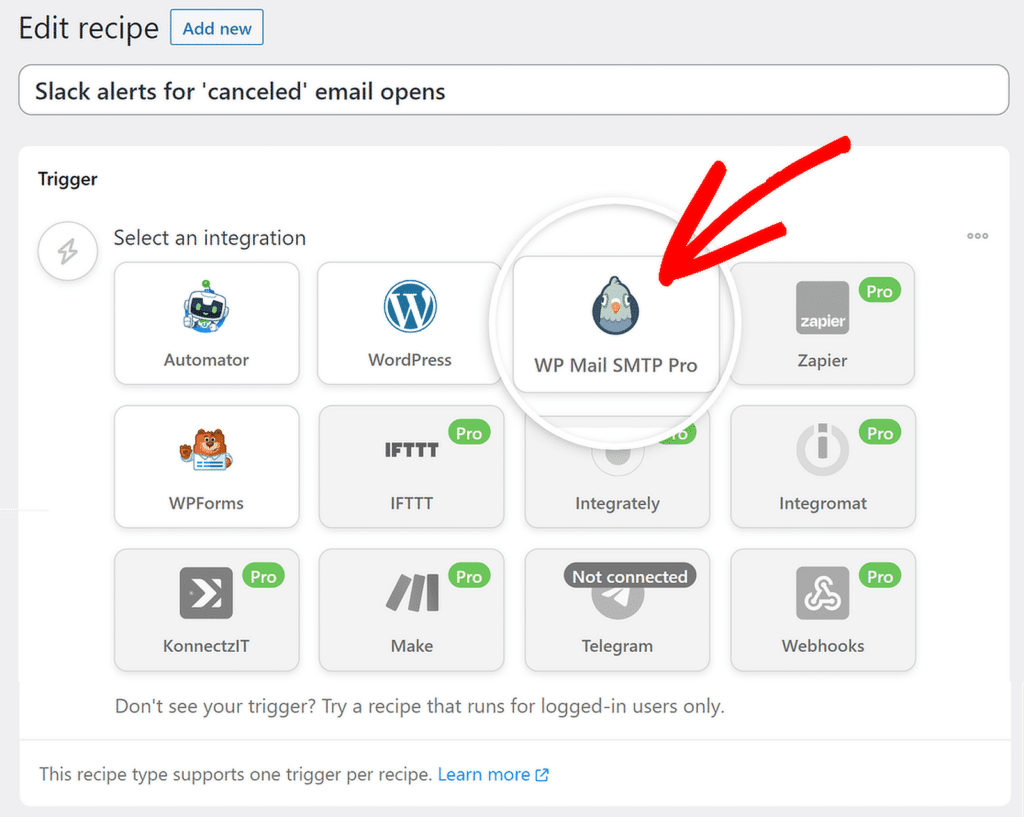
The next step is to set up a trigger, which is a critical part of any workflow. We’ll choose WP Mail SMTP Pro as the trigger plugin for this example. This allows us to automate an action whenever specific WordPress emails are opened.
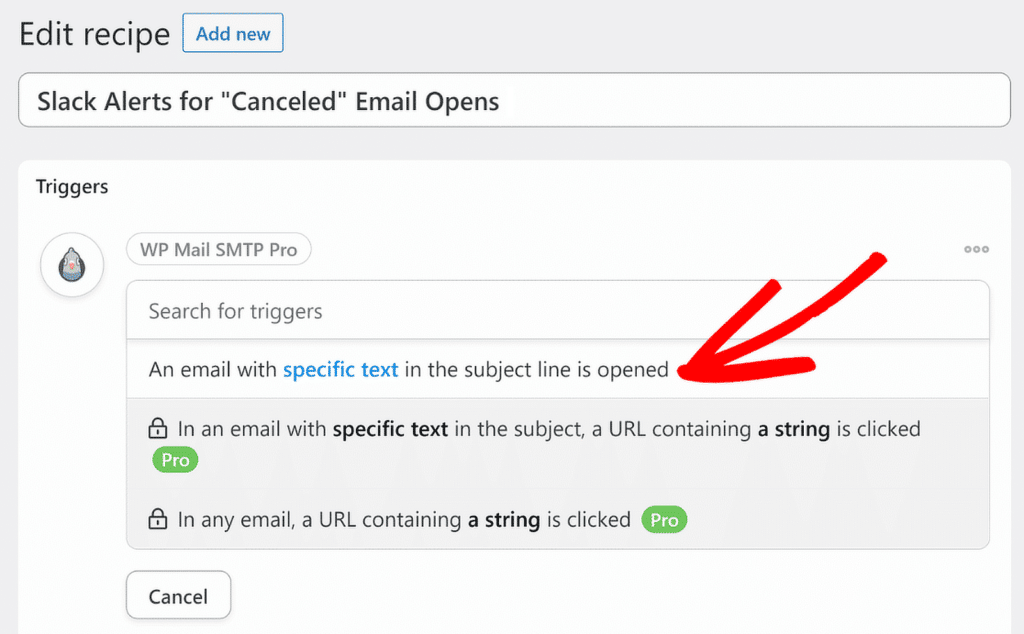
After selecting WP Mail SMTP Pro, additional options will appear, allowing you to define the type of trigger you need. We’ll use the An email with specific text in the subject line is opened trigger.
Once you’ve chosen this trigger, a new field called Text to match will appear. Here, you’ll enter the specific subject line or keyword you want to track.
For example, if you type “canceled,” the workflow will send a Slack notification whenever someone opens an email with this word in the subject line.
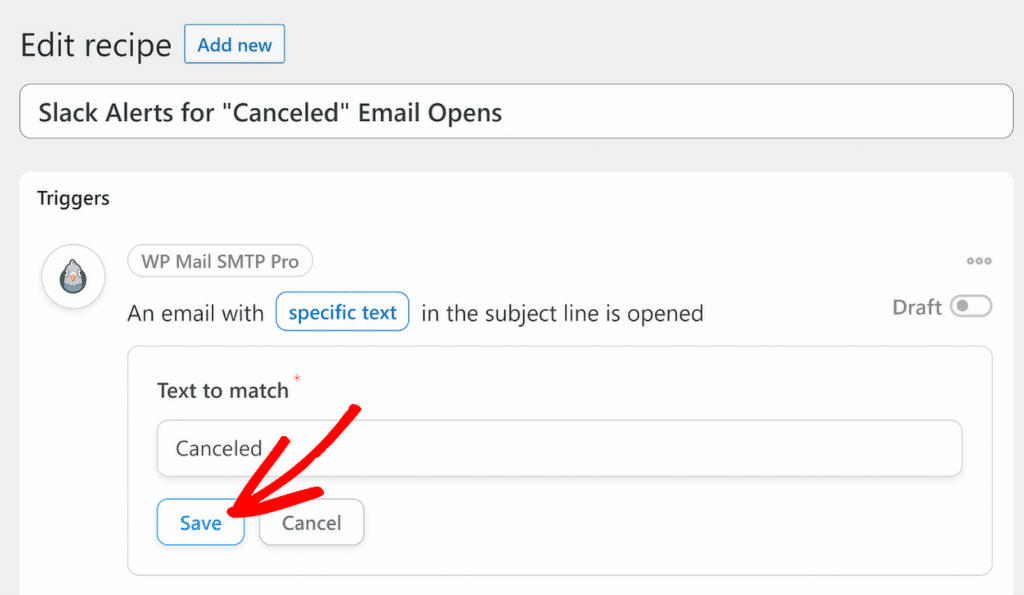
Once you’ve filled out all the details, make sure to save your trigger. This step ensures that your automation is ready to act whenever the conditions are met.
Step 4: Set Up the Action with Uncanny Automator
In the Actions section, start by clicking Add action to begin setting up what happens when your trigger is activated.
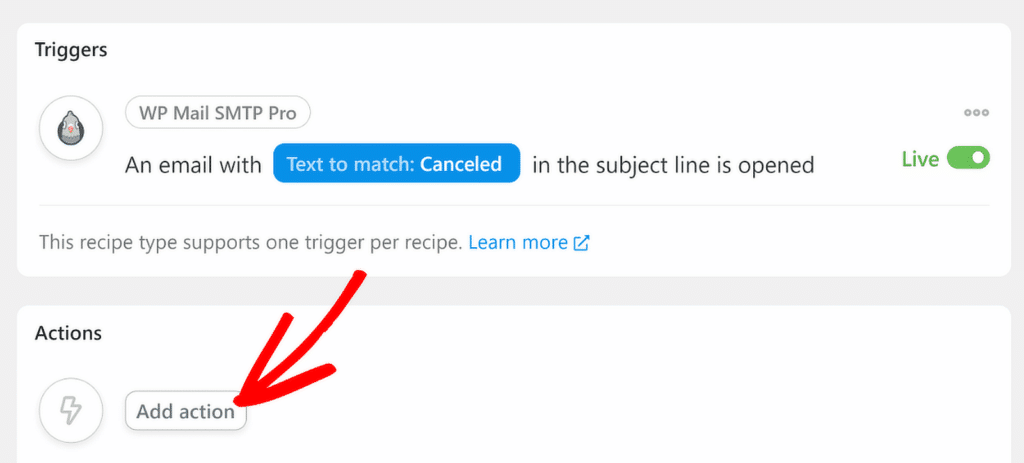
Next, you’ll see a list of apps, services, and plugins that Uncanny Automator can use to connect WP Mail SMTP. For this example, I’ll be choosing Slack as the service.
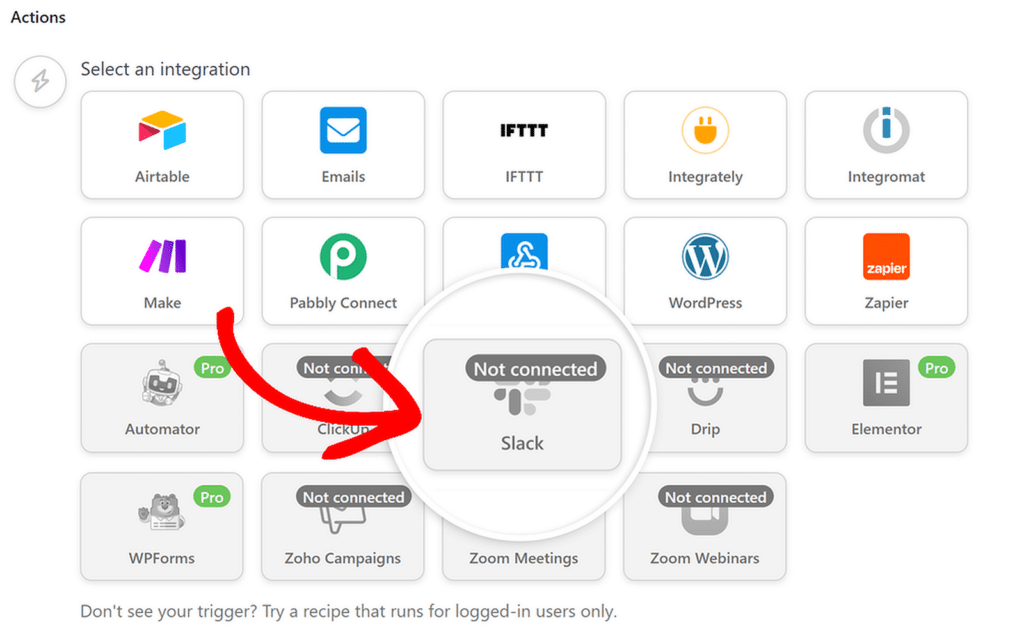
When you select Slack, a popup will prompt you to sign up for a free Uncanny Automator account. Click Sign up and follow the instructions to create your account.
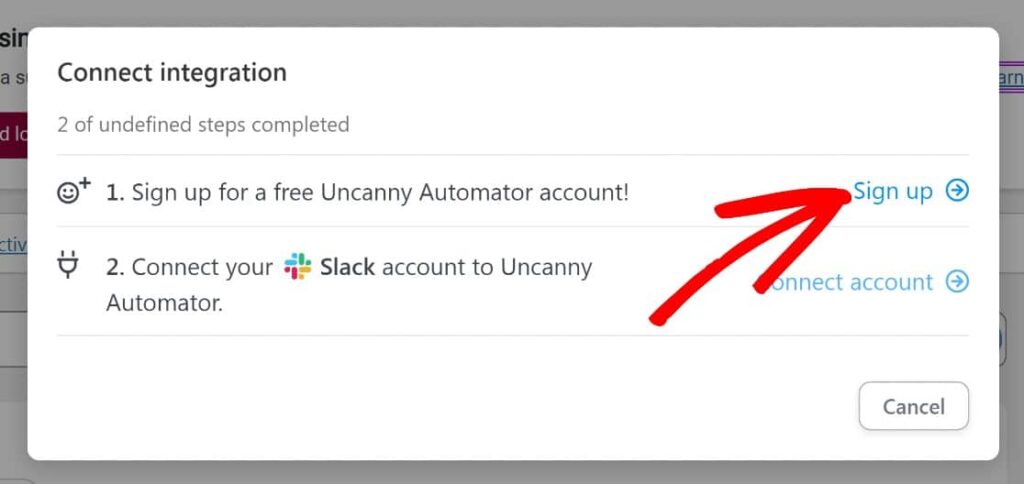
After completing the sign up, go back to your WordPress dashboard and click the Connect account button.
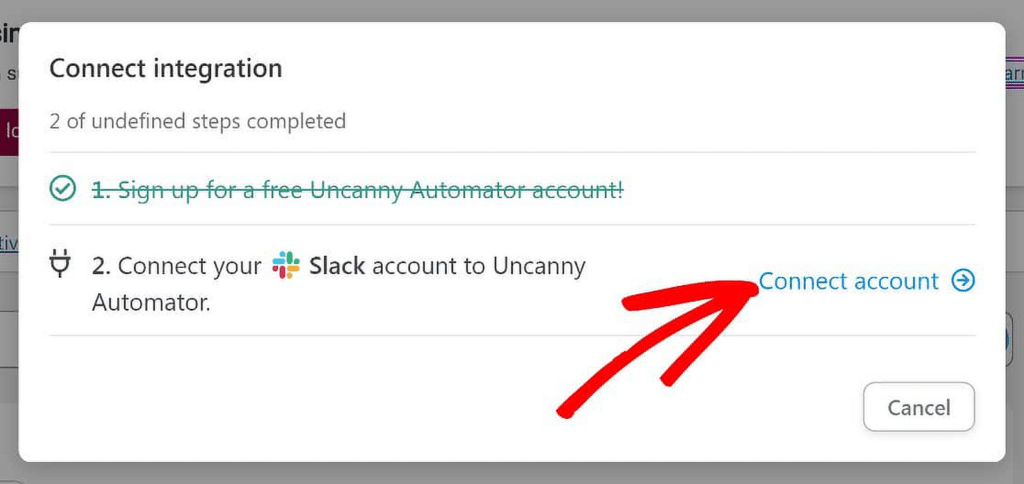
This will open another popup, where you’ll click the Connect Slack workspace button to proceed.
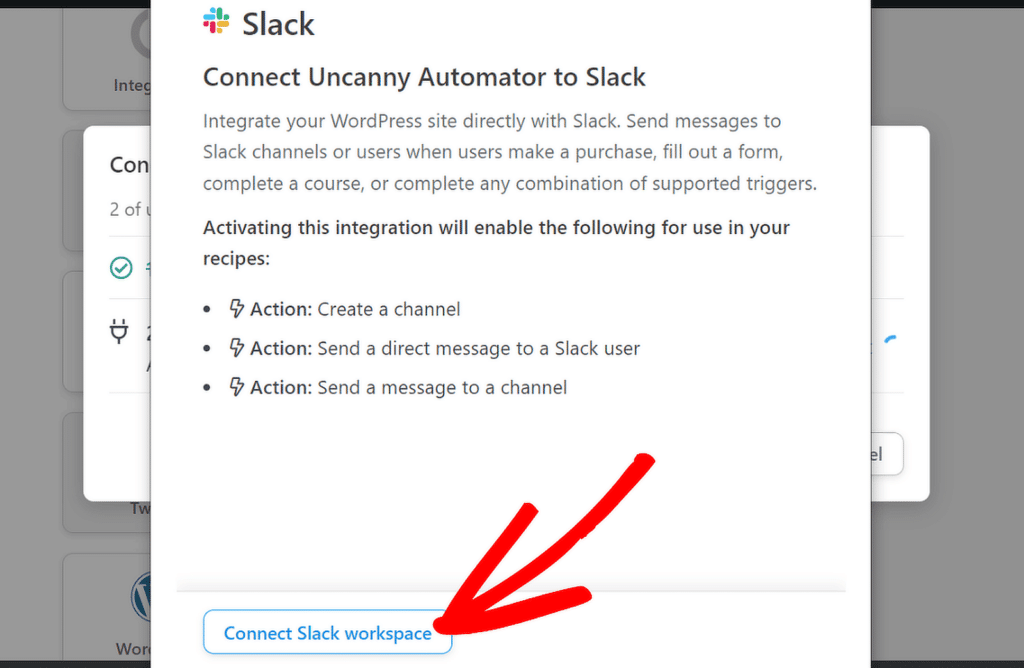
Uncanny Automator will ask permission to access your Slack workspace at this stage. Click Allow to grant access.
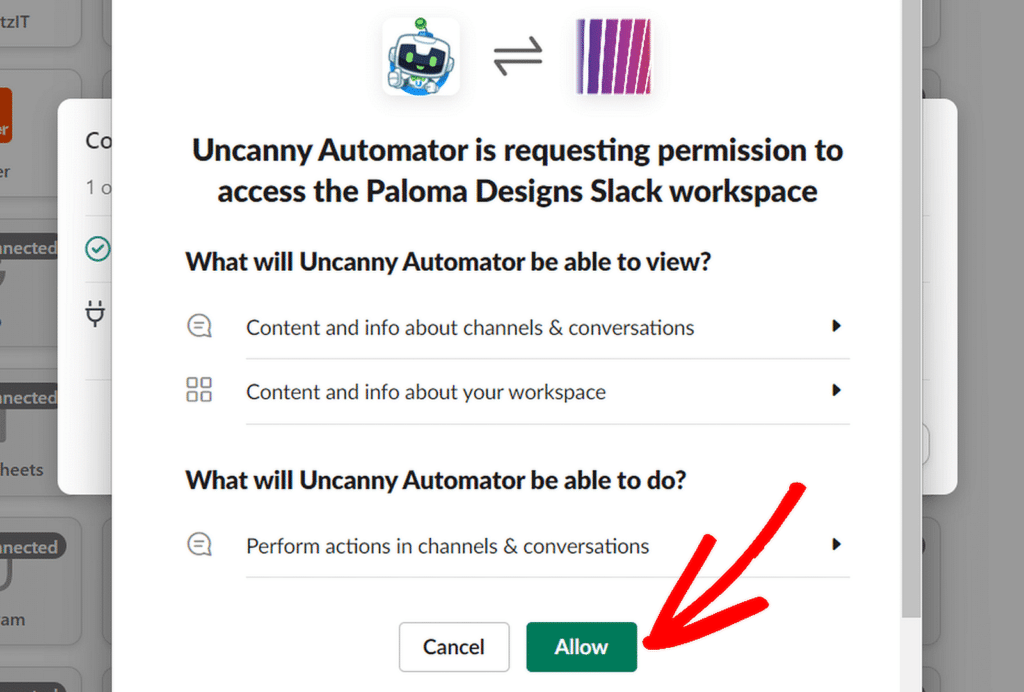
Once that’s done, a confirmation will appear, showing a preview of the Uncanny Automator bot in your Slack workspace.
If you like, you can customize the bot’s name and icon or stick with the default settings and then simply click on the Save settings.
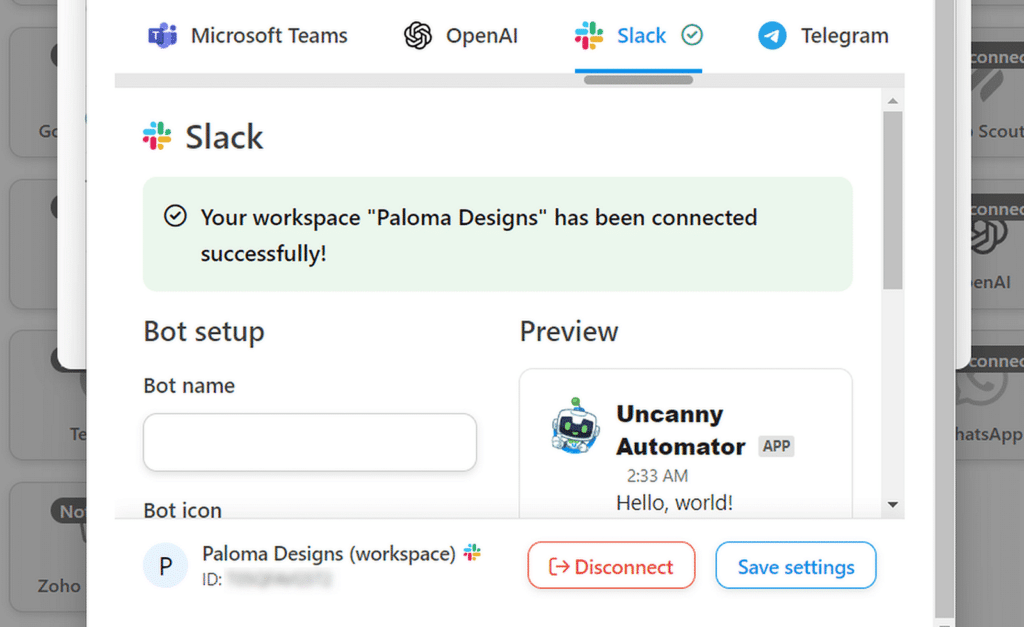
Close the popup, and your Slack connection is ready. Now you can set up the specific action Slack should take when the trigger is activated.
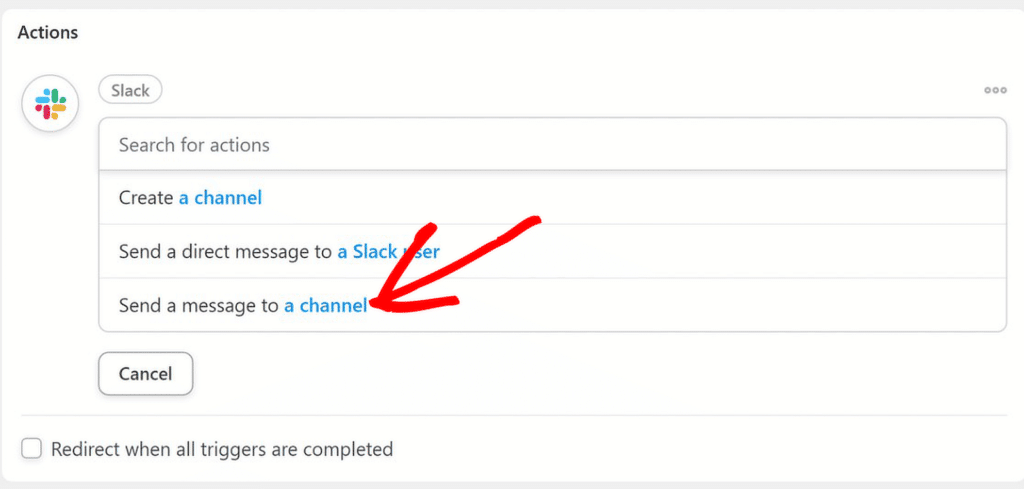
For this example, I’ll select the Send a message to a channel action. This option ensures that a Slack notification is sent whenever a WordPress email matching the specific subject line text is opened.
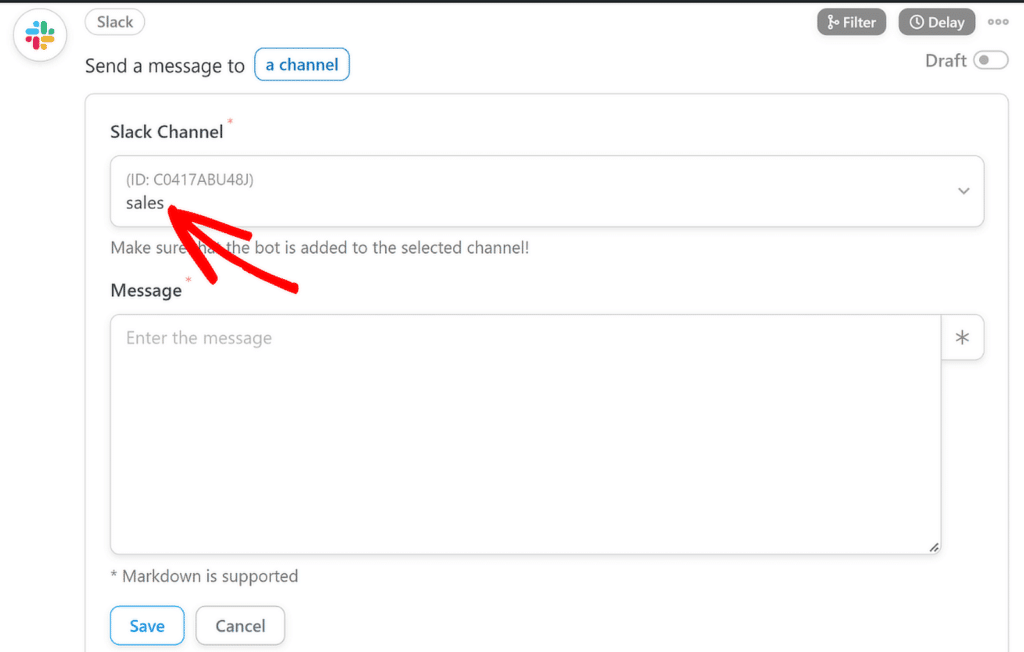
Next, use the Slack Channel dropdown menu to select the Slack channel where you want to receive these alerts. In the Message field, type the notification text you’d like Slack to send.
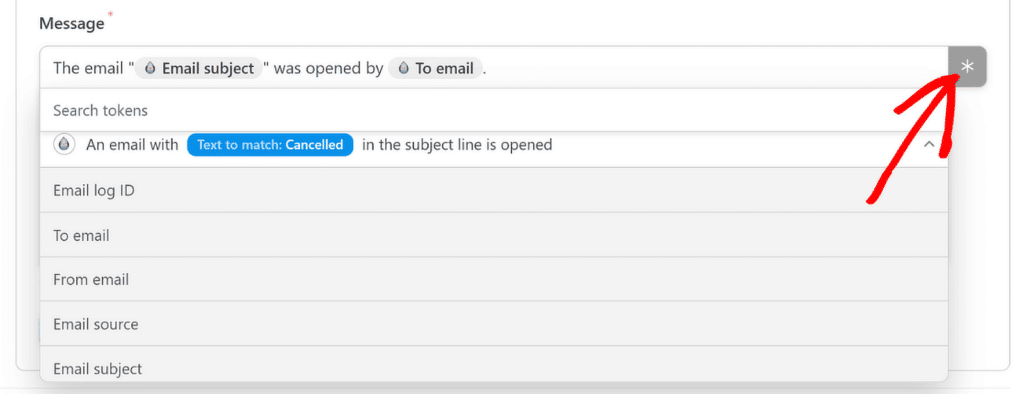
To add more context to the notifications, you can pull details from the email itself. Click the Asterisk (*) button to access dynamic tokens.
For this example, I’ll use Email subject and To email tokens, so each Slack alert will include the email’s subject line and the recipient’s email address.
In the following step, we’ll add the Uncanny Automator bot to the Slack channel where we wish to receive notifications and take the recipe live.
Step 5: Take Your Uncanny Automator Recipe Live
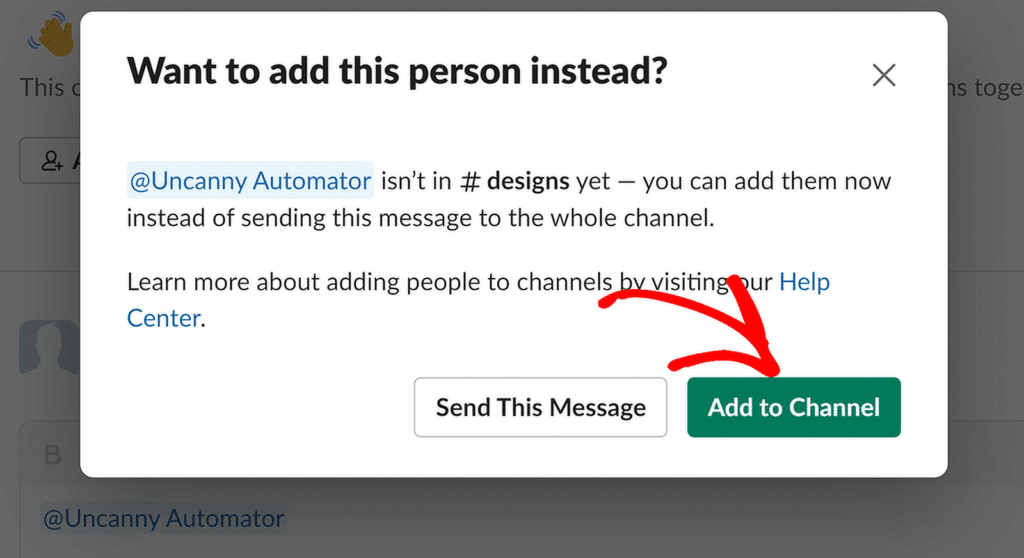
To add the Uncanny Automator bot to your Slack channel, simply go to the desired channel and type ‘@uncannyautomator’ in the message field.
A popup will appear. From here, select Uncanny Automator from the list, and press enter to add it to the channel.
Next, head to the Recipe section, and toggle the button to the Live position. This ensures the recipe is fully functional.

And that’s all it takes! You’ve now successfully set up Uncanny Automator with WP Mail SMTP Pro, creating an automated email workflow that integrates seamlessly with Slack.
Check out this email integrations and recipes page to get an idea of the possibilities for more email integrations you can create with Uncanny Automator.
FAQs on How to Create an Automated Email Workflow in WordPress
Creating an automated email workflow in WordPress is a popular topic of interest among our readers. Here are answers to some common queries about it:
How to set up automatic emails in WordPress?
You can set up automatic emails in WordPress using different plugins like WP Mail SMTP and WPForms. WP Mail SMTP ensures your emails are delivered reliably by connecting your WordPress site to a trusted email service provider.
WPForms is an excellent choice for automating emails based on actions like form submissions. When a visitor submits a form on your site, WPForms can automatically send email notifications to you and confirmation emails to the user.
How does Uncanny Automator work with WP Mail SMTP?
Uncanny Automator connects WP Mail SMTP to other apps and plugins, allowing you to automate email workflows.
For example, you can set triggers based on specific email subject lines or user actions and send notifications through email or integrated platforms like Slack.
This setup makes managing automated email workflows seamless and customizable.
Is it possible to send email alerts for specific actions in WordPress?
Yes, you can send email alerts for specific actions in WordPress by using WP Mail SMTP and Uncanny Automator.
Set triggers like “a user submits a form” or “an email is opened with specific text in the subject line,” and the system will automatically send an alert to your chosen email address or app.
Can I send email notifications to Slack or other apps from WordPress?
With WP Mail SMTP, you can receive various alerts for emails that fail to send from your site.
To begin setting up email alerts from the WordPress dashboard, go to WP Mail SMTP » Settings and click on the Alerts tab.
Next, Learn How to Set Up More Automated Emails in WordPress
Are you looking for more ideas on setting up your WordPress site to send email notifications automatically? This guide provides comprehensive tutorials for several email automation tools, demonstrating various ways of sending automated emails in WordPress for different purposes.
Ready to fix your emails? Get started today with the best WordPress SMTP plugin. If you don’t have the time to fix your emails, you can get full White Glove Setup assistance as an extra purchase, and there’s a 14-day money-back guarantee for all paid plans.
If this article helped you out, please follow us on Facebook and Twitter for more WordPress tips and tutorials.

