AI Summary
Is weForms not sending email notifications when forms are submitted? This means you’re missing customer inquiries, support requests, and potential sales without even knowing it.
The problem almost never comes from weForms itself. WordPress uses an unreliable default email system that hosting companies often block or email providers mark as spam.
When weForms tries to send a notification, WordPress hands it off to a broken email system, and the message simply disappears. This guide provides the permanent fix.
How Do I Fix weForms Not Sending Email?
weForms relies entirely on WordPress to send its email notifications. When you submit a form, weForms creates the notification email and hands it to WordPress’s wp_mail() function.
WordPress sends emails without proper authentication, which means services like Gmail and Outlook can’t verify that the message is legitimate.
These emails lack the digital signatures (SPF, DKIM, DMARC) that modern email providers require, so they’re either blocked outright or sent directly to the spam folder.
You can easily fix this issue by using WP Mail SMTP. It replaces the default method of sending email in WordPress. Instead, WP Mail SMTP will send emails through a 3rd party mailing service.
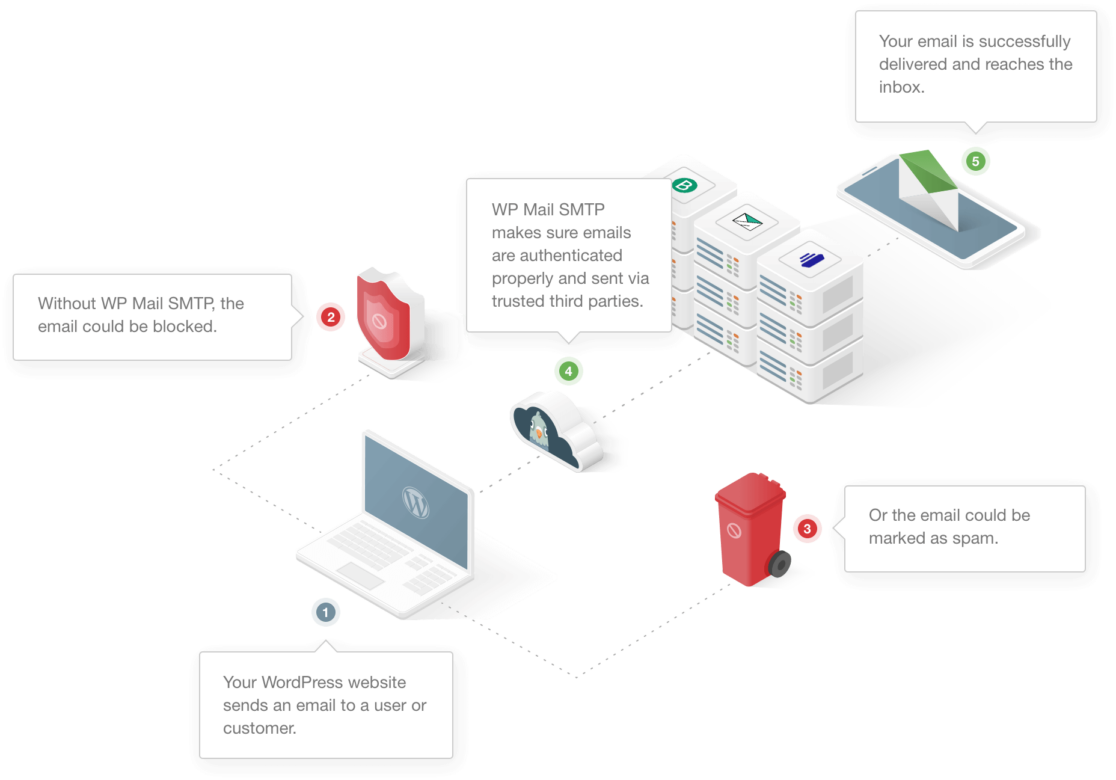
Some web hosting companies disable SMTP to make sure no spam is sent through their servers. So, even if you use a basic SMTP plugin, you might not be able to use your host’s credentials.
(That’s why so many people have issues with GoDaddy not sending email.) So WP Mail SMTP gets around this by giving you a choice of alternative mailers.
How To Fix weForms Not Sending Email Issue
We’ll first check your weForms notification settings to rule out configuration errors, then install WP Mail SMTP to replace WordPress’s failed email system with a professional delivery service.
1. Check Admin Notification Settings
Before fixing WordPress email delivery, you need to confirm that weForms is actually configured to send notifications.
A misconfigured notification setting is the simplest cause of missing emails and takes only a minute to check.
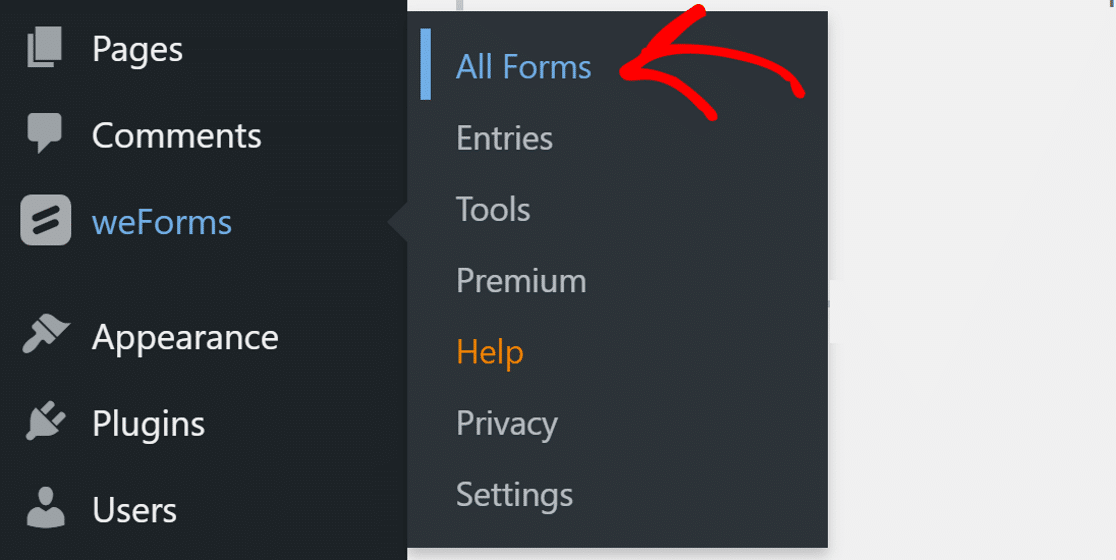
To check the settings, head over to the WordPress dashboard and click on weForms » All Forms.
Find the form that isn’t sending emails and click on it to open the form editor. Then, switch to the Notifications tab at the top.

By default, your form will have one admin notification. If you don’t see it or want to add an additional notification, you can click the Add Notification button.
When you have a notification, make sure its toggle is set to ON and shows green color. Now, click the gear icon next to the notification to open its settings.

The new page will let you set the email notification. In the Type dropdown, choose the Email Notification and enter an email address in the To field.
This is the email address on which you’ll receive notifications from this contact form. Be sure to use one with your domain extension. For example, for our website, we use [email protected].
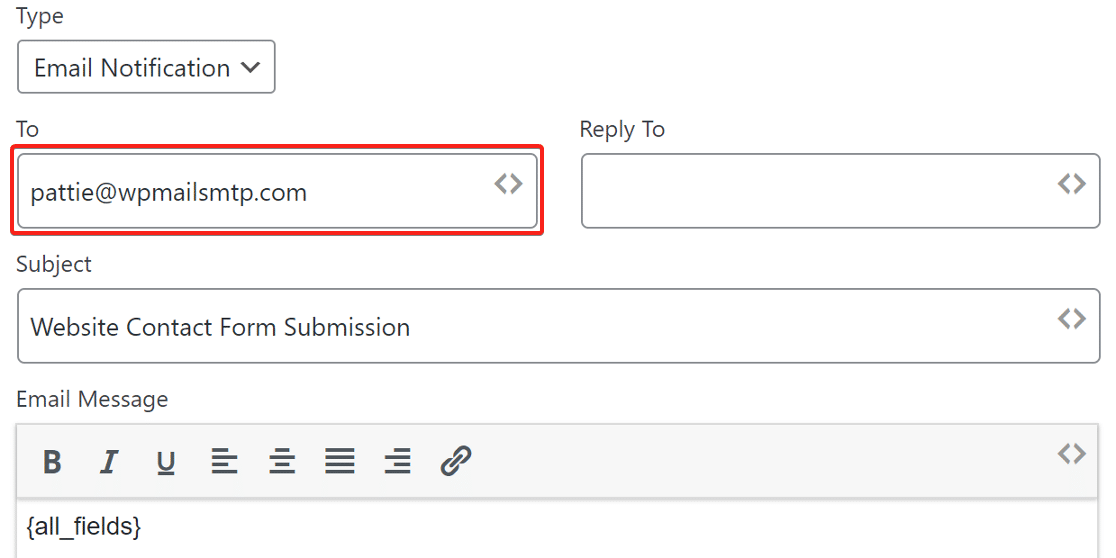
Using your domain email improves deliverability and ensures proper email authentication in later steps. Click on the Done button at the bottom to save the settings.
2. Disable weForms SMTP
If you’re using weForms Pro, the plugin includes its own built-in SMTP settings. While this might seem convenient, using a contact form plugin’s SMTP feature creates more problems than it solves.
weForms SMTP can conflict with other plugins that also send emails, and it lacks the advanced features that a dedicated SMTP plugin provides.
Meanwhile, WP Mail SMTP is purpose-built for email delivery and includes powerful diagnostic tools like domain checkers, email logging, and delivery monitoring.
To avoid conflicts and ensure reliable email delivery across your entire site, you need to disable weForms’ SMTP and let WP Mail SMTP handle all email sending instead.
Go to weForms » Settings in your WordPress dashboard. Under the General Settings section, find the Send Email Via dropdown and set it to WordPress.

This tells weForms to hand off email sending to WordPress’s standard email system, which WP Mail SMTP will then intercept and handle properly in the next steps.
3. Install the WP Mail SMTP Plugin
Now you’ll install the plugin that will permanently fix your weForms email delivery. WP Mail SMTP is the most reliable SMTP plugin for WordPress, trusted by over 3 million websites.
Beyond just fixing email delivery, it includes advanced email logging that lets you see exactly what happened to every notification your site sends.
To get started, log in to your WP Mail SMTP account and go to the Downloads tab. Click the button to download the latest version of the plugin as a .zip file.
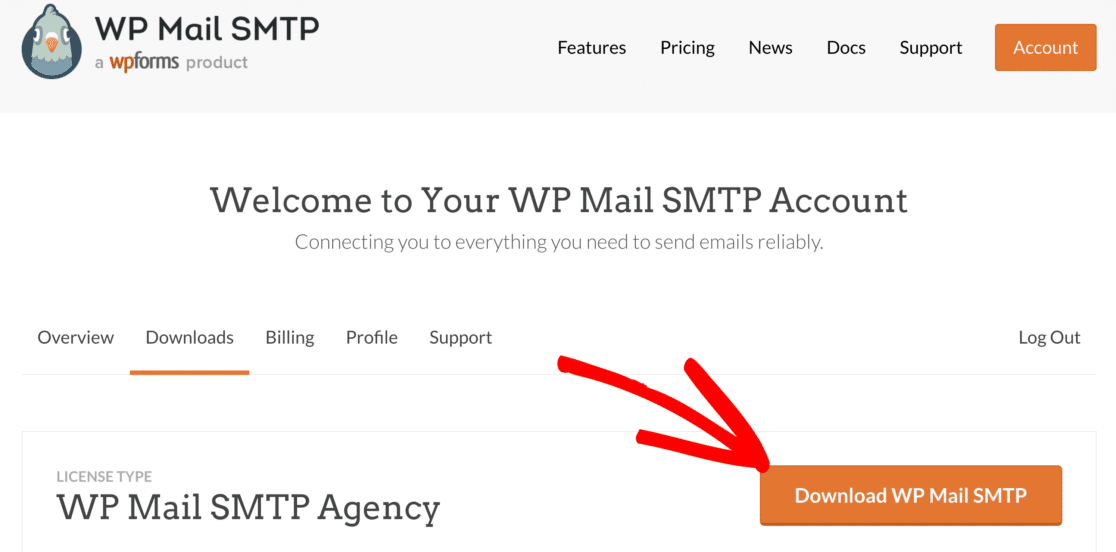
Next, from your WordPress dashboard, navigate to Plugins » Add New and upload the .zip file. If you need detailed instructions for this part, you can refer to our guide on installing a WordPress plugin.

After installing, don’t forget to activate it. As soon as you do that, the Setup Wizard will start in your browser. The wizard will help you configure the mailer service on your website.
Need help?
If you are facing any difficulty setting up the mailer service, our team of experts can help you. White Glove Setup is included with the Elite license.
4. Set Up an Email Service
This is the most critical step. You’ll connect your WordPress site to a dedicated email service that adds the authentication and reliability your weForms notifications need.
In the Setup Wizard, click Let’s Get Started. On the next screen, you’ll see a list of supported mailers. These are professional email services designed specifically for sending automated emails like form notifications.
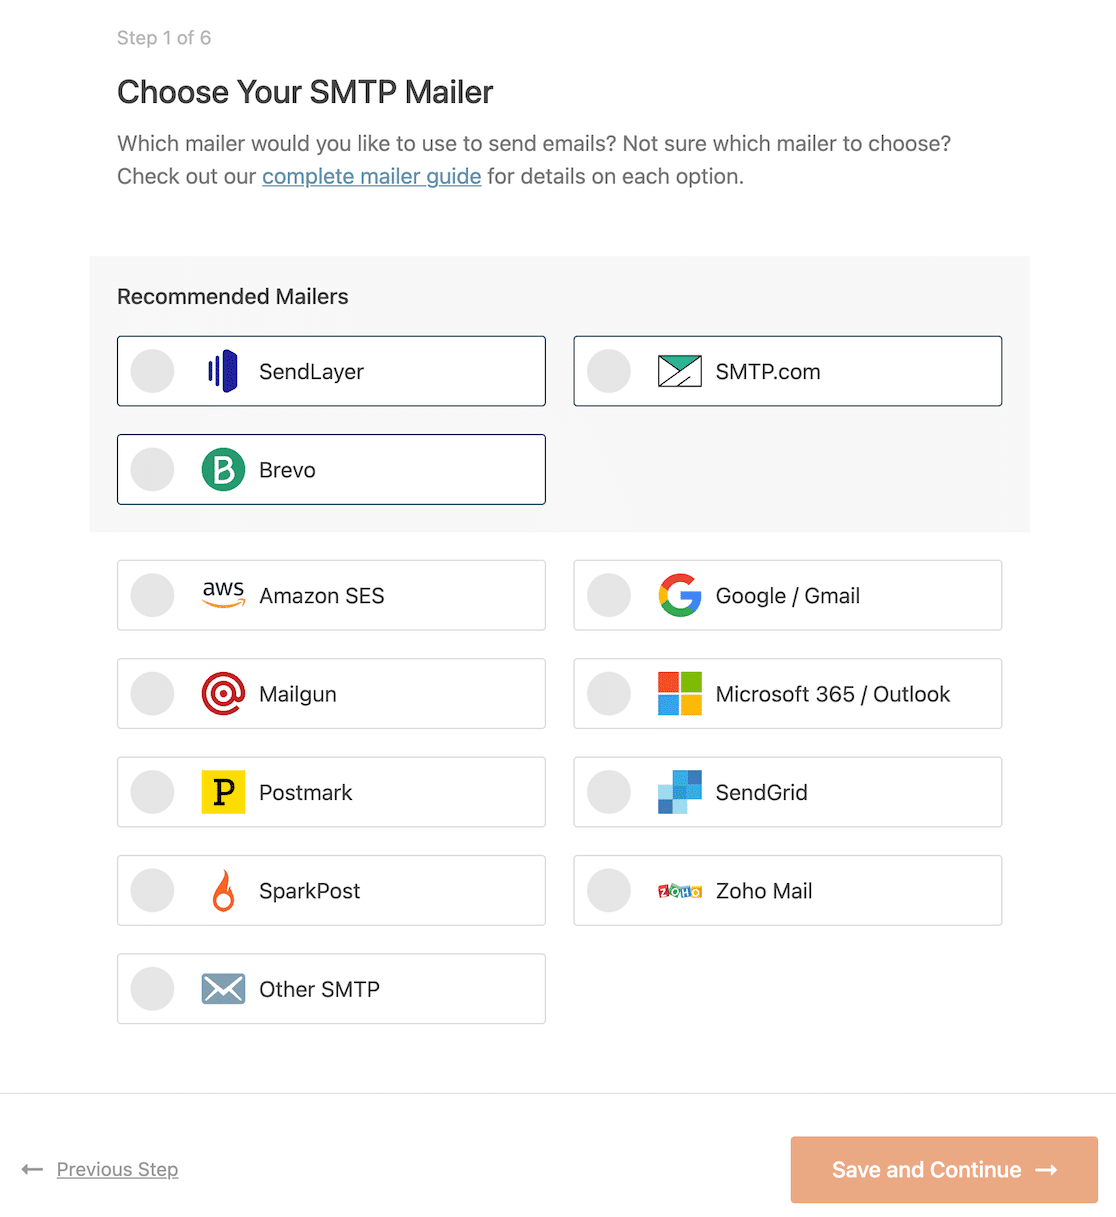
The best one for you to choose will depend on your website. Here are a few tips to help you pick. You can go ahead and select the email service you think is the best fit for your website.
- If your website sends occasional emails and you are looking for a free option, Brevo (formerly Sendinblue) is a good choice. You can use it to send up to 300 emails per day for free.
- Do you have an eCommerce website that sends lots of transactional emails? We recommend SendLayer or SMTP.com.
- If you use a Google Workspace or a regular Gmail account, you can use it to send WordPress emails from a Gmail alias if you want to.
- The Other SMTP option lets you use an email service that you already have access to.
Once you choose the mailer, click the below link to open the documentation page and follow the steps to establish a connection with your website.
If you want to set up multiple mailers, you can do so in the Additional Connections settings once you’ve finished the Setup Wizard. Then you can select a Backup Connection and configure Smart Routing.
When you’ve set everything up, switch back to this guide to enable email logging.
5. Enable Email Logging
After connecting your mailer, the Setup Wizard will ask which features you want to enable. For weForms troubleshooting, email logging is essential.
It creates a permanent record of every notification your site sends, allowing you to verify delivery and diagnose future problems.
The wizard enables Improved Email Deliverability and Error Tracking by default. These features are helpful, but the real power comes from enabling Detailed Email Logs.
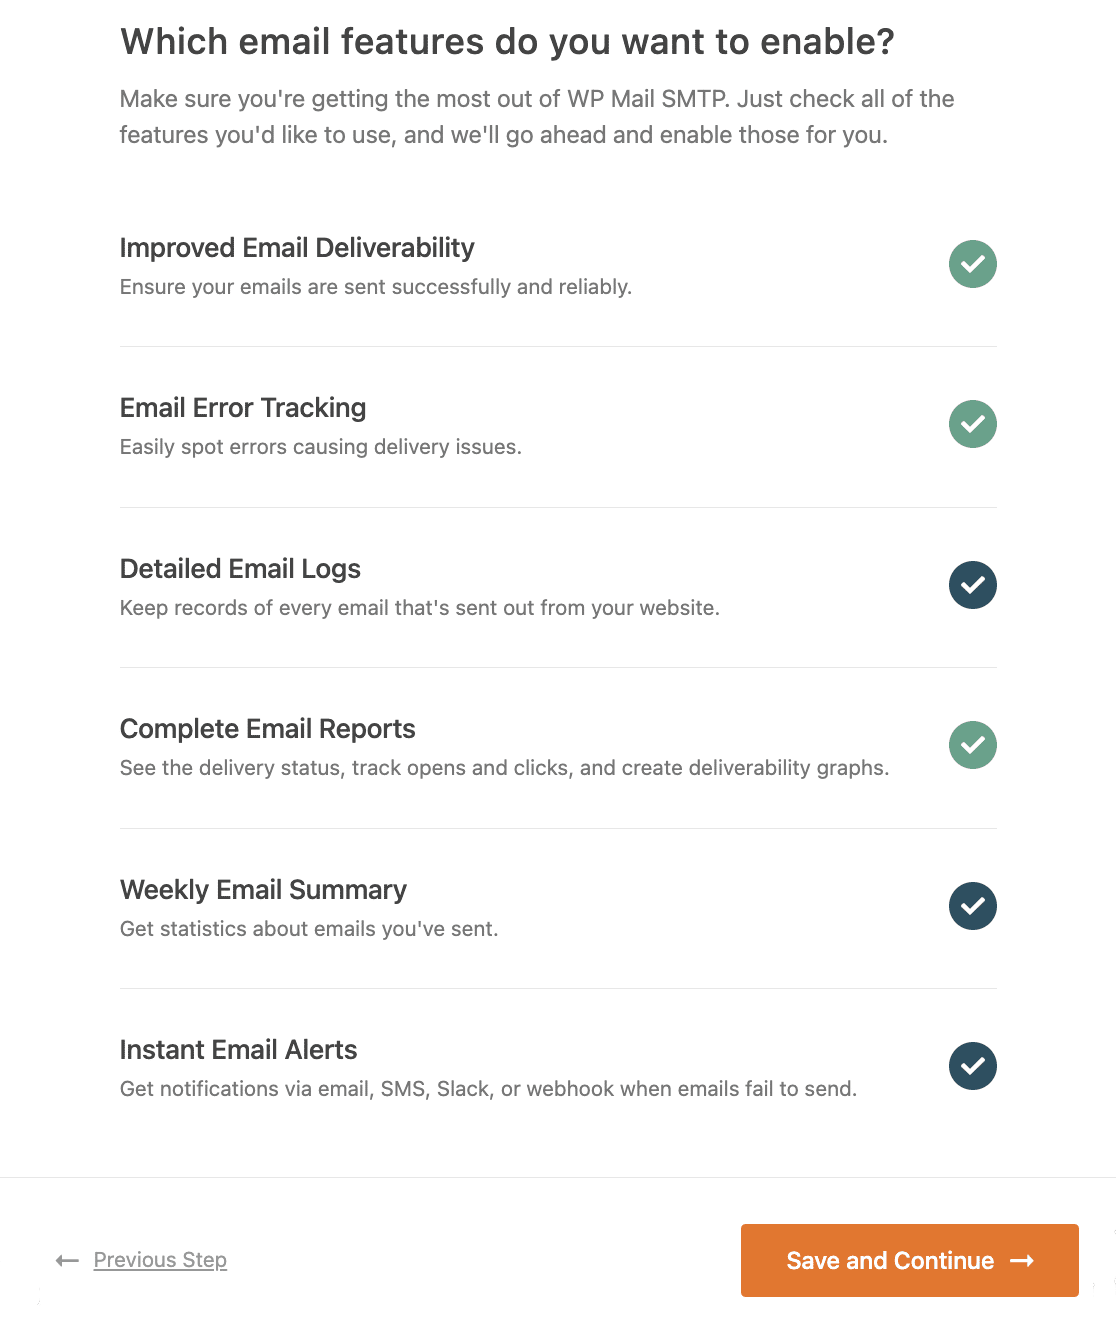
With Detailed Email Logs enabled, you get access to the complete email log screen, where you can search for specific notifications, filter by date, and see the exact delivery status of every email.
This is invaluable when a customer claims they never received a form confirmation or when you need proof that a notification was sent.
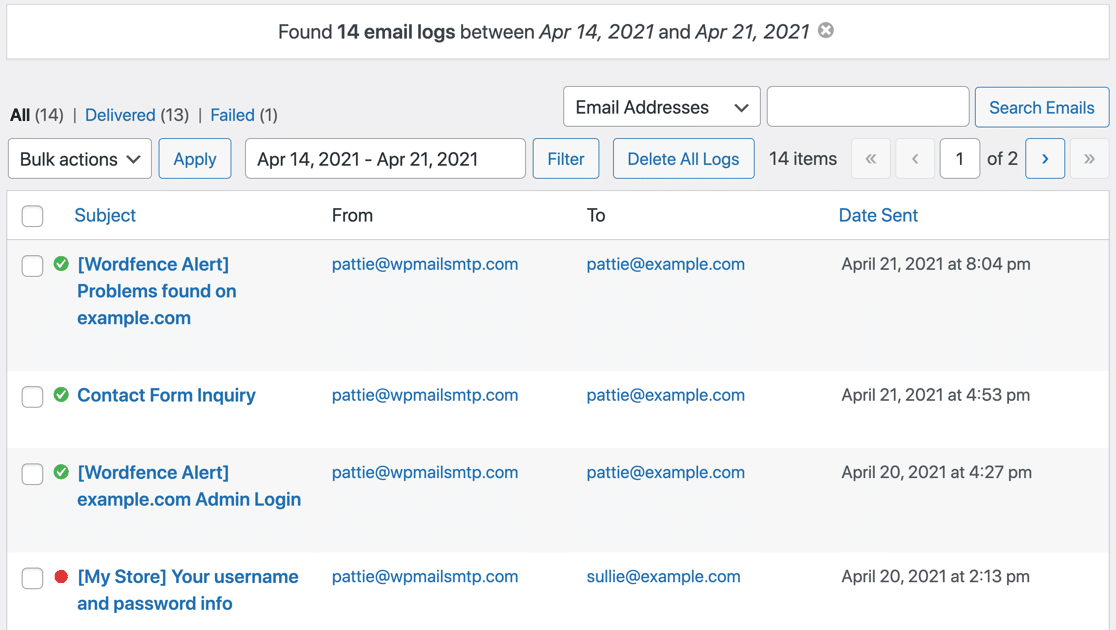
On the log page, you can use the search functionality to search for the keyword in the email content or Subject and Headers.
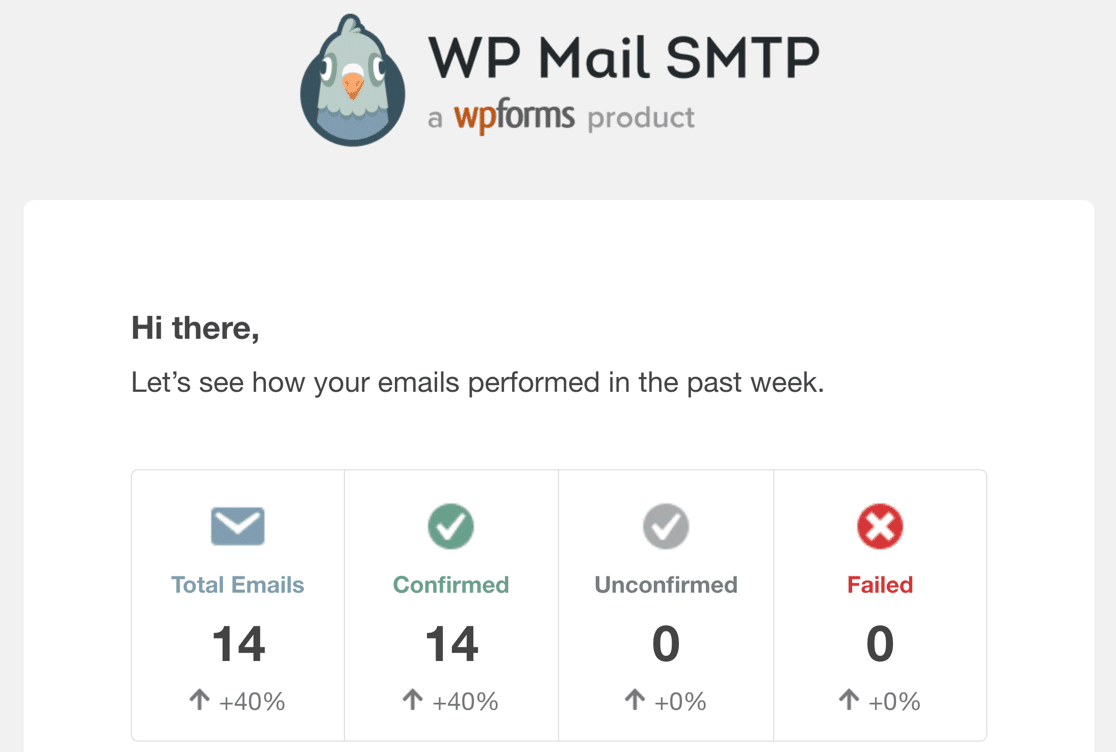
Enabling Detailed Email Logs automatically turns on Complete Email Reports and gives you the option to receive the Weekly Email Summary, which shows your latest delivery stats.
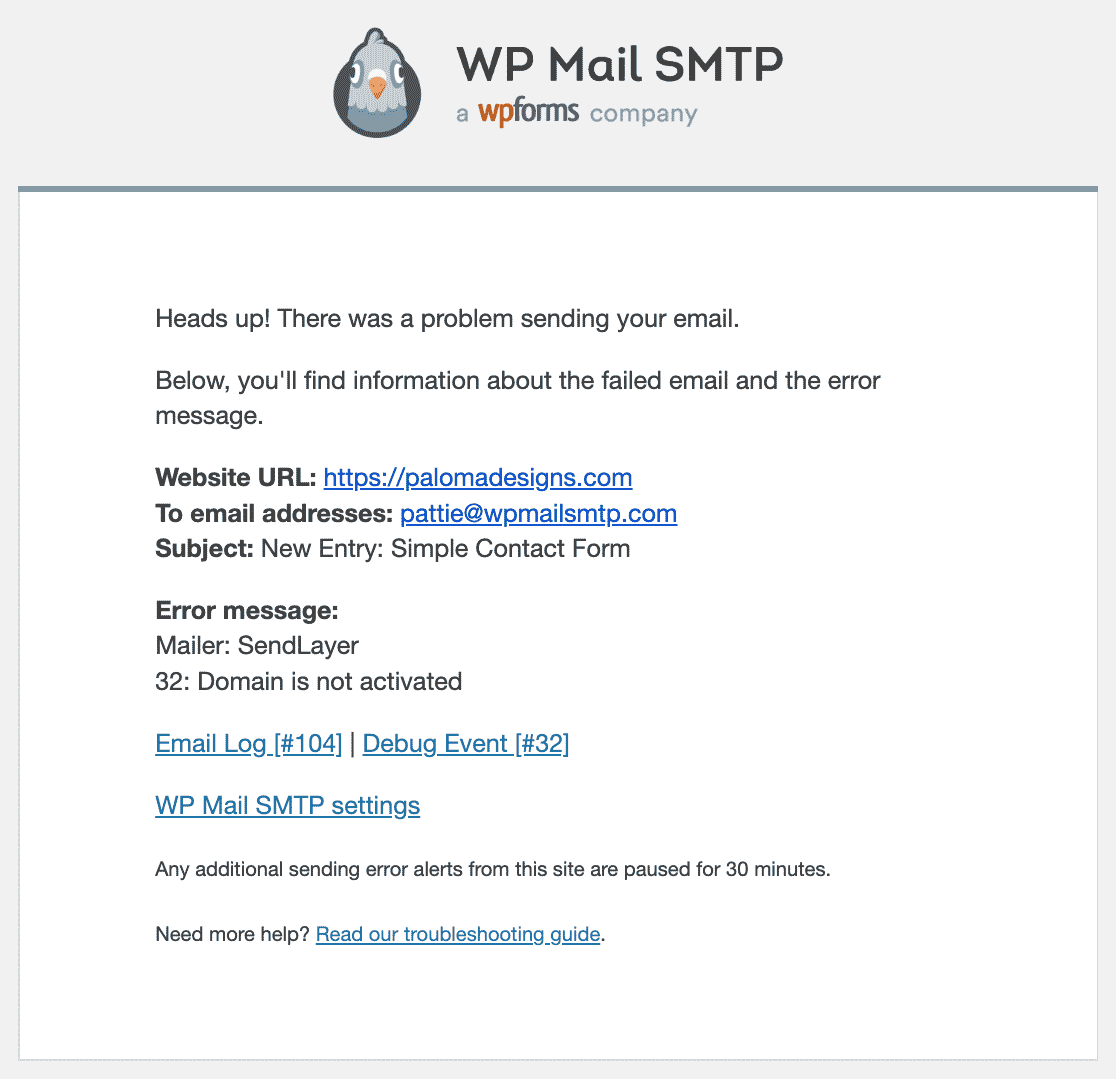
Instant Email Alerts let you know if your site fails to send an email. This gives you the chance to check out your WordPress emails and fix whatever is keeping them from sending properly.
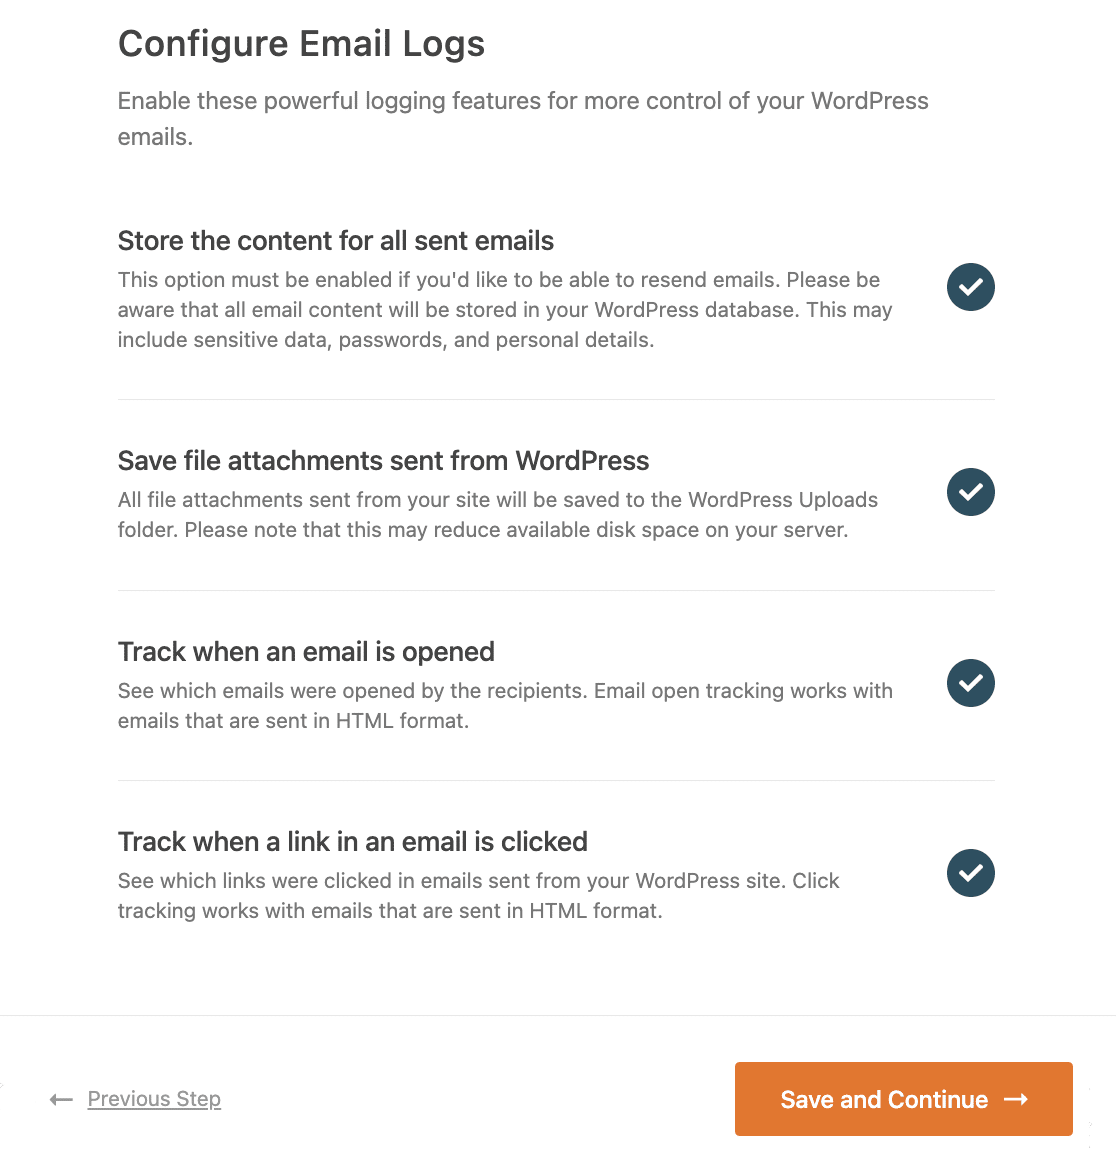
On the next screen, there are more email logging features you can enable. These options include:
- Save the content for all sent emails. Store all your email content in your site’s database.
- Store file attachments sent from WordPress. Save email attachments to your site’s Uploads folder.
- Track when an email is opened. Monitor when recipients open your emails.
- Track when a link in an email is clicked. Monitor which links were clicked in emails.
If you want to know more about the email logging functionality of WP Mail SMTP, we have a guide that explains how to log emails in WordPress.
For the final step, copy the license key from the WP Mail SMTP account and paste it to enable automatic future updates.

That’s it! At the end of the wizard, the plugin will automatically send a test email to confirm that your WordPress site is sending email.
Frequently Asked Questions About weForms Email Issues
Here are answers to the most common questions about fixing weForms email notification problems.
Why is weForms not sending email notifications?
weForms notifications fail because WordPress uses an unreliable default email system that lacks proper authentication.
Email providers like Gmail and Outlook often block or spam-filter these unauthenticated emails. The fix is to install WP Mail SMTP, which routes your emails through professional email services.
How do I fix weForms not sending email?
First, check your notification settings in weForms to ensure they’re enabled and configured with the correct email address.
Then, install WP Mail SMTP and connect it to a professional email service like SendLayer or Brevo. This replaces WordPress’s broken email system and ensures your weForms notifications are delivered reliably.
What is the best alternative to weForms?
If you’re experiencing consistent email issues or want more advanced features, WPForms is the best alternative. It’s easier to use for beginners while offering more power for advanced users.
WPForms also includes native SPAM protection options (reCAPTCHA, hCaptcha, and Custom CAPTCHA), better email integration, and works seamlessly with WP Mail SMTP.
Does weForms work with WP Mail SMTP?
Yes, weForms works perfectly with WP Mail SMTP. Once WP Mail SMTP is installed and configured, it automatically handles all email delivery for your entire WordPress site, including weForms notifications.
Why should I disable weForms’ built-in SMTP?
weForms Pro includes basic SMTP settings, but using them can create conflicts with other plugins that also send emails. Using one dedicated SMTP plugin for your entire site is more reliable than using multiple email systems.
A dedicated SMTP plugin like WP Mail SMTP is purpose-built for email delivery and includes advanced features like email logging, delivery monitoring, and diagnostic tools that weForms’ basic SMTP doesn’t provide.
Can I receive form notifications at multiple email addresses?
Yes, in your weForms notification settings, you can enter multiple email addresses in the To field. Simply separate each address with a comma.
This allows you to send notifications to different team members or departments simultaneously, ensuring important form submissions are never missed.
Next, Use the Best WordPress Contact Form Plugin
WPForms is the best contact form plugin available for WordPress. It’s easy to use and integrates with WP Mail SMTP perfectly, giving you the best possible combination of form builder and SMTP features.
It has integration with reCAPTCHA, hCaptcha, and Custom CAPTCHA to fight against contact form spam. weForms on the other hand only has support for Google reCAPTCHA.
So if you’re getting contact form spam, it’s a good idea to make the switch. You’ll also get a huge list of addons/features which can help improve form completion rates.
Ready to fix your emails? Get started today with the best WordPress SMTP plugin. If you don’t have the time to fix your emails, you can get full White Glove Setup assistance as an extra purchase, and there’s a 14-day money-back guarantee for all paid plans.
If this article helped you out, please follow us on Facebook and Twitter for more WordPress tips and tutorials.

