AI Summary
Do you want to figure out why wp_mail is not working and fix it?
Issues with the wp_mail() function are very common for WordPress users. And when it’s not working properly, your WordPress emails won’t send (which is a big problem).
But it’s very easy to fix wp_mail(). In this post, we’ll show you the simplest way you can solve wp_mail() issues to make sure your emails always reach your recipients without fail.
Fix Your WordPress Emails Now! 🙂
What Is wp_mail?
wp_mail() is a PHPMailer function that generates and sends your WordPress emails. By default, almost all WordPress plugins use wp_mail() to send emails. But the wp_mail() function is not very reliable. So when something goes wrong with it, you’ll find email delivery issues across your whole site.
Why wp_mail Is Not Working?
There are a few common reasons why wp_mail() may not be working for you:
- PHP mail is disabled by your web server: The PHP Mailer is an insecure way of sending emails and it can be exploited by hackers and spammers. This is why many web hosts disable the PHP Mailer on their servers. Since
wp_mail()relies on PHP to send emails, it fails to work when PHP is disabled on your web host. - Your emails are being marked as spam: A big problem with the
wp_mail()function is that it was only designed for simplicity. So the emails generated by this function don’t include any authentication information to show that the email is coming from a legitimate source. As a result, your emails are seen as spam and never reach the inbox of your recipient. - Your site is running on localhost: If your site is still under development, then you won’t be able to send any emails with
wp_mail(). This is becausewp_mail()isn’t supported on localhost. Instead, you’ll need an alternative email delivery method like SMTP to generate and send emails reliably.
The good thing is, there is a single solution to all of these problems with wp_mail not working. And the solution is to use the WP Mail SMTP plugin.
How to Fix wp_mail the Easy Way
The easiest way to fix all problems with the wp_mail() function is to reconfigure it to use SMTP rather than relying on PHP. The easiest way to achieve this is by using WP Mail SMTP.
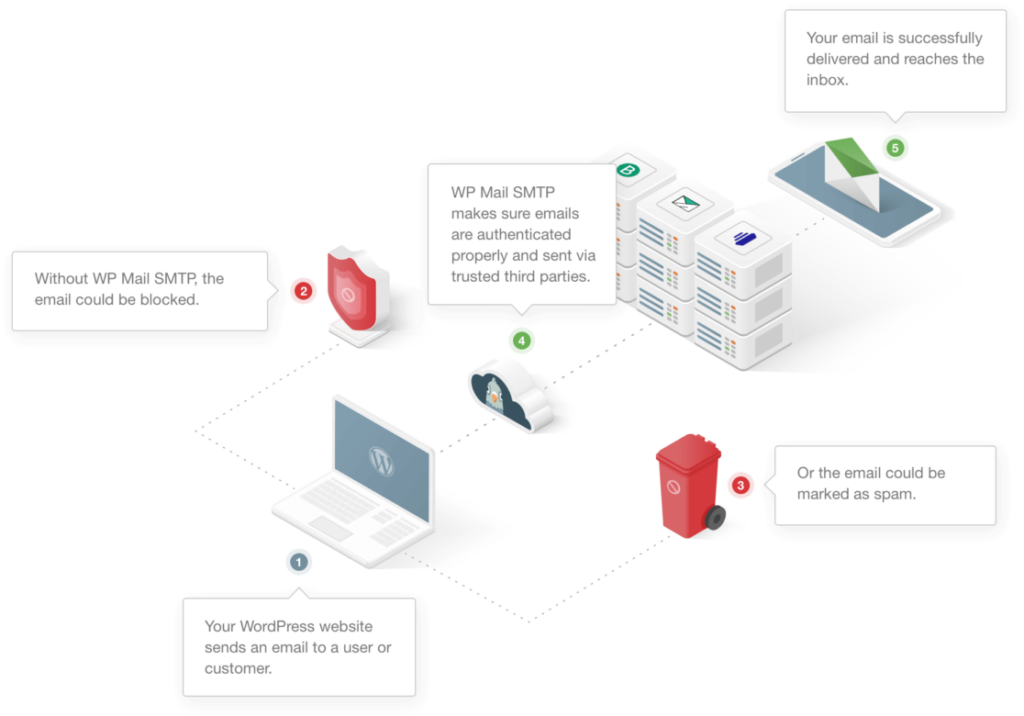
This plugin configures your WordPress site to use SMTP, which is a proven method of sending your emails because it adds proper authentication to your messages.
Moreover, this plugin sends your emails through a dedicated 3rd party email service provider rather than your default web host. As a result, your email deliverability is always guaranteed.
In addition, WP Mail SMTP comes with a bunch of extra features like:
- Error tracking
- Weekly email summary
- Detailed email logs
- … and more
1. Install the WP Mail SMTP Plugin
To start with, you’ll need a paid WP Mail SMTP subscription or the free version. You can get either to fix wp_mail() issues but the free version doesn’t include advanced features like the weekly email summary and email logs.
When you’ve purchased your plan, head over to your WP Mail SMTP dashboard and navigate to the Downloads tab. Scroll down to click on the Download WP Mail SMTP button.
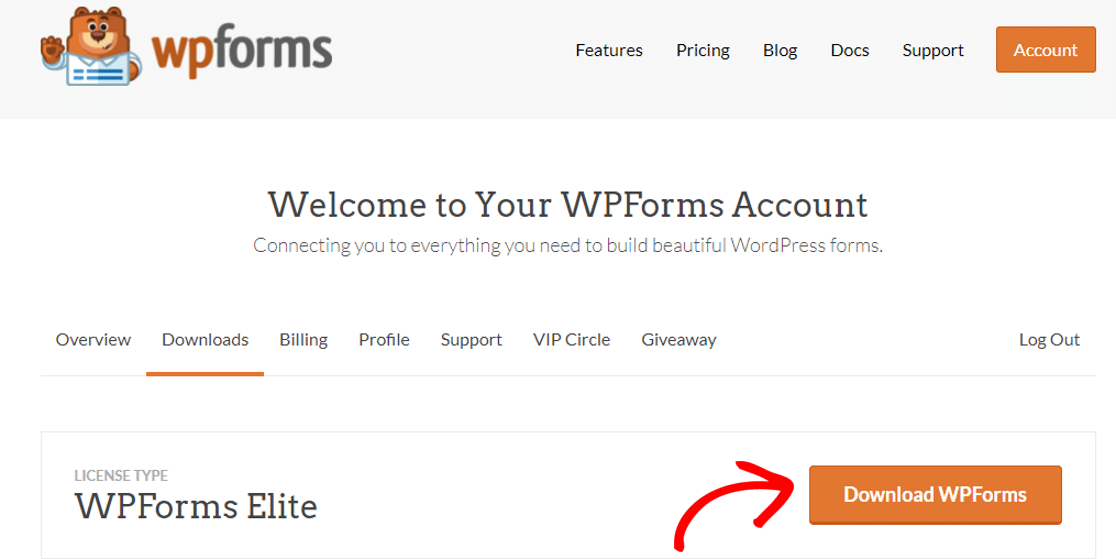
Once the zip file has finished downloading, open your site’s WordPress dashboard. In the left-hand menu bar, click on Plugins and then click Add New.
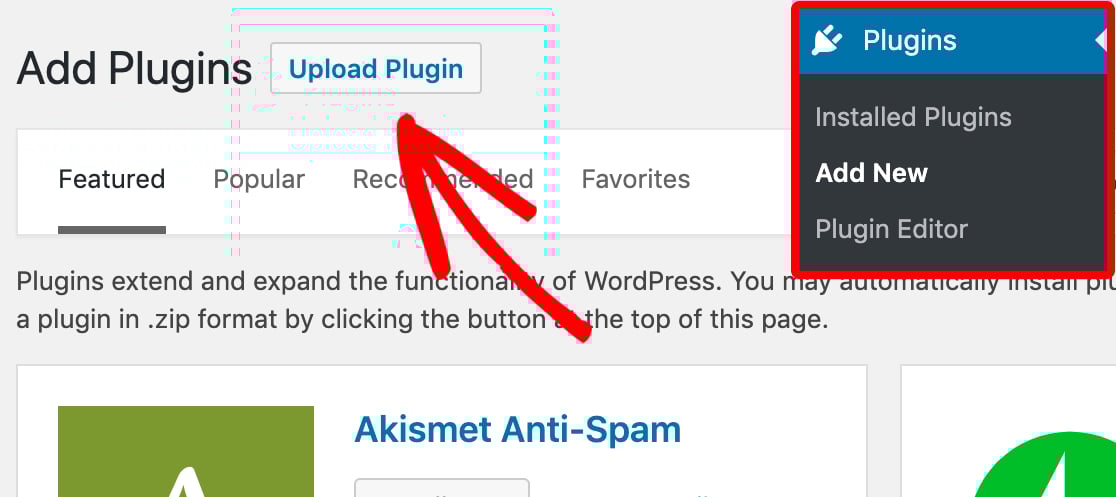
Then, click on Choose File and navigate to the location where you downloaded the WP Mail SMTP zip file. Then double-click on it and press Install Now, followed by Activate Plugin.
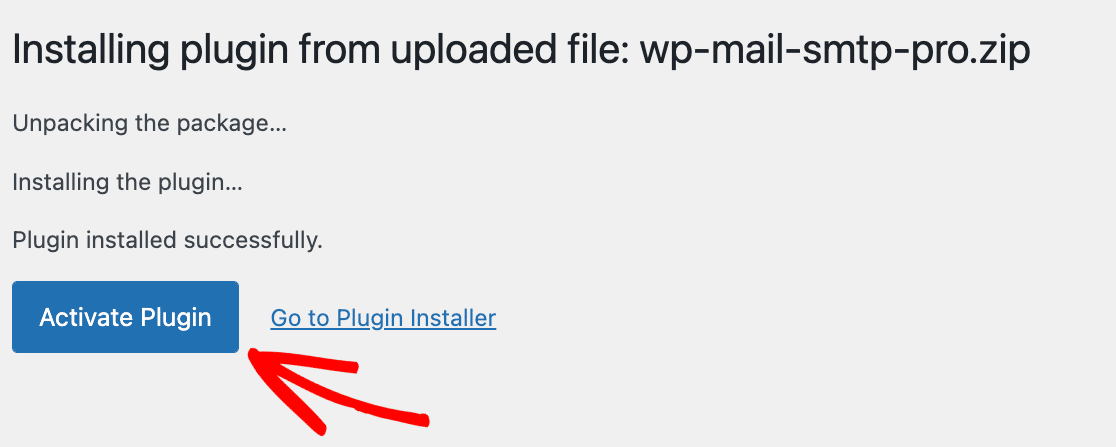
This should launch the Setup Wizard automatically. If it didn’t launch, you can manually launch it by going to WP Mail SMTP » Settings and pressing the Launch Setup Wizard button.

2. Connect to a Mailer Service
The Setup Wizard lets you choose a 3rd party mailer service to send your emails. So in this step, we’ll be configuring a proper email delivery service to replace the problematic default WordPress web host.
When you’re finished with this step, WP Mail SMTP will reconfigure the default wp_mail() function to use SMTP from now on to avoid email issues. To begin, click on the Let’s Get Started button.

You’ll find a list of recommended mailers on the next screen. You can choose any mailing service from this list. If you’re just getting started, then one of the best options is to use the free trial of SendLayer.
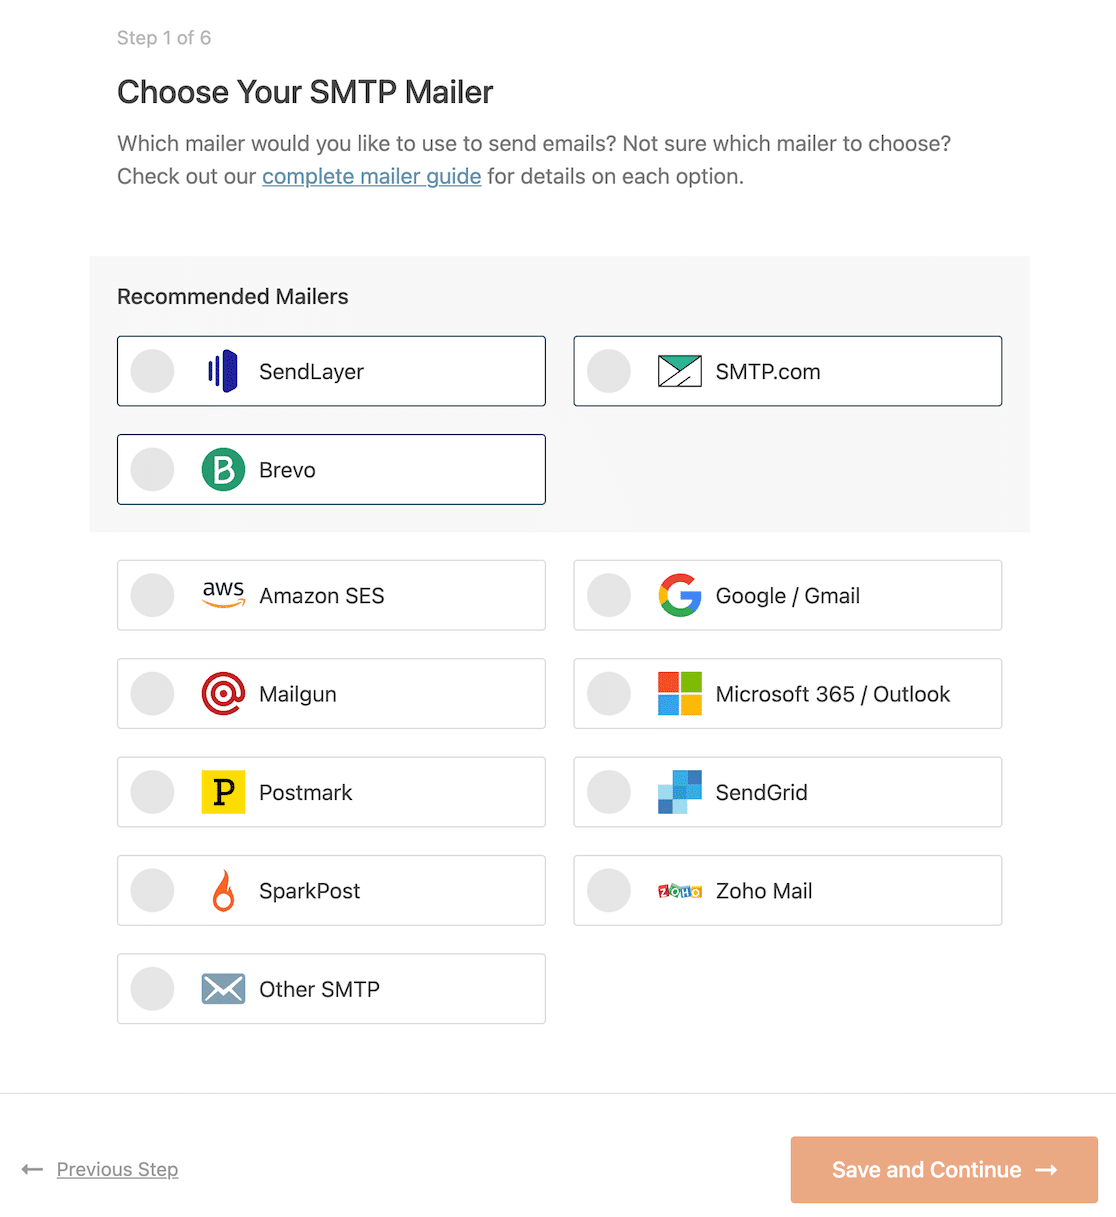
You can also learn more about different transactional email providers to make a better decision. When you’ve decided on the mailer you want to use, click on the link below for the mailer you want to set up:
| Mailers available in all versions | Mailers in WP Mail SMTP Pro |
|---|---|
| SendLayer | Amazon SES |
| SMTP.com | Microsoft 365 / Outlook.com |
| Brevo (formerly Sendinblue) | Zoho Mail |
| Google Workspace / Gmail | |
| Mailgun | |
| Postmark | |
| SendGrid | |
| SparkPost | |
| Other SMTP |
Follow the instructions in the doc carefully and come back to this article to finalize your WP Mail SMTP setup.
Want to set up multiple mailers? You can do so in the Additional Connections settings, then select a Backup Connection and configure Smart Routing.
3. Enable Detailed Email Logs Optional)
Once you’ve successfully configured and connected your mailer with WP Mail SMTP, the Setup Wizard will ask you to choose the email features you want to enable.
Improved Email Deliverability and Email Error Tracking are enabled by default and can’t be turned off, but I highly recommend turning on the Detailed Email Logs, too.
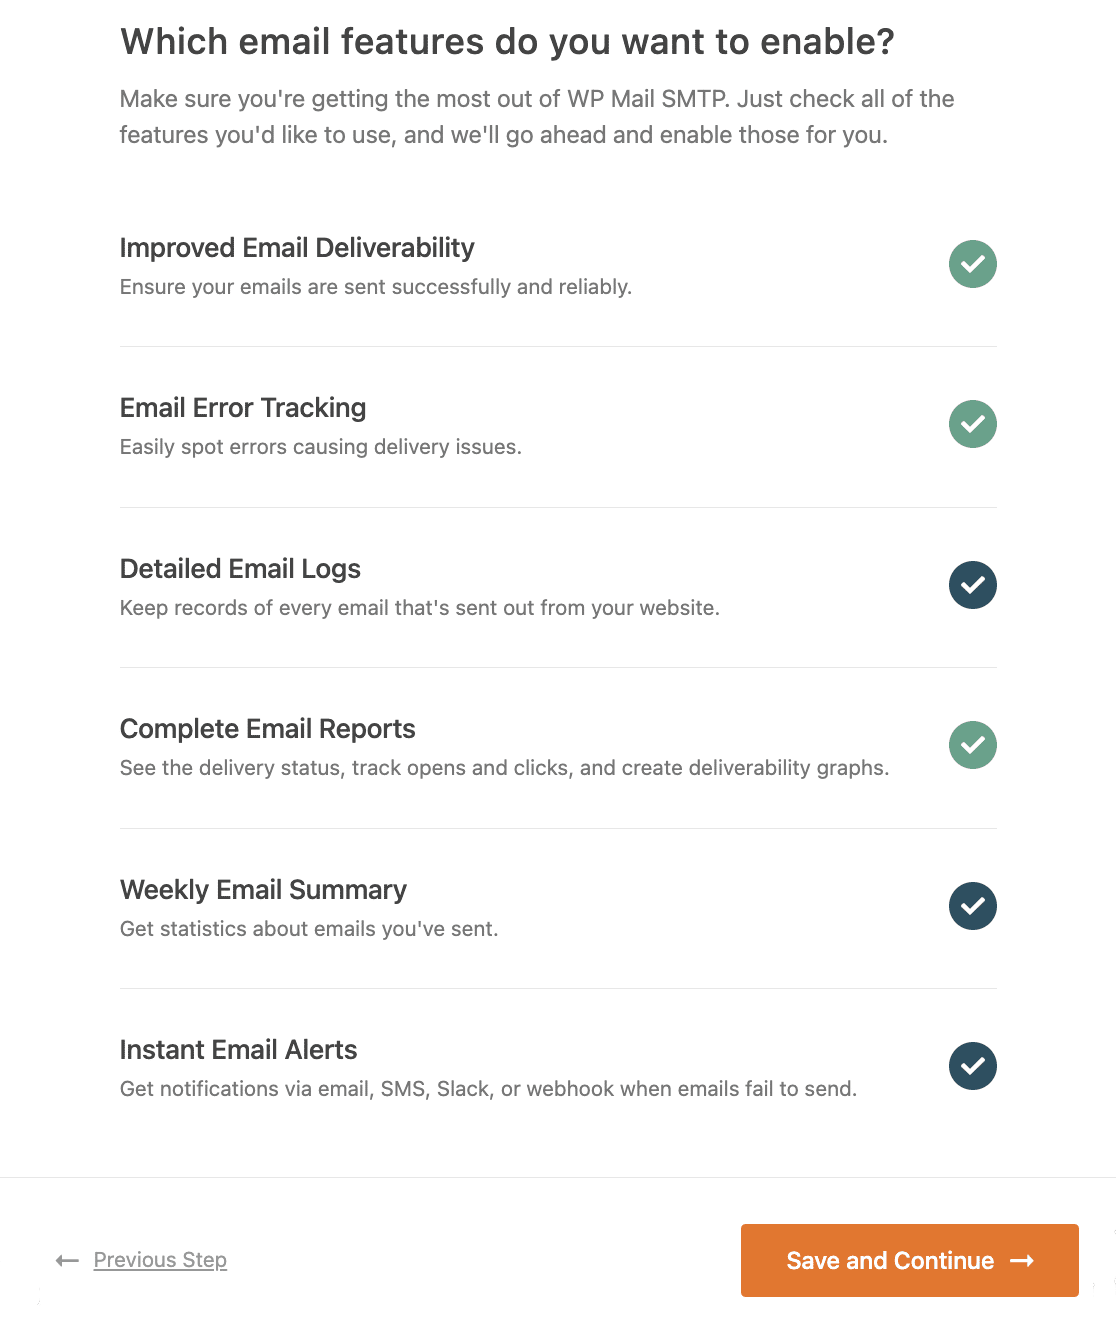
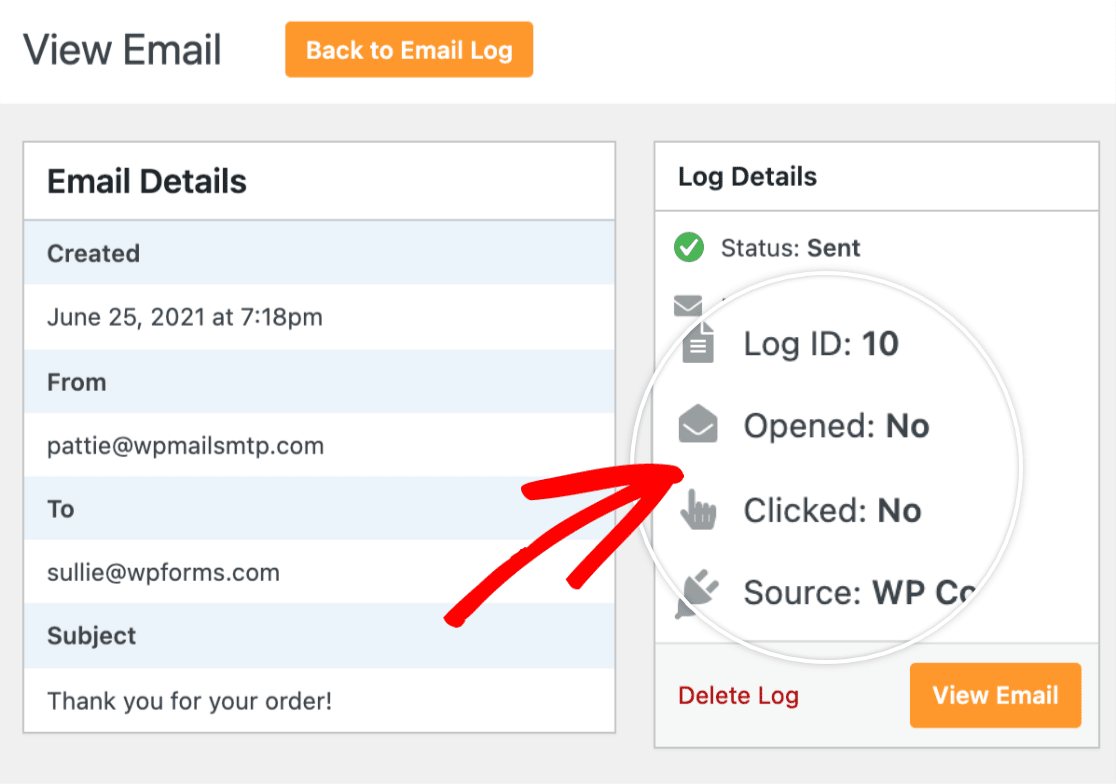
When enabled, this tool keeps a log of all the emails your WordPress site has generated and sent. Plus, it keeps a record of a ton of useful data in Complete Email Reports, such as:
- Number of opens and clicks in your WordPress emails
- Number of attachments
- Email delivery status
- Date and subject of each email
- Resend or forward failed emails
- …and more
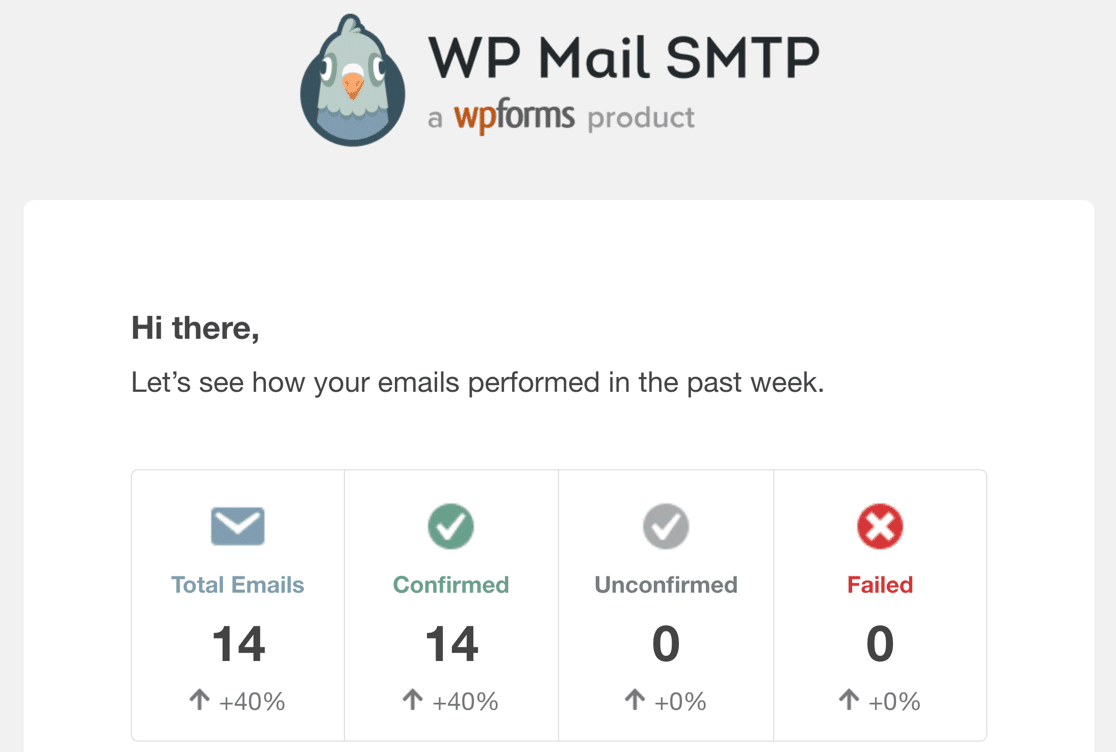
The Weekly Email Summary feature is a very useful way of monitoring your email performance. When enabled, it will send you an email every week with a quick summary about:
- Total emails sent the past week
- Number of confirmed email deliveries
- Number of unconfirmed email deliveries
- Failed emails
With this summary, you can keep track of how well your wp_mail function is working and check if there are any errors as they show up.
The Instant Email Alerts feature notifies you whenever an email fails to send to that you can quickly fix the problem. That way your users won’t miss out on important messages.
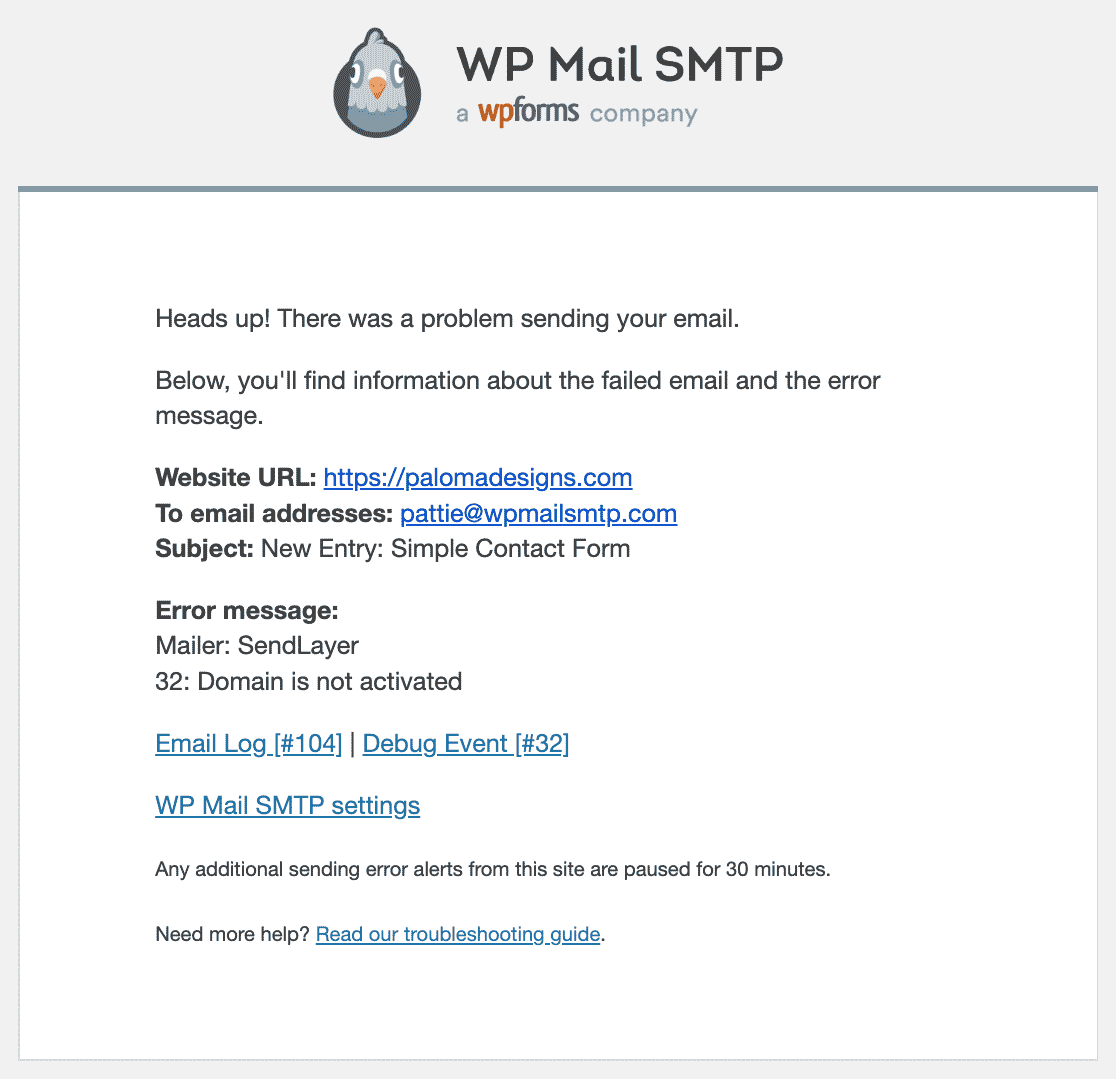
So, if you’d like to make sure everything is going well with your emails at all times, we recommend enabling these extra features to get the most out of WP Mail SMTP.
4. Perform an Email Test
After you have completed all of the above steps, the WP Mail SMTP Setup Wizard will send a test email to verify if everything has been configured correctly.
If there are no problems with your chosen configuration, the WP Mail SMTP setup wizard will display a success message.

At this stage, you should wait until a few emails have been generated to ensure you don’t face the ‘could not instantiate mail function’ error again.
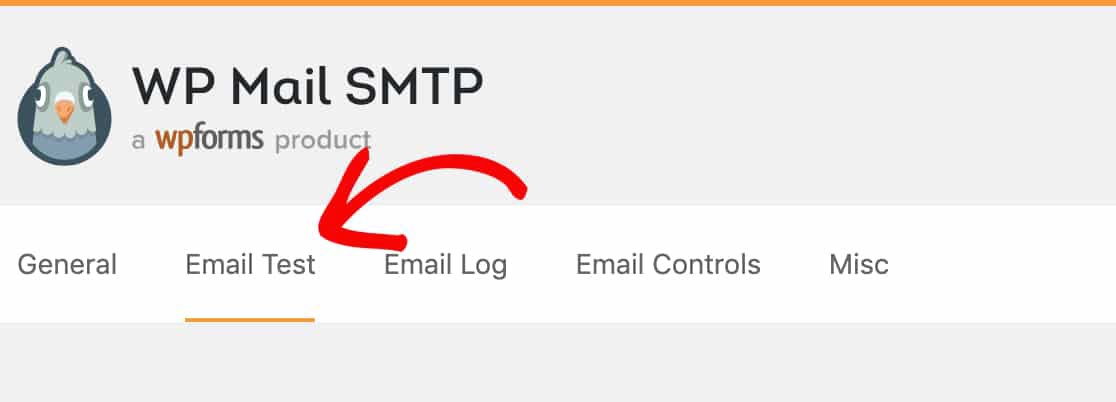
If you don’t want to wait, you can go to WP Mail SMTP » Tools » Email Test to send a few test emails from WP Mail SMTP.
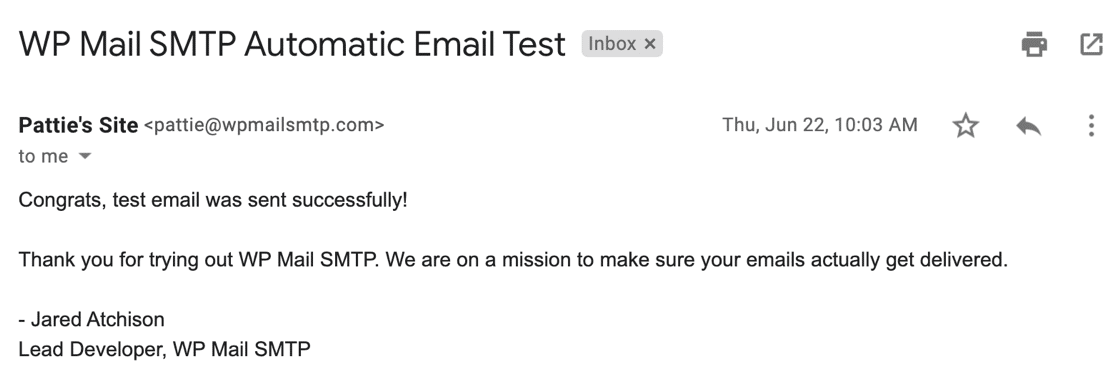
Here is a screenshot of what the test message could look like in your inbox, so you know what to expect. This ensures that your emails will now send successfully.
5. Resend Failed Emails Instantly
You can resend failed emails easily from the WP Mail SMTP email log. In order to do this, you’ll need to have turned on the Store the content for all sent emails option in the Setup Wizard.
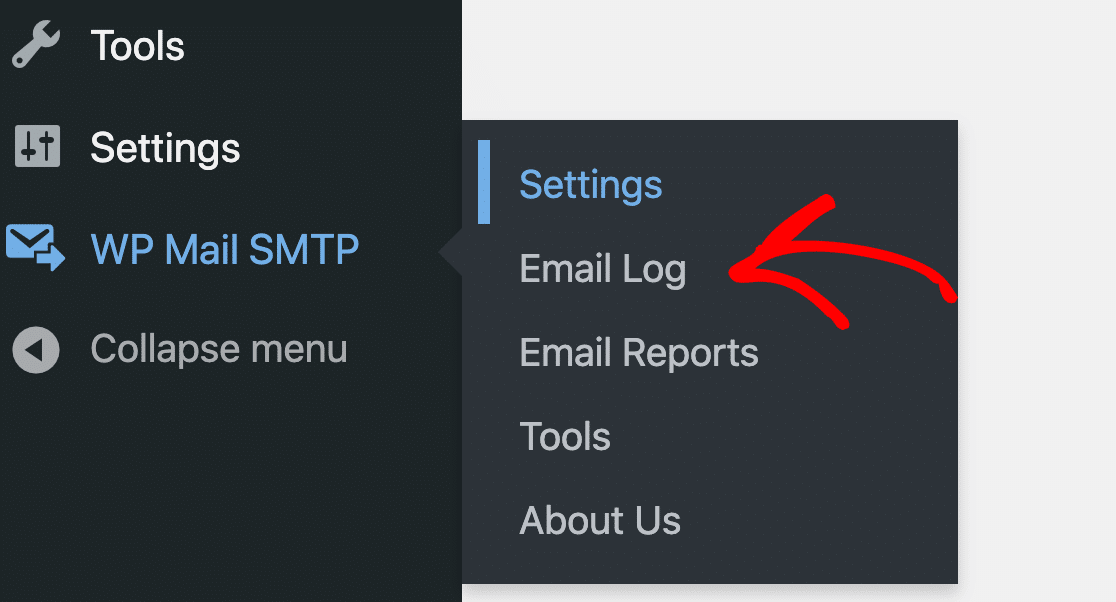
If you didn’t do so, you can turn the setting on by going to WP Mail SMTP » Settings » Email Log. To resend an email, go to WP Mail SMTP » Email Log from your WordPress dashboard
You’ll see a list of all emails sent from your website. Any emails that failed will be marked with a red dot. Click on the View Log button for the email that has failed to deliver.

And on the right-hand side, you’ll find the Resend button under the Actions tab. Edit the email address if you need to, then click the YES button to resend the email.
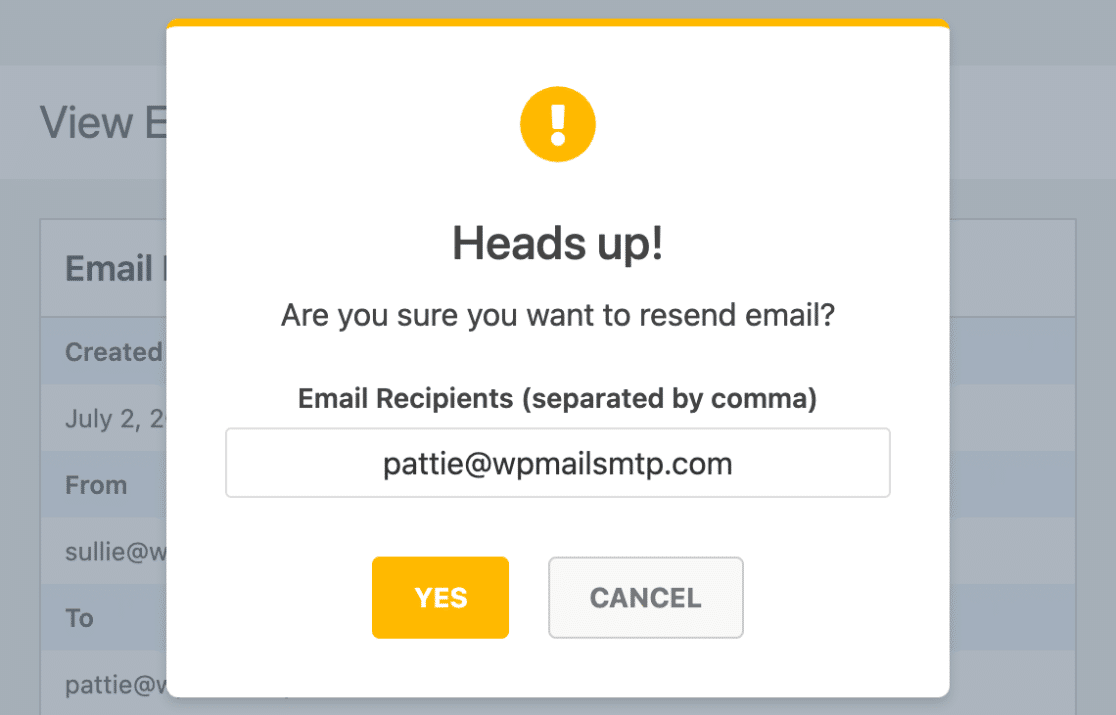
And that’s it! You’ve now fixed the wp_mail() function by reconfiguring it to use the much more reliable SMTP and even learned how to resend any failed emails.
FAQs on Why wp_mail Is Not Working (& How to Fix It)
The wp_mail() function not working is a popular topic of interest among our readers. Here are answers to some common queries about it:
Why is wp_mail not sending emails in WordPress?
WordPress uses the PHP mail function, which many web hosts block. That’s why emails often fail to send.
How do I fix wp_mail() not working in WordPress?
You can fix it by installing WP Mail SMTP. It connects your site to a proper email service that handles delivery the right way.
What causes wp_mail to fail in WordPress?
The most common reason is the hosting server blocking PHP mail. Missing email authentication or plugin conflicts can also cause issues.
How do I test if wp_mail is working properly?
Install WP Mail SMTP and use its test email tool. It shows if your site can send emails or if something’s broken.
Can WP Mail SMTP fix wp_mail issues?
Yes. WP Mail SMTP fixes wp_mail by using a trusted email service like SendLayer, Brevo, or SMTP.com.
What is the best way to troubleshoot wp_mail problems?
Start by sending a test email with WP Mail SMTP. Then, check your mailer settings and make sure your DNS records are correct.
Why does my contact form not send emails using wp_mail?
If your form plugin uses wp_mail, and it’s not set up with an SMTP, the server might block the message or mark it as spam.
How do I enable wp_mail on my server?
You don’t. It’s built into WordPress, but many hosts block it. Use WP Mail SMTP to connect to a proper mailer instead.
Next, Send Emails With Attachments
Would you like to send emails with file attachments from WordPress? See our guide on sending WordPress emails with file attachments from your WordPress forms or other plugins.
And if you’re having some trouble getting emails from your Elementor forms, here’s what to do when Elementor contact forms don’t send emails.
You might also want to improve your WordPress SEO. See our article on the best WordPress SEO plugins to boost your organic traffic and rankings.
Ready to fix your emails? Get started today with the best WordPress SMTP plugin. If you don’t have the time to fix your emails, you can get full White Glove Setup assistance as an extra purchase, and there’s a 14-day money-back guarantee for all paid plans.
If this article helped you out, please follow us on Facebook and Twitter for more WordPress tips and tutorials.

