AI Summary
Is FluentCRM not sending emails from your website?
In this article, we’ll show you how to easily solve email deliverability issues with FluentCRM so that your emails don’t get lost or filed as spam.
What Is FluentCRM?
FluentCRM is a self-hosted email marketing plugin. You can design email campaigns in WordPress using the drag and drop block editor.
FluentCRM supports smart tags that let you dynamically personalize the content of the emails you send out.

It also supports:
- Subscriber segmentation
- Automated drip campaigns
- Reporting
- Integration with LMS and membership plugins.
If your emails aren’t being delivered reliably, let’s fix that.
How To Fix FluentCRM Not Sending Email
1. Check Email Settings In FluentCRM
FluentCRM lets you set the email sender within the plugin.
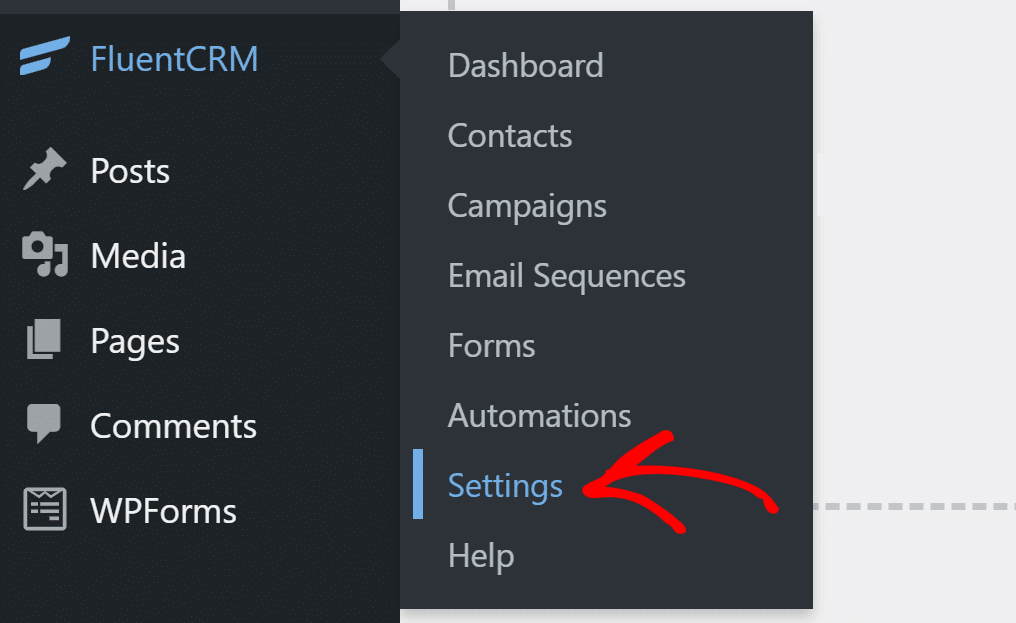
To check this, go to FluentCRM » Settings from your WordPress dashboard.
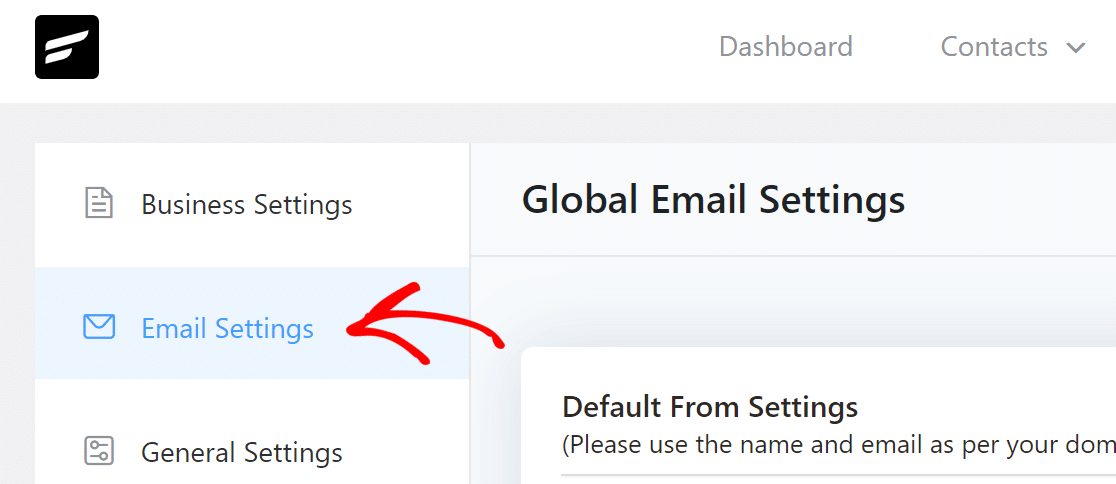
Click the Email Settings tab and you’ll find the fields to set the sender options.
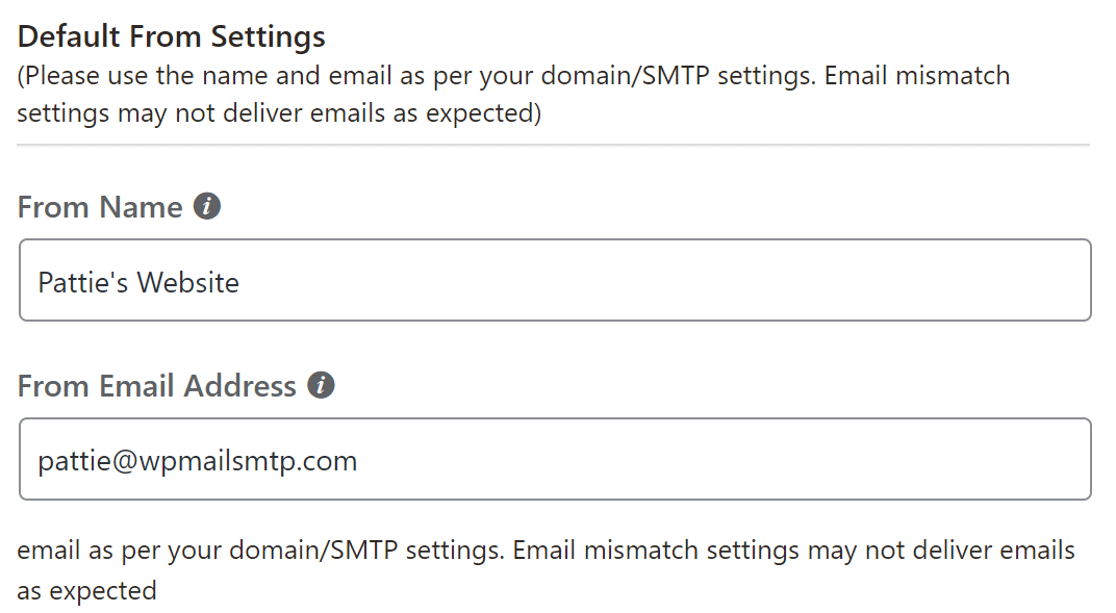
In the From Name, enter the name of your website or a name that your subscribers are likely to recognize.
For the From Email Address field, we recommend using an email with the same domain extension as the domain you’re sending from. This can sometimes help with email deliverability.
Click on Save Settings for the changes to take effect.
Let’s now install the WP Mail SMTP plugin to send all emails through a reliable email provider.
2. Install the WP Mail SMTP Plugin
FluentCRM uses the default wp_mail() function to send marketing emails from your website. It’s much better to use an email provider that can authenticate your emails instead.
WP Mail SMTP lets you easily connect your website to a mailer service and route all emails through it.
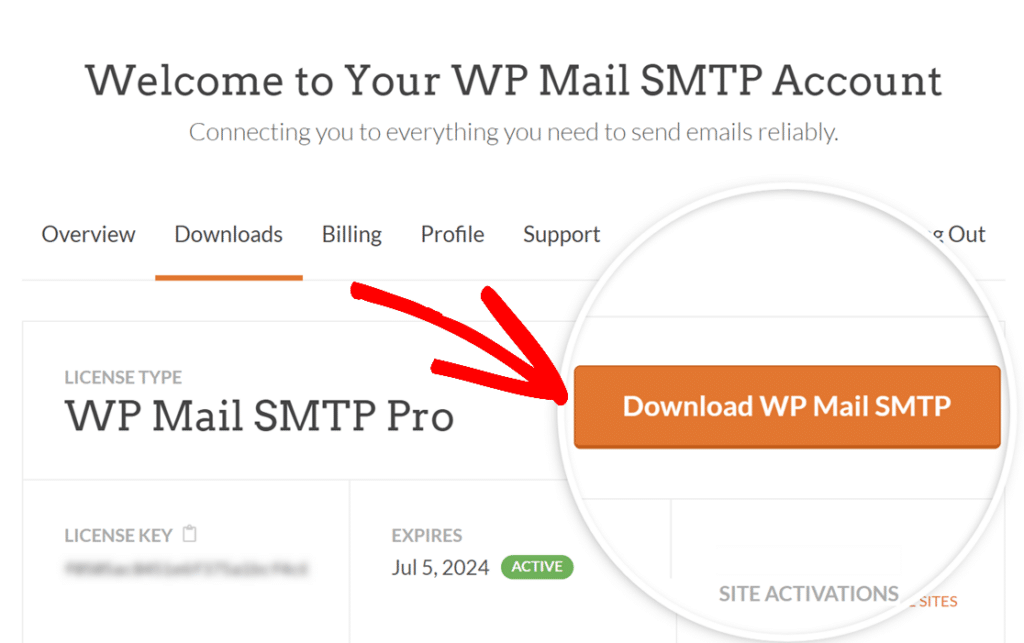
To download the plugin, head over to your WP Mail SMTP account. Under the Downloads tab, click the orange button to grab the latest version of the plugin file.
Switch back to your website and upload the zip file to the plugins page.
If you are new to WordPress, you can check out this guide on installing a WordPress plugin.

Once the plugin is installed, be sure to Activate it. As soon as you do that, the plugin Setup Wizard will start in your browser. The wizard will help you to configure the plugin in few easy steps.
3. Connect to a Mailer Service
In this step, we’ll connect the website to a mailer service that’ll add authentication to your marketing emails.
To begin, click the Let’s Get Started button in the wizard.

On this screen, you can choose your new email provider. We recommend that you use a transactional email provider, like SendLayer, Brevo (formerly Sendinblue), or SMTP.com.
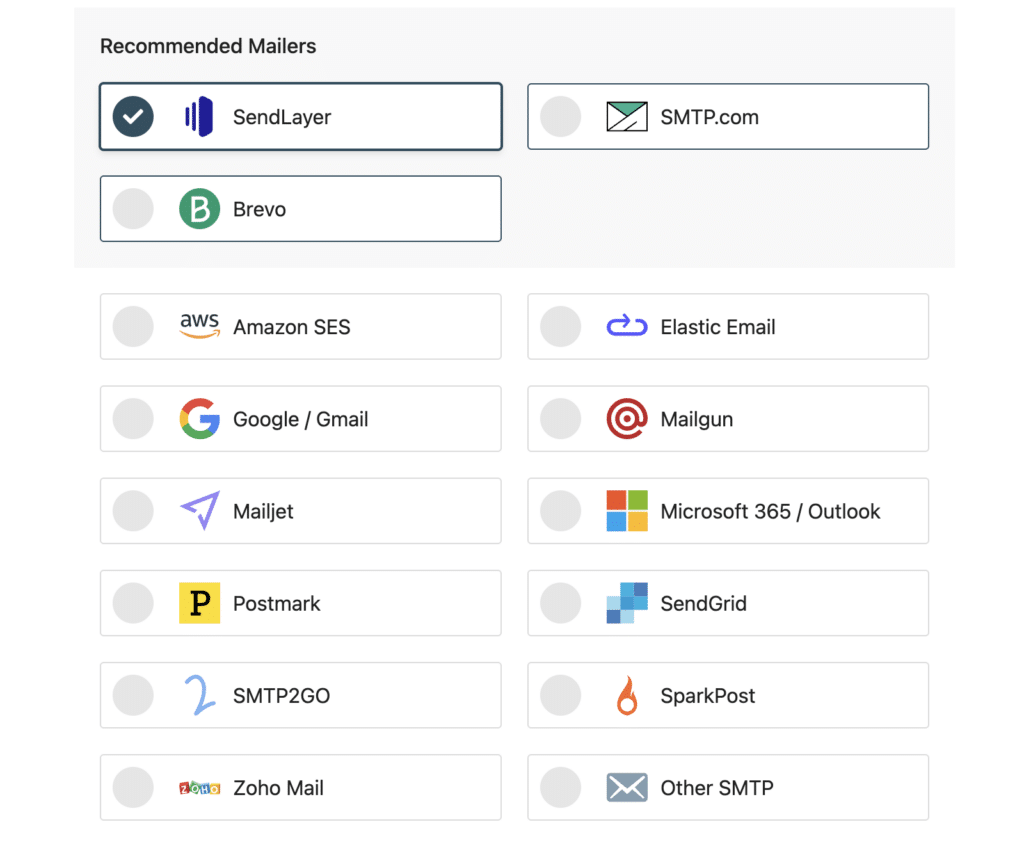
Once you’ve chosen a mailer, click the link below to open our documentation.
Work through the steps to set up an account and connect it to WP Mail SMTP.
| Mailers available in all versions | Mailers in WP Mail SMTP Pro |
|---|---|
| SendLayer | Amazon SES |
| SMTP.com | Microsoft 365 / Outlook.com |
| Brevo | Zoho Mail |
| Google Workspace / Gmail | |
| Mailgun | |
| Postmark | |
| SendGrid | |
| SparkPost | |
| Other SMTP |
Switch back to this website once you establish a connection between the mailer and your website.
Want to set up multiple mailers? You can do so in the Additional Connections settings, then select a Backup Connection and configure Smart Routing.
4. Enable Email Logging
As you come to the end of the Setup Wizard, you’ll have the option of turning on email logging.
We recommend that you turn on the Detailed Email Log and Instant Email Alerts.
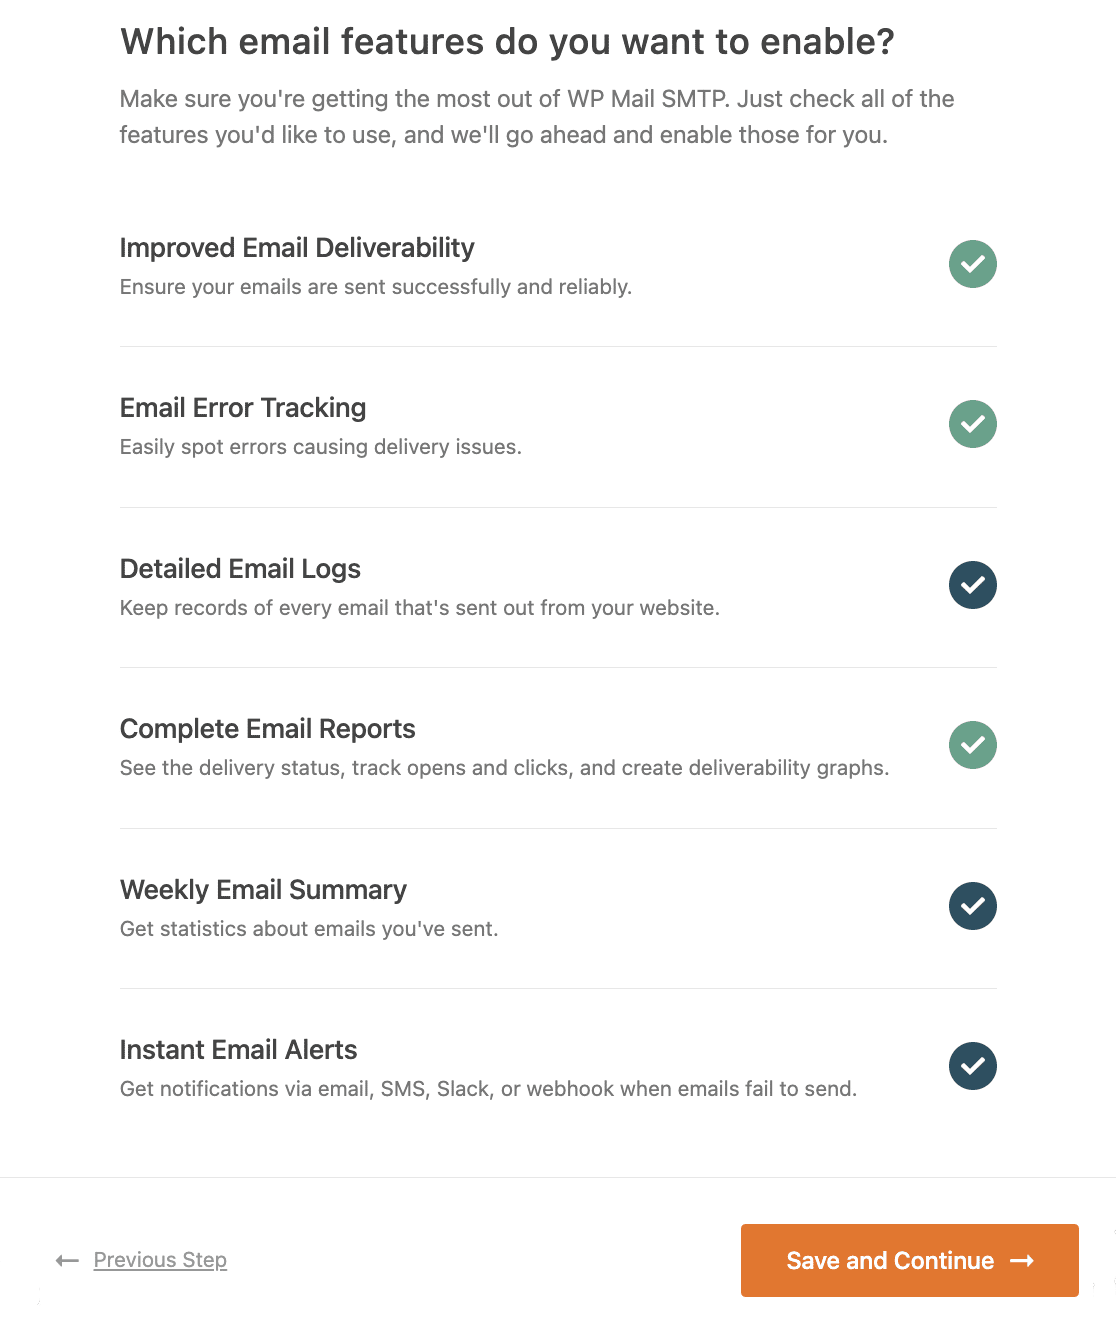
Detailed Email Logs will save the basic details about your emails in Complete Email Reports. You can also have WP Mail SMTP and send you a Weekly Email Summary.
Instant Email Alerts let you know when an email from your website fails to send. That way you can quickly fix the problem.
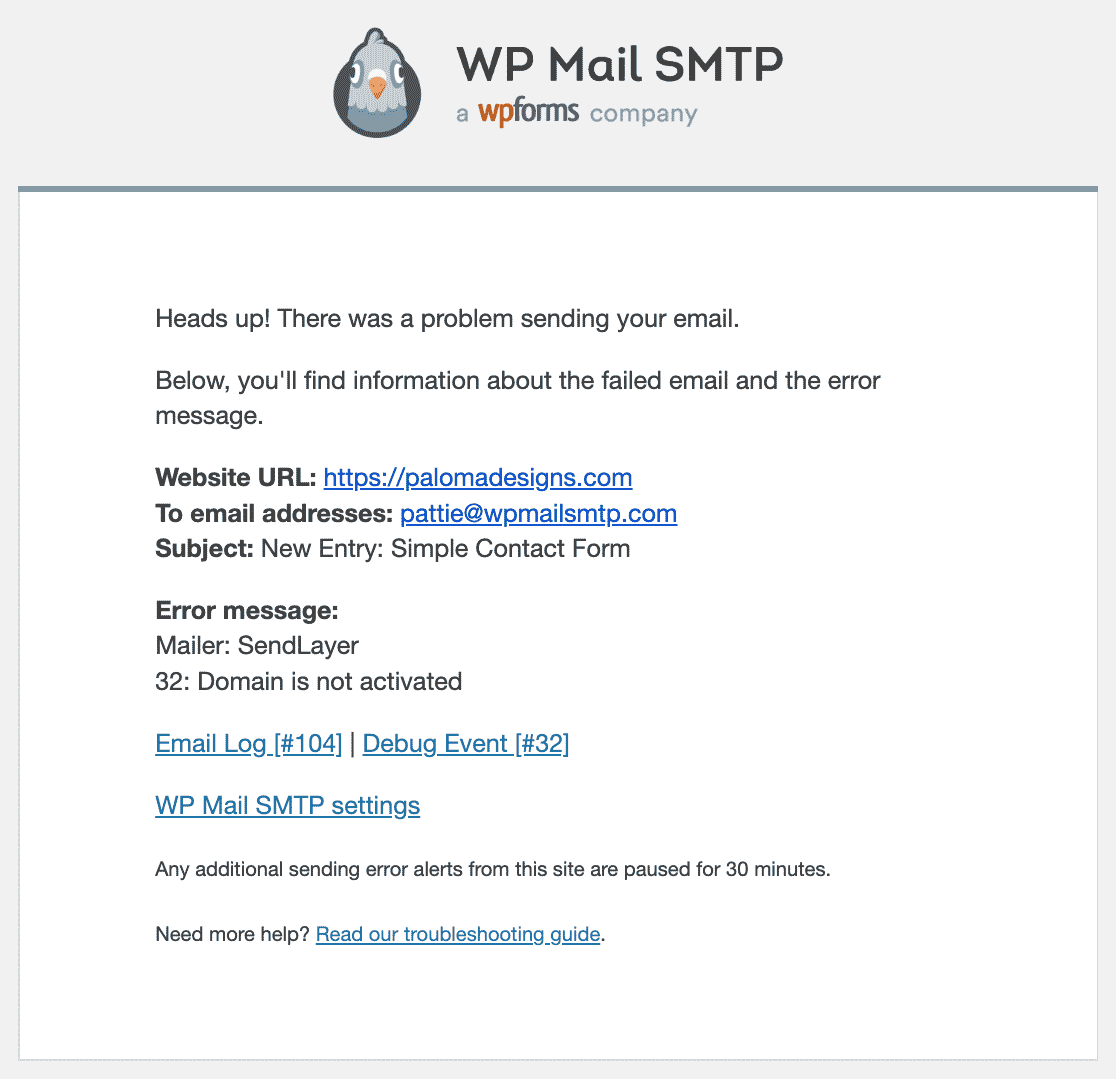
Let’s now see how we can resend failed marketing emails using WP Mail SMTP.
5. Resend Failed FluentCRM Emails Using WP Mail SMTP
Even after setting up the mailer service on your website, some emails may fail to deliver. This can happen if your SMTP server or email provider has a brief outage.
To combat this, we recommend that you log the entire contents of your emails.
On the next screen, you can enable additional email logging features, including the option to save email content, save attachments, and track email opens and clicks.
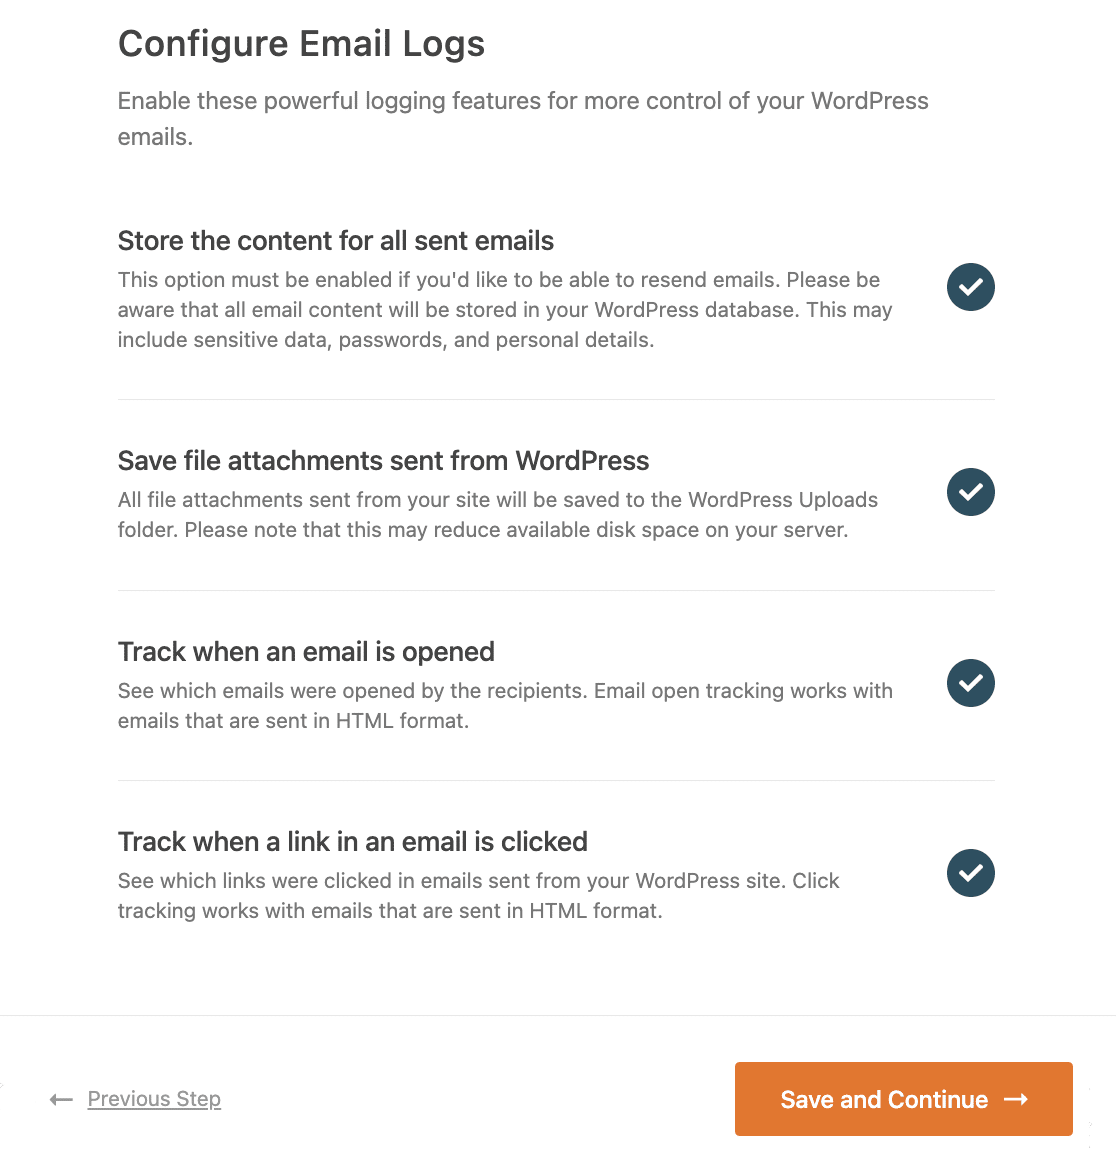
Go ahead and enable all of the logging features you want. You must enable the Store the content for all sent emails to be able to resend emails.
You can check out all other email logging features in detail in our article on how to log your WordPress emails.
WP Mail SMTP will check your DNS settings and sends a test email. If everything is correctly set up, you’ll see a success message in the end. If there’s an issue with the DNS settings, it will show you details of the error.
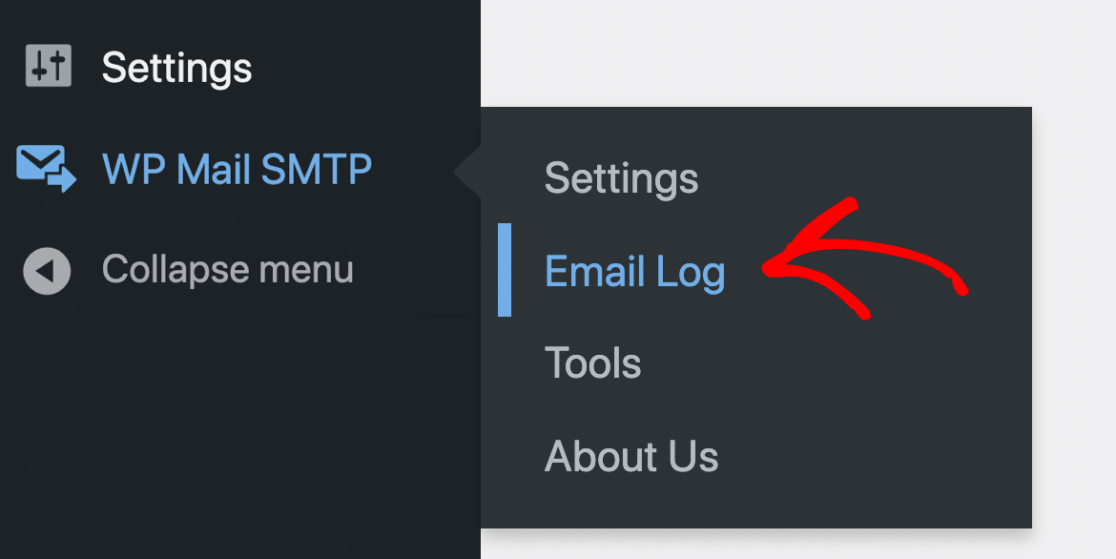
Next, let’s try resending an email so you can see how it works. To start go to WP Mail SMTP » Email Log.
We have an email right here that’s marked with a red dot.
Click on the View Log button for the email that you want to resend.

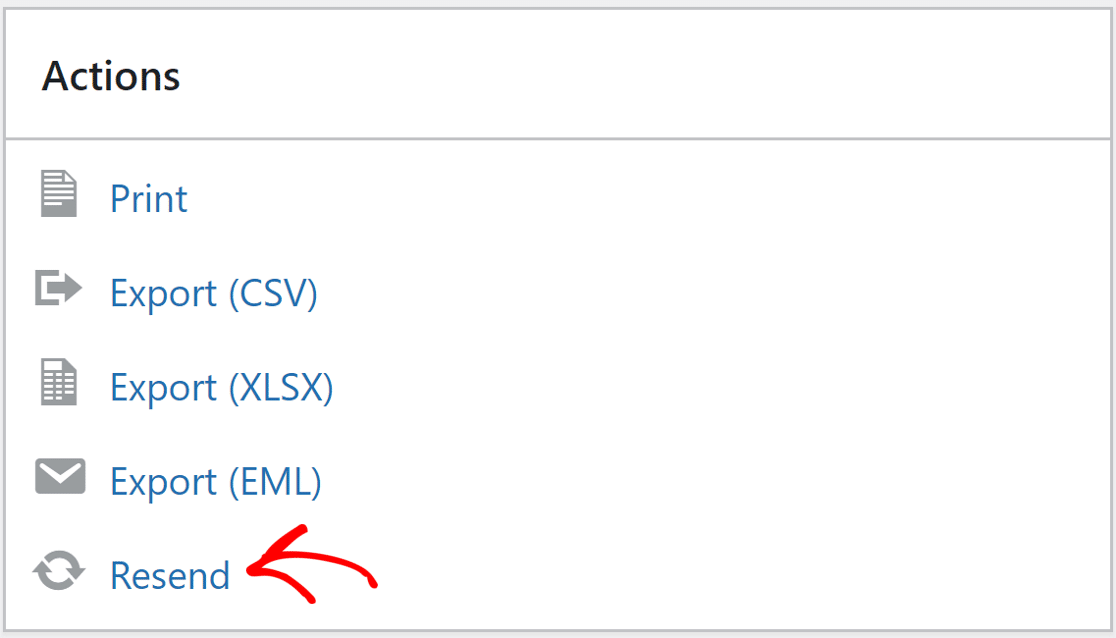
On the log screen, you’ll find the Resend button under the Actions tab. Click on it and a popup will appear.
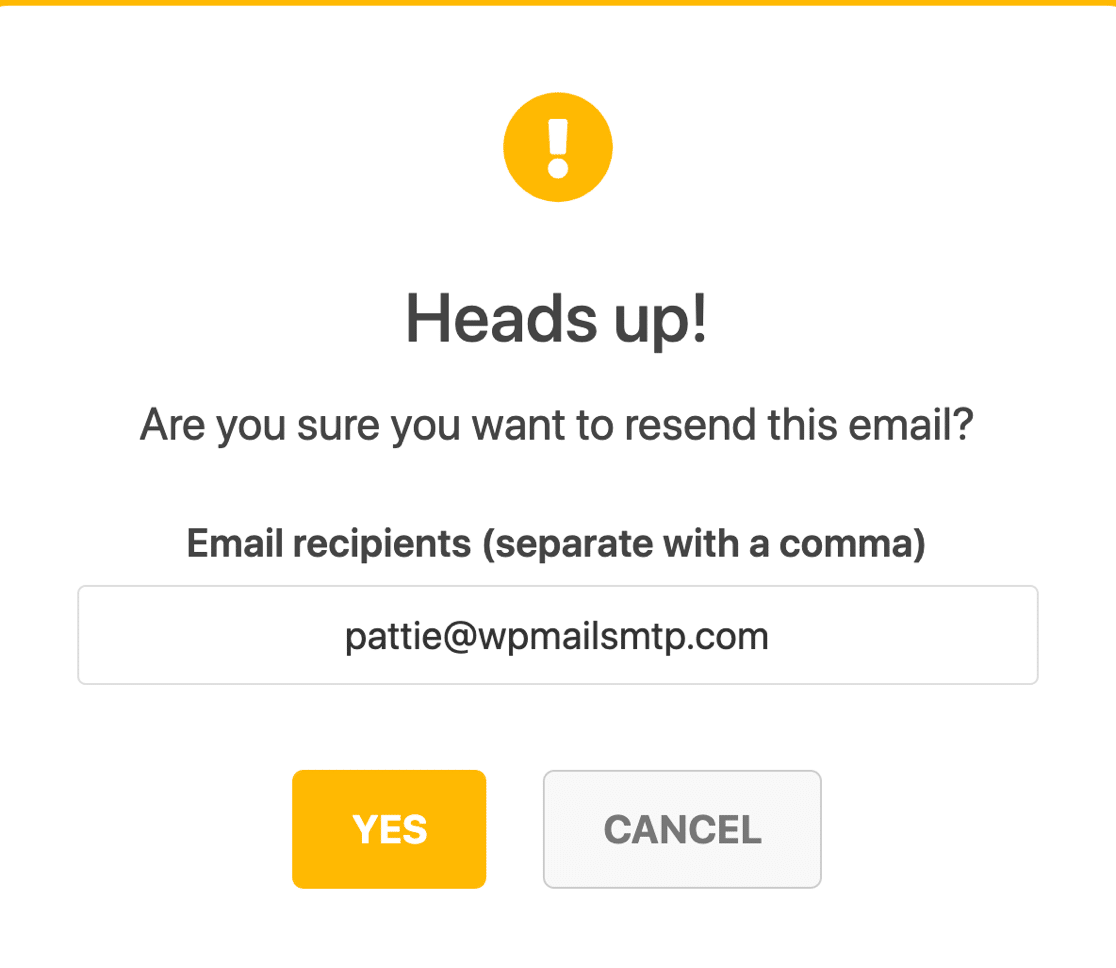
The email field will be prefilled with the same email address. You can click the YES button to resend the email, or change the email address first if you need to.
And that’s it! You’ve done everything to fix FluentCRM not sending email, and you also know how to resend emails that failed.
Bonus: Create Open and Click Rate Reports
Did you know that WP Mail SMTP Pro also lets you create open and click-through graphs? This is an awesome way to measure performance for your FluentCRM campaigns.
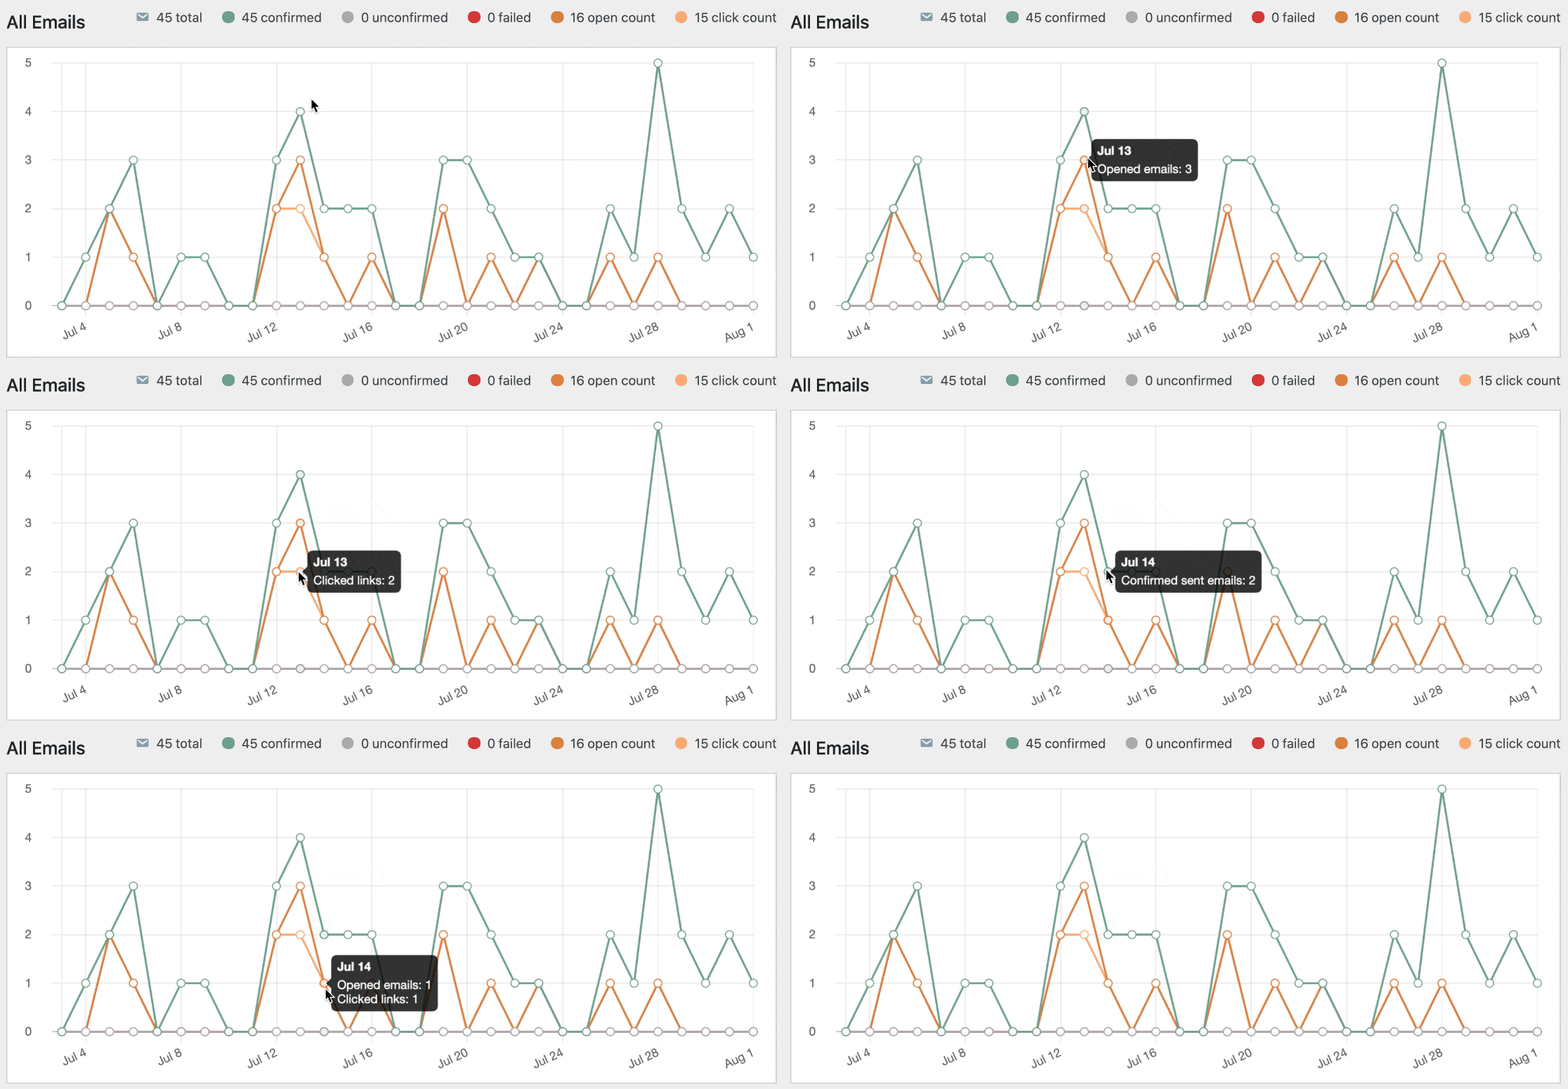
You also get a breakdown of this data in your weekly summary:
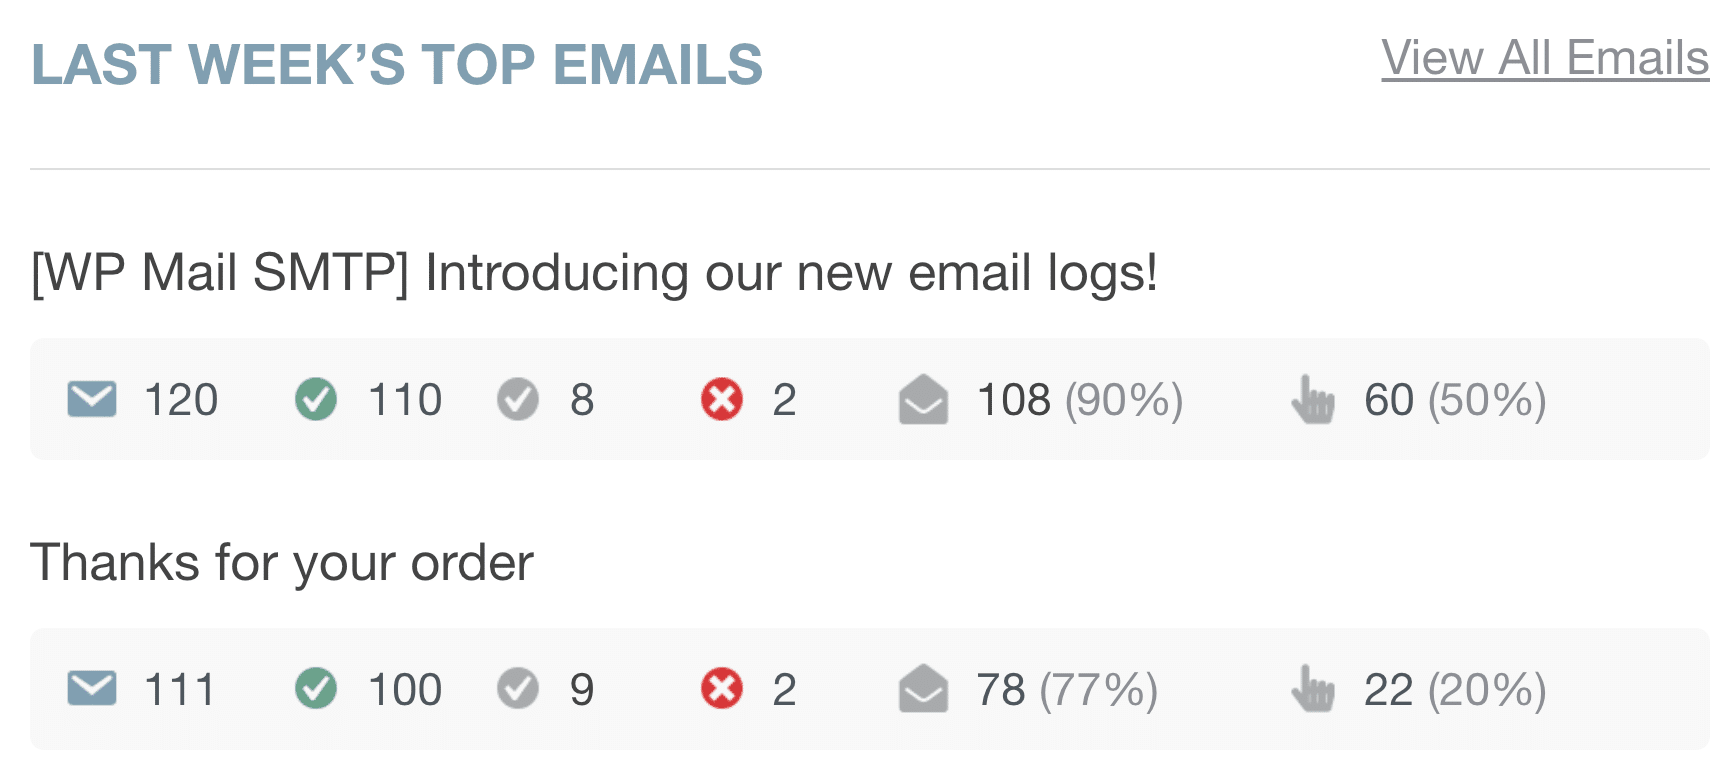
Be sure to check out the Email Reports to see all the new features you can use with WP Mail SMTP and FluentCRM.
Frequently Asked Questions about FluentCRM Emails
Many users contact us because they’re having issues with FluentCRM not sending emails. Here are some of the most common questions our support team answers:
Why is FluentCRM not sending emails?
FluentCRM uses the default WordPress wp_mail() function to send emails. If your site isn’t connected to a proper SMTP service, emails may fail to send or land in spam. The most common cause is relying on your web host’s limited or unreliable email server.
💡 Fix it fast: Install and configure WP Mail SMTP to connect WordPress to a dedicated email provider like SendLayer, SMTP.com, or Gmail.
Do I need an SMTP plugin for FluentCRM?
Yes. While FluentCRM can technically send emails without one, it’s highly recommended to use an SMTP plugin for reliable delivery. Without SMTP, your emails are more likely to be flagged as spam or blocked entirely.
🔧 WP Mail SMTP ensures your emails are authenticated and sent through trusted channels, improving inbox placement and deliverability.
How can I check if FluentCRM emails are sending?
Install WP Mail SMTP and enable the Email Log feature. This shows every email sent (or attempted) by FluentCRM and other plugins on your site.
You can filter by:
- Date
- Subject
- Recipient
- Sending status (success/fail)
This makes it easy to confirm whether emails were sent and identify any problems.
What should the “From Email” be in FluentCRM?
Always use an email address associated with your domain—for example, [email protected]. Free addresses like Gmail or Yahoo often fail domain verification checks and can be rejected.
WP Mail SMTP helps you set a verified “From Email” and ensures that it matches the sending domain properly.
Will installing WP Mail SMTP affect my existing FluentCRM settings?
No. WP Mail SMTP works independently and only improves how WordPress sends emails. Your FluentCRM campaigns, automations, and sequences stay exactly the same.
Once SMTP is configured, FluentCRM’s emails will be routed through your new provider, increasing the chances they reach inboxes.
Next, Find Out How To Set Up an Email Marketing Funnel
If you’re using FluentCRM for email marketing, it’s important to understand all the different stages of the email marketing funnel so you can make more conversions and turn subscribers into repeat customers. Read our guide that explains exactly what is an email marketing funnel for some more information and helpful tips.
Ready to fix your emails? Get started today with the best WordPress SMTP plugin. If you don’t have the time to fix your emails, you can get full White Glove Setup assistance as an extra purchase, and there’s a 14-day money-back guarantee for all paid plans.
If this article helped you out, please follow us on Facebook and Twitter for more WordPress tips and tutorials.

