AI Summary
Are you looking for an easy way to send automated email from your WordPress site?
If you run any kind of online business, emails are crucial for staying in touch with your customers, sending order confirmations and delivery updates, communicating account information, and other important messages.
In this guide, we’ll show you how to set up email automation in WordPress so you can send many of these messages automatically, saving time and streamlining your business operations.
Automate Your WordPress Emails Now
What Types of Automated Emails Can I Set Up in WordPress?
With the right email service and automation plugin, you can send several types of automated emails, such as updates, newsletters, notifications, reminders, drip campaigns, transactional emails, and more.
In this guide, we’ve included tutorials for several email automation tools to demonstrate various ways of setting up automated email workflows in WordPress for different purposes.
How to Send Automated Email in WordPress
Here is an overview of the tutorials and plugins we’ll cover in this guide:
In This Article
- Configure Your Website for Email Deliverability
- Example 1: Send a Welcome Email to a New Subscriber With WPForms
- Example 2: Send Automated Drip Emails With Constant Contact
- Example 3: Send Targeted Marketing Campaigns With OptinMonster
- Example 4: Automatically Deliver Digital Products With Easy Digital Downloads
- Example 5: Send Automated Transactional Emails With FunnelKit Automations
- Example 6: Send Automated Emails With Uncanny Automator
Configure Your Website for Email Deliverability
Before you do anything else, it’s essential to make sure that your WordPress site is set up to send emails in a way that maximizes deliverability.
Although WordPress can generate and send emails without the need for a third-party service or plugin, it’s not the best idea to rely on WordPress alone.
This is because WordPress uses the PHP mail function to send emails, which is a very basic function not supported by all hosting providers.
Because emails sent by PHP mail are not authenticated, they’re also more likely to be marked as spam. So even if your site can send emails successfully, they may not reach their intended recipient. The easiest way to fix this issue is by installing the WP Mail SMTP plugin.
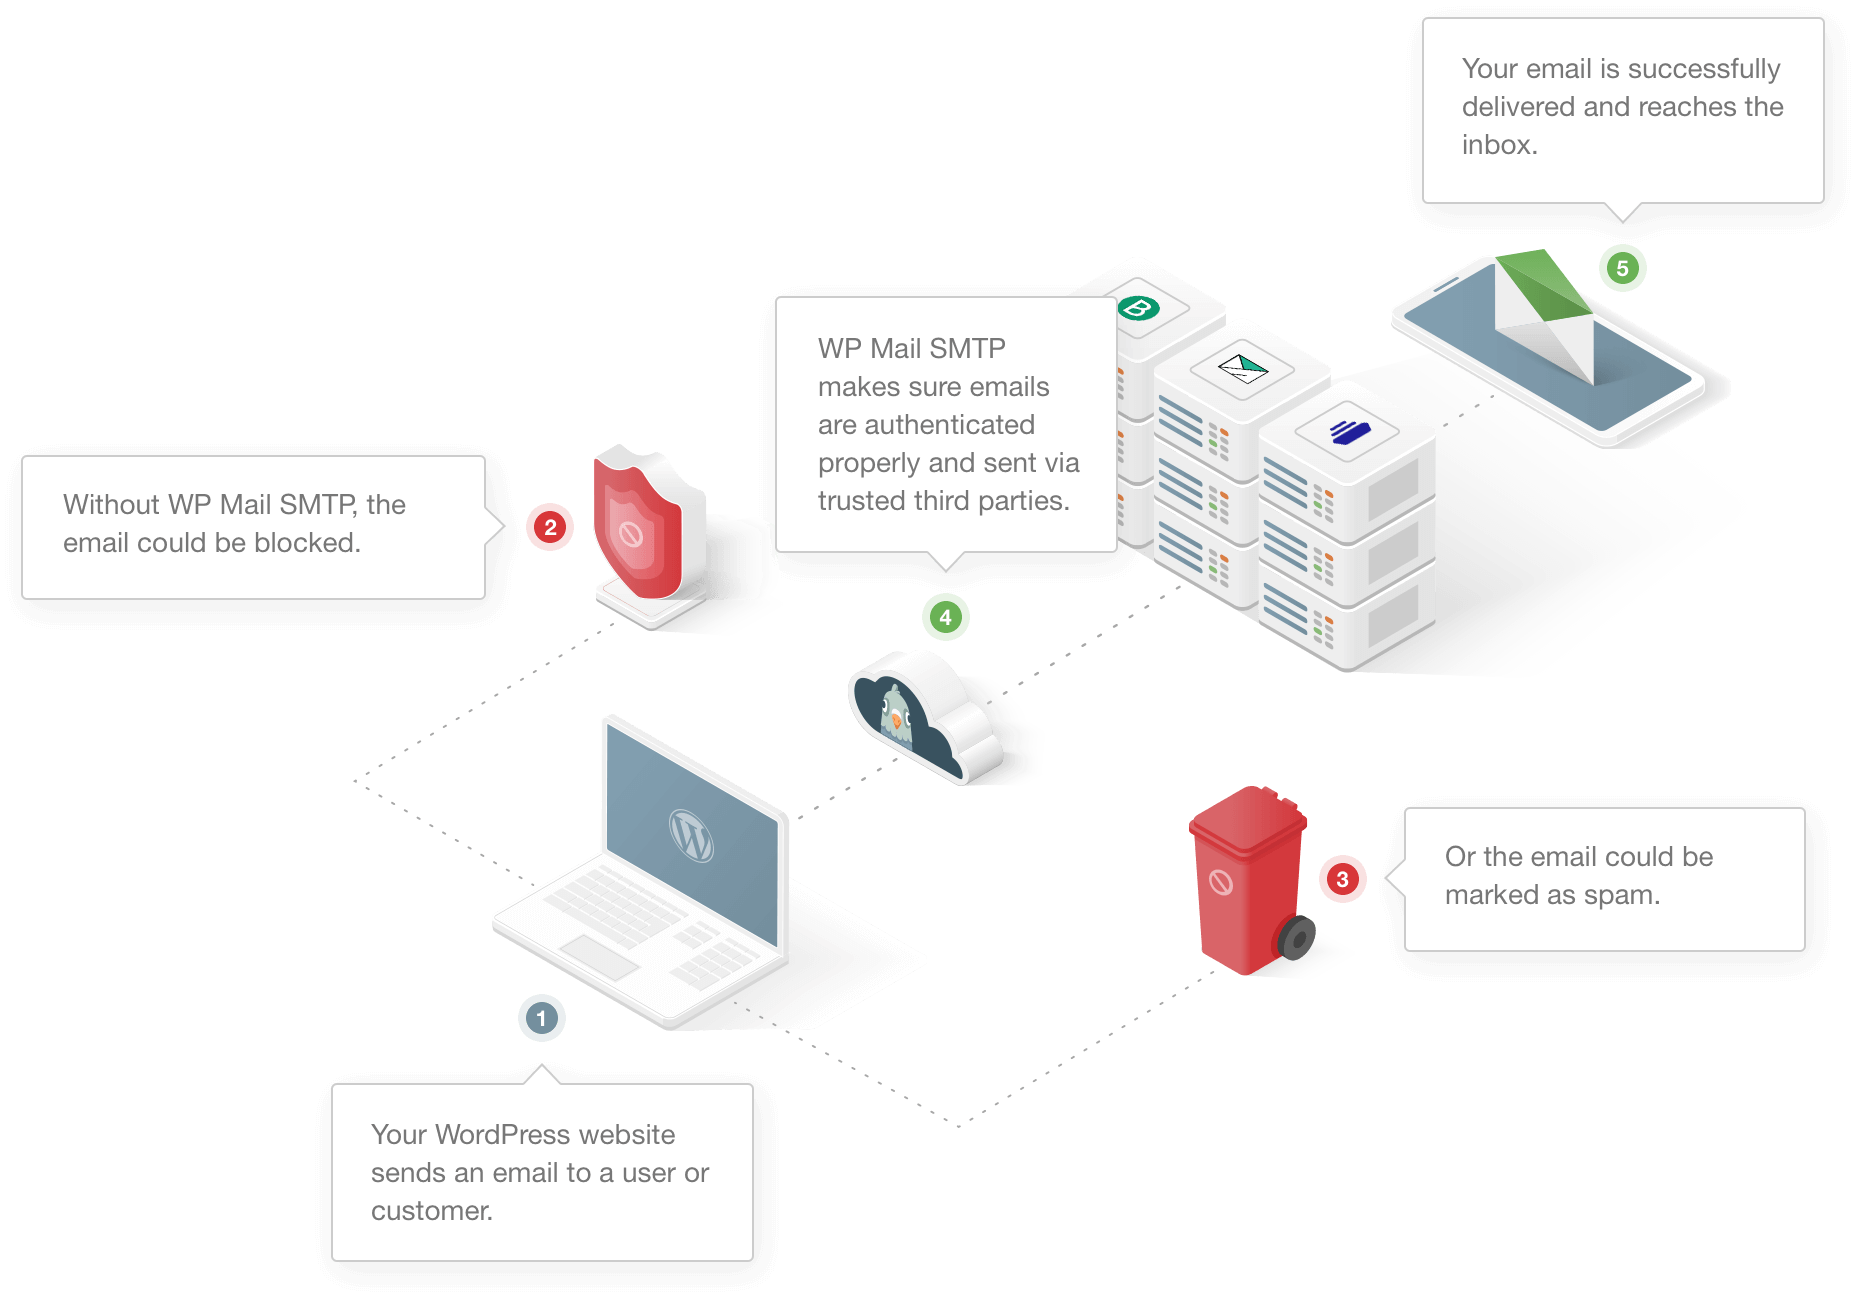
WP Mail SMTP works by sending mail through a third-party SMTP mailer service such as SendLayer, Gmail, or SMTP.com. These mailers authenticate emails so they won’t be marked as spam and will reach the recipient’s inbox every time.
For complete instructions on installing and configuring WP Mail SMTP, see this complete guide on how to set up WP Mail SMTP with any host.
If you already have WP Mail SMTP but are encountering issues related to SMTP host, check out our troubleshooting guide for an easy fix.
Example 1: Send a Welcome Email to a New Subscriber With WPForms
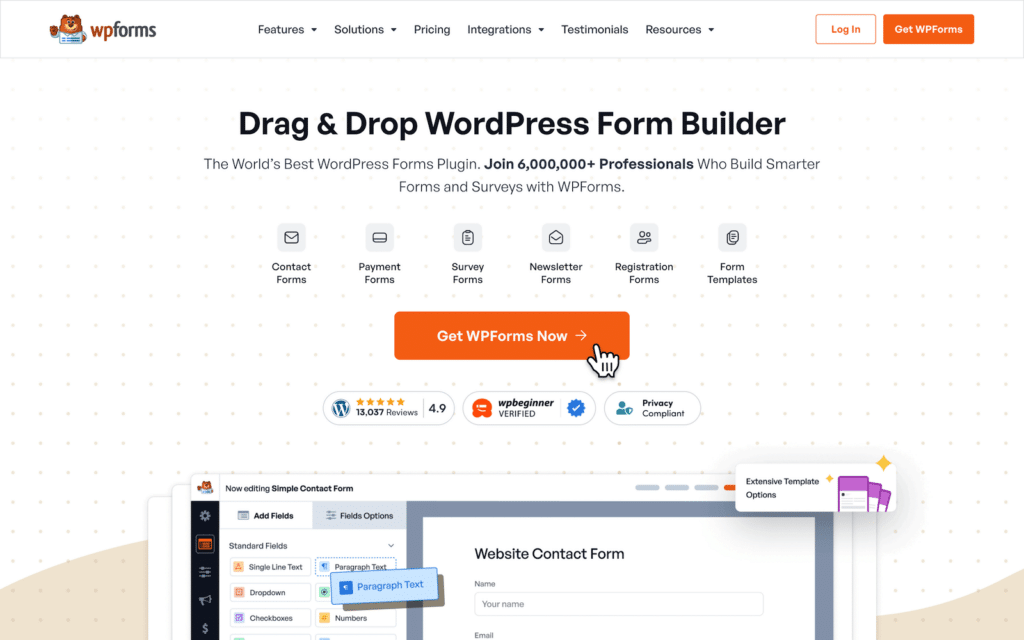
WPForms is the best form builder plugin for WordPress as it’s simple to use with powerful features.
The WPForms plugin also includes hundreds of pre-built form templates, so you can get an email subscription form published on your WordPress site and ready to collect emails in just a few minutes.
The free version of the plugin also comes with built-in integration with Constant Contact, so you can add email addresses from your signup form directly to your mailing list. You can upgrade to WPForms Pro if you want to use another email marketing service like AWeber or Mailchimp.
1. Install WPForms
Start by installing and activating the WPForms Lite plugin. If you need any help with this, you can follow this beginner’s guide to installing a WordPress plugin.
2. Create an Email Signup Form
Once you’ve installed WPForms, go to WPForms » Add New to access the form builder.
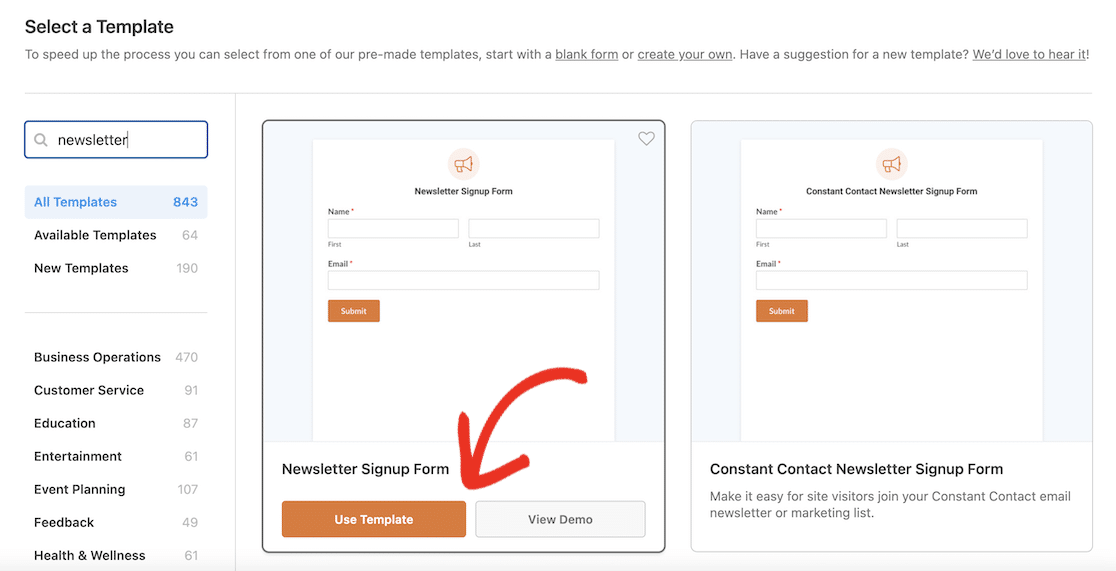
Type a name for your form at the top of the form builder (something like “Subscribe to Newsletter” is fine) and type “newsletter” in the search bar on the left to find the Newsletter Signup Form. Click the Use Template button.
3. Create a Welcome Email Notification
In the form builder, click the Settings tab and then Notifications.
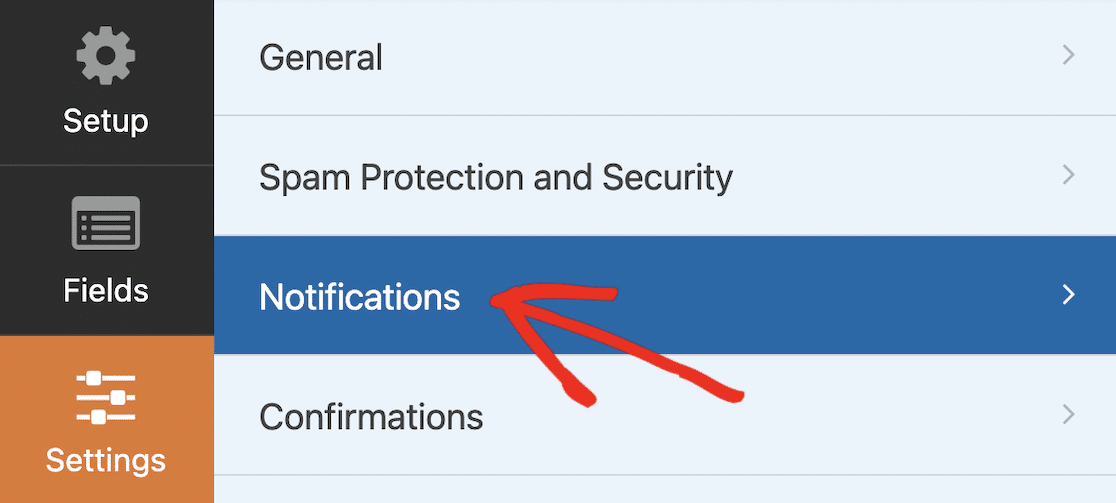
By default, WPForms already generates and sends an email to the site administrator when someone submits a form created with this template.
To send multiple notification emails, you’ll need to upgrade to WPForms Pro. But you can edit the default notification to change it into a welcome or first email for the user instead.
First, make sure that Enable Notifications is set to on, and then click the Show Smart Tags link next to the Send To Email Address label.
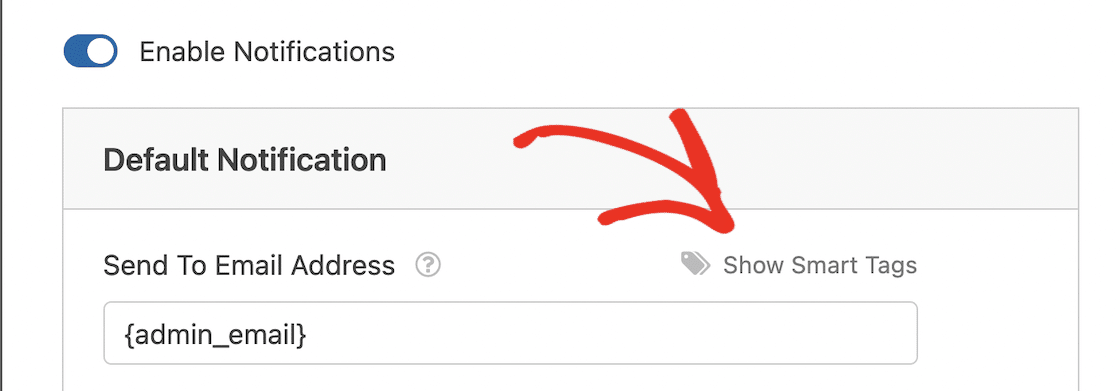
Under Available Fields, click Email. This will set the email entered in the form as the email to send the notification to.

If you don’t want the admin to also receive a thank you email every time a user signs up, delete “{admin_email}” from the Send To Email Address field. Or, you can leave it and separate the two email addresses with a comma if you want to send the same message to the admin email.

Change the Email Subject Line, From Name, and Email Message to something more appropriate for a welcome email.
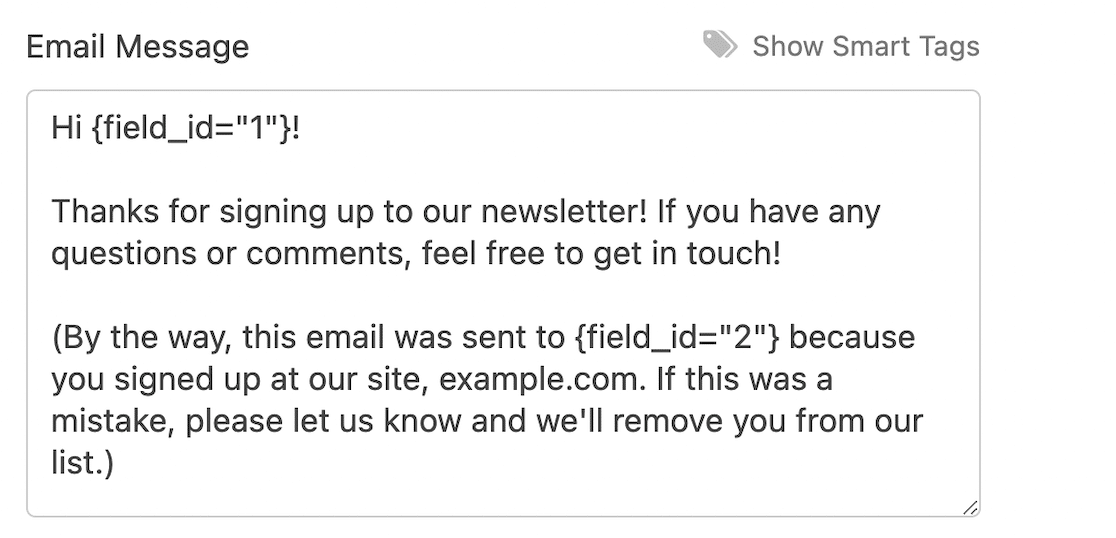
You can add the name and email entered into the form as part of the message. You can enter these by using the Smart Tags, as above. If you would like more help, you can see the smart tags documentation on WPForms.
For example, here’s what your email message might look like:
Finally, change the Reply-To field to “{admin_email}” or another email where you can monitor emails from subscribers.

Click the Save button at the top of the form builder to save your changes.
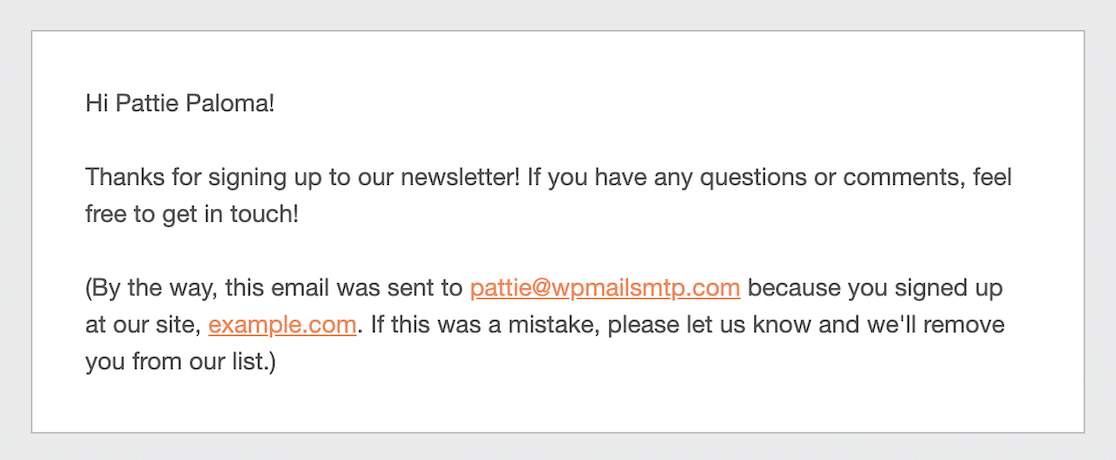
Once that’s done, your email notification should be all set up and ready to go. Make sure to test a form submission to check that both emails are received and look how you intended. The email should look something like this:
You’ve now got a signup form that sends a thank you email but won’t automatically add the user to your email list.
To do that, follow the next example, which walks you through the process of linking WPForms to Constant Contact and sending automated marketing emails to your list.
Example 2: Send Automated Drip Emails With Constant Contact
Drip marketing involves sending a series of pre-written automated emails to a subscriber on a set schedule as a series of “drips.”
Drip email marketing campaigns are a great way to keep your followers engaged and boost retention rates, as they’ll receive regular emails from you. They will also save you a lot of time, as once you’ve created the emails and set them up in an email marketing platform, they’ll automatically be sent out to subscribers without any more work from you.
We recommend using Constant Contact for your email marketing automation, as you can get started for free, and it’s integrated with WPForms lite. You can use any of several email automation tools, such as Drip, Brevo, AWeber, or another email marketing platform if you prefer.
Just so you know, you’ll need to upgrade your Constant Contact account to access automation templates and custom automations.
Before you start, ensure you’ve completed the steps in the previous example to create an opt-in form with WPForms.
1. Connect WPForms to Constant Contact
Go to WPForms » All Forms and click on the name of your signup form to open the form builder.

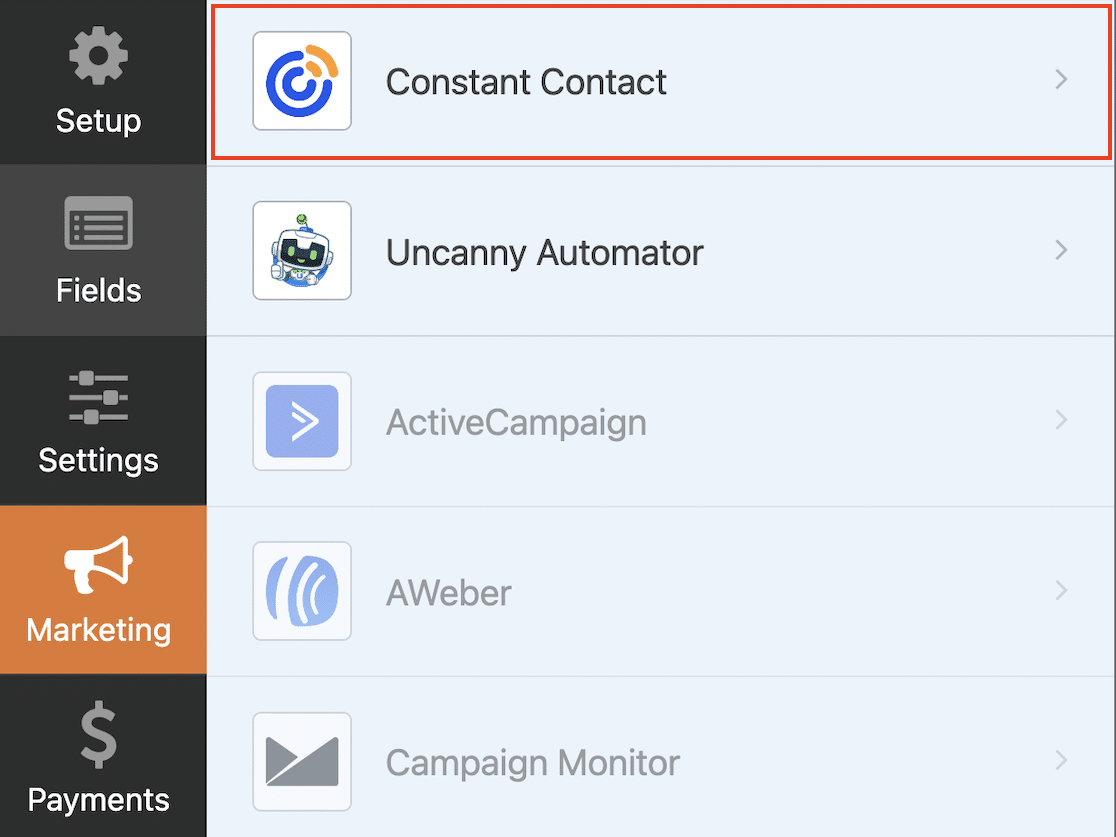
Click on the Marketing tab in the form builder and choose Constant Contact for the marketing integration.
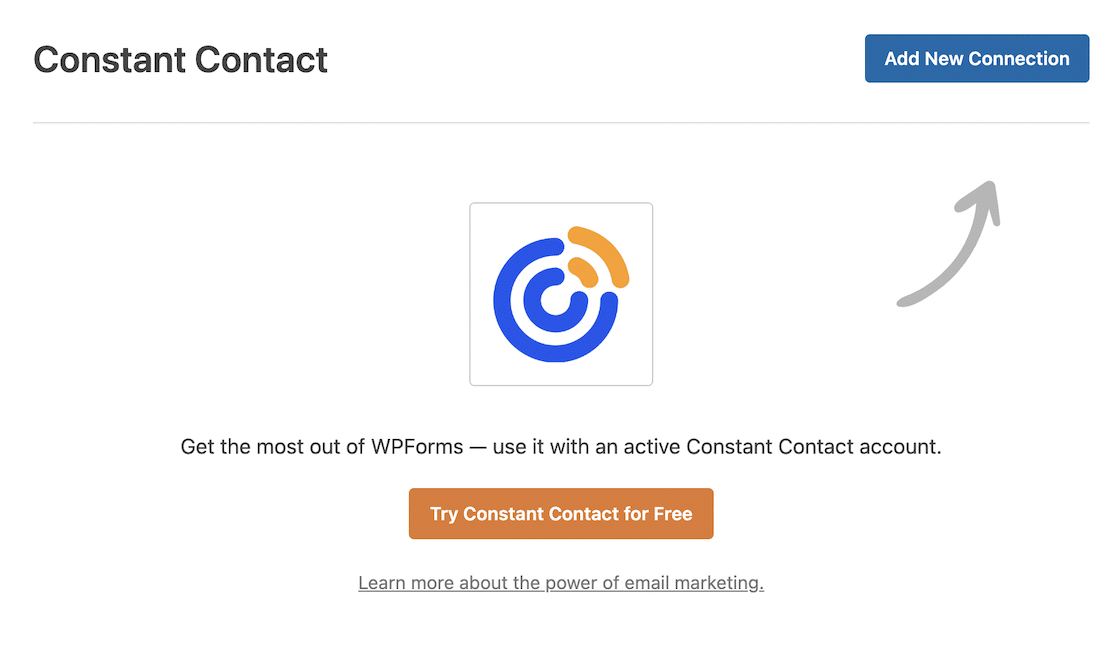
If you don’t already have a Constant Contact account, click the Try Constant Contact for Free button to create an account. Once you have an account, click Add New Connection.
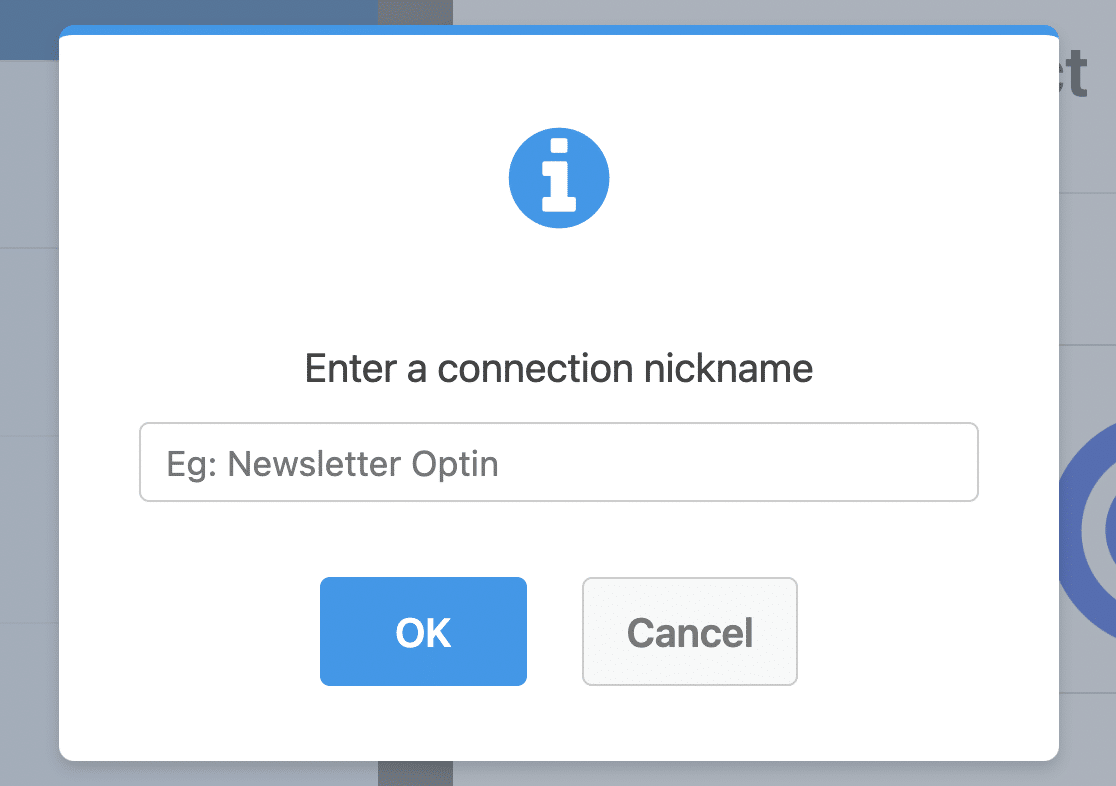
Enter a name for the connection and click OK.
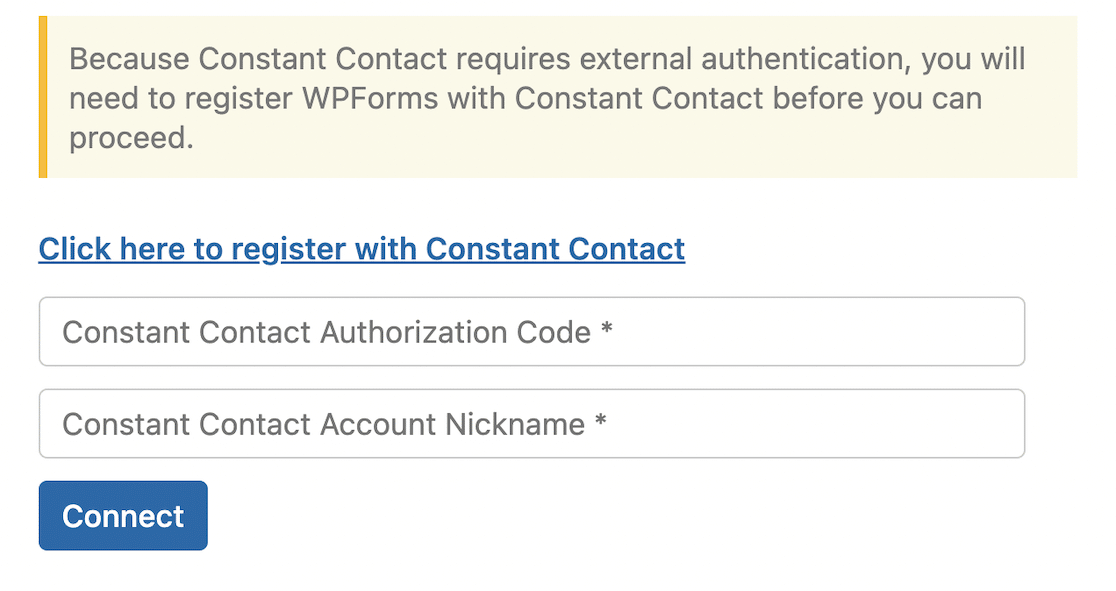
Follow the link to register WPForms with Constant Contact, enter the authorization code and account nickname, and click Connect.
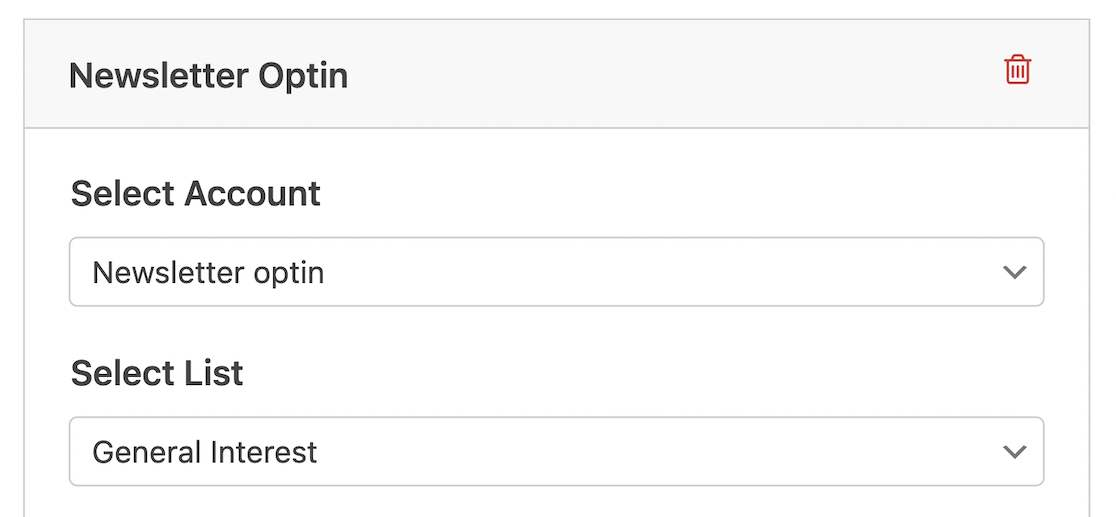
Choose the account and list in Constant Contact to which you want to save newsletter signups.
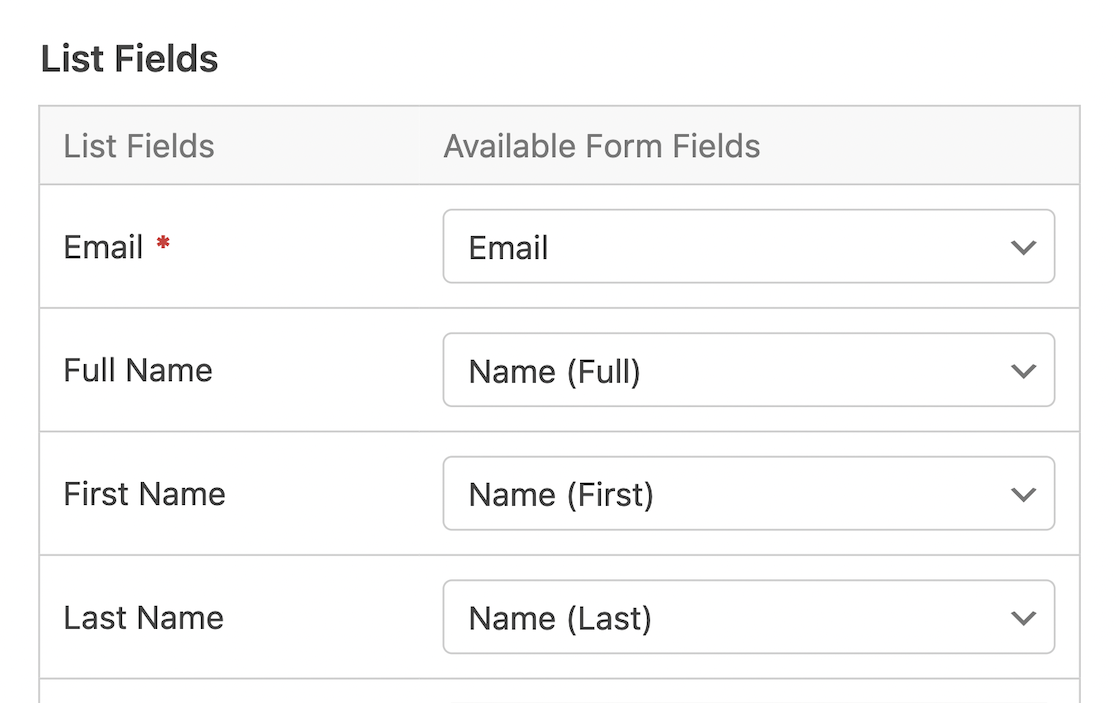
Select the name and email fields from your form to map to the equivalent fields in Constant Contact.
Finally, click the Save button at the top of the form builder.
If you need more help or get stuck at any step of this process, follow the detailed integration instructions on WPForms.
2. Create Your Drip Campaign
Log into your Constant Contact account and click the Create button in the top right corner.
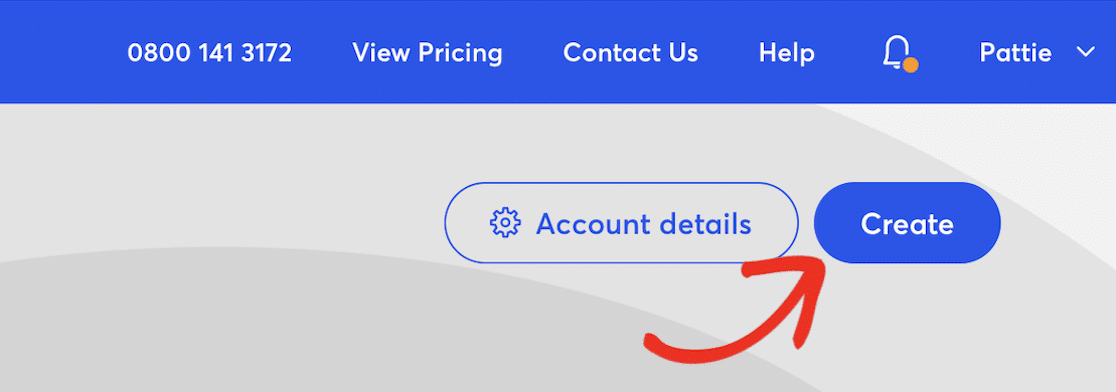
Choose Automations from the popup box.
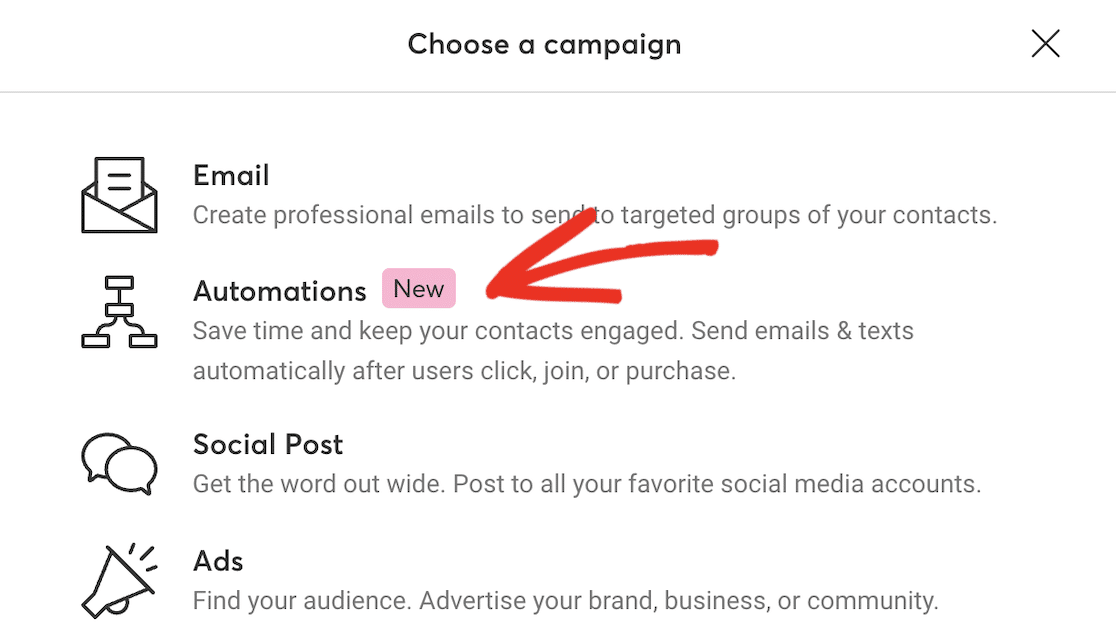
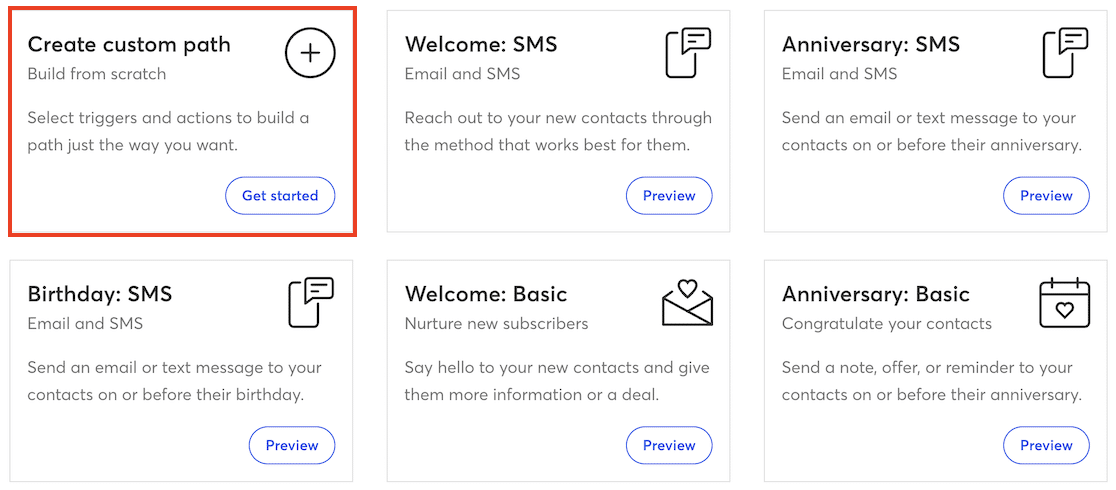
Constant Contact offers several pre-built templates for automated sequences, including emails and SMS notifications, or you can create your own. Click Create custom path.
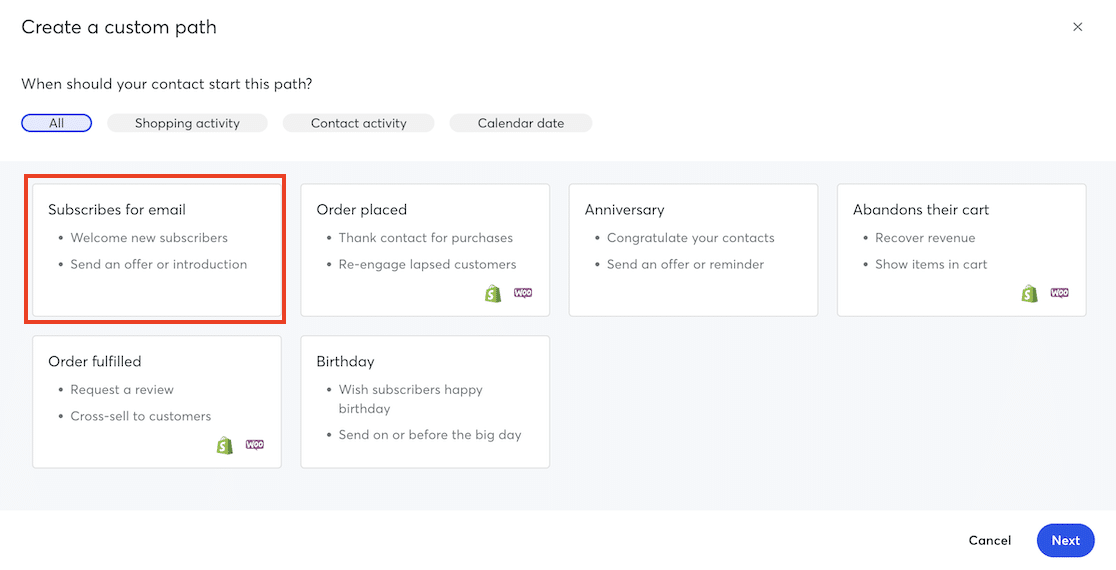
Select the trigger to start the email sequence. This is a date, or something the user does that will trigger the automations. For this example, we need Subscribes for email.
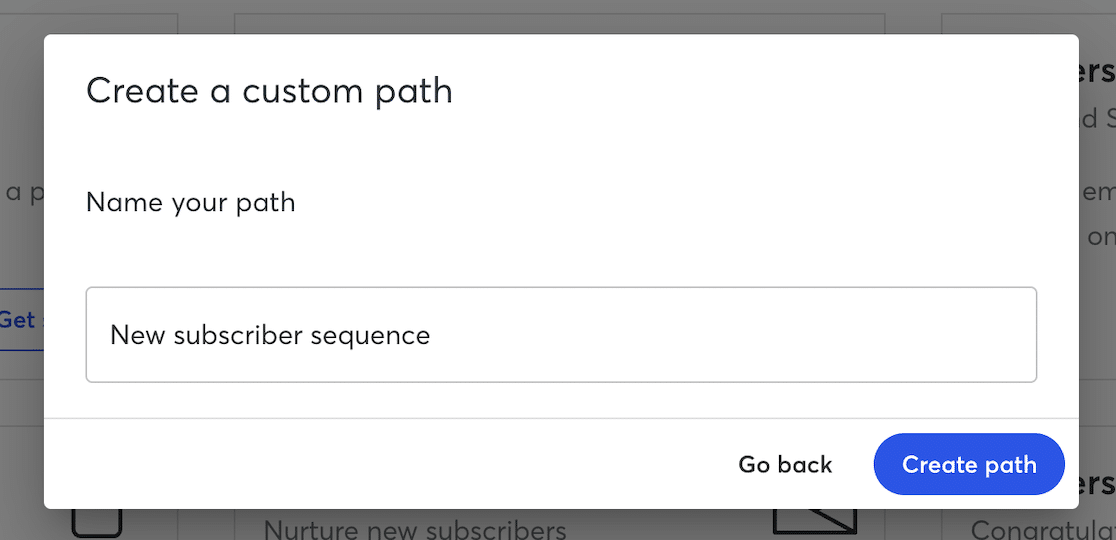
Enter a name for your automation and click Create path.
You can now use the drag-and-drop sequence builder to build your drip campaign by dragging Send an email actions and Time delay rules across until you’ve added as many emails as you wish.
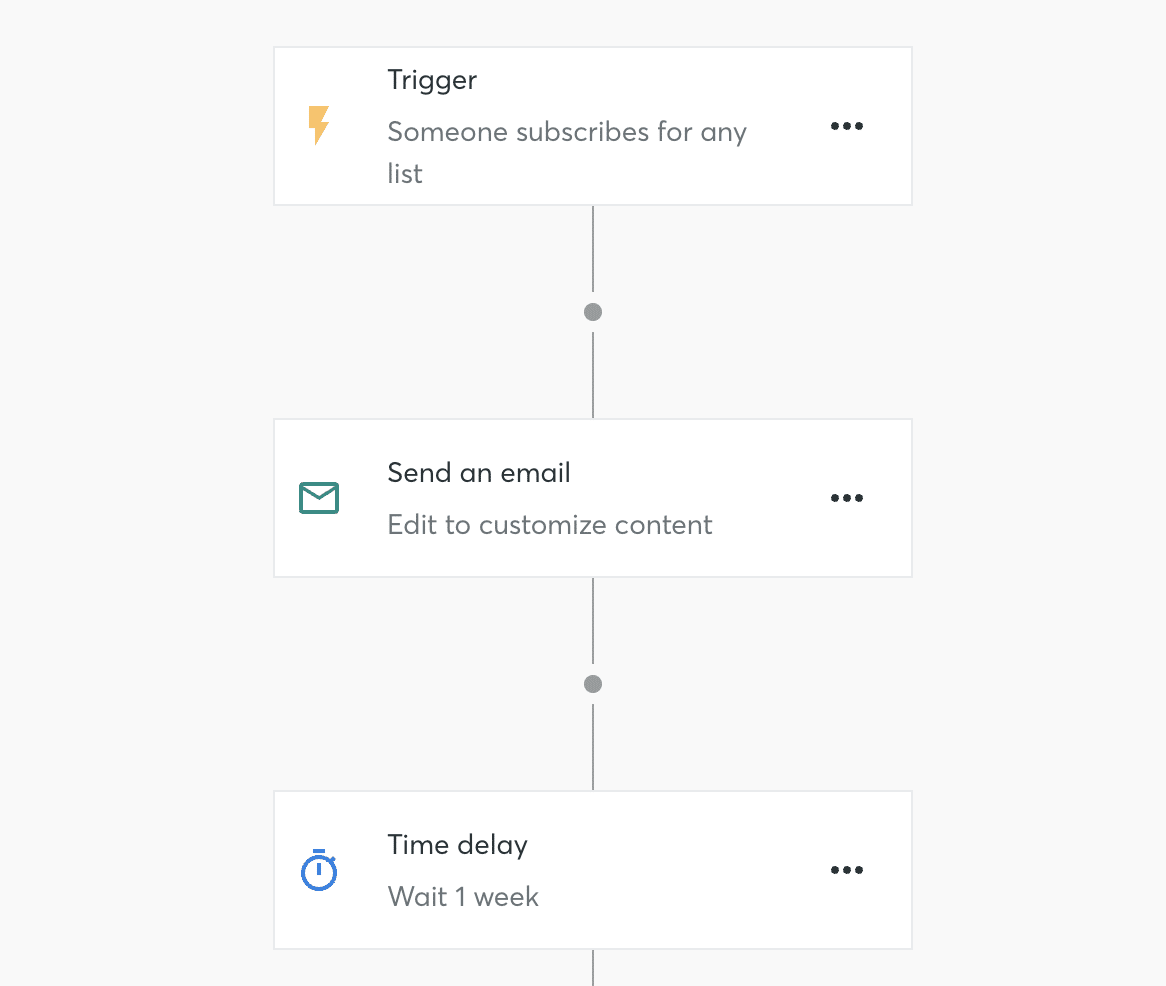
You can click the three dots to the right of each action and time delay to edit them.
Editing the Send an email action will take you through the process of creating a new email (or you can copy an existing one you’ve already made).
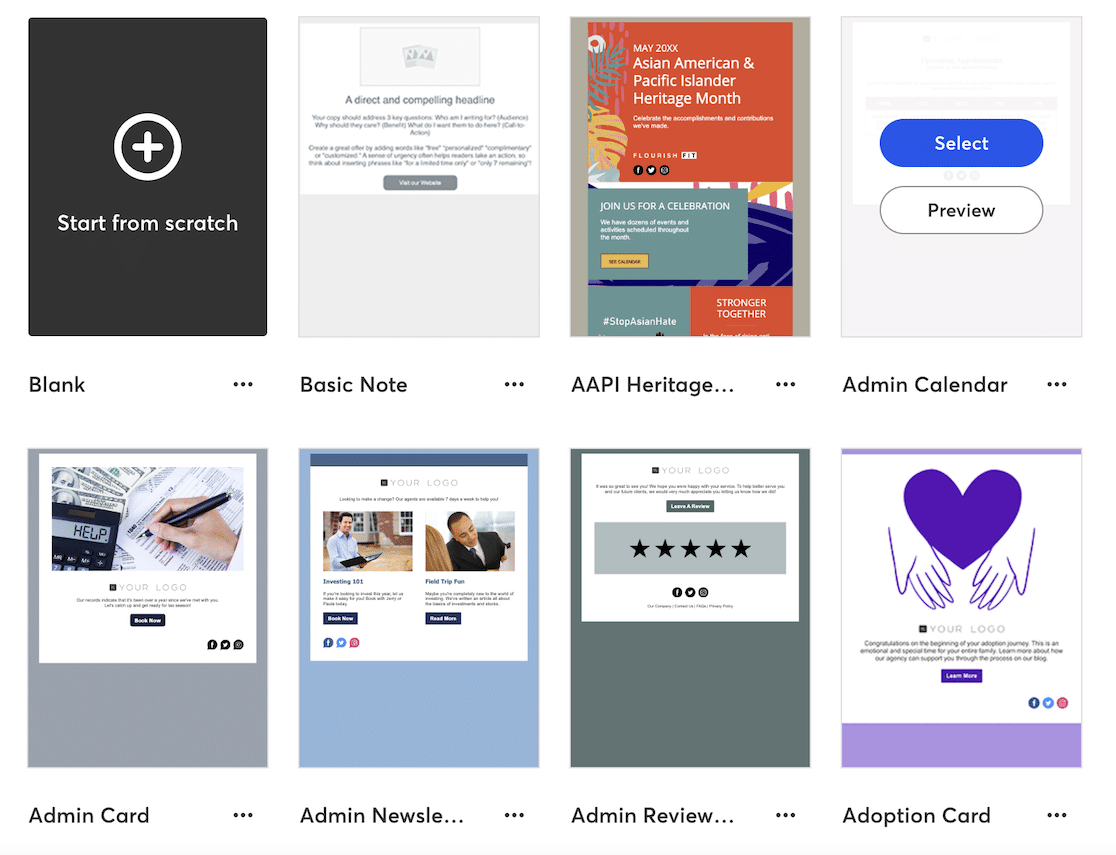
Start by entering a name for your email.

Next, choose a template for your email.
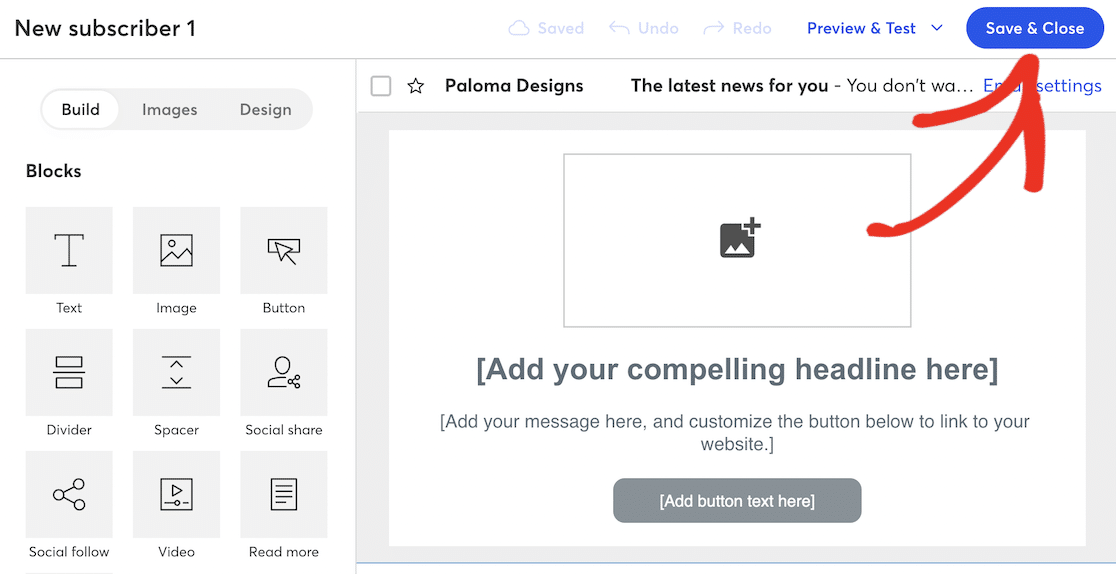
This will take you to the Constant Contact visual email designer, where you can drag and drop new elements like images and layouts and customize the text. When you’re finished, click the Save & Close button in the top right to go back to the email sequence builder.
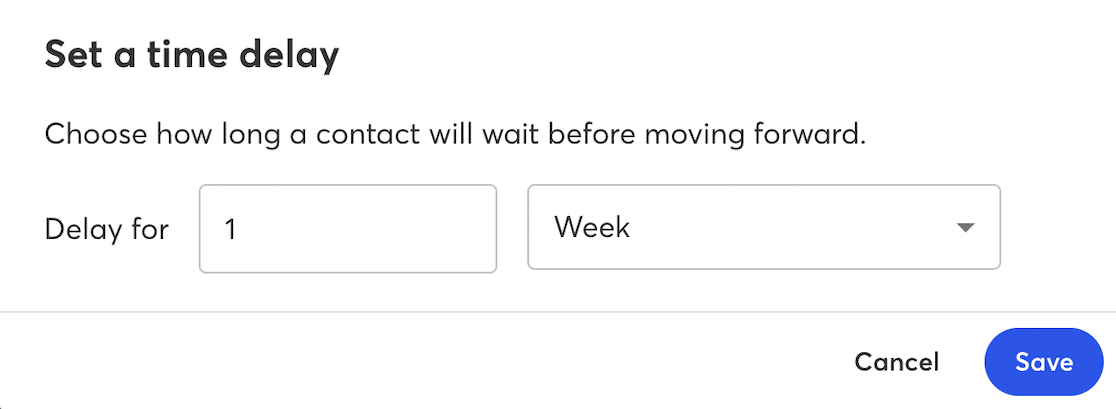
To edit the interval between emails, click the three dots on the time delay to edit. You can set an interval in minutes, hours, days, weeks, or months, as you wish.
Keep adding Send an email actions separated by time delays until you complete your entire sequence. You can add conditional rules and create a more complex sequence if you wish. For example, you can choose to send an email to a subscriber only if they click links in your email.
When you’re finished editing your sequence, click the Activate button. If you’re on the free Constant Contact account, you’ll be prompted to upgrade your account before you can activate your campaign, or you can click Save & close to come back to it later.
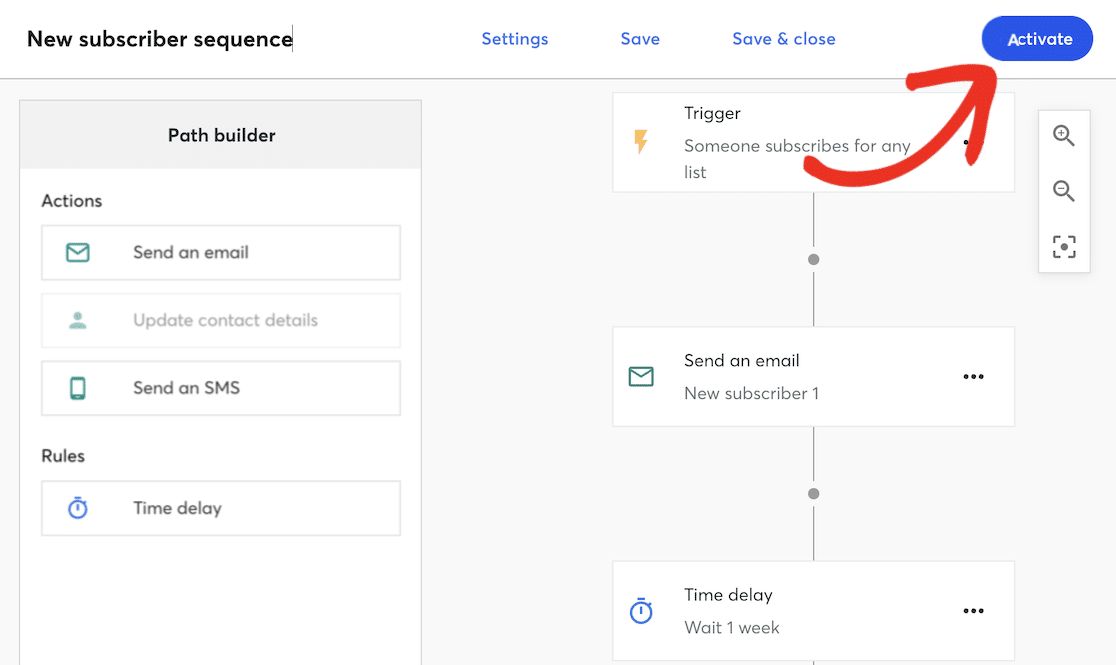
After you’ve activated your campaign, Constant Contact will make sure the sequence is set up correctly and ask you to confirm before making it live.
You’ve now successfully set up an automated email campaign. Your subscribers will automatically be sent a series of emails when they opt into your newsletter on the schedule you set, and they can unsubscribe at any time to opt out of further emails.
Example 3: Send Targeted Marketing Campaigns With OptinMonster

OptinMonster is the best lead generation plugin for WordPress. It allows you to create high-converting signup forms in popups, slide-ins, floating bars, landing pages, welcome mats, and other eye-catching ways to grow your email list.
The plugin also has powerful tools for A/B testing and to segment your email list based on user location, specific actions, device, referral source, and more.
Segmenting your list with this information makes it easy for you to send more highly targeted and follow-up emails to your audience and potential customers, which are more likely to convert them into customers.
1. Install and Activate the OptinMonster Plugin
OptinMonster is a premium plugin, but plans start from just $9 a month, which includes list segmentation and basic targeting rules.
Head over to the OptinMonster website to purchase the plugin and set up your account.
You can install the plugin from your WordPress dashboard by navigating to Plugins » Add New and searching for “OptinMonster.” After you’ve installed and activated the plugin, you’ll need to connect it to your OptinMonster account to use it.
If you need help installing or connecting the plugin, there’s a full installation guide on the OptinMonster site.
2. Set Up a New Campaign
Once you’ve set up OptinMonster on your WordPress site, navigate to OptinMonster » Campaigns, and click the Add New button.

From the popup, choose Templates.
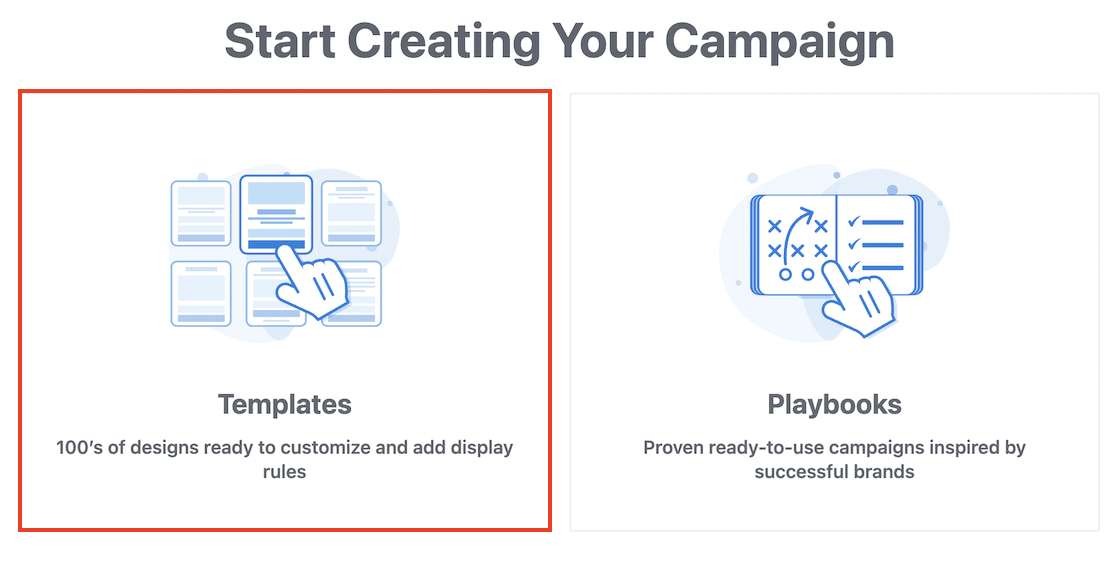
Next, choose a campaign type and a template.
For this tutorial, we’ll choose a popup with the Subscribe To Email template.
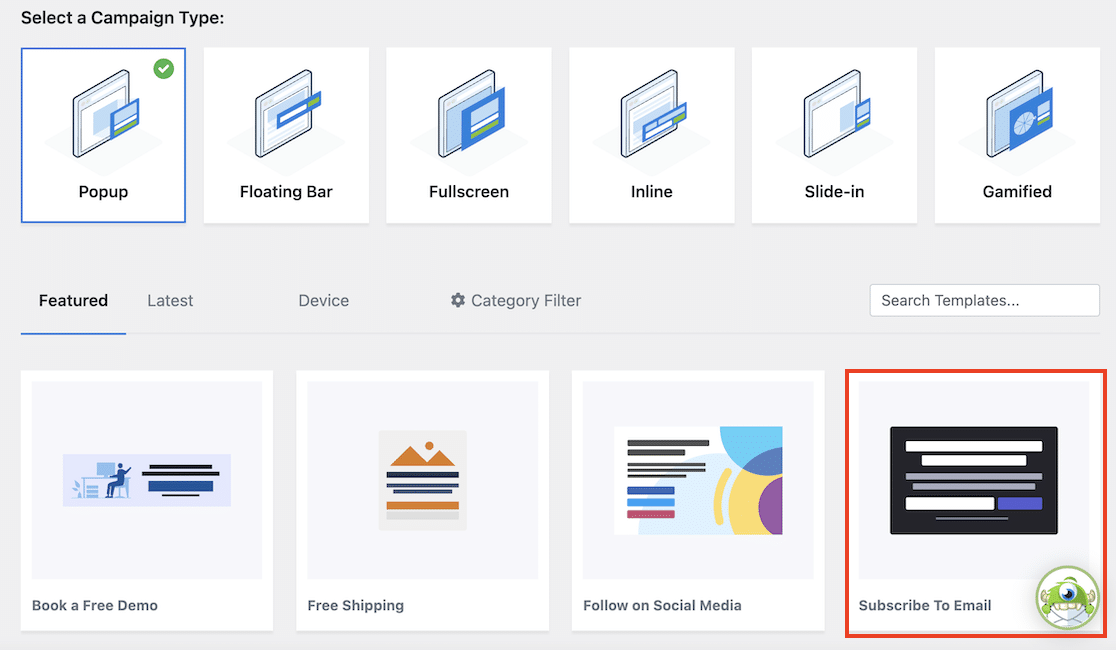
Click the Use Template button on the Subscribe To Email template and enter a name for your campaign.
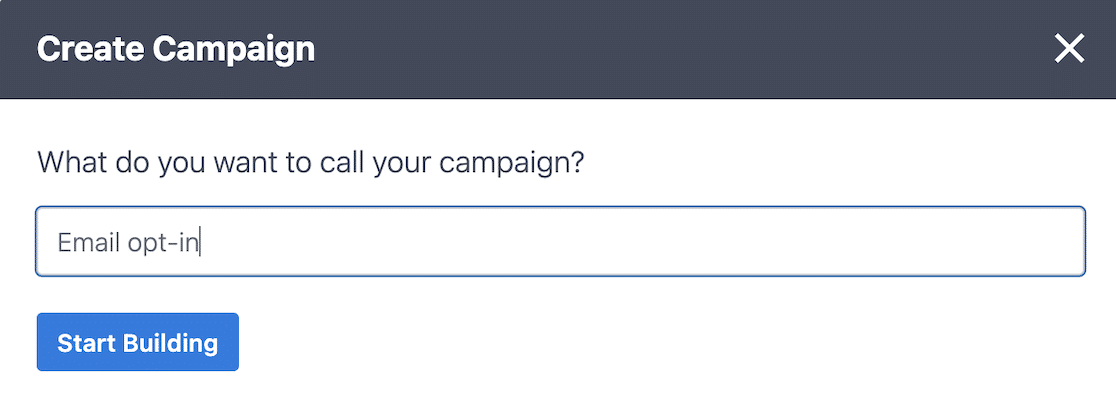
When you click the Start Building button, you’ll be taken to the OptinMonster drag-and-drop campaign builder to customize the design and behavior of your popup.
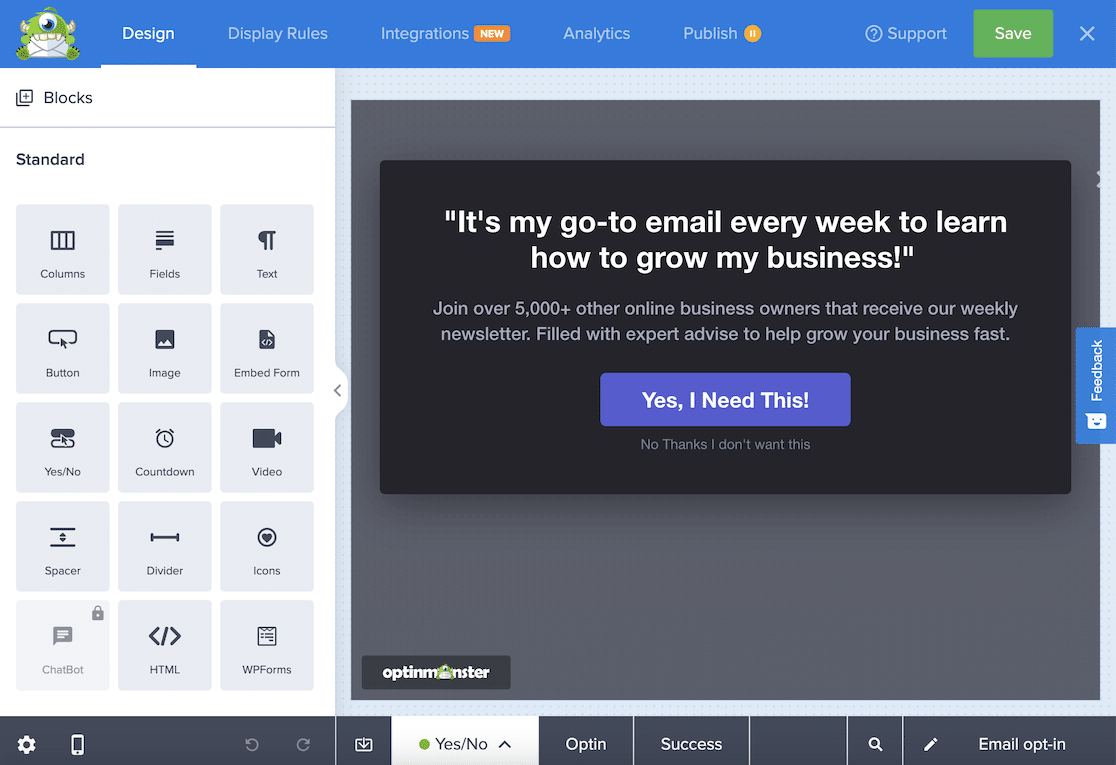
With OptinMonster’s display rules, you can set this popup to display only under certain conditions. Click on the Display Rules tab and click on the conditions dropdown to change it.
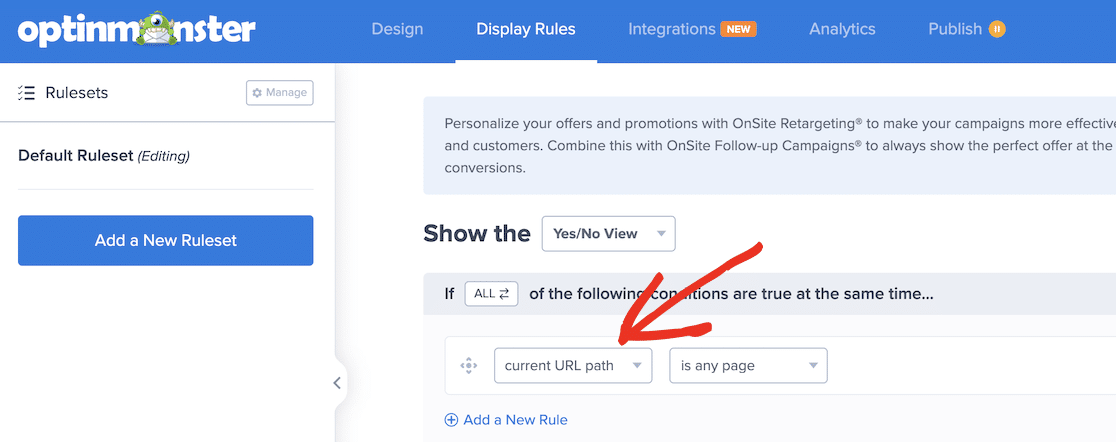
You have many options for display rules with OptinMonster. For this example, we’ll choose to show the popup only when users are on a specific page.
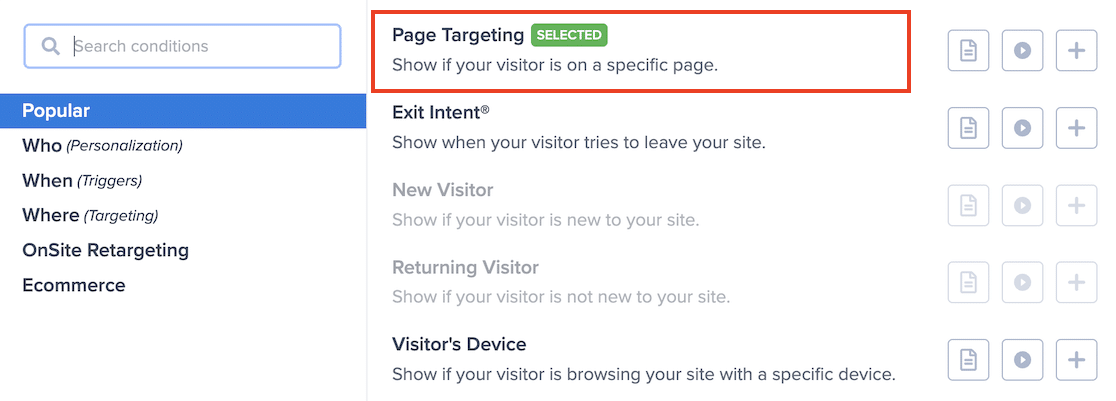
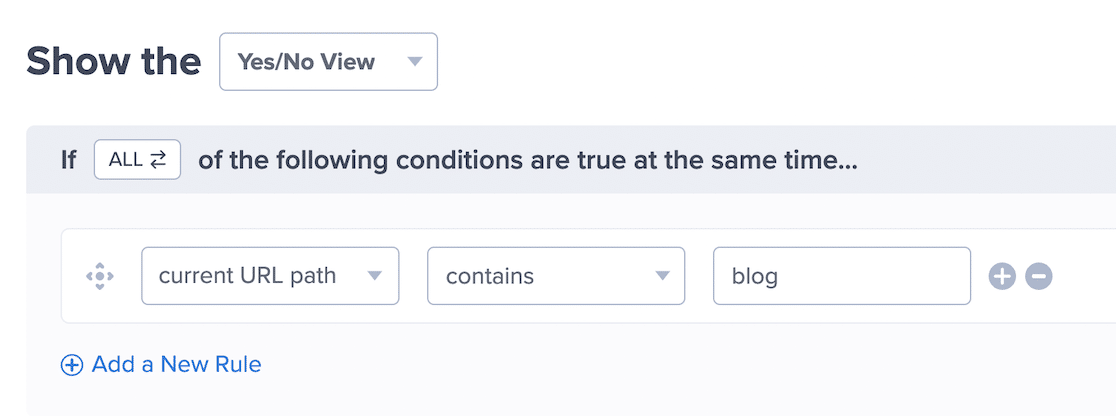
There is a lot of flexibility when you’re setting up this condition. You can restrict it to a single page, any page other than the homepage, or specify URLs containing specific keywords. For example, if you want to encourage users to sign up for your newsletter when they’re reading your blog, you could set the condition to “current url path contains blog.”
After you’ve finished setting up your display rules, click the Integrations tab to connect to your email marketing platform.
3. Connect OptinMonster to Your Email Marketing Service
We’ll continue with using Constant Contact as the example.
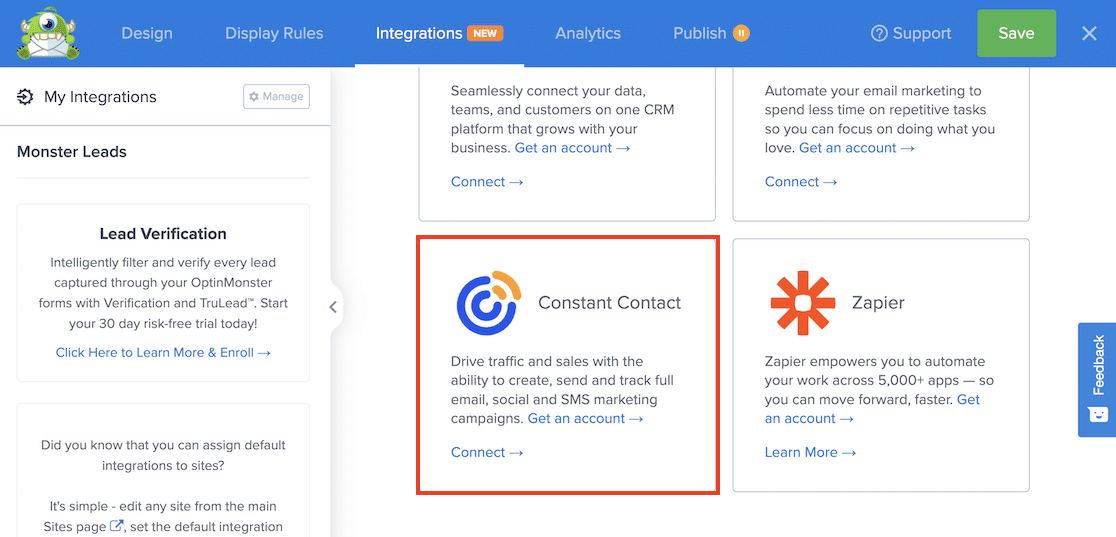
Continue following the steps to connect to Constant Contact and link your OptinMonster account.
For more details on using Constant Contact with OptinMonster, you can follow this complete tutorial on how to create a Constant Contact form in WordPress.
With the help of OptinMonster, you can easily add users to different lists or tag them based on behavior, location, customer status, and other data. You can then set up an email automation in Constant Contact to send targeted marketing messages or an entire drip campaign of personalized emails for different audiences.
Example 4: Automatically Deliver Digital Products With Easy Digital Downloads
One of the benefits of selling digital products online is that you can automate the entire customer journey. Instead of packing and shipping products, you can set up an automated email to deliver your ebooks, courses, templates, and other digital products as soon as a customer has completed checkout.
To set this up, we’ll be using the Easy Digital Downloads plugin, which is an eCommerce plugin designed specifically for digital products.
Before you get started, make sure you’ve followed the earlier guide on configuring your WordPress site for email deliverability. When users buy digital products, they expect to receive them immediately, so you definitely don’t want to deal with any angry customers who haven’t received their emails from EDD.
1. Install and Activate the Easy Digital Downloads Plugin
Start by installing the Easy Digital Downloads plugin on your WordPress site. You can follow this step-by-step guide to installing a WordPress plugin if you need clarification on the process.
Once the plugin is installed and activated, click the Get started button to set up your account.
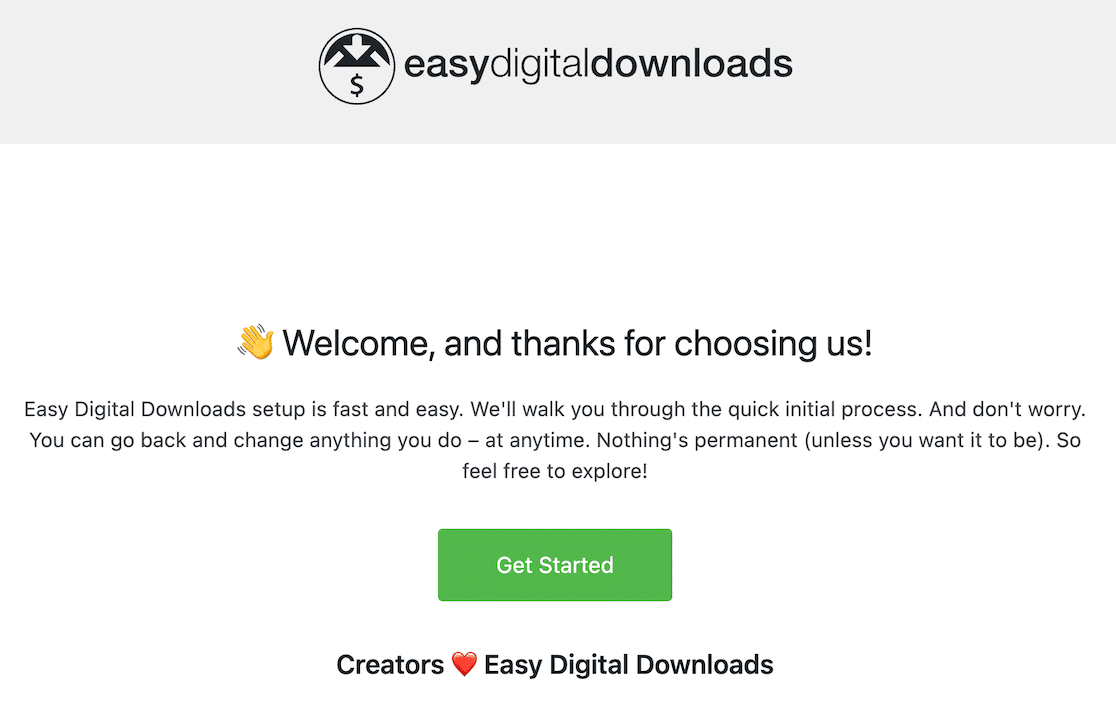
This will take you through the process of setting up Easy Digital Downloads, step by step.
2. Set Up Your Email Purchase Receipts
You’ll first need to fill out some information about your business. Fill out the form and click the Save and continue button to move on to the next step of the setup wizard.
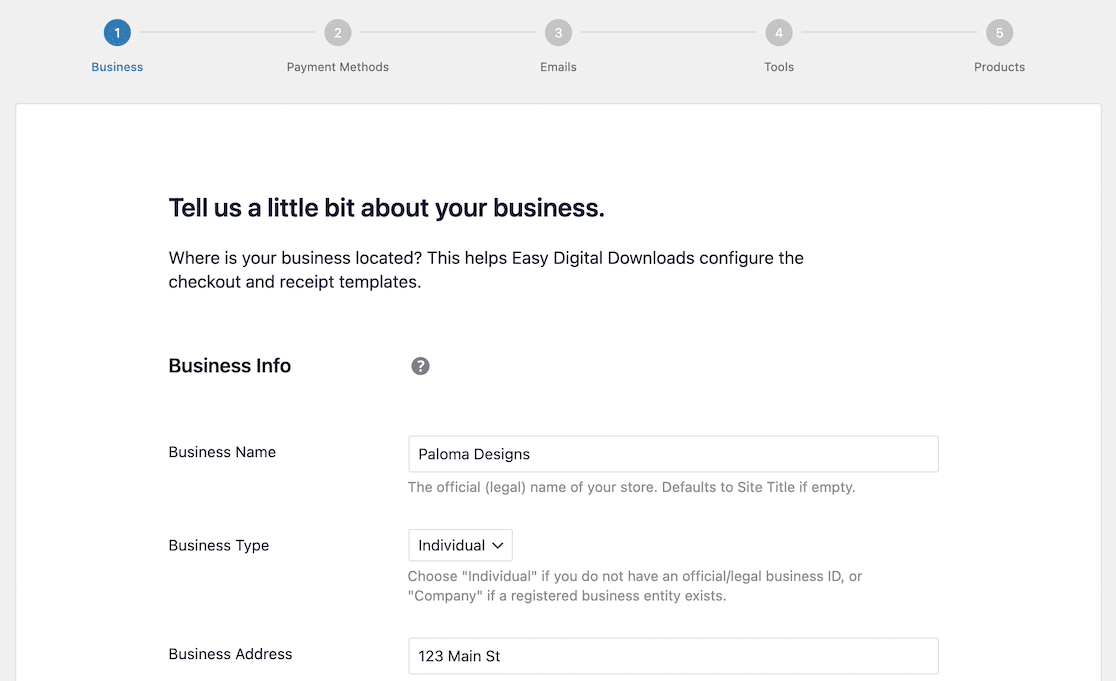
Continue through the payment methods to connect your site to Stripe. You can then customize the automated email receipts that will be sent to customers when they make a purchase on your site.
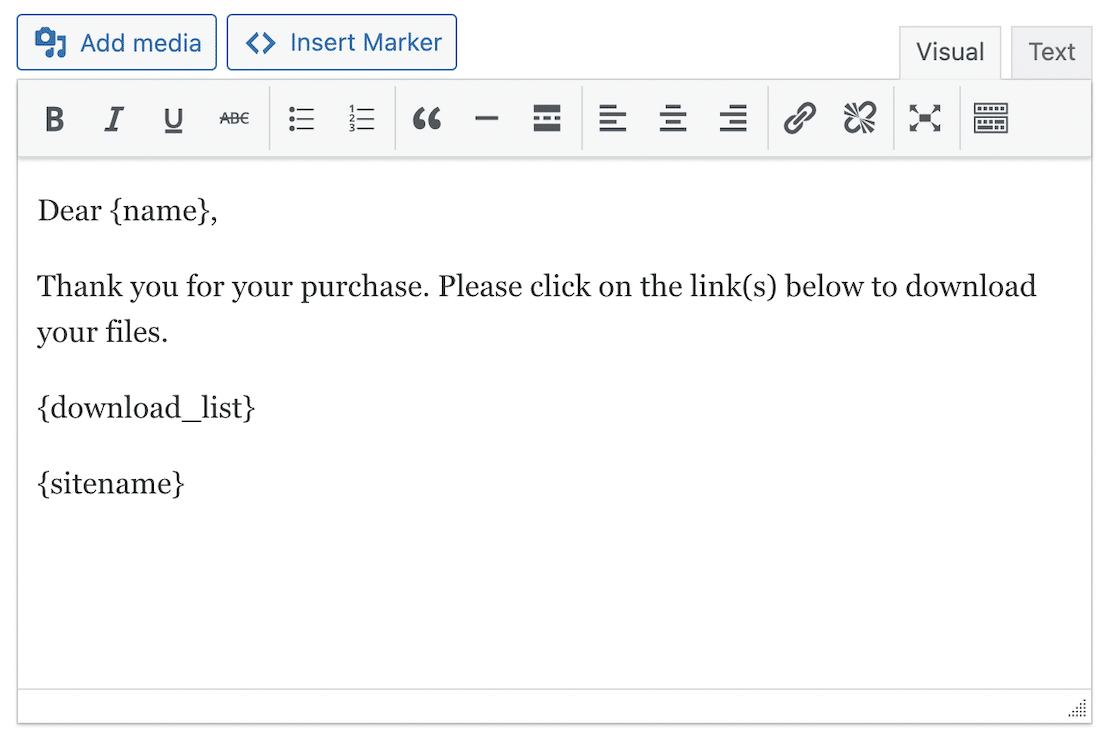
Fill out the To and From fields of the email and the Subject line. You can also upload a logo if you wish. Complete editing your email purchase receipt by editing the body of the email. The default email already has smart tags included to personalize the email.
Continue through the wizard to enter your digital product name, image, and price.
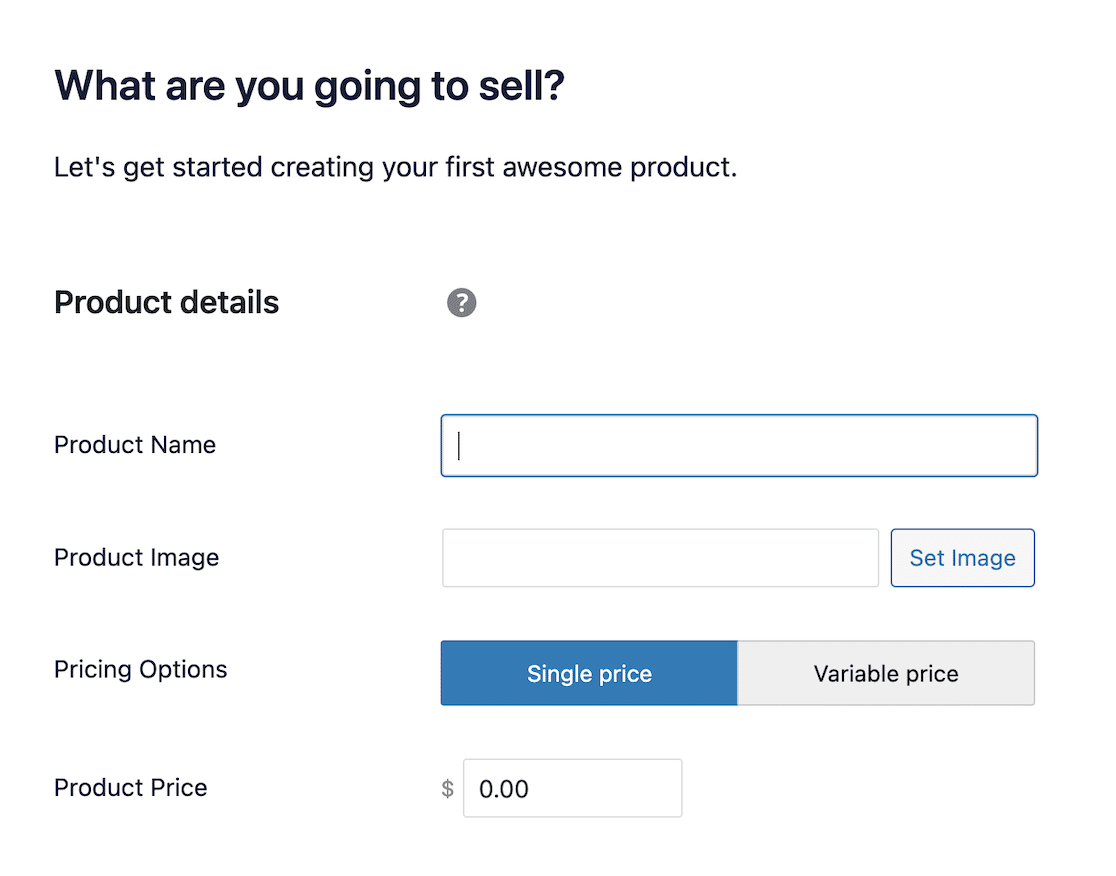
You can also upload your digital product at this stage or add it later.
When you complete the wizard, Easy Digital Downloads will save your product with all of its information.
3. Test Your Automated Email Receipts
Before you publish your checkout page, it’s a good idea to test your email to make sure it works properly and looks the way you intended.
Easy Digital Downloads makes this really easy. Just go to Downloads » Settings in your WordPress dashboard and click on the Emails tab and then Purchase Receipts.
Click the Send Test Email button to send a test email to the admin email address.

The email should look something like this:
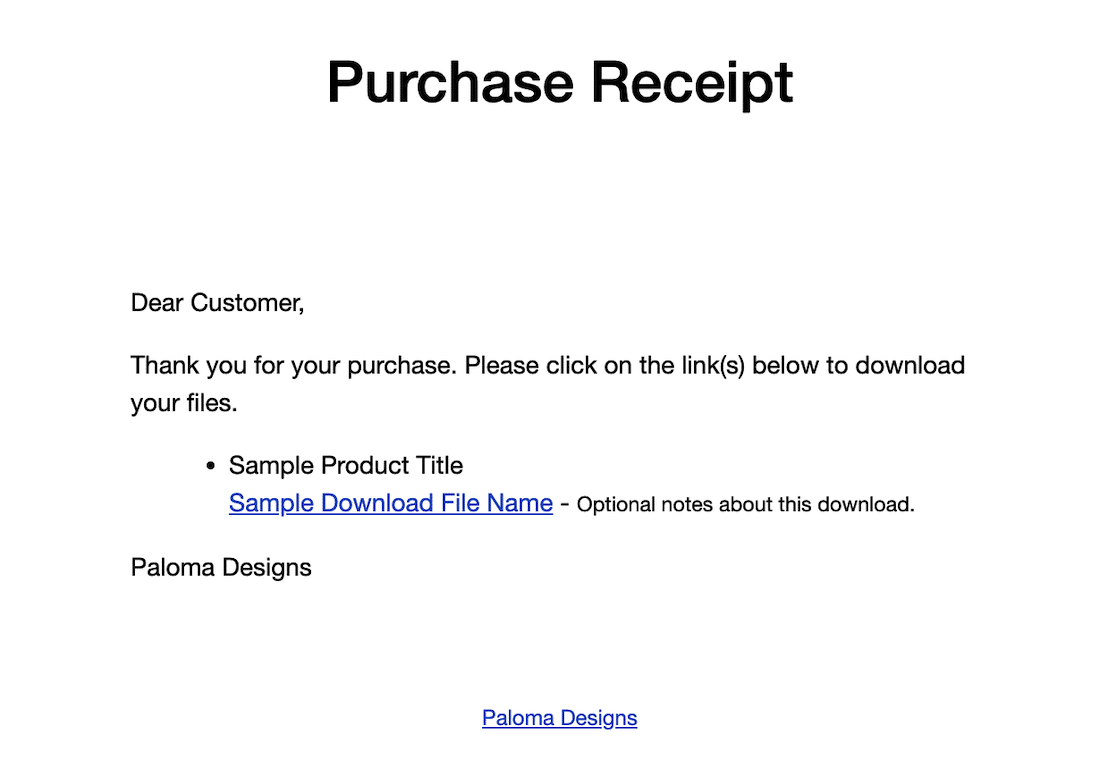
If you don’t get the email, ensure you have the WP Mail SMTP plugin installed and set up on your site to make sure it’s delivered.
If you receive the email and everything looks ok, you can go ahead and go to Downloads » Downloads in your WordPress dashboard to view and publish your digital products, just like you would with a post or page.
For more detailed instructions, see the Easy Digital Downloads guide on how to send automated eCommerce emails in WordPress.
The Easy Digital Downloads plugin installs an entire checkout process so your website visitors can buy your digital products and receive the automated email with a link to download the product. All you need to do is upload your products once and let the plugin take care of the rest!
Example 5: Send Automated Transactional Emails With FunnelKit Automations
Another situation where automated emails are essential is if you have a WooCommerce store. To run an online store efficiently, you’ll need a system for sending transactional emails, which are emails sent to a customer after they complete a transaction online.
For example, you’ll probably want to send an order confirmation email to let the customer know their order was received, and you can also send emails with shipping confirmation, tracking information, and other helpful information for online shoppers.
WooCommerce does send some of these emails by default, but the FunnelKit plugin allows you to send more advanced automated customer experience emails such as abandoned cart reminders and follow-up emails, customer anniversary messages, automated upsells and product recommendations, and more.
1. Install and Activate the FunnelKit Automations Plugin
You can install FunnelKit Automations from your WordPress dashboard by navigating to Plugins » Add New and searching for “FunnelKit Automations.” Click the Install Now button to install the plugin.
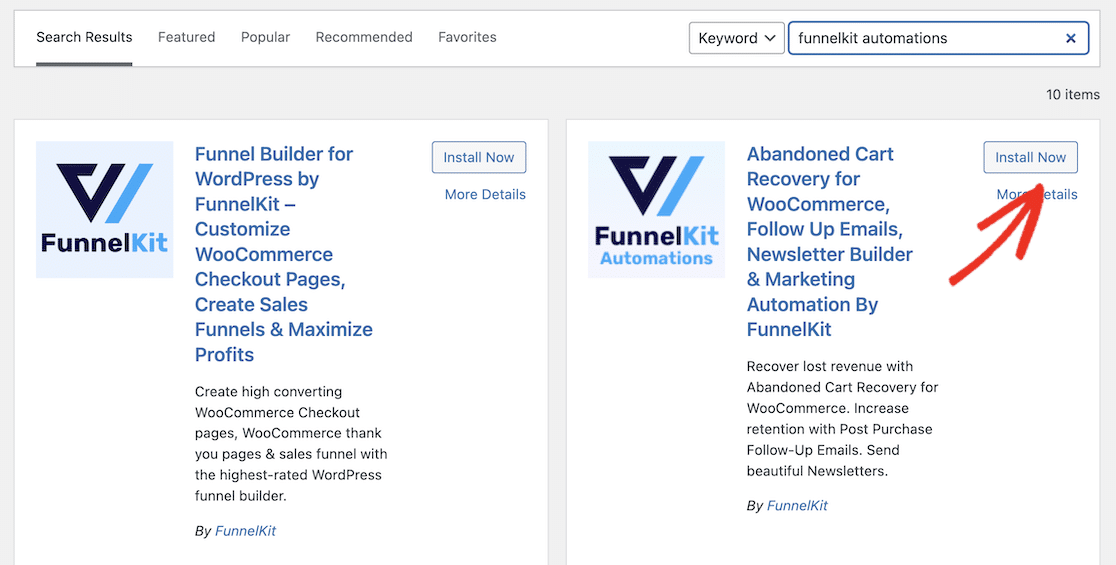
Wait a few moments for the plugin to install, then click the Activate button.

2. Create an Automation
Once the plugin is installed and activated, you can go to FunnelKit Automations » Automations (Next Gen) and click the Add New Automation button.
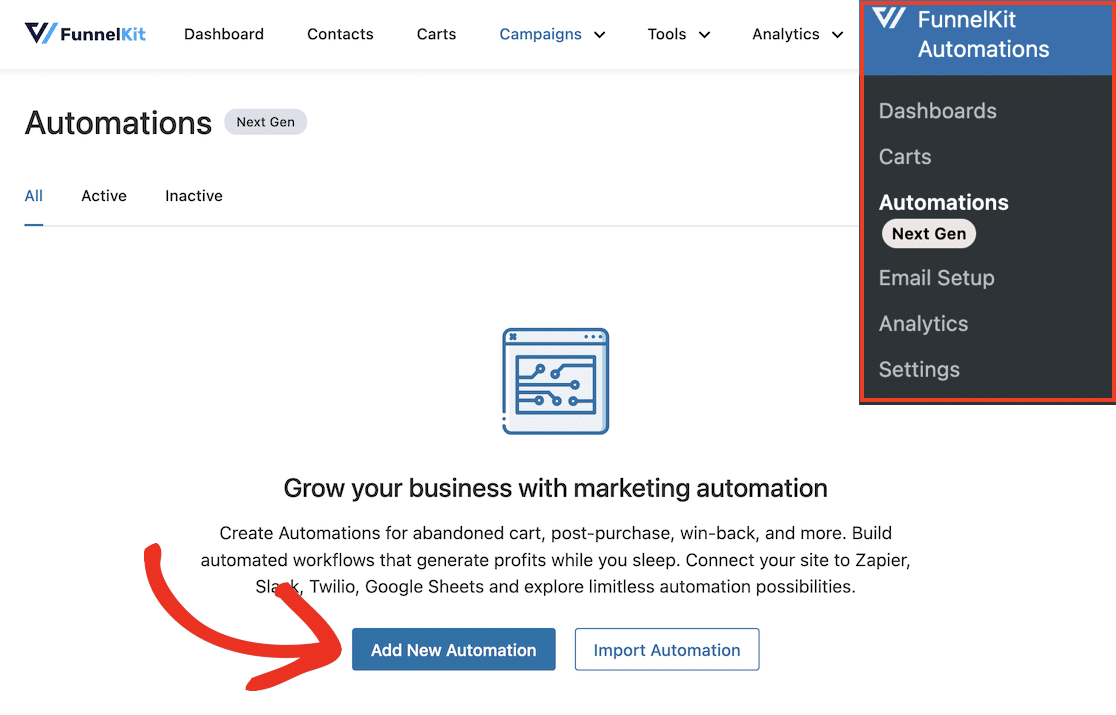
FunnelKit Automations comes with a library of pre-built automations to choose from, or you can create your own automation from scratch with the drag-and-drop builder.
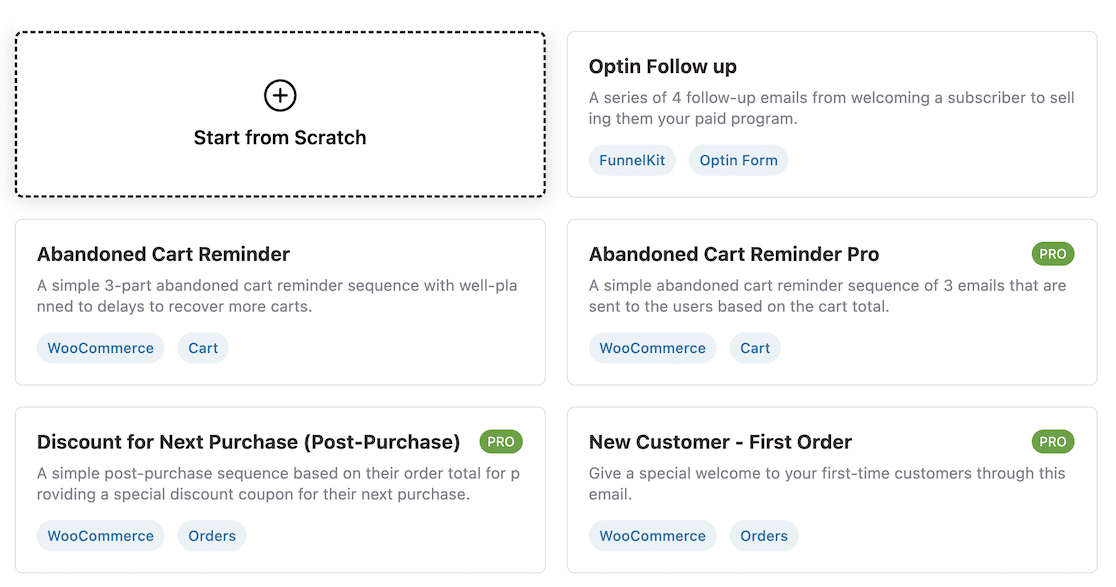
If you click on the Abandoned Cart Reminder, you’ll see precisely how the automation works for cart abandonment emails, including actions and time delays.
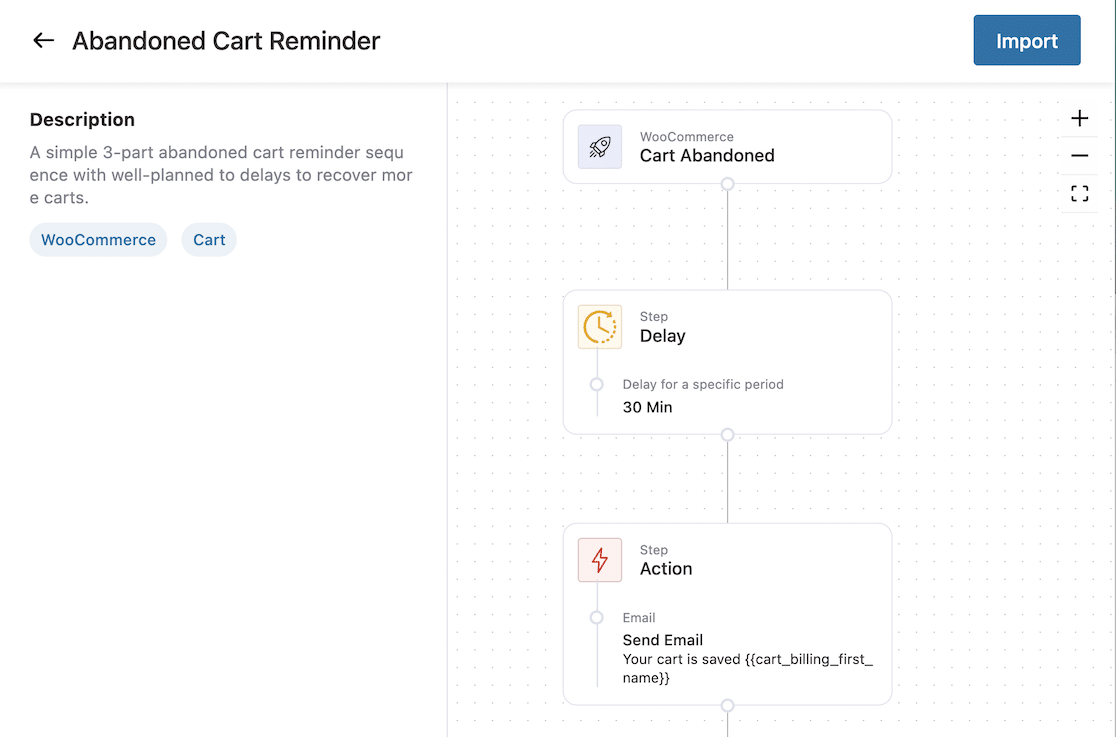
To use this automation template, click the Import button in the top right corner, enter a name for your automation, and click Create.
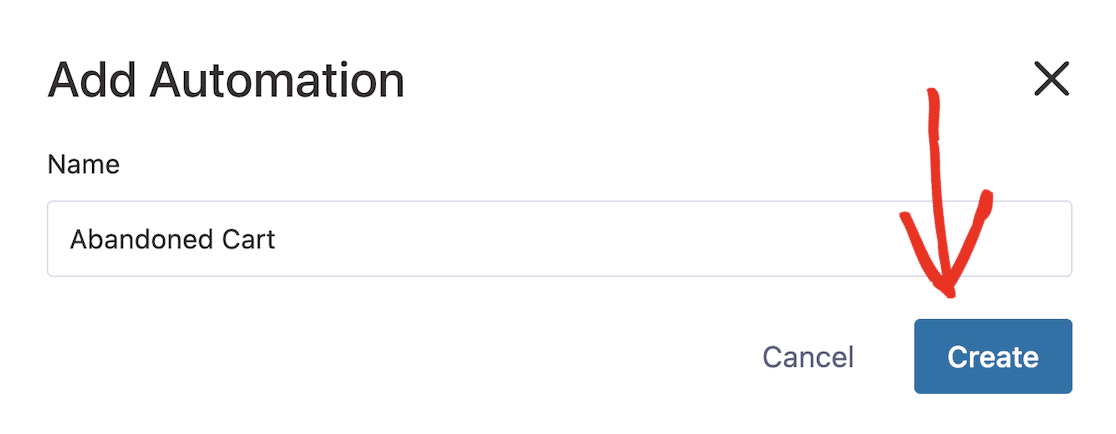
This will take you to the drag-and-drop automations builder, where you can edit the automation if you wish. Once you’re happy, toggle the Active setting in the top right corner to on to activate the automation.
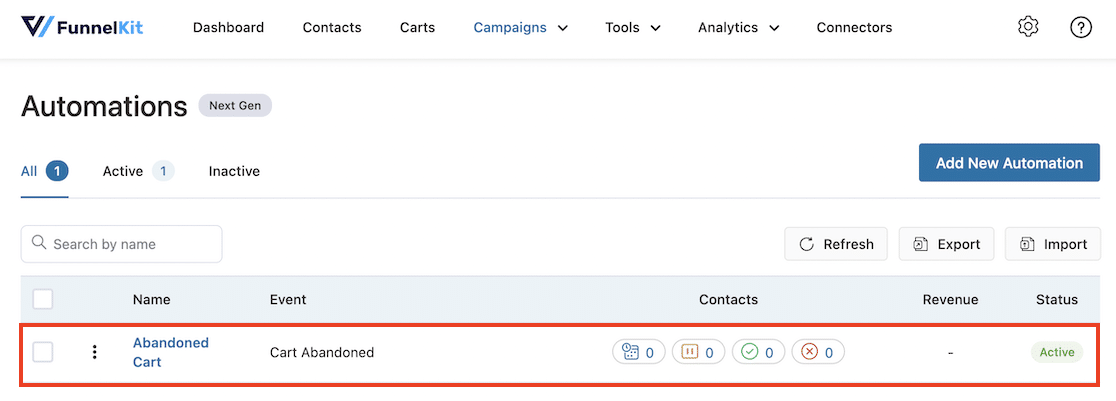
When your automation is active, you can see it under FunnelKit Automations » Automations (Next Gen), where you can deactivate, duplicate, edit, or export it as you wish.
3. Customize WooCommerce Emails
As well as offering pre-built automations that you can activate at the click of a button, the Pro version of FunnelKit Automations also provides a visual drag-and-drop builder for creating and editing WooCommerce emails.
To use this feature, you’ll need to upgrade to FunnelKit Automations Pro. Once you’ve purchased the Pro plugin, install and activate it in your WordPress dashboard and enter your license key. There are full instructions on the FunnelKit site if you need help.
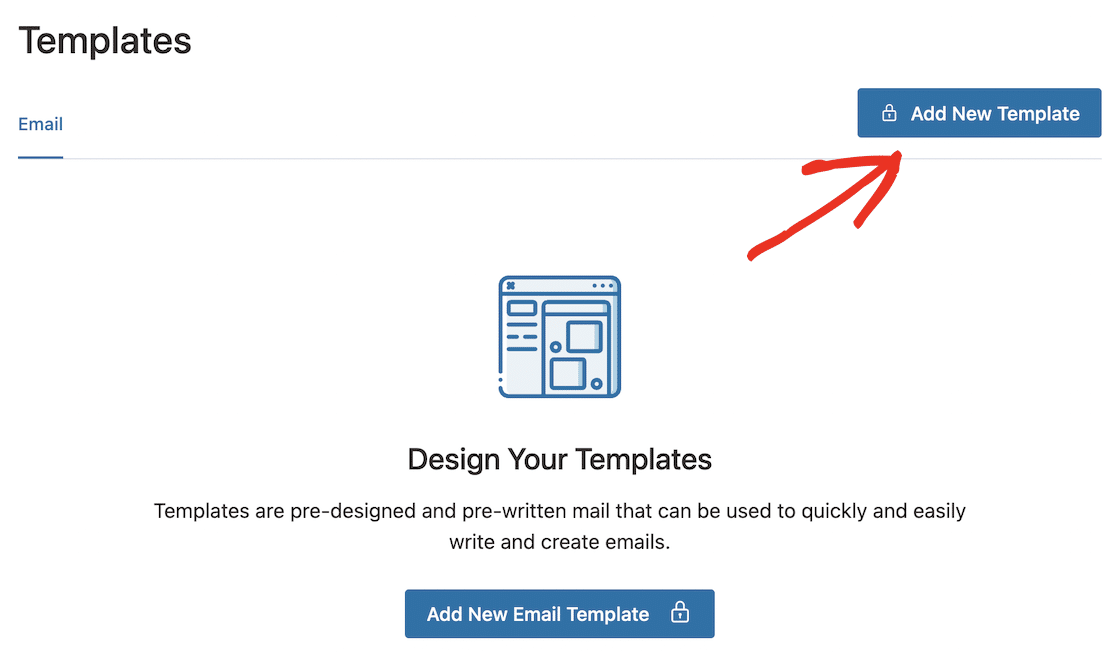
To start customizing your WooCommerce emails, go to FunnelKit Automations » Templates in your WordPress dashboard main menu, then click the Add New Template button.
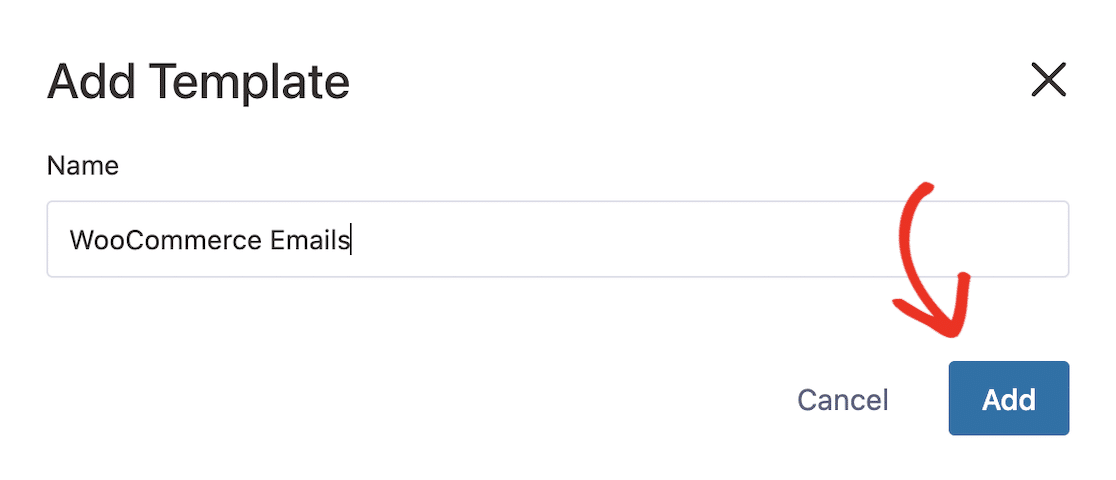
Enter a name for your template and click the Add button.
Add a subject line and preview text for your email. You can also edit the text in the body of the email.
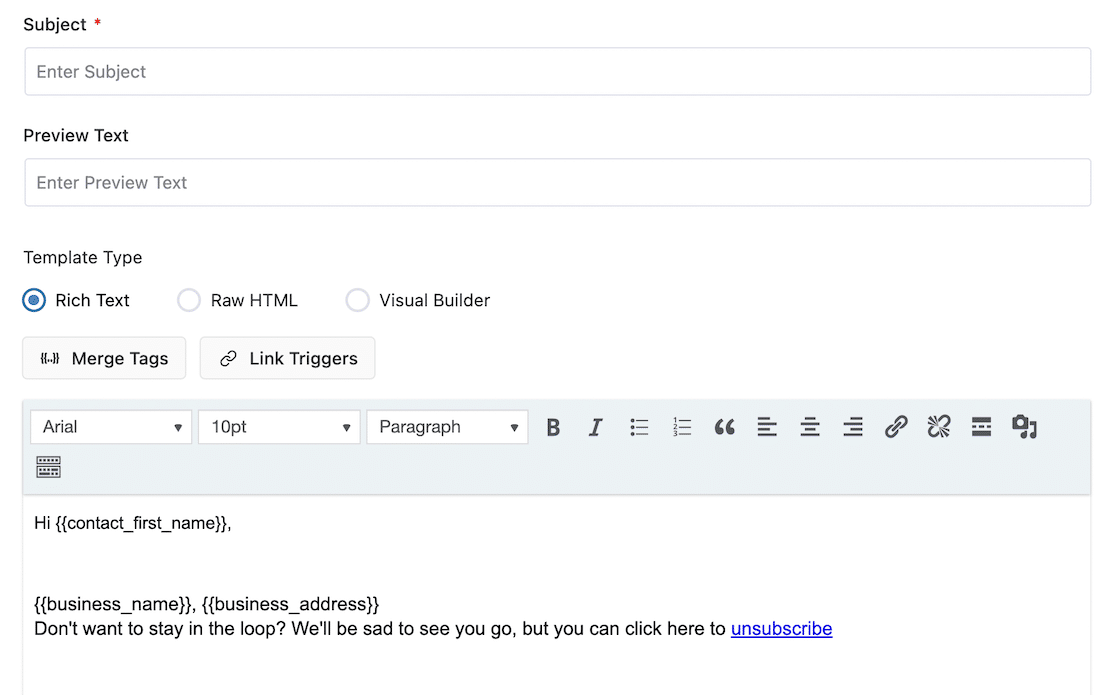
To use the visual email builder, select the Visual Builder radio button and click the Start button to launch the builder.
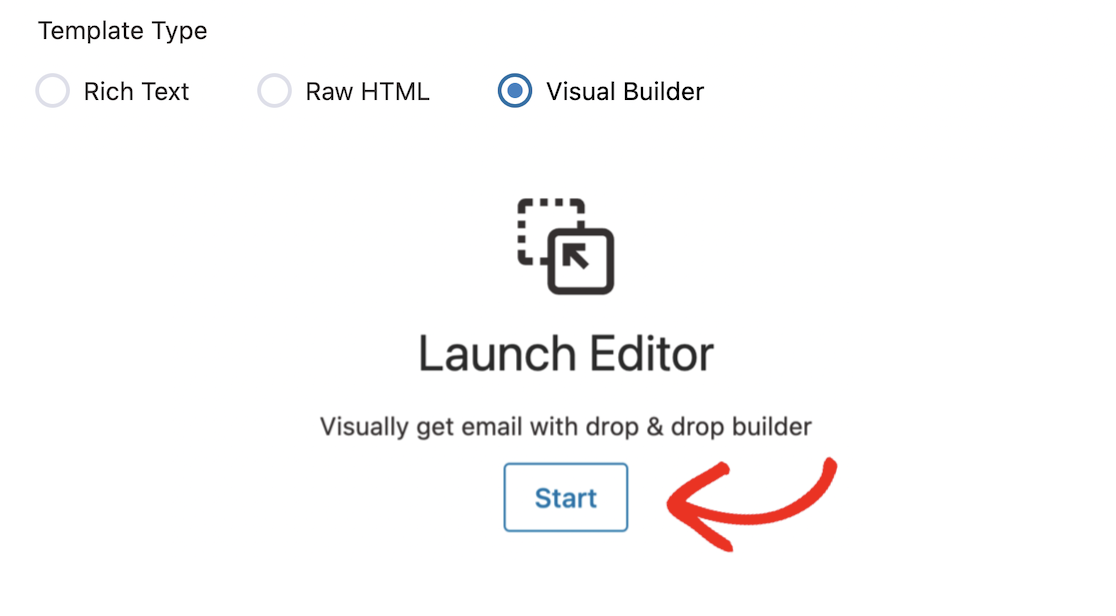
Once you’re in the builder, you can easily customize how your WooCommerce emails look by dragging and dropping columns, images, headings, buttons, and other elements. With the visual builder, it’s simple to create professional-looking emails designed to optimize conversions and move users through the sales funnel.
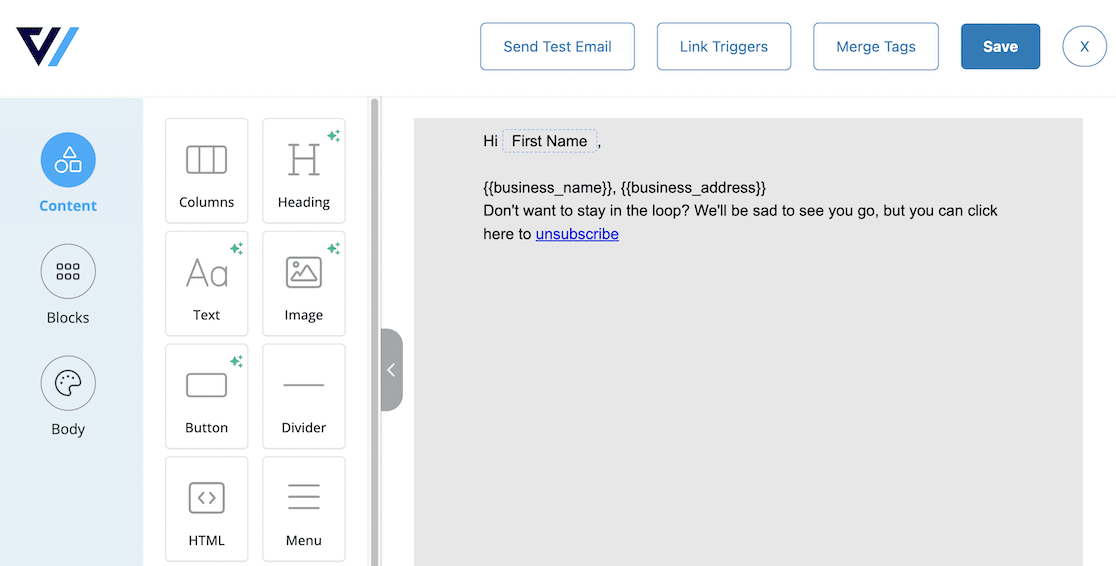
When you’re finished editing, click the Save button and close the editor.
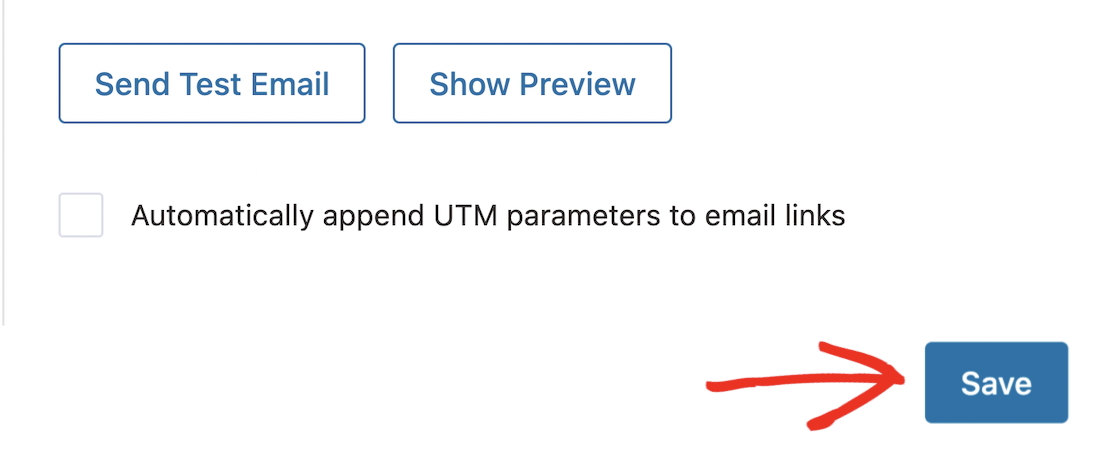
You can see a preview of your finished template or send a test email using the buttons at the bottom of the template page. Remember to click the Save button when you’re happy with everything.
This is just a brief overview of the possibilities that FunnelKit offers for automated WooCommerce emails. For example, you can follow this detailed guide on how to create automated birthday and anniversary emails if you’d like help with automating emails to send greetings, coupons, and other incentives to your customers on their birthdays.
Be sure to also check out our full review of FunnelKit, which explores both the automation and funnel-building sides of the platform.
Example 6: Send Automated Emails With Uncanny Automator
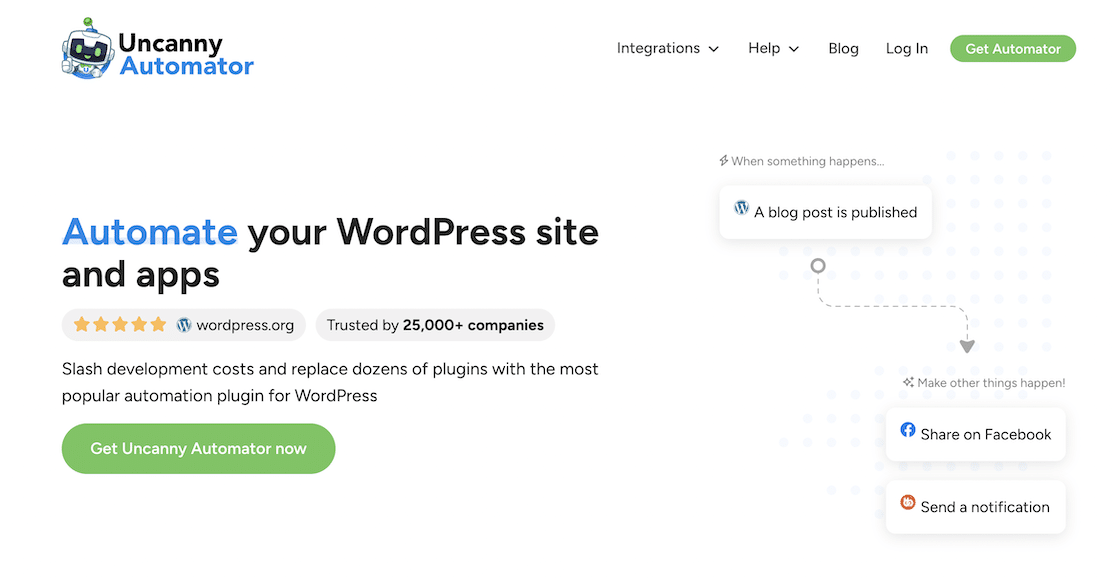
Uncanny Automator is a no-code automation plugin that integrates your WordPress site with over 100 other apps and services for automated email marketing, eCommerce, social media, CRM, and more.
Using Uncanny Automator to send automated emails gives you total flexibility to send one-off emails outside of your drip campaigns triggered in real-time by various actions or events on your WordPress site.
For example, let’s say you want to send specific blog posts directly to your target audience automatically, as soon as they’re published. You can easily do this by creating an email automation for tagged posts in Uncanny Automator.
1. Install and Activate the Uncanny Automator Plugin
In your WordPress dashboard, navigate to Plugins » Add New, and search for “Uncanny Automator.” Click the Install Now button next to the plugin.
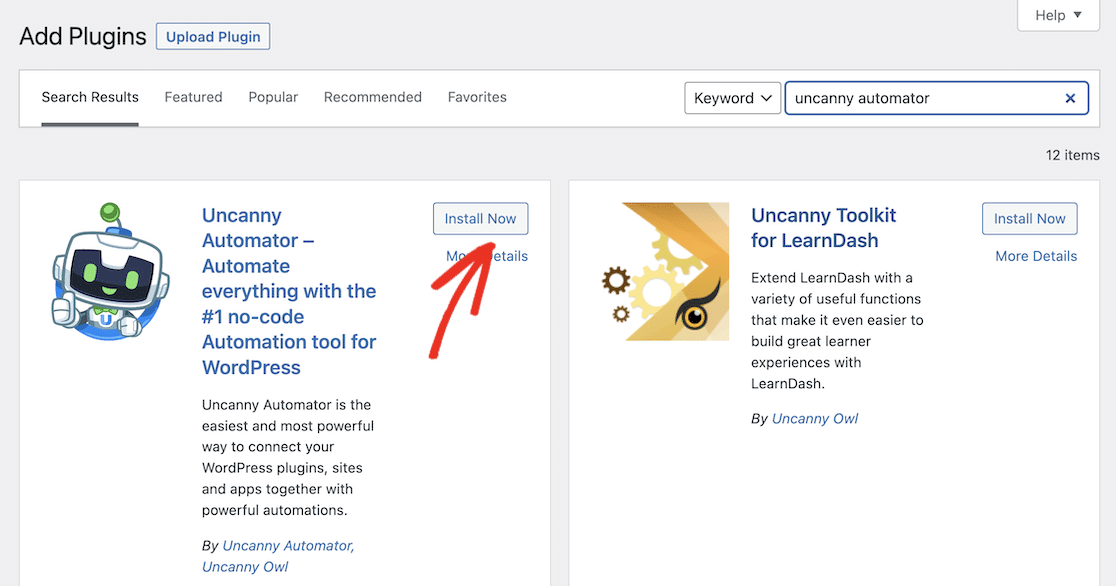
When the plugin has finished installing, be sure to click the Activate button before you can use the plugin.
If you get stuck at any stage, you can follow this step-by-step guide to installing a WordPress plugin.
2. Sign Up for an Uncanny Automator Account
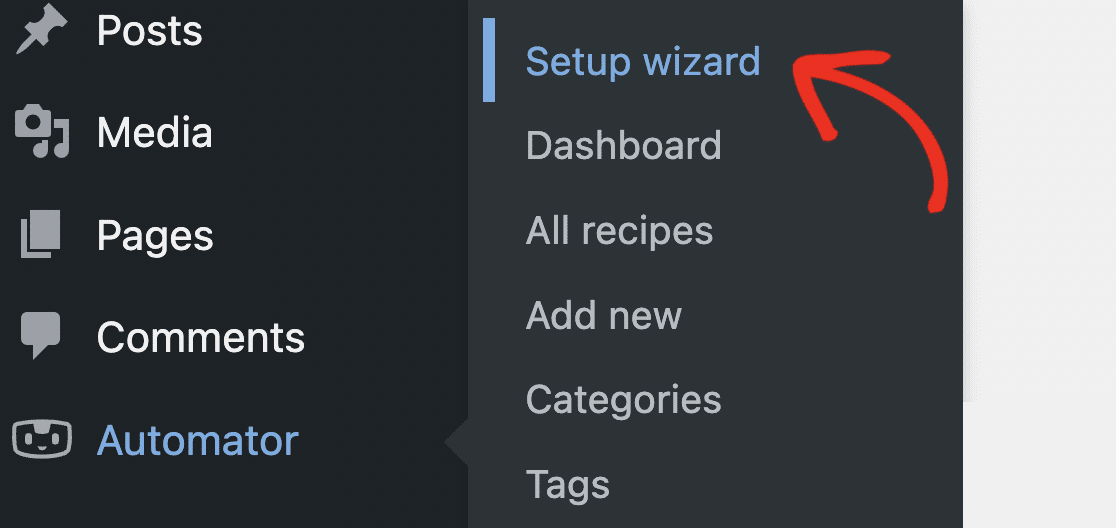
After you’ve installed and activated the plugin, go to Automator » Setup Wizard in your WordPress dashboard sidebar menu to be walked through setting up the plugin.
When the wizard launches, click the button to Connect your free account.
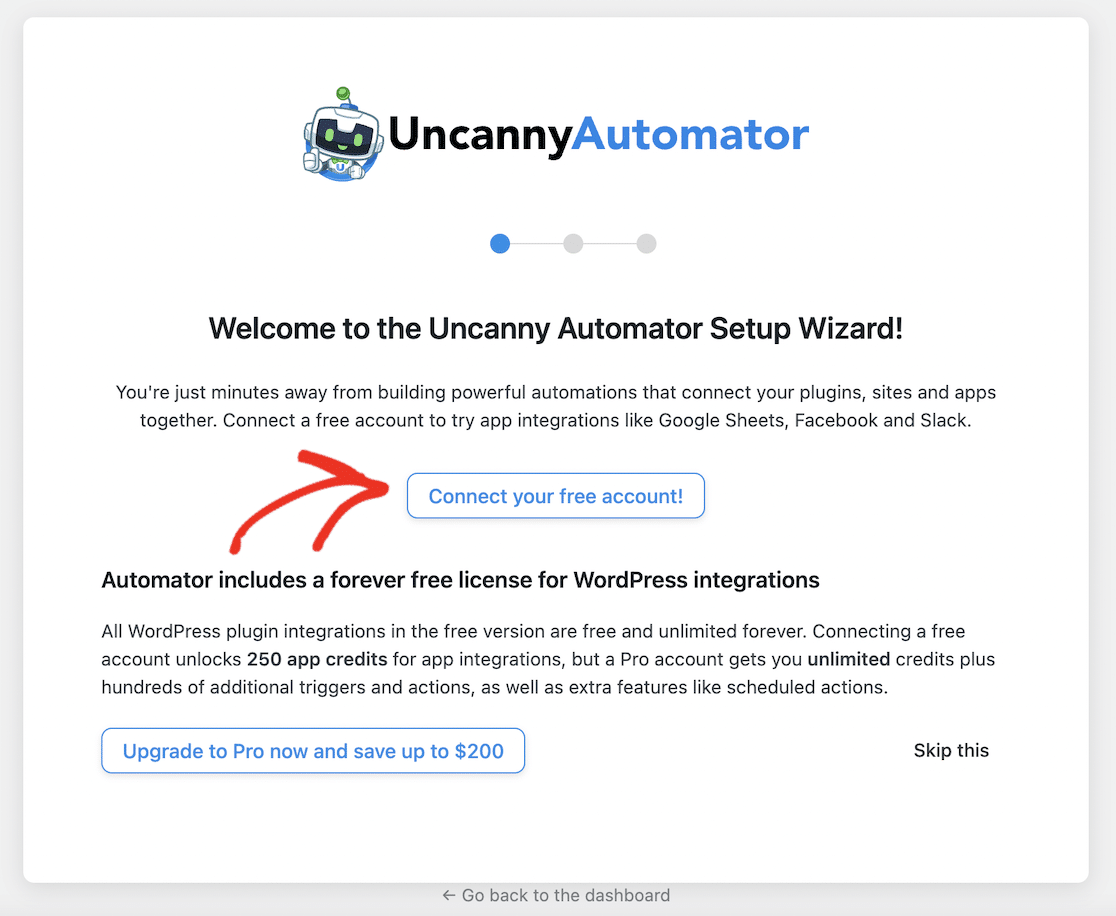
This will take you to the Uncanny Automator website, where you can sign up for a free account. Fill out your details and click the Sign up button.
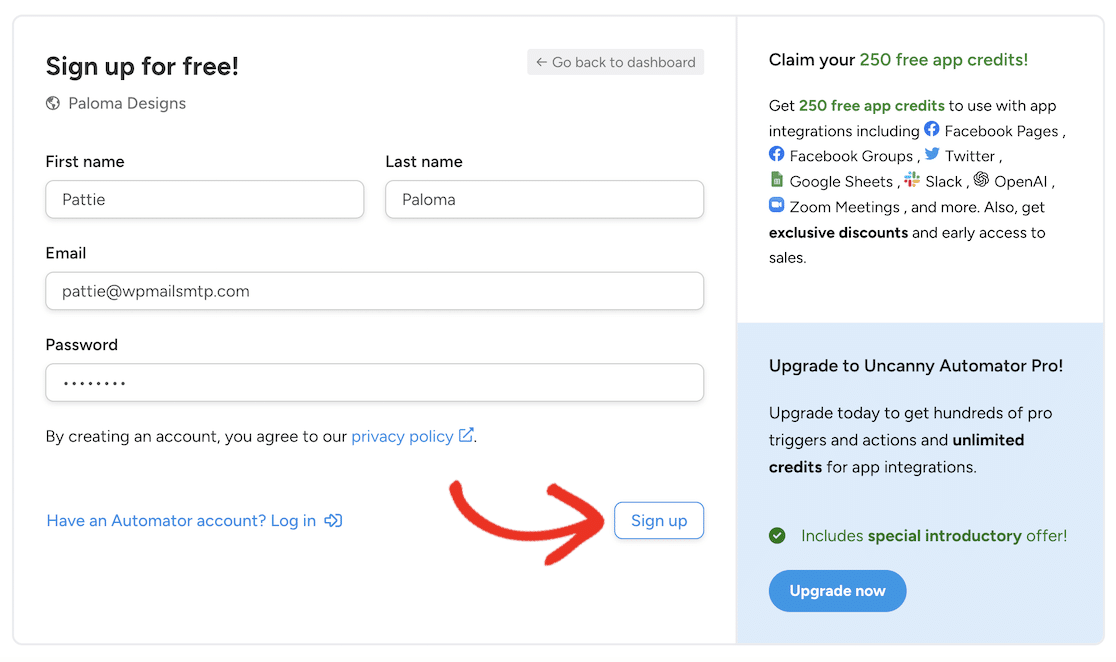
Once you’ve signed up, you can click the button to return to your WordPress site and Create my first recipe.
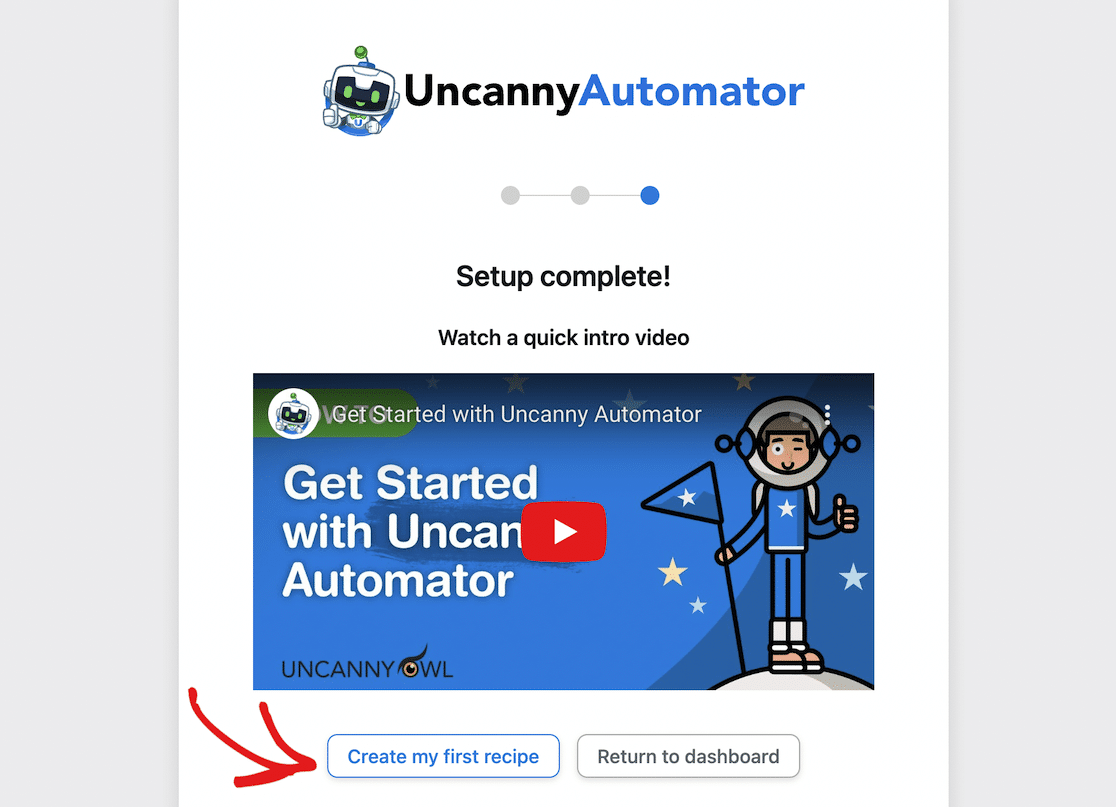
3. Create an Uncanny Automator Recipe
“Recipes” are essentially Uncanny Automator’s name for automated workflow templates. You can either create email workflows for logged-in users or all users. For this use case, we’ll choose the option for logged-in users.
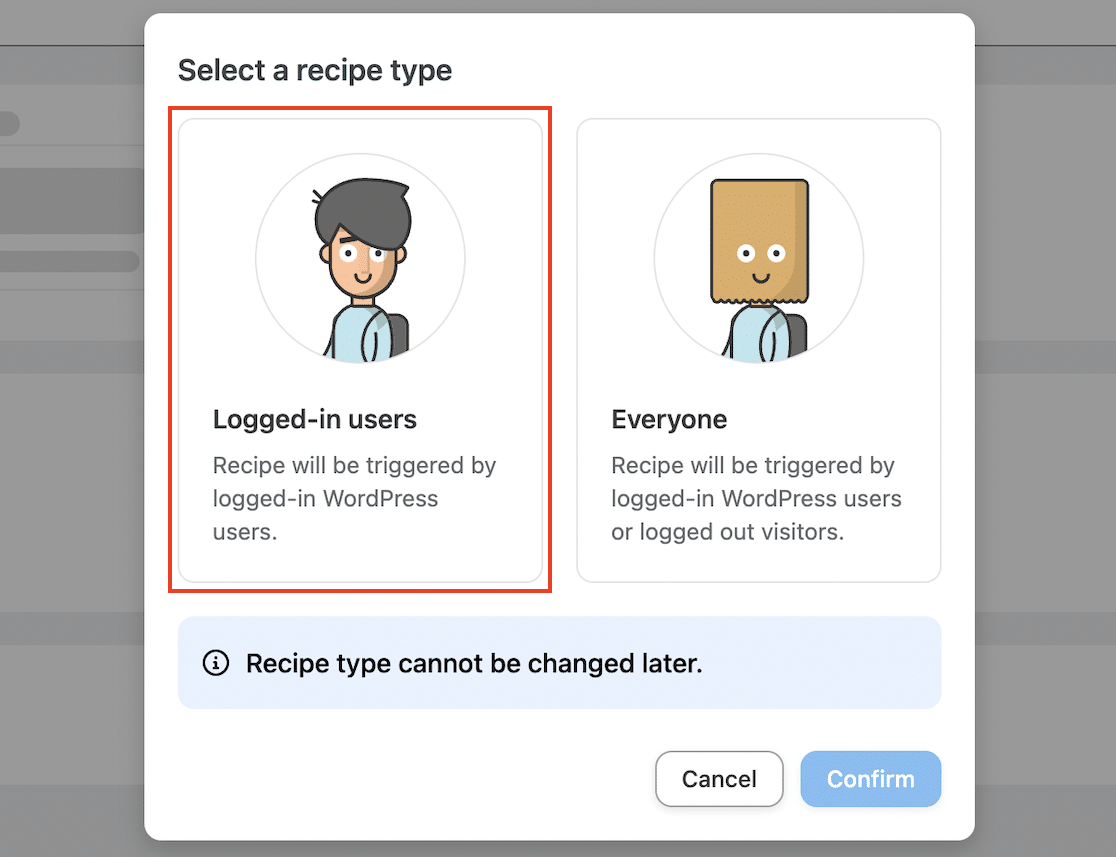
After clicking the Confirm button, you’ll be taken to a page where you can edit your recipe. Get started by entering a name for your recipe at the top of the page.
As we want to trigger an email when we complete an action in WordPress (publishing a new blog post), choose WordPress as the integration trigger.
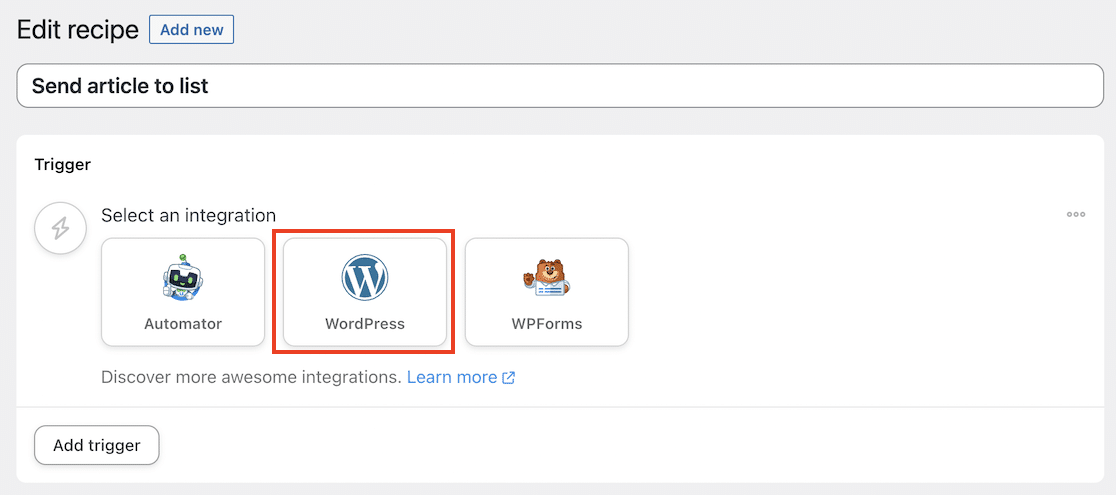
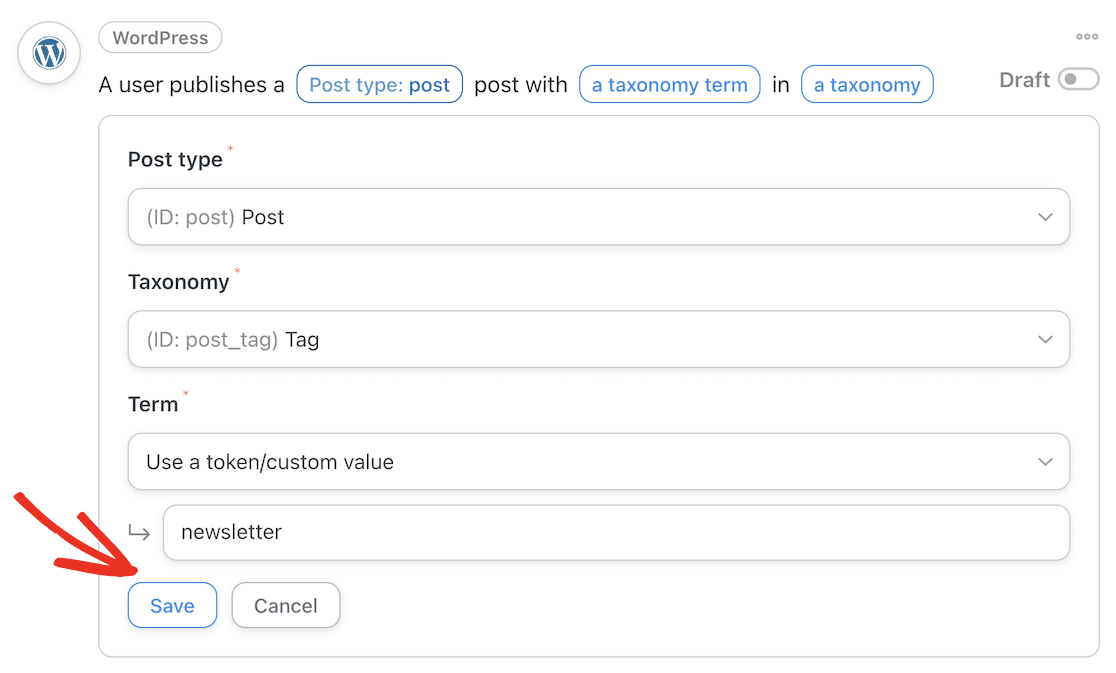
A dropdown of available triggers will appear. Scroll down and select the option “A user publishes a post in a taxonomy.”

You can now choose the post category or tag you want to send to emails. Let’s choose only posts tagged with “newsletter.”
Select “Tag” for the Taxonomy and “Use a token/custom value” for the Term. Type “newsletter” in the sub-field under Term, then click the Save button.
Make sure the trigger is set to Live.

Next, click the Add Action button.

As we want to send automated emails with Uncanny Automator, we’ll need to choose an email service as an action. You can either choose a email marketing service like ActiveCampaign or Mailchimp, or you can select “Emails,” which uses WordPress to send emails to email addresses you specify.
If you do choose to send your emails through WordPress, make sure you’ve installed and configured WP Mail SMTP first to make sure your emails are sent properly and get delivered.
4. Connect Uncanny Automator to Mailchimp
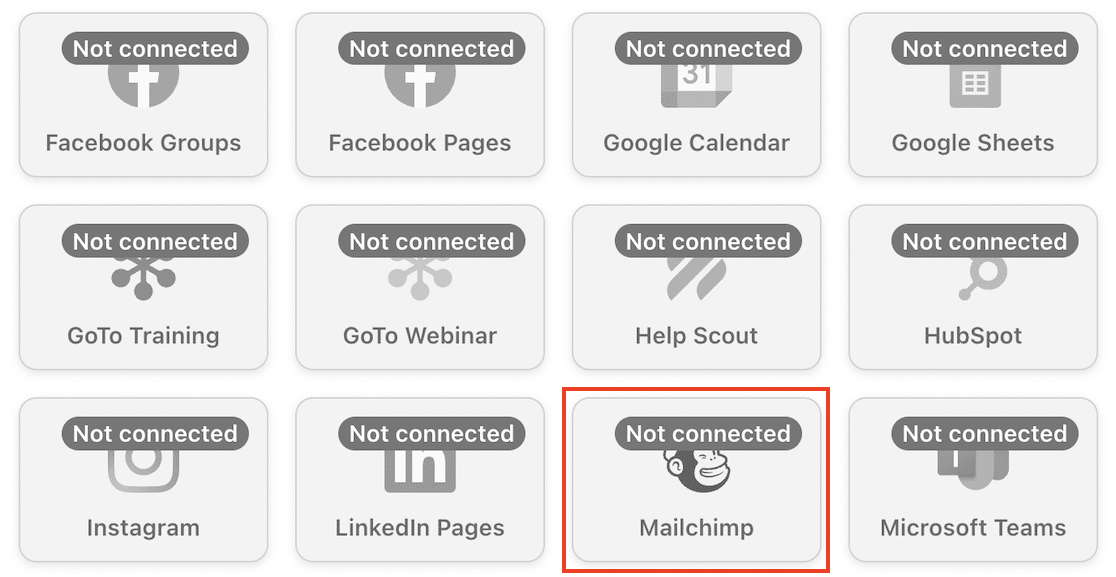
As we want to send an email to our list rather than specific email addresses, we’ll use Mailchimp for the integration. Scroll down and click the Mailchimp integration.
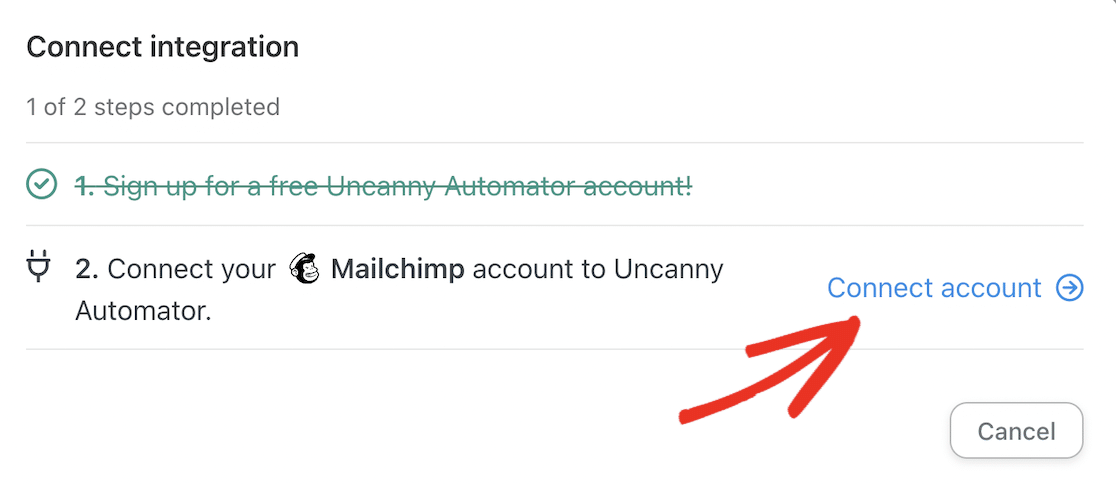
Next, click the Connect account link to connect Uncanny Automator with your Mailchimp account.
Continue through the online instructions to connect your account. You’ll need to log into your Mailchimp account (or create a new account) and authorize Uncanny Automator to access it.
Choose Create and send a campaign from the dropdown list of actions.
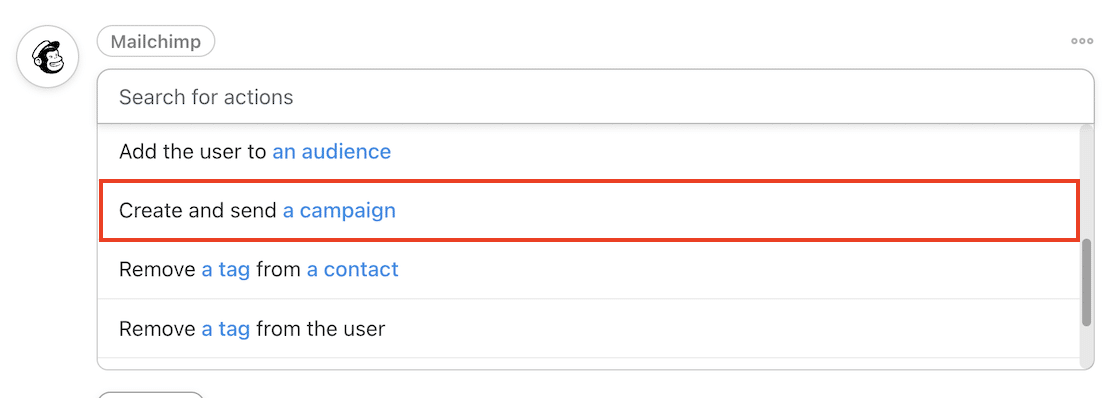
You can then give your email campaign a name, choose a list, select an audience segment or tag if you wish, and other settings for your automated emails.
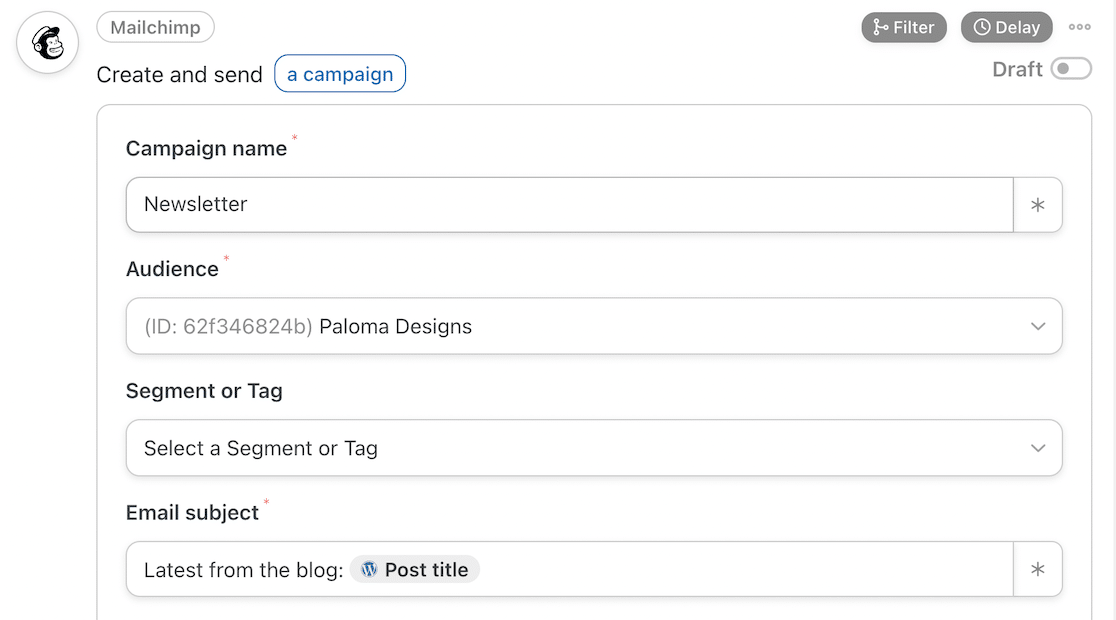
You can use tokens to insert data from your blog post directly in the email for the email subject and content. Click the asterisk (*) icon and select Post title from the dropdown for the email subject and Post content for the email content.
When you’re finished, click the save button at the bottom of the form.
You then just need to change your recipe status from Draft to Live to start automating emails.
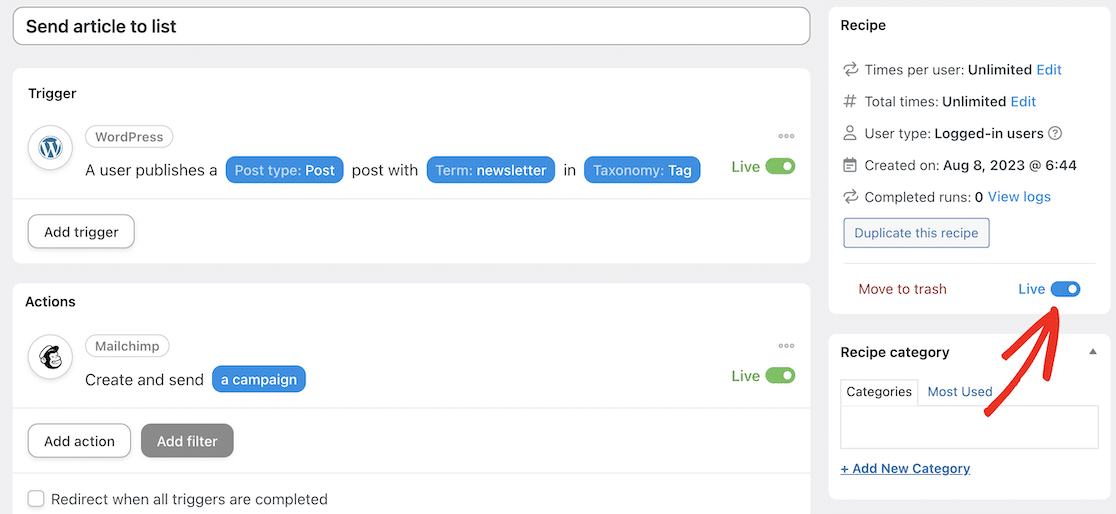
And that’s it! Now, every time you publish a post tagged with “newsletter” on your blog, it will automatically be sent to your list via Mailchimp.
Frequently Asked Questions
We’ve covered several methods of sending automated emails in WordPress in this article, but if you’re still unsure, take a look at our most frequently asked questions about email automation.
What Are the Benefits of Automated Email?
Automated email offers many benefits, primarily saving you the time and effort of emailing your users manually. Many WordPress plugins can be used to automate emails on your site for several use cases, such as:
- Welcome messages when users or new customers sign up to your site
- Notifications about new posts and features
- Order confirmations and shipping notifications
- Failed payment alerts
- Abandoned cart emails when a customer has added an item to their shopping cart but has not completed checkout
- Communications related to user accounts, such as subscription confirmations and password reminders
- Onboarding emails and email sequences for online courses
- Re-engagement and lead nurturing emails
- Drip campaigns and other emails as part of your integrated marketing strategy
Using automation plugins to generate and send these emails for you is more efficient and will save you a lot of time. You’ll see more results from your marketing efforts as open rates increase, and you can customize call-to-actions and track metrics, increasing your conversion rates.
Moreover, one of the main benefits of email automation is that it creates a better experience for your users and improved customer relationships. Your followers can instantly receive alerts, updates, and digital purchases without waiting for you to email them.
What Is the Difference Between Automated and Broadcast Email?
Unlike automated emails, broadcast emails are set up and sent manually. Broadcast email is when you send an email to everyone on your list or your entire customer base at the same time. This type of email isn’t really automated; You still have to press the “send” button. However, you can set it up in advance to send the email at a specific date and time.
Automated emails, on the other hand, are triggered by a user action, an event on a website, a time delay, or any other condition you set.
What Is the Best Automated Email Service?
We recommend Constant Contact and Brevo for email automation as they are powerful and easy to use. There are many different email marketing tools offering features designed for different needs. You can read this roundup of the best email marketing services for more recommendations and an overview of each service.
Next, Create More Automations in WordPress
If you want to be more efficient and streamline your workflow, many marketing automation tools also include Slack integration. Take a look at our guide to the best Slack integrations for WordPress sites.
We’ve also rounded up the best Google Workspace plugins for WordPress that allow you to automate data input in Google Sheets, schedule events on Google Calendar, and more.
Looking for someone to help you with your WordPress site maintenance? Check out these WordPress maintenance services.
Ready to fix your emails? Get started today with the best WordPress SMTP plugin. If you don’t have the time to fix your emails, you can get full White Glove Setup assistance as an extra purchase, and there’s a 14-day money-back guarantee for all paid plans.
If this article helped you out, please follow us on Facebook and Twitter for more WordPress tips and tutorials.

