Is WordPress PHPMailer not working on your site, causing you and your users to miss out on important emails? By default, WordPress uses PHPMailer and the wp_mail() function to send emails from your web hosting mail server.
However, this isn’t a reliable way to send email, and sometimes your messages will fail to send or end up in the spam folder. Some GoDaddy customers have had problems with PHPMailer on GoDaddy Managed Hosting accounts.
In this guide, I’ll show you why this happens and how to fix it so your emails get delivered the right way using a reliable mailer and the WP Mail SMTP plugin!
Fix Your WordPress Emails Now! 🙂
What Is PHPMailer in WordPress?
PHPMailer is a code library that PHP applications can use to send mail. Lots of Content Management Systems (CMS), including WordPress, use PHPMailer.
More specifically, WordPress uses a PHP mail function called wp_mail() to send emails using your web hosting server. Because it comes with wp_mail(), you can start sending emails from your WordPress site right away.
This includes WordPress admin notification emails, user management emails such as password reset emails, and emails from plugins such as contact form submission notifications.
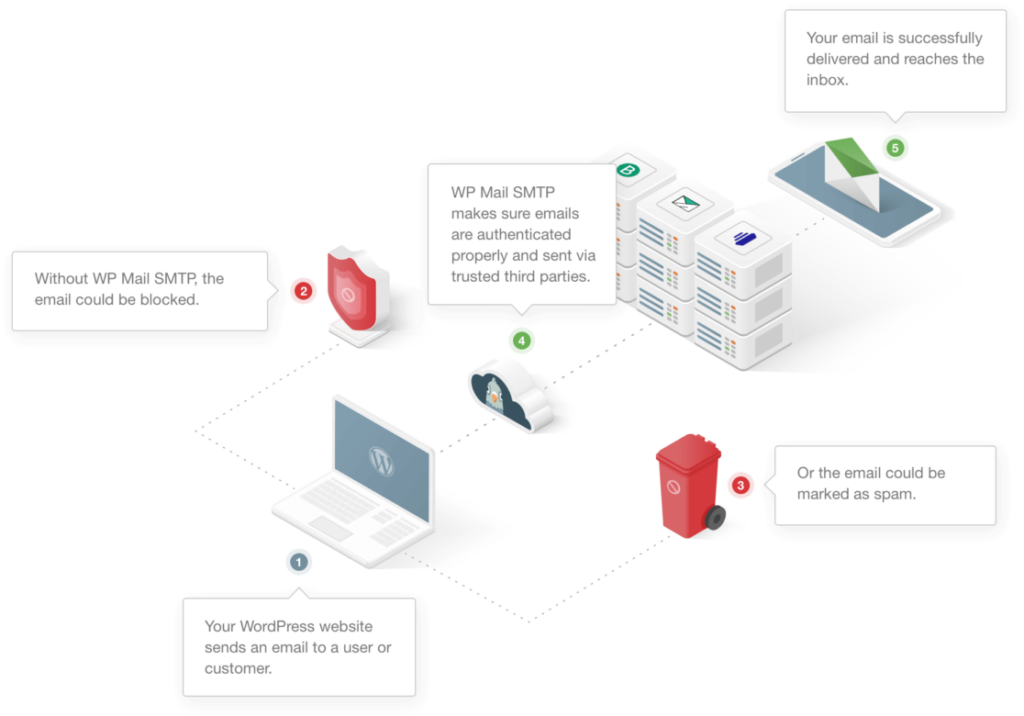
The downside is that PHPMailer and wp_mail() do not add any authentication to your emails to prevent them from going to spam.
Also, if your web server isn’t set up to send high volumes of email, then you could get in trouble for sending bulk emails that exceed the limits set by your hosting provider.
Connecting your WordPress site to a 3rd party SMTP provider with WP Mail SMTP helps you avoid these email issues and fix PHPMailer not working.
How to Fix WordPress PHPMailer Not Working
To resolve the issue of PHPMailer not sending emails from your WordPress site, you need to authenticate your sending domain and configure SMTP on your website. I’ll show you how in just a few simple steps:
Step 1: Install an SMTP WordPress Plugin
The easiest way to connect your site to an SMTP server is to use a plugin. There are a lot of SMTP WordPress plugins to choose from, but we recommend WP Mail SMTP.
It’s easy to use and offers lots of advanced features for tracking your emails after you set it up. If you need help installing the WP Mail SMTP plugin, check out this tutorial on installing a WordPress plugin.
The free version of WP Mail SMTP will improve your email delivery, or you can upgrade to access email logging and other advanced features.
Step 2: Configure Your SMTP Mailer
Once you’ve installed WP Mail SMTP, you’ll need to set it up to connect your site to your 3rd party SMTP service provider, also called a mailer.
If you’d prefer to have a professional configure WP Mail SMTP for you, our support team offers a White Glove Setup service at an additional cost.
Or, if you want to do the work yourself, you can open your WordPress dashboard and head over to WP Mail SMTP » Settings. Then click on the Launch Setup Wizard button.
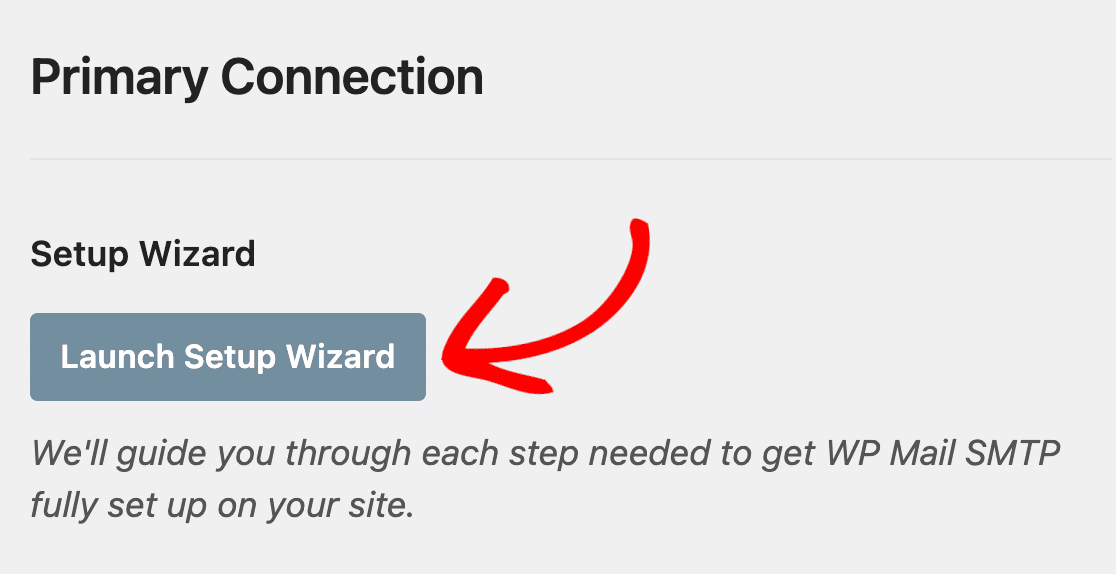
The Setup Wizard guides you through the process step by step, starting with choosing a mailer. There are lots of options here, but I recommend SendLayer, SMTP.com, or Brevo (formerly Sendinblue).
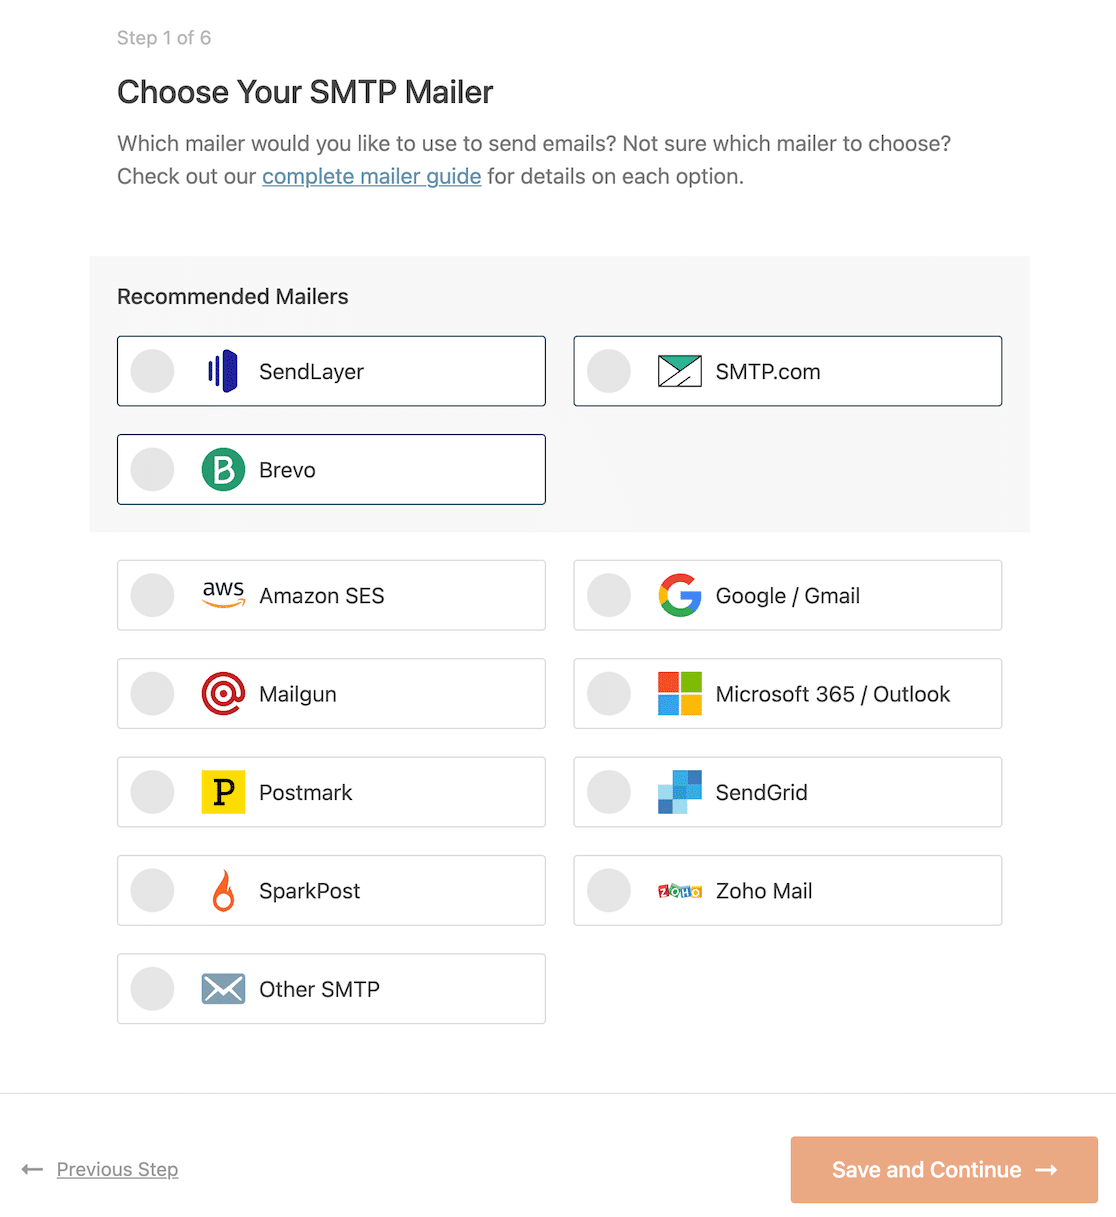
These mailers are easy to use, affordable to get started, and super reliable for sending transactional emails. You’ll need to create an account with whichever mailer you choose.
This may involve adding DNS records to your domain settings to add SMTP authentication to your domain name. See the documentation for your mailer for details on how to set it up:
- SendLayer
- SMTP.com
- Brevo
- Amazon SES
- Google Workspace / Gmail
- Mailgun
- Microsoft 365 / Outlook.com
- Postmark
- SendGrid
- SparkPost
- Zoho Mail
- Other SMTP
When you’re done, click Save and Continue to move on to the next step. Depending on which email service you chose, you’ll see some additional SMTP settings on the next screen.
Here you can choose the From Name and From Email you want to use and enter the API key for your mailer, if you need one.
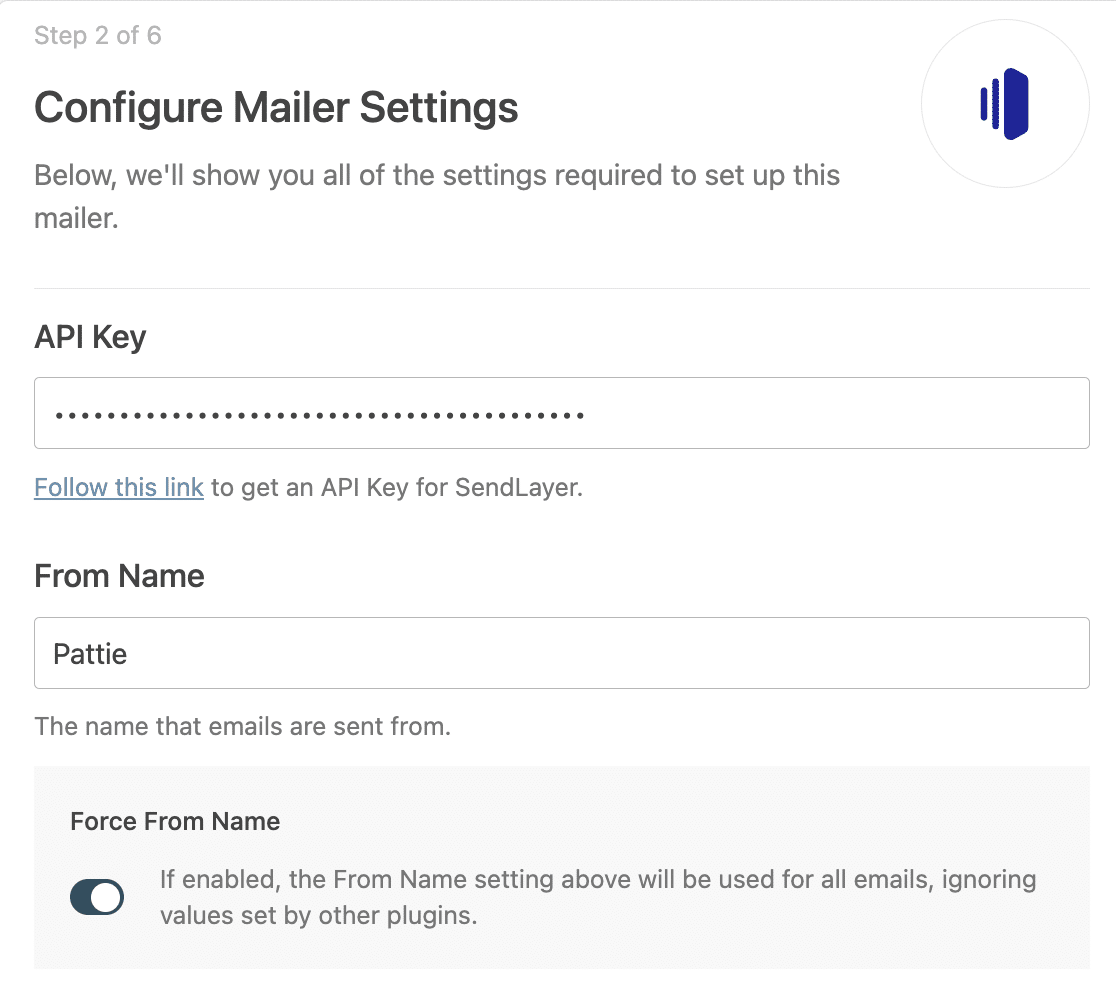
After you’ve entered all the required settings, click Save and Continue again.
Step 3: Enable Email Logging and Alerts
WP Mail SMTP will then ask you which features you want to enable for your site. Improved Email Deliverability, Email Error Tracking, and Complete Email Reports are turned on automatically.
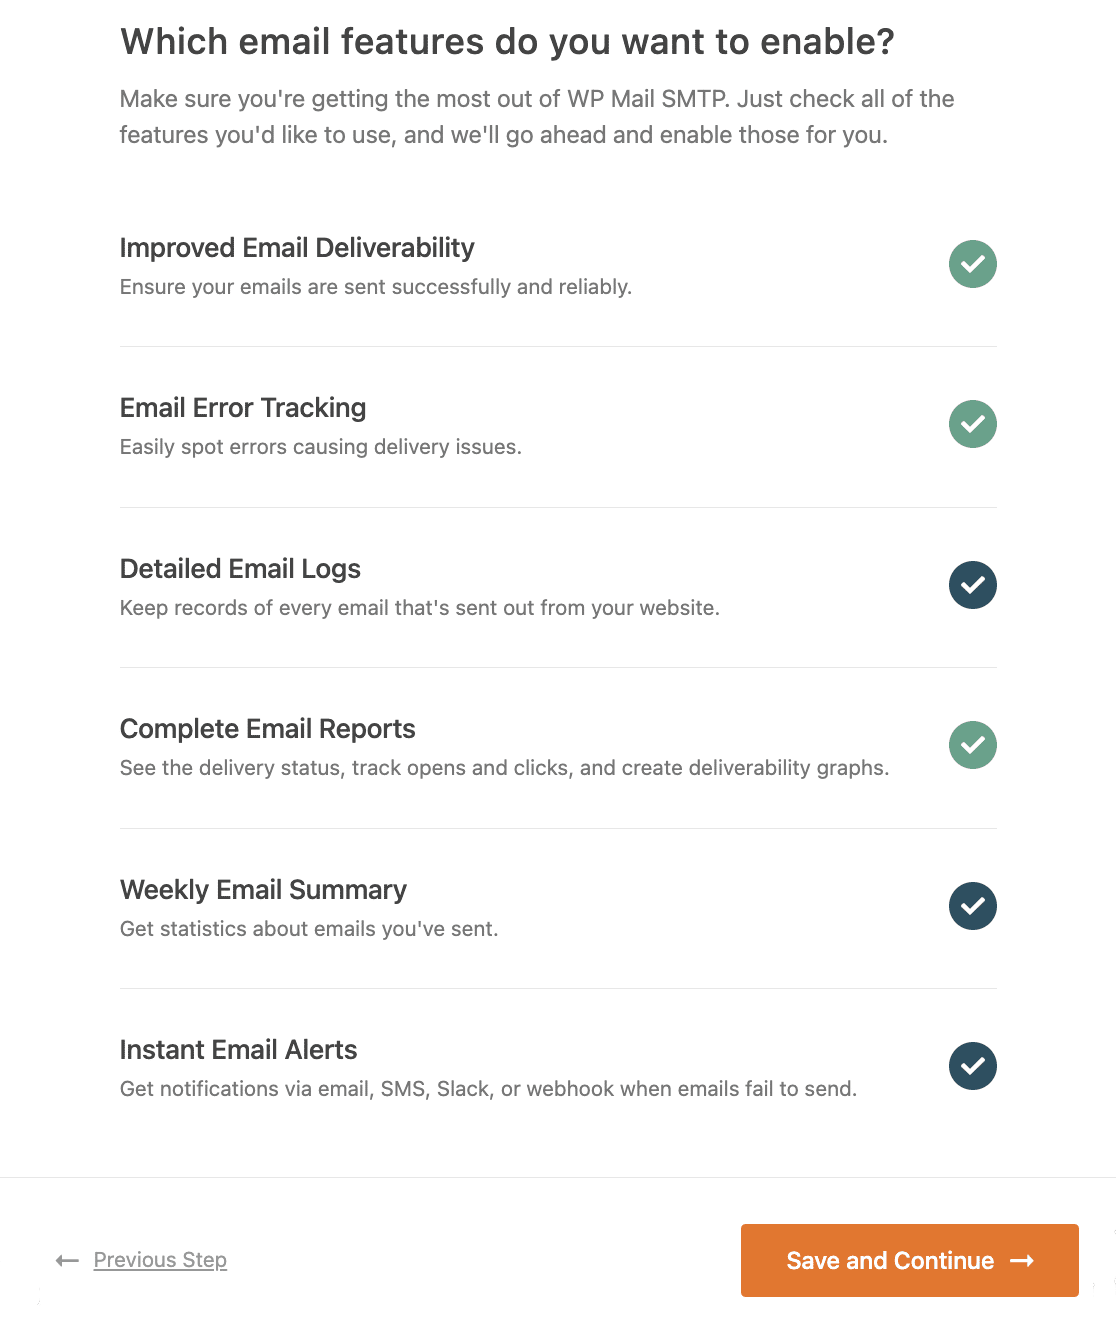
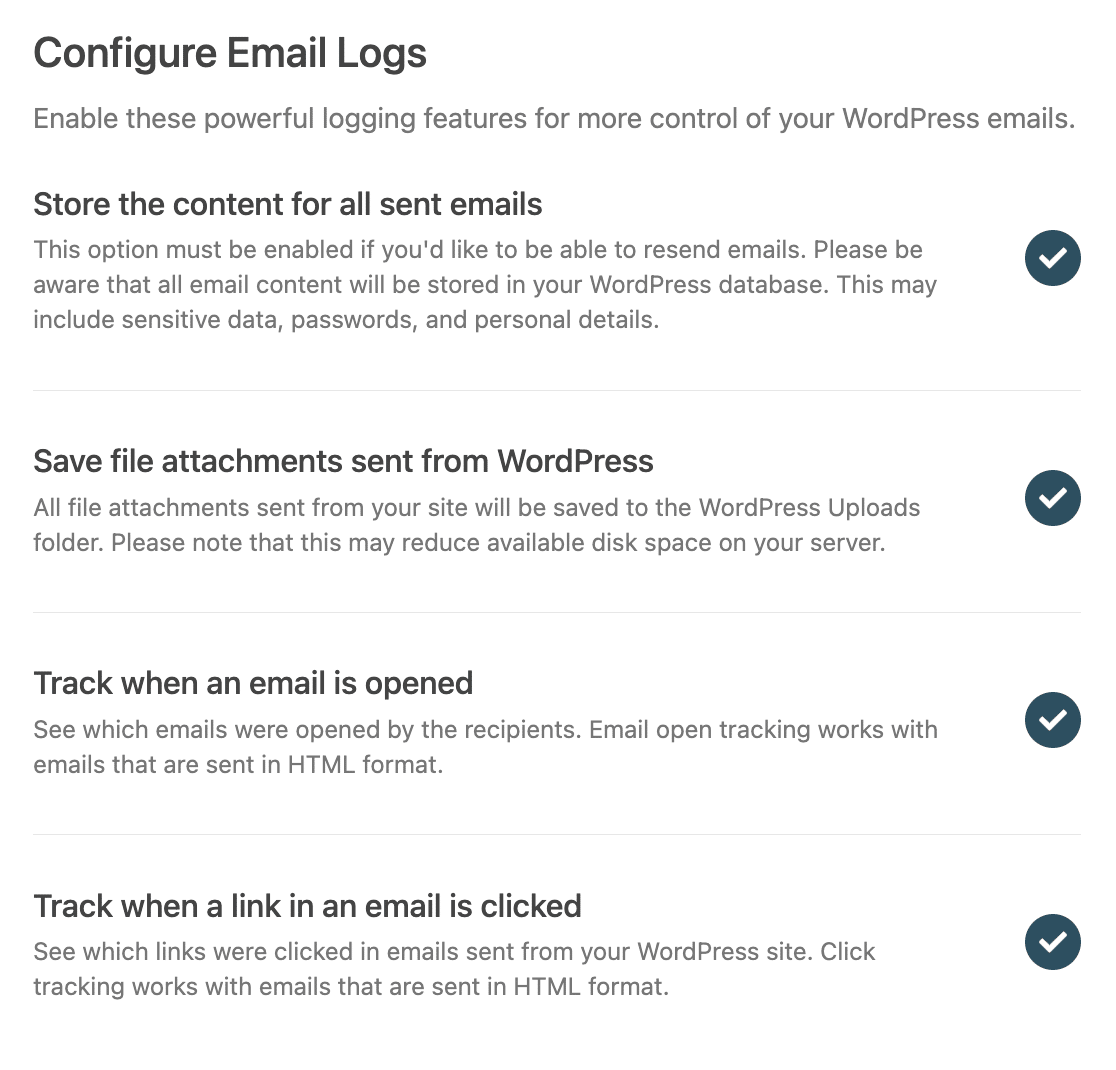
You can also choose to enable Detailed Email Logs, which will store the headers for your emails and show you the delivery status of each email your site sends, as well as open and click tracking.
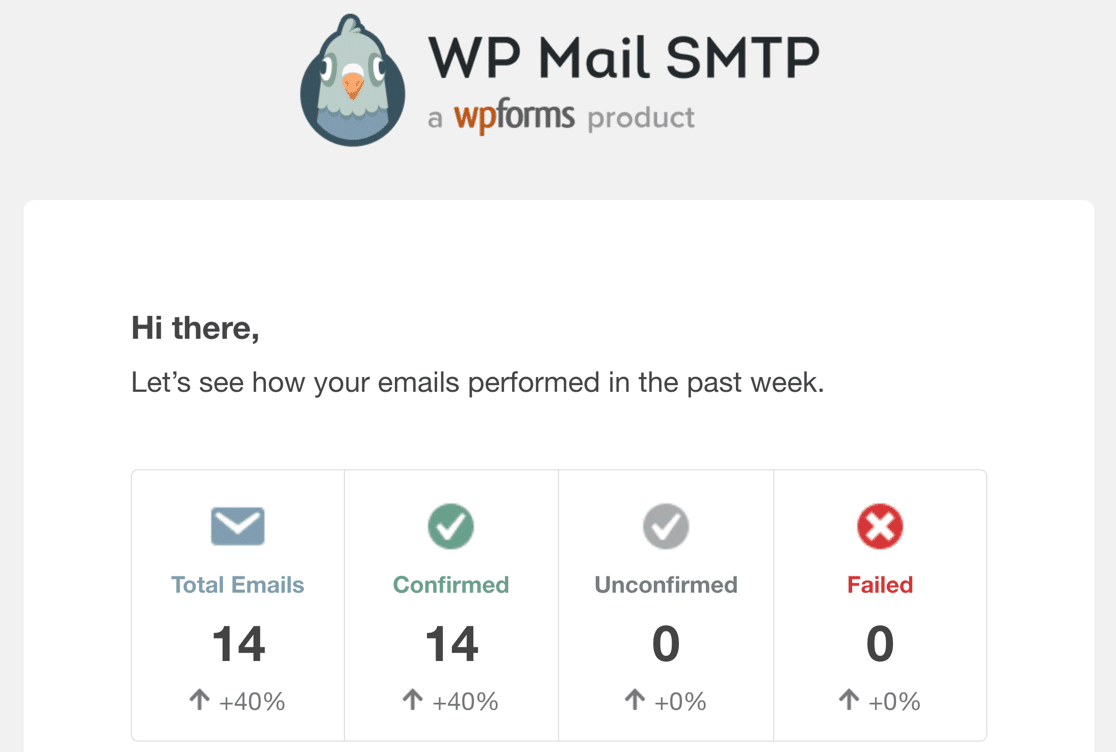
To receive an email with a summary of your website’s emails each week, check the box for the Weekly Email Summary. This email shows you an overview of the statistics for your website from the past week.
Finally, if you would like to receive a text, email, or Slack notification when your site fails to send an email, you can turn on Instant Email Alerts. This is super helpful for troubleshooting problems that occur with your WordPress emails.
The Setup Wizard will ask you to configure a few additional settings for any features you enable, such as asking which metrics you want to track in your email logs and what content you want to include.
So, if you’d like to make sure everything is going well with your emails at all times, I recommend enabling these extra features to get the most out of WP Mail SMTP.
Step 4: Perform an Email Test
Once you finish setting up WP Mail SMTP, the setup wizard will send a test email to check if everything is working the way it should. If the setup is correct, you’ll see a message that says the test email was sent successfully.

At this point, it’s a good idea to wait for a few real emails to go out from your site—just to make sure the “could not instantiate mail function” error doesn’t show up again.
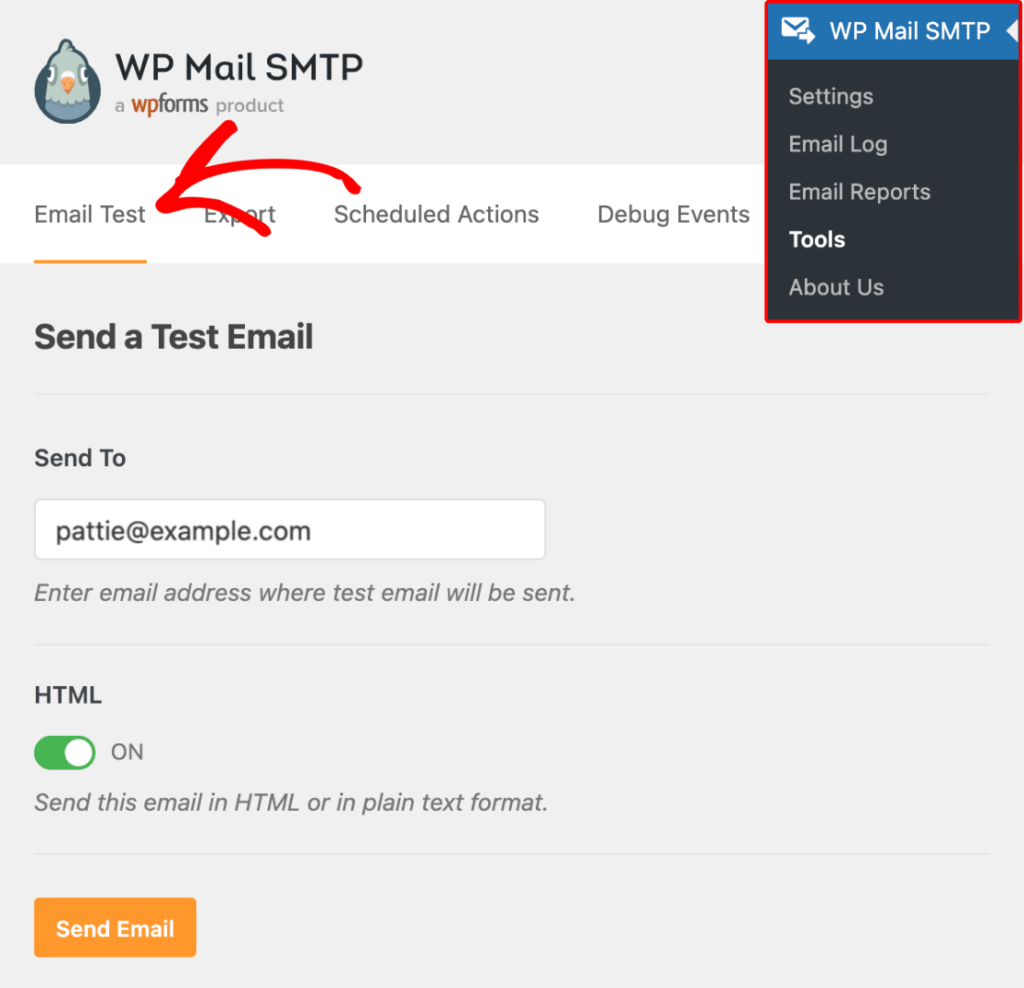
If you don’t want to wait, you can send more test emails yourself. Go to WP Mail SMTP » Tools » Email Test, type an email address you have access to, and click send.
Here is a screenshot of what the test message could look like in your inbox, so you know what to expect. This ensures that your emails will now send successfully.

Step 5: Resend Failed Emails Instantly
If PHPMailer isn’t working on your WordPress site, switching to SMTP with WP Mail SMTP can help fix the problem. Once that’s done, you can resend any failed emails right from your WordPress dashboard.
To do this, make sure the Store the content for all sent emails setting is turned on. You can enable it during setup or by going to WP Mail SMTP » Settings » Email Log.
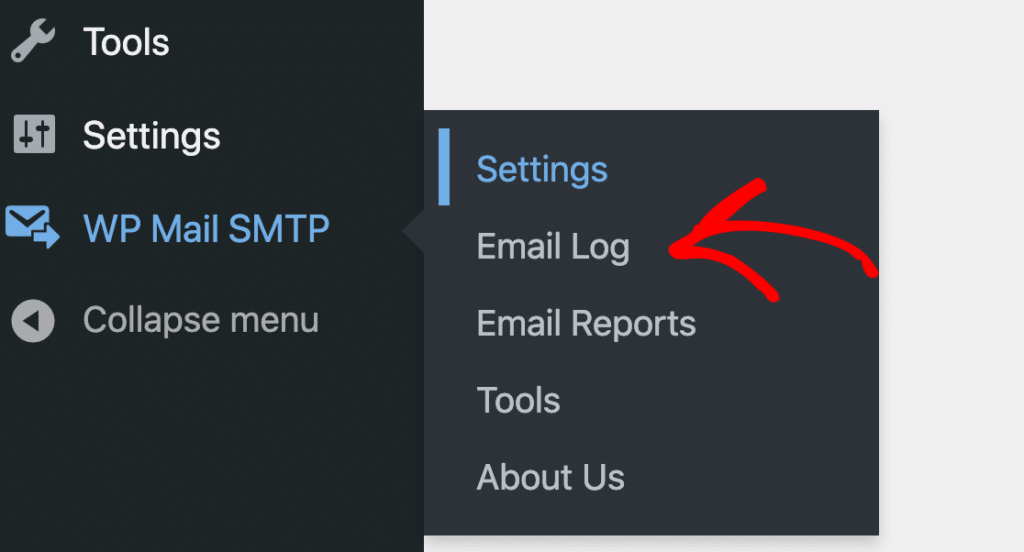
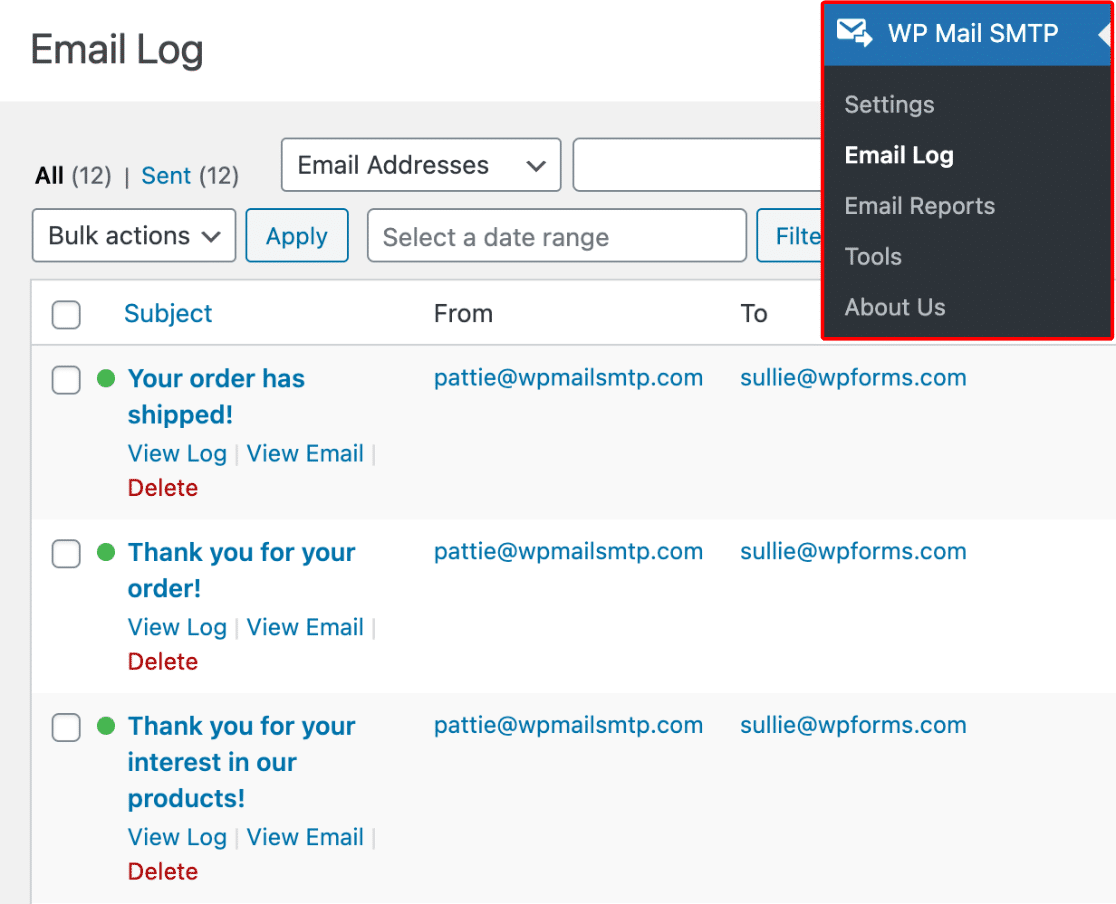
Next, head to WP Mail SMTP » Email Log. You’ll see a list of emails sent from your site. Emails that failed will show a red dot. Click View Log next to the one you want to resend.

On the right side of the log, click the Resend button. You can also change the email address if needed. When you’re ready, click Yes to send it again.
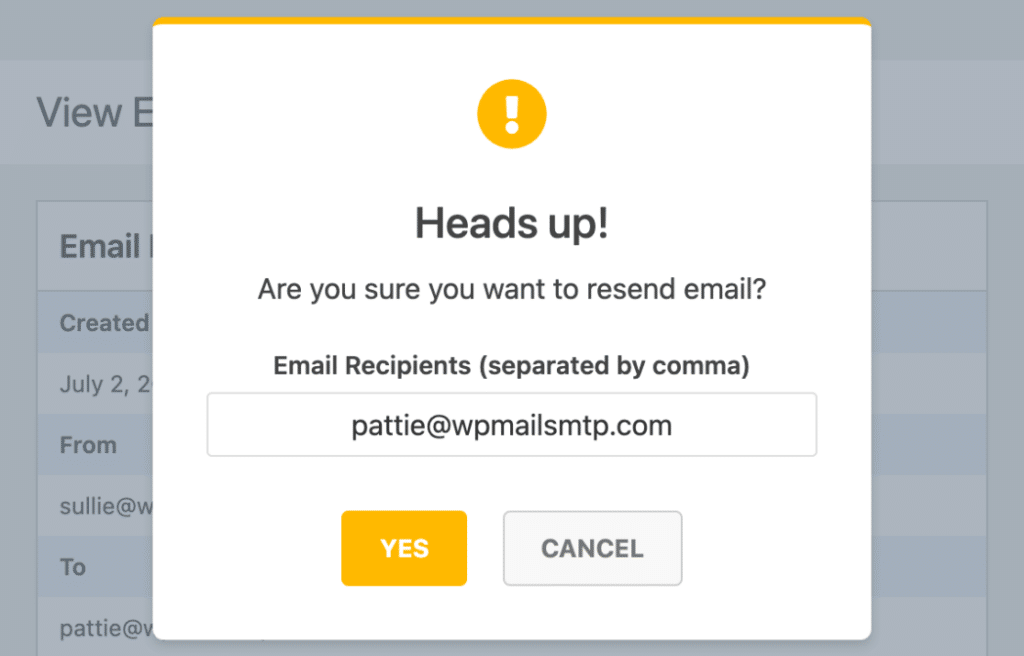
That’s it. This gives you an easy way to check for problems and try sending the email one more time without doing it all over again.
FAQs on How to Fix WordPress PHPMailer Not Working
Learning how to fix WordPress PHPMailer not working is a popular topic of interest among our readers. Here are answers to some common queries about it:
Why is PHPMailer not working on my WordPress site?
Most of the time, PHPMailer stops working because your web host blocks the default mail method. This can prevent WordPress from sending emails like password resets or form alerts.
What causes the “PHPMailer was able to connect to SMTP server but failed” error?
This error usually means the connection started but wasn’t accepted. The problem might be a wrong password, bad port number, or blocked firewall on the server.
How can I test if PHPMailer is sending emails?
Install WP Mail SMTP and go to WP Mail SMTP » Tools » Email Test. Send a test email to yourself. If it lands in your inbox, PHPMailer is working through SMTP.
What’s the difference between wp_mail and PHPMailer?
wp_mail() is a WordPress function that sends email using PHPMailer behind the scenes. It’s the tool WordPress calls, but PHPMailer does the actual sending.
Can I use Gmail SMTP with PHPMailer in WordPress?
Yes. Use a plugin like WP Mail SMTP, pick Google Workspace / Gmail as the mailer, and connect your Google account. This lets your website send messages through Gmail servers.
Where do PHPMailer errors show up in WordPress?
You may see PHPMailer errors on-screen when sending fails, or inside your site’s error log. Some SMTP plugins like WP Mail SMTP also log these messages for easy checking.
Next, Find the Best Contact Form Plugin for WordPress
Contact form plugins like WPForms help you land sales and grow your business by giving visitors an easy way to get in touch with you.
Check out our list of the top WordPress contact form plugins for the best recommendations. You can also read our tutorial on how to send contact form email notifications to multiple email addresses.
Ready to fix your emails? Get started today with the best WordPress SMTP plugin. If you don’t have the time to fix your emails, you can get full White Glove Setup assistance as an extra purchase, and there’s a 14-day money-back guarantee for all paid plans.
If this article helped you out, please follow us on Facebook and Twitter for more WordPress tips and tutorials.

