AI Summary
Is WP Fluent Forms not sending email notifications when forms are submitted on the website?
Deliverability of contact form emails is important as it is one way your readers might try to reach you.
In this guide, I’ll show you how to solve the email delivery issue so that you never miss another important email notification.
Fix Your Fluent Forms Emails Now! 🙂
Why Is My Fluent Form Not Sending Emails?
Sometimes a small mistake in the contact form settings can lead to issues in email delivery. By default, WordPress uses the PHP mail() function to send emails from your website.
This isn’t reliable and can cause issues in email delivery due to server misconfiguration. Some hosting companies disable it completely to prevent server abuse.
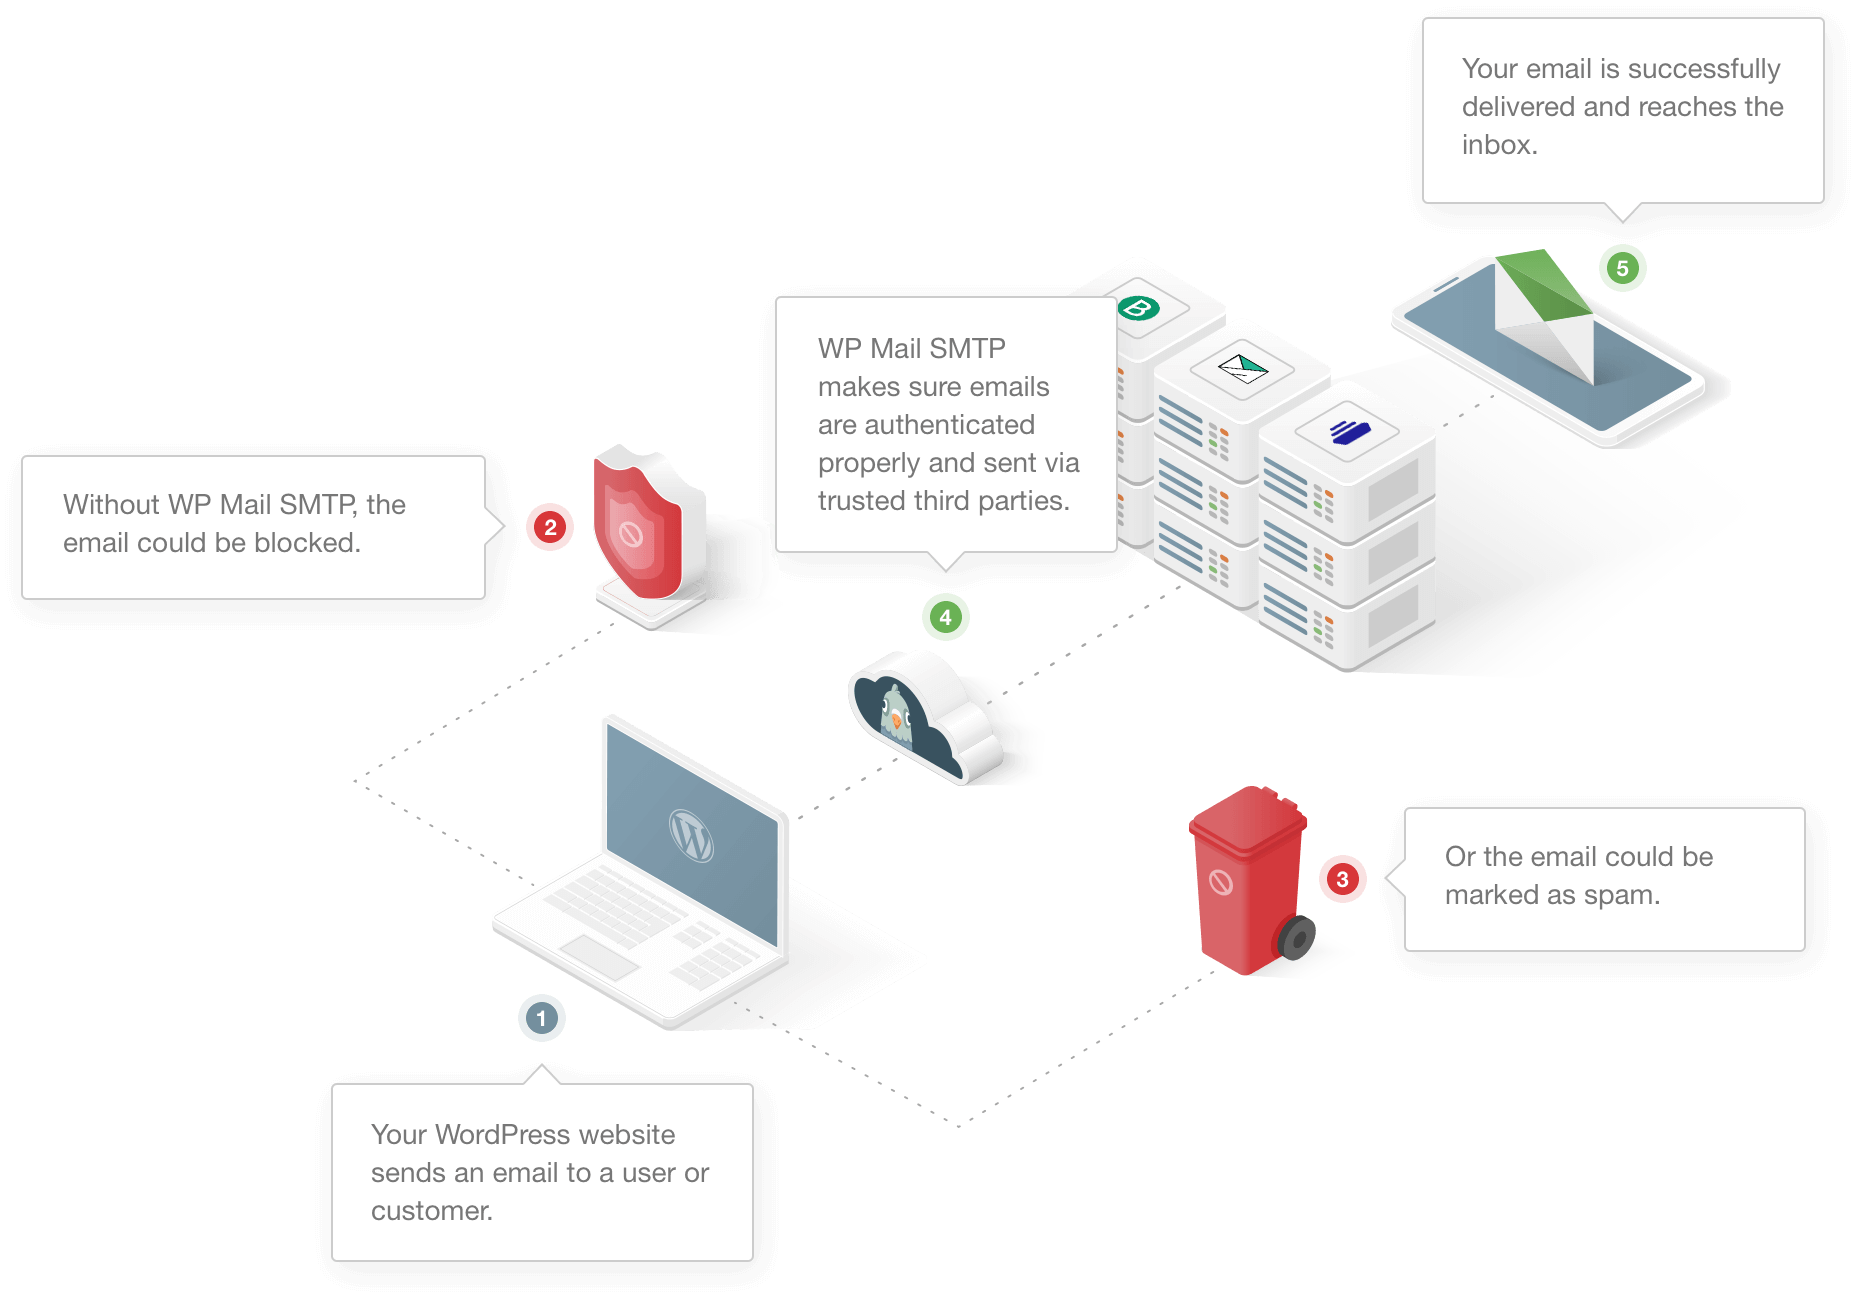
Another major reason is the lack of verification of the emails sent from WordPress. WordPress uses the default email address ([email protected]) to send all emails from your website.
This isn’t a real address on most websites. Most email client apps flag emails from such addresses as spam. Sometimes, the emails get blocked and don’t even make it to the spam folder.
Let’s see how we can solve the problem using an SMTP plugin. If you’re using Fluent CRM, we have a separate guide on fixing Fluent CRM emails.
How To Fix WP Fluent Forms Not Sending Email
Step 1: Check Email Settings in WP Fluent Forms
By default, WP Fluent Forms will send all emails to the administrator email. If you aren’t getting the emails, let’s check if the contact form has the correct notification settings.
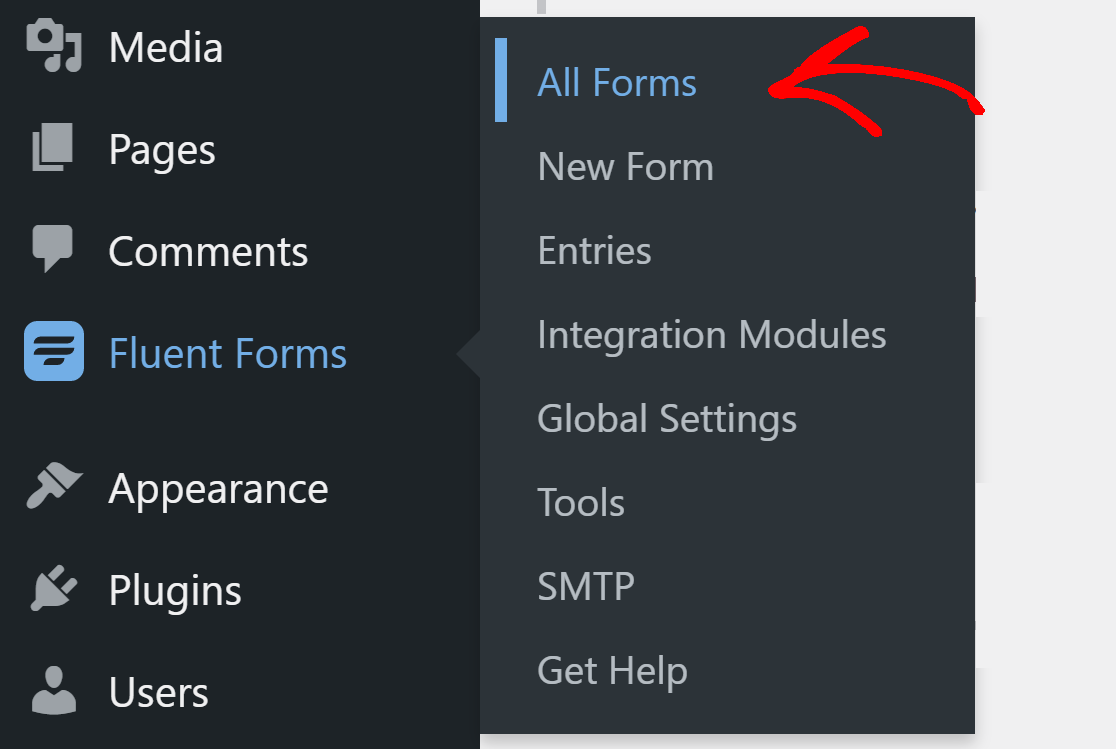
From the WordPress dashboard, click on Fluent Forms » All Forms to view all the forms you have on your website.
Next, click on the Settings button to open the form.

From the sidebar, click on Email Notifications and make sure the toggle is on. If you don’t see any notifications here, you can click the Add Notification button to add one.

Now, click on the gear icon to open its settings.

Here, next to Send To, make sure Enter Email is selected. In the below field, you can enter the email address you wish to use to receive emails from this contact form.

Now, scroll down and click on Advanced. In the From Email field, enter an email address you’d like to send emails from. It is recommended that you use your domain’s email. For example, since our domain is wpmailsmtp.com, we use [email protected] for contact forms on our website.

Scroll down and click on Save Notifications to save the settings. Repeat the same process for all the other contact forms you have on the website.
Now, let’s install the WP Mail SMTP plugin which will add authentication to the emails sent from your website.
Step 2: Install the WP Mail SMTP Plugin
WP Mail SMTP is the best SMTP plugin for WordPress. It solves the issue of Fluent Forms not sending email by connecting your website to an external email service.
The dedicated email service adds important verification to the messages. That way, the emails don’t get lost or end up in the spam folder.
Setting up WP Mail SMTP is very easy, thanks to the included Setup Wizard. To start, download the plugin from the WP Mail SMTP account. You’ll find it under the Downloads tab.
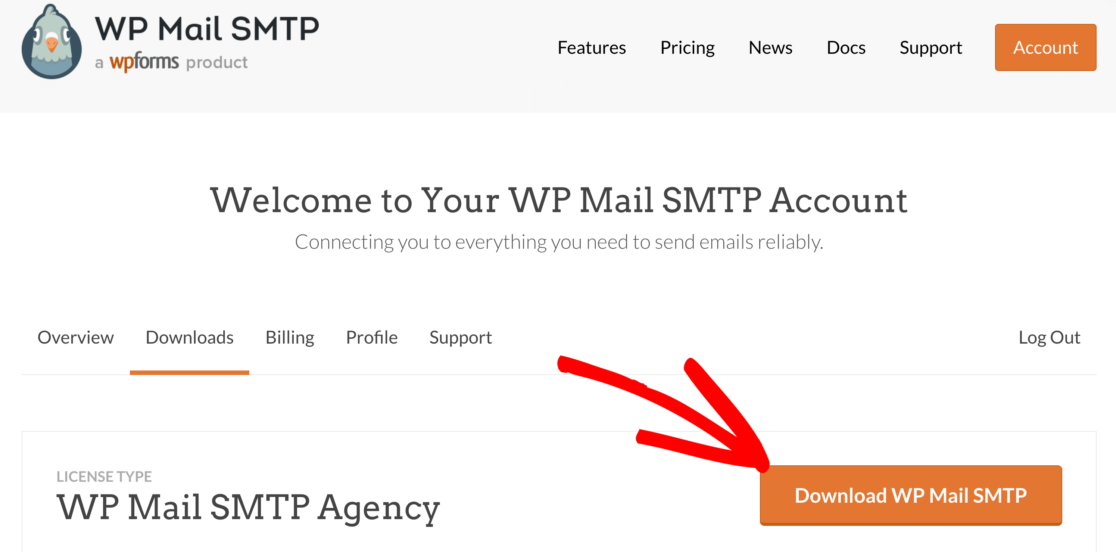
Log in to your WordPress dashboard and upload the zip file to the Plugins page. If you need help with this, refer to the guide on installing a WordPress plugin.

Once you’ve installed the plugin, make sure you activate it. As soon as you do that, the Setup Wizard will start in your browser.
If you prefer to have someone else set it up for you, White Glove Setup is included with the Elite license. If you prefer to do it on your own, follow along.
Step 3: Choose an SMTP Service
Now, you’ll want to choose a mailer service that will add authentication to the messages. Click on the Let’s Get Started button to begin.

Now choose the mailer service you want to use. WP Mail SMTP offers you free as well as paid options. What you select here will depend on the type of website.
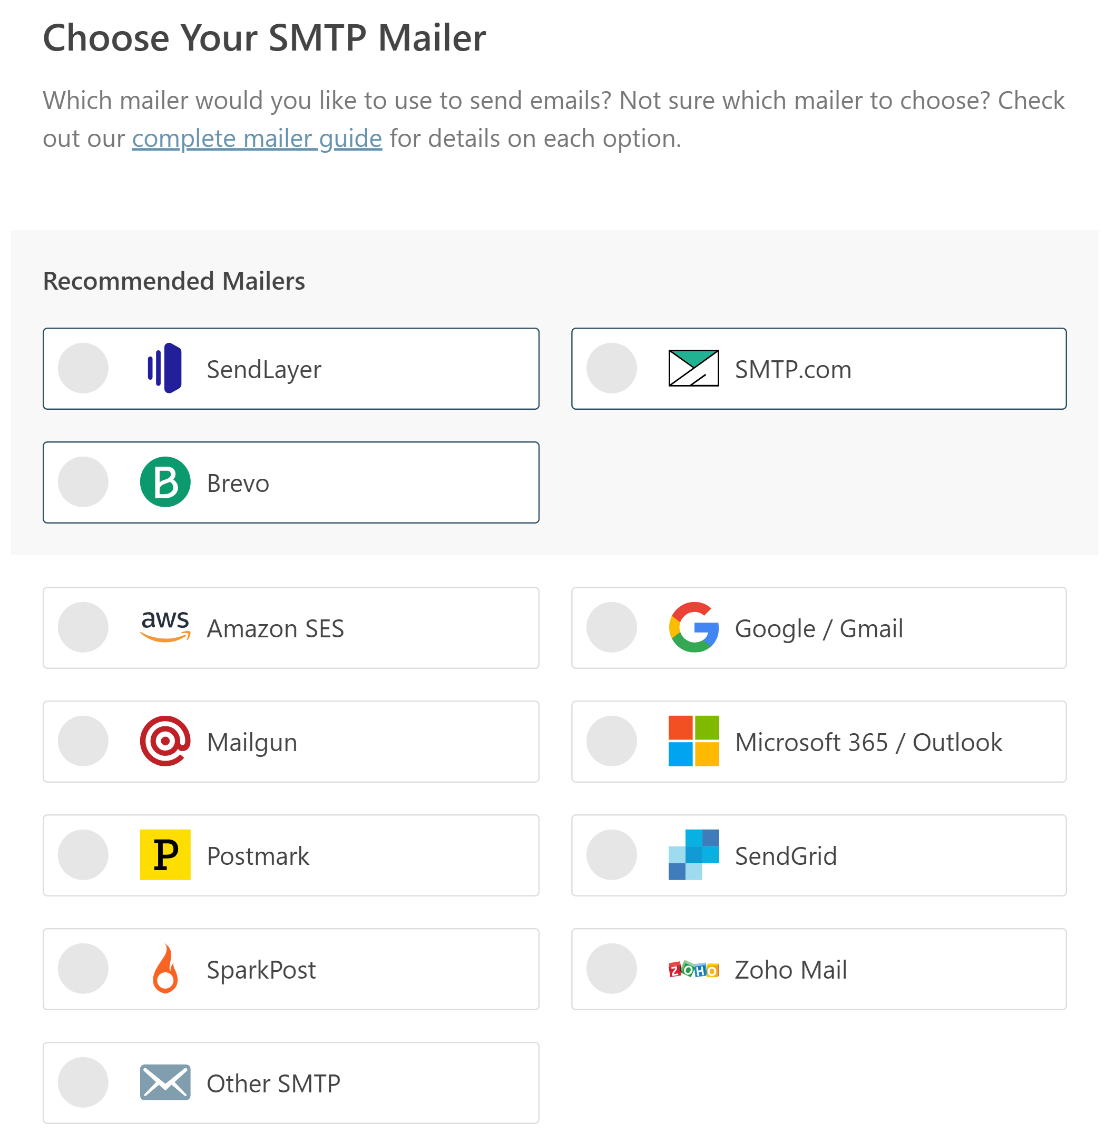
If your website sends occasional emails through the contact form, we recommend SendLayer, SMTP.com, or Brevo (formerly Sendinblue). They’re all easy to use and offer reliable service.
You can also send emails from the Gmail alias if you have a Gmail or Google Workspace account. This is a great option for small websites that don’t want to spend any extra money.
When you’ve chosen your mailer, open up our documentation to complete the setup steps on the provider’s side:
- SendLayer
- SMTP.com
- Brevo
- Amazon SES
- Google Workspace / Gmail
- Mailgun
- Microsoft 365 / Outlook.com
- Postmark
- SendGrid
- SparkPost
- Zoho Mail
- Other SMTP
Want to set up multiple mailers? You can do so in the Additional Connections settings after you finished the Setup Wizard. Then select a Backup Connection and configure Smart Routing.
Switch back to this guide after you establish a connection with the mailer service. Follow the below steps to enable email logging.
Step 4: Enable Email Logging (Optional)
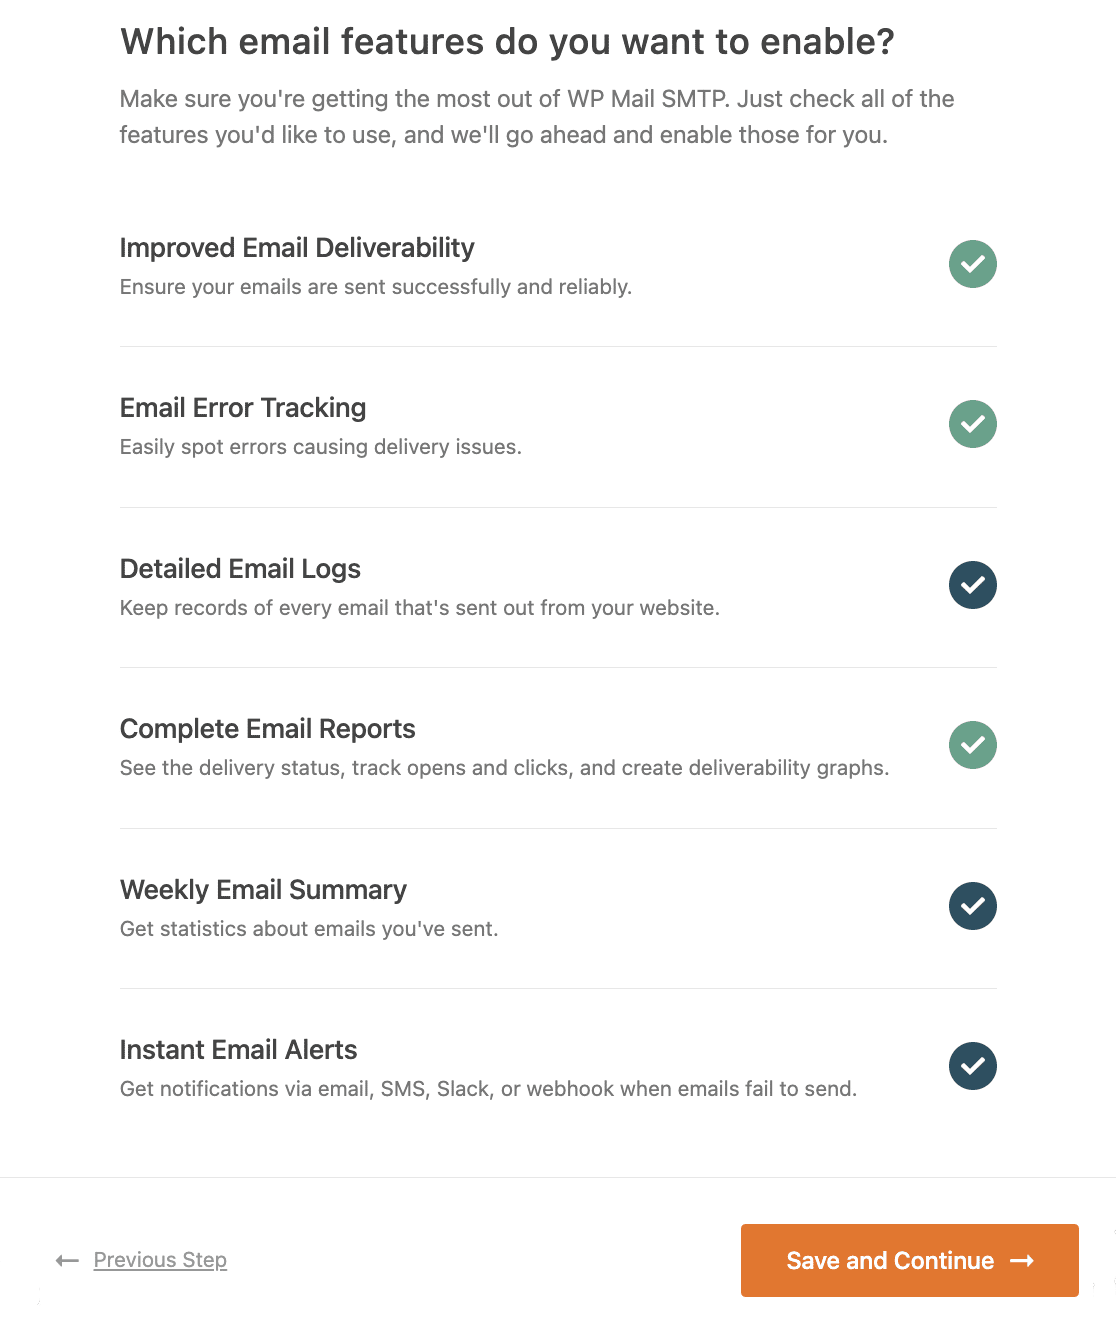
In the next step, WP Mail SMTP will ask you which email feature you’d like to enable. By default, the first 2 options will be turned on:
- Improved Email Deliverability
- Email Error Tracking
You’ll want to have both the options enabled to fix WP Fluent Forms not sending email. In our Pro version, the Detailed Email Logs will let you keep track of all the emails that are being sent from your website.
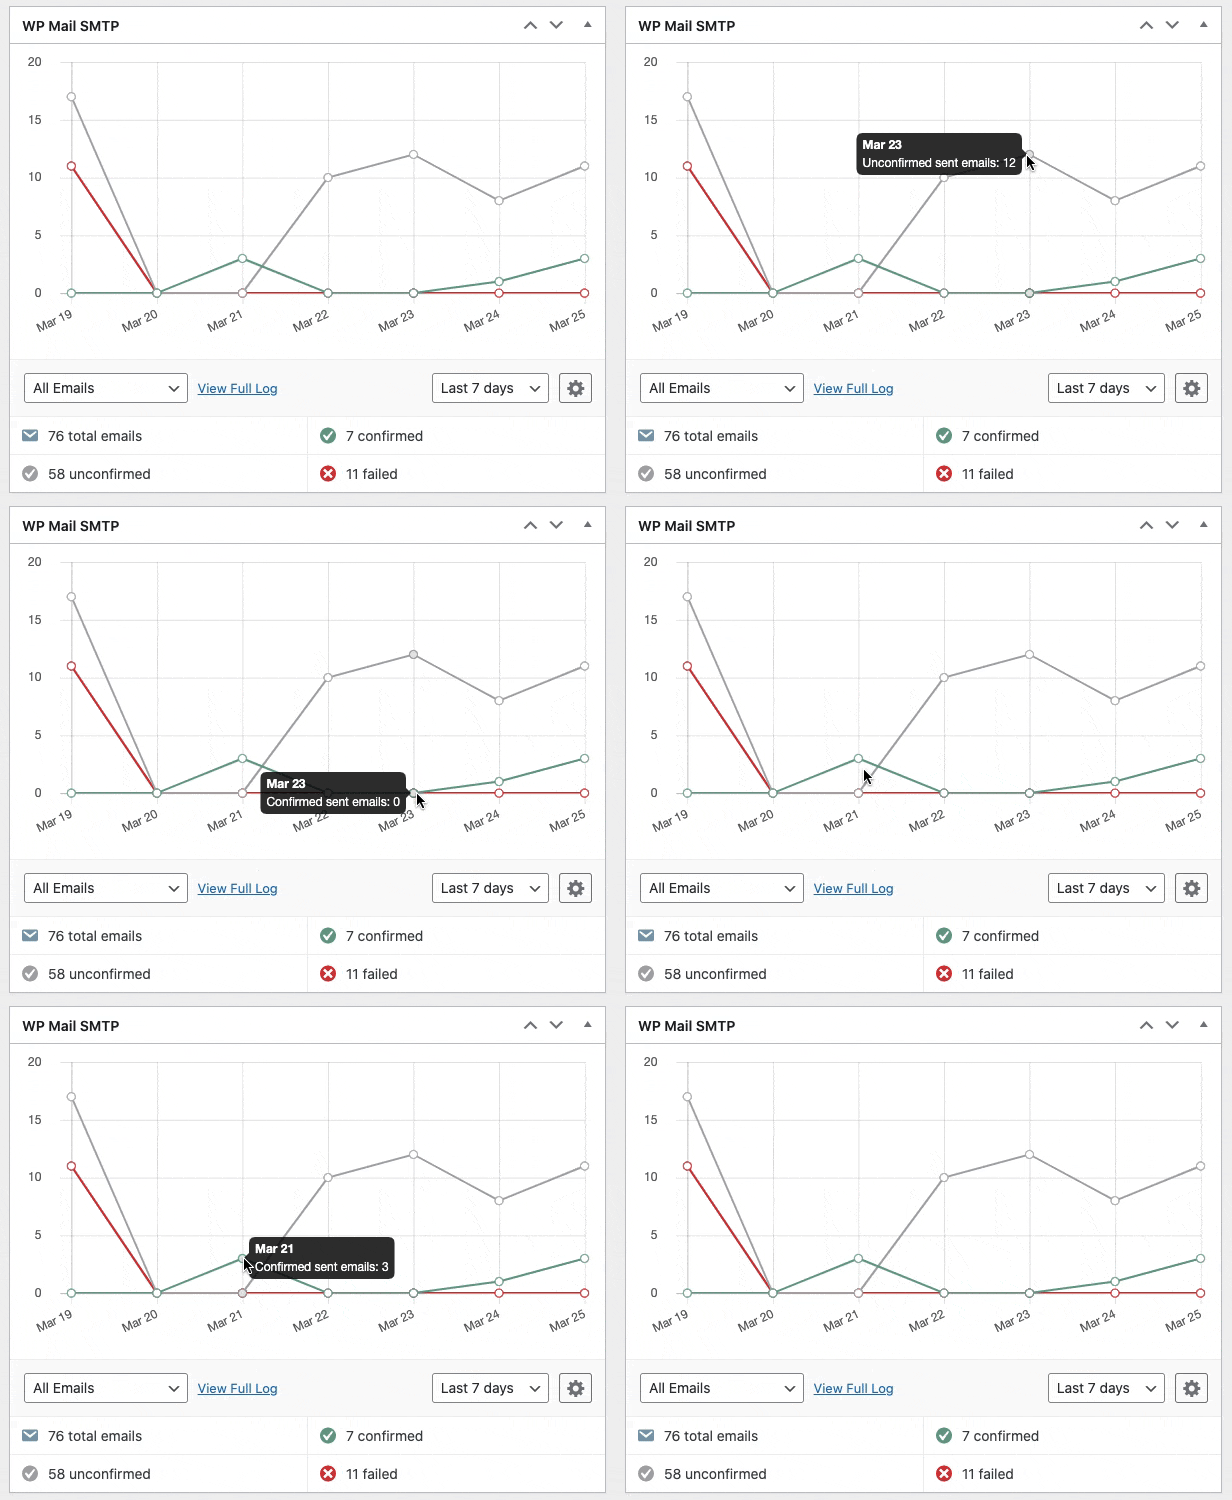
When you use email logging, you’ll also see a neat dashboard widget that displays logs in the form of a chart.
Turning on email logging also enables Complete Email Reports. You can also choose to receive the Weekly Email Summary if you’d like to see your email delivery stats each week.
Instant Email Alerts are a type of notification that tells you when your site fails to send an email. This gives you the chanc
You’ll also be able to export your logs to a spreadsheet, print logs, resend emails, and more. Check out this guide on how to export and search email logs in WordPress.
For the last step, you’ll need to grab the license key from the WP Mail SMTP account and paste it into the box. This will enable future automatic updates to the plugin.

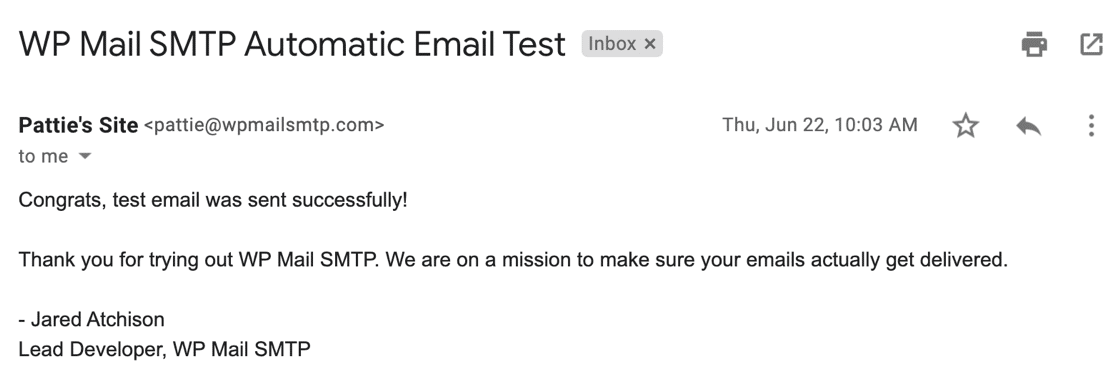
After that, complete the Setup Wizard and you’ll get an automatic test email to confirm that everything’s working.
Step 5: Resend Failed Fluent Form Emails
You can resend failed emails easily from the WP Mail SMTP email log. In order to do this, you’ll need to have turned on the Store the content for all sent emails option in the Setup Wizard.
If you didn’t do so, you can turn the setting on by going to WP Mail SMTP » Settings » Email Log. To resend an email, go to WP Mail SMTP » Email Log from your WordPress dashboard
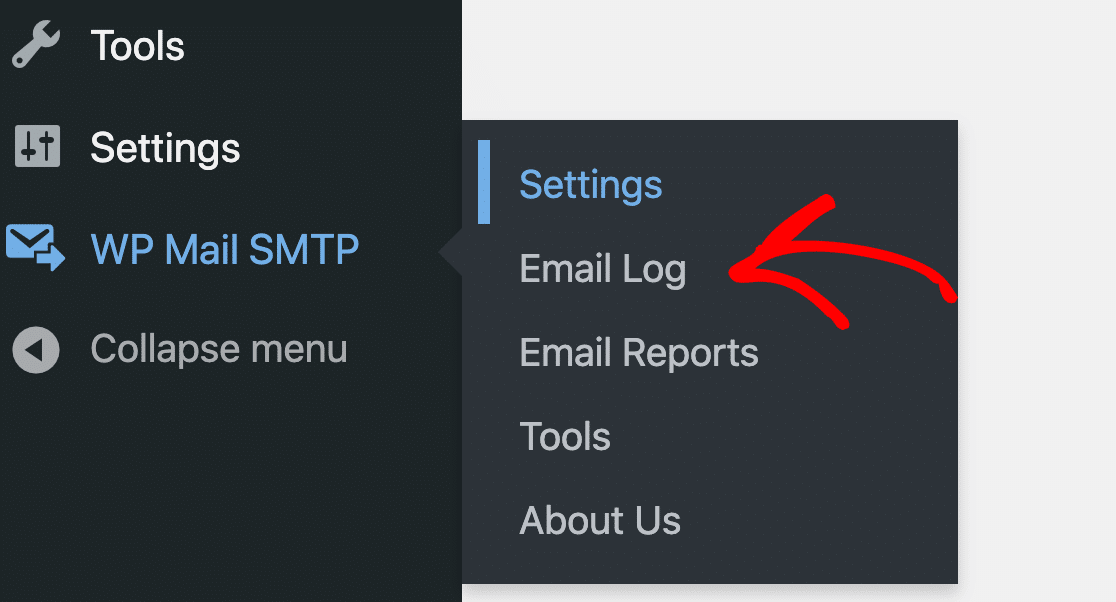
You’ll see a list of all emails sent from your website. Any emails that failed will be marked with a red dot. Click on the View Log button for the email that has failed to deliver.

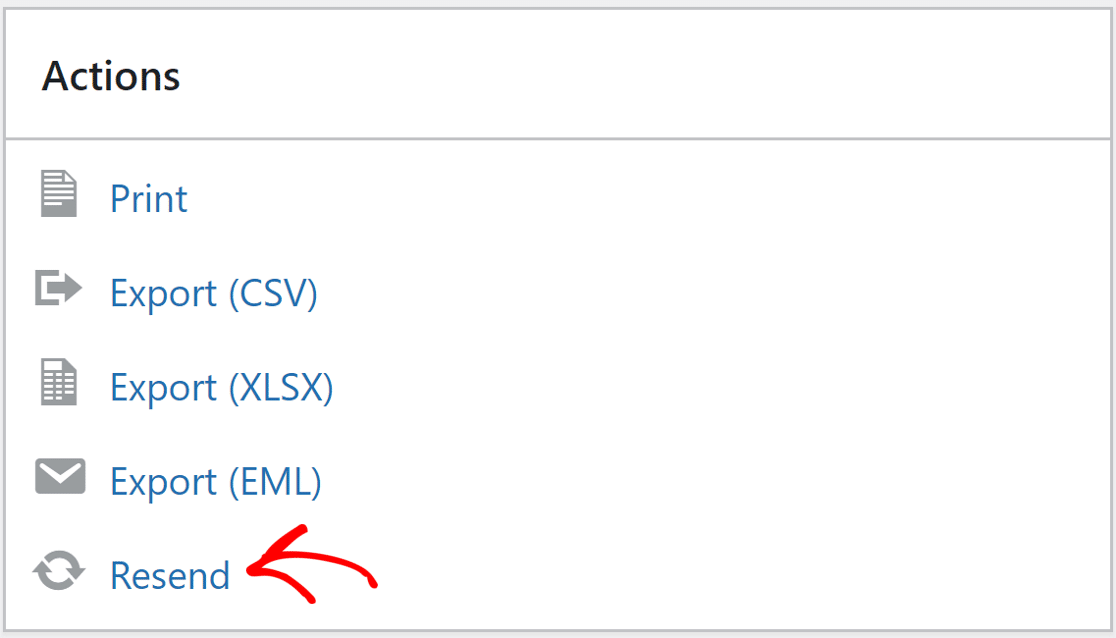
And on the right-hand side, you’ll find the Resend button under the Actions tab.
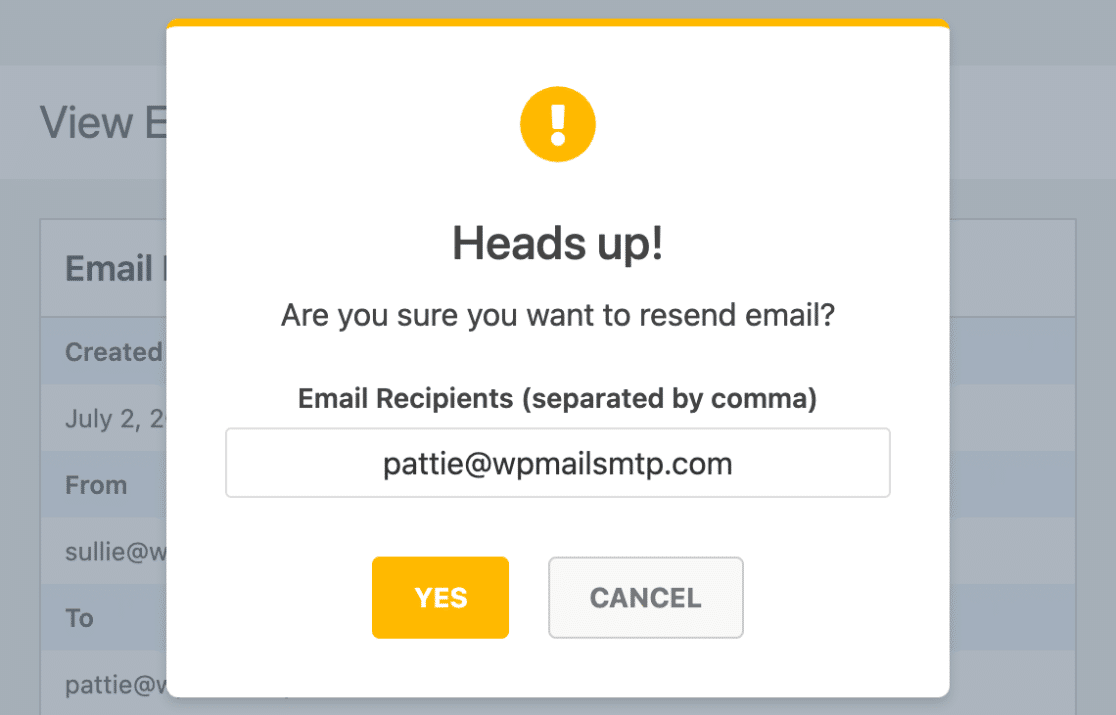
Edit the email address if you need to, then click the YES button to resend the email.
FAQs on How to Fix Fluent Forms Not Sending Emails
Fluent Forms not sending emails is a popular topic of interest among our readers. Here are answers to some common queries about it:
Why are my Fluent Forms emails not sending?
Most servers block the plain PHP mail function that Fluent Forms tries to use. Without an SMTP service, messages are often flagged or dropped before they reach the inbox.
How do I fix “Fluent Forms email notifications not working”?
Install WP Mail SMTP, pick a mailer like Brevo or SendLayer in the setup wizard, and set the same From Email in both plugins. Send a quick test to confirm delivery.
Does Fluent Forms need SMTP to send emails?
It can send mail without SMTP, but success is hit or miss. Adding an SMTP plugin routes each message through a real mail server, which makes delivery far more reliable.
How do I set up SMTP for Fluent Forms with WP Mail SMTP?
Install WP Mail SMTP » Go to WP Mail SMTP » Settings » Run the wizard » Choose a mailer » Enter the API or SMTP keys » Save. Fluent Forms now uses those settings for every email.
How can I test if Fluent Forms is sending email correctly?
Open WP Mail SMTP » Tools » Email Test, type an address you control, and click Send Email. If you see the message in your inbox, your form emails should work too.
Why do I see a “Fluent SMTP forbidden error”?
The error means your API key or sender address is not authorised with the mail service. Re-check the key, make sure the sender domain is verified, then try again.
How do I connect Gmail SMTP to Fluent Forms?
In WP Mail SMTP, pick Google / Gmail as your mailer and use the one-click setup option, or create OAuth keys in your Google Cloud project, paste them into the plugin, and grant access. All Fluent Forms emails will then send through Gmail.
What is the difference between “Send To Email” and “Admin Email” in Fluent Forms?
Send To Email is the address your form visitor should receive, like a confirmation note. Admin Email goes to you or your team, so you know a new entry has arrived.
Next, Consider Using WPForms
If you continue to face issues with Fluent Forms not sending emails, it may be time for you to use a better form plugin. I recommend using WPForms. It integrates perfectly with WP Mail SMTP, offers amazing anti-spam protection features, and even comes equipped with plenty of amazing integrations.
The best part of all: WPForms has a prebuilt library of over 2000 form templates to help kick off your form creation process, and it regularly releases updates to keep everything running smoothly, along with a very proactive support team and great documentation for step-by-step guidance.
Ready to fix your emails? Get started today with the best WordPress SMTP plugin. If you don’t have the time to fix your emails, you can get full White Glove Setup assistance as an extra purchase, and there’s a 14-day money-back guarantee for all paid plans.
If this article helped you out, please follow us on Facebook and Twitter for more WordPress tips and tutorials.

