AI Summary
Are you looking for an easy way to preview and perform a WooCommerce email test from your WordPress website?
Every email counts in your WooCommerce experience, from when an order is placed until the final transaction receipt.
In this guide, we’ll show you how to preview and test WooCommerce emails in WordPress, ensuring they appear and function correctly.
Why Preview and Test Your WooCommerce Emails?
Let’s break down the fundamental reasons why previewing and testing WooCommerce emails is a must:
- Effective Communication: The essence of your emails – their message – must be crystal clear. By previewing and testing, you can ensure that call-to-actions are noticeable and the content is engaging and relevant to the recipient.
- Optimized User Experience (UX): An excellent UX comes from a well-structured and adaptable email design. By testing your WooCommerce emails, you can be sure that they are easy to read and look good on all platforms and email apps.
- Accuracy and Professionalism: A misspelled word, broken link, or faulty graphic in an email can all hurt your company’s credibility. By eliminating such flaws through testing, you can present a more professional front to your consumers.
- Adherence to Branding Guidelines: Email previews ensure that the colors, logos, and fonts used are consistent with the identity of your company. Maintaining coherence in your company’s branding helps to cultivate trust among your clients.
If you want to increase your email deliverability and success, previewing and testing WooCommerce emails is essential. Follow the steps below to get started!
How to Test Your WooCommerce Emails
There are 2 simple ways to test your WooCommerce emails: with the Preview E-mails for WooCommerce plugin, or testing deliverability with WP Mail SMTP. Here’s how to use both methods to keep test your WooCommerce emails.
In This Article
Method 1: Use a Preview Email Plugin for WooCommerce
To make sure your WooCommerce emails appear and function correctly, follow the steps below to preview them:
1. Install Preview E-mails for WooCommerce
The first step is to install the Preview E-mails for WooCommerce plugin and activate it on your site. This plugin allows you to preview and test different email templates.
If you are new to WordPress plugins and don’t know how to install one, check out this guide for easy steps on how to install a WordPress plugin.
2. Select an Existing Order for the Email Preview
After installing the plugin, navigate to WooCommerce » Preview Emails from your WordPress dashboard to select which WooCommerce email to preview.
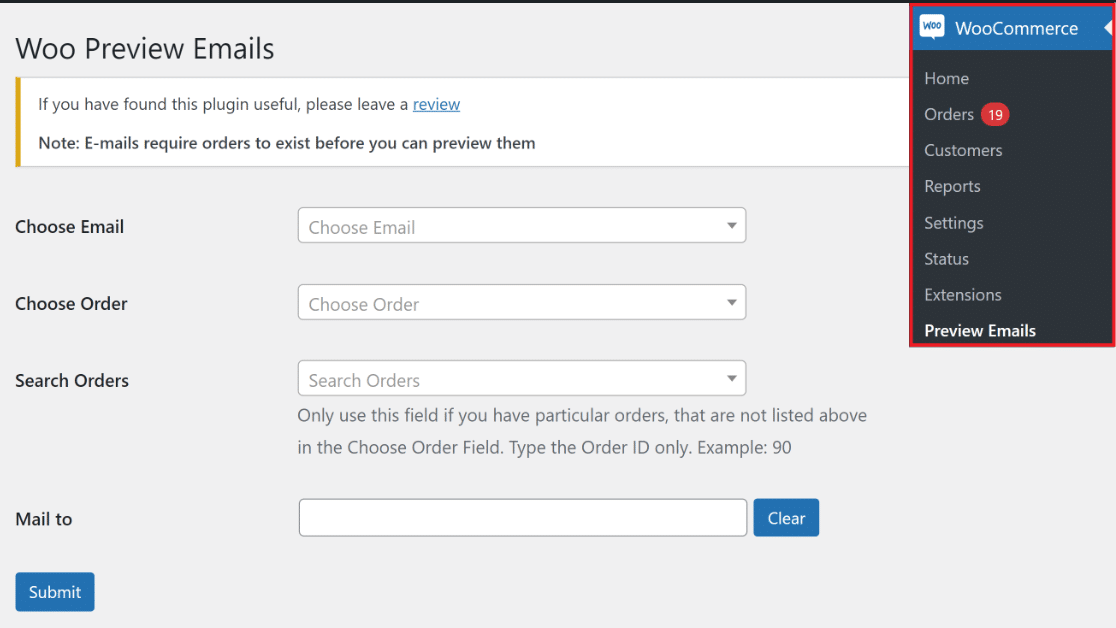
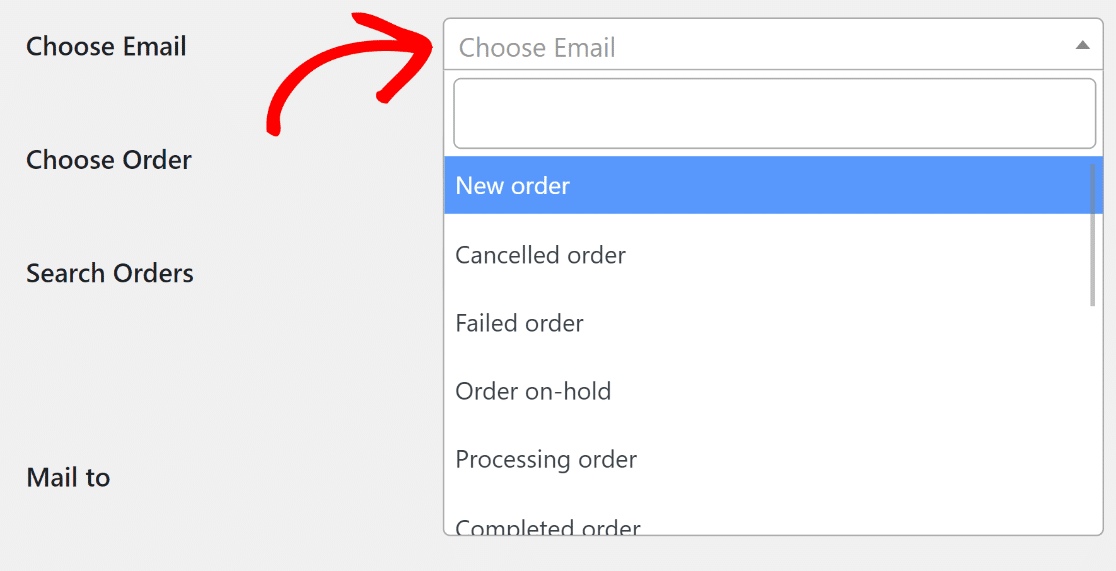
Next, select Choose Email from the dropdown menu and choose the WooCommerce email you want to preview here.
After that, choose an existing or new order from the Choose Order dropdown box. The details from this order will be used for the email preview.
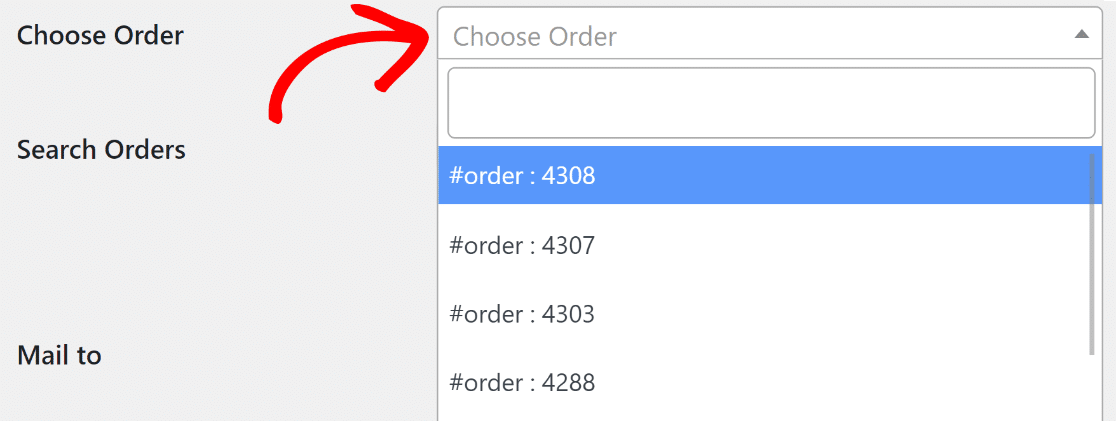
If the completed order you want to use for the preview isn’t shown in the list, you may use the Search Orders feature to look it up.

If your WooCommerce online store hasn’t had any sales yet, you can make a dummy order by putting Stripe payments in test mode first.
3. Send a Test Email to Your Email Address
Enter an email address in the Mail to field to send a test email and hit the Submit button. If you only want to preview the email onscreen, leave this blank.

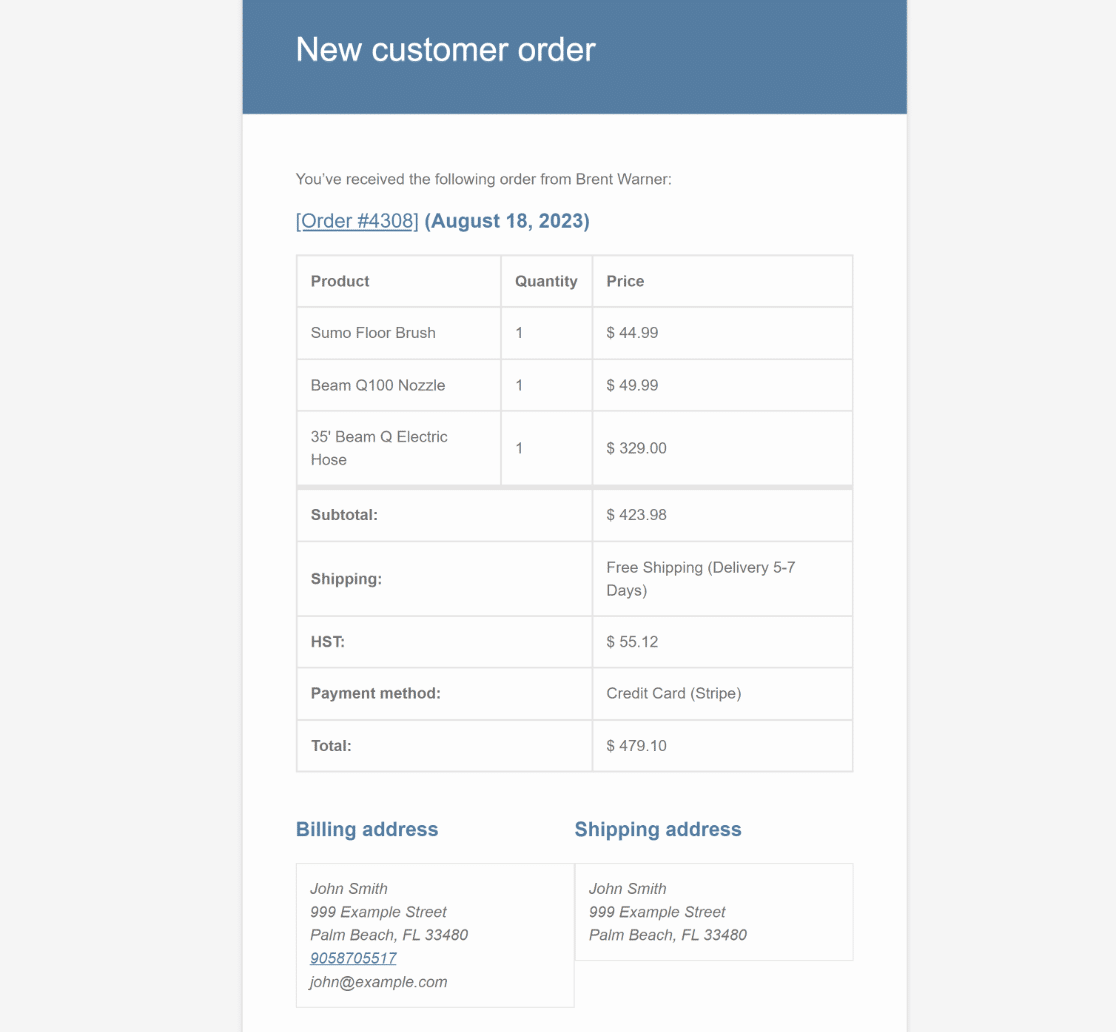
When you click the Submit button, a preview of the email and order you chose earlier will be shown. A test email will also be sent to the Mail to address you specified earlier.
Method 2: Test Deliverability of Emails with WP Mail SMTP
It’s also a good idea to check the deliverability of emails from your WooCommerce store to ensure they go to the customer inbox rather than the spam folder.
1. Install and Activate WP Mail SMTP
Install the WP Mail SMTP plugin on your website. You’ll need the Pro version to turn on WooCommerce email logging.
Your WP Mail SMTP account has the .zip file you need to install the WordPress plugin. It can be found under the Downloads tab.
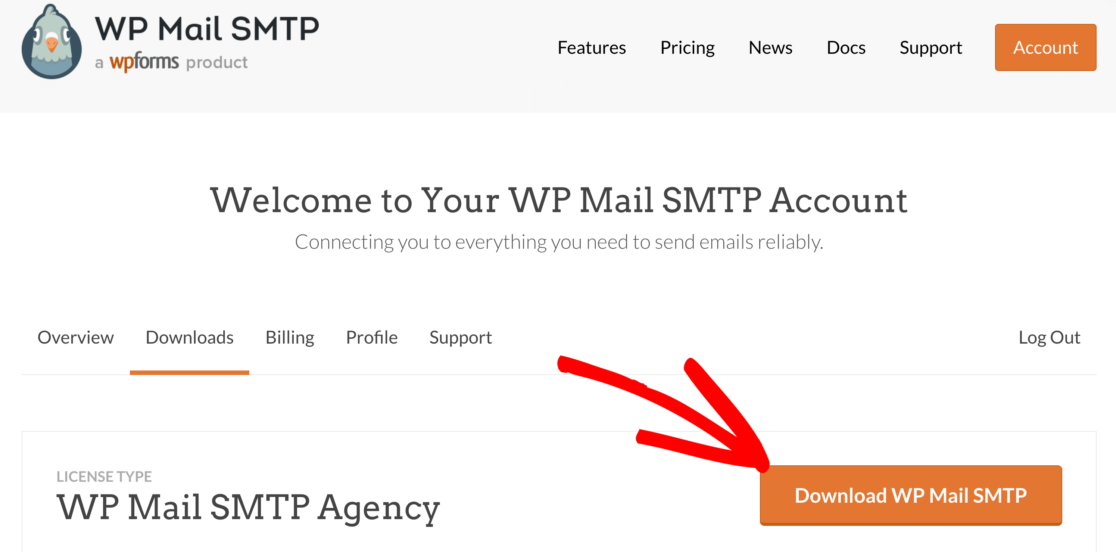
Once you activate the WP Mail SMTP plugin on your WordPress site, the Setup Wizard will automatically launch.
2. Choose Your Email Service Provider
We can now set up your SMTP service with the help of the Setup Wizard. To begin, click the Let’s Get Started button.

WP Mail SMTP is compatible with a wide range of email providers, both paid and free. To choose a mailer, simply click on its name displayed on the screen.
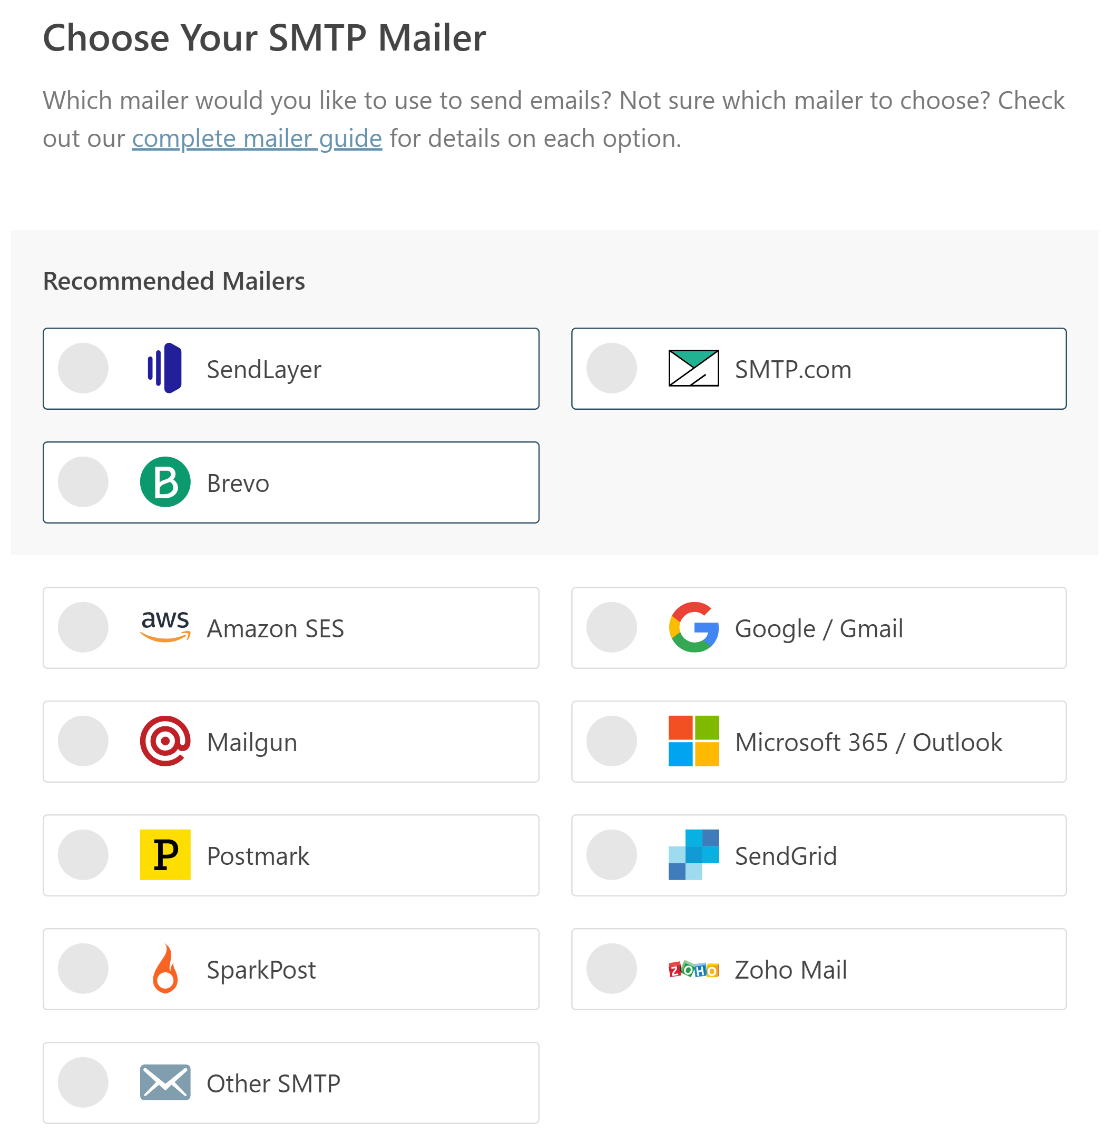
If you’re unsure which mailer to select, we advise using WP Mail SMTP with SendLayer, Brevo (formerly Sendinblue), SMTP.com, Mailgun, Postmark, or SparkPost for optimal email tracking.
When you’ve settled on an email service, you can start setting up the connection by consulting the relevant documentation in the table below.
| Mailers available in all versions | Mailers in WP Mail SMTP Pro |
|---|---|
| SendLayer | Amazon SES |
| SMTP.com | Microsoft 365 / Outlook.com |
| Brevo | Zoho Mail |
| Google Workspace / Gmail | |
| Mailgun | |
| Postmark | |
| SendGrid | |
| SparkPost | |
| Other SMTP |
Need a hand?
You can purchase White Glove Setup as an additional service with any of our WP Mail SMTP licenses and have our customer support team set up WP Mail SMTP for you.
Feel free to return to this guide whenever you feel prepared to proceed to the next step of enabling WooCommerce email logging.
3. Enable WooCommerce Email Logging
Once you’ve successfully set up your mailer, you can activate additional features of WP Mail SMTP. Make sure to select the option for Detailed Email Logs here.
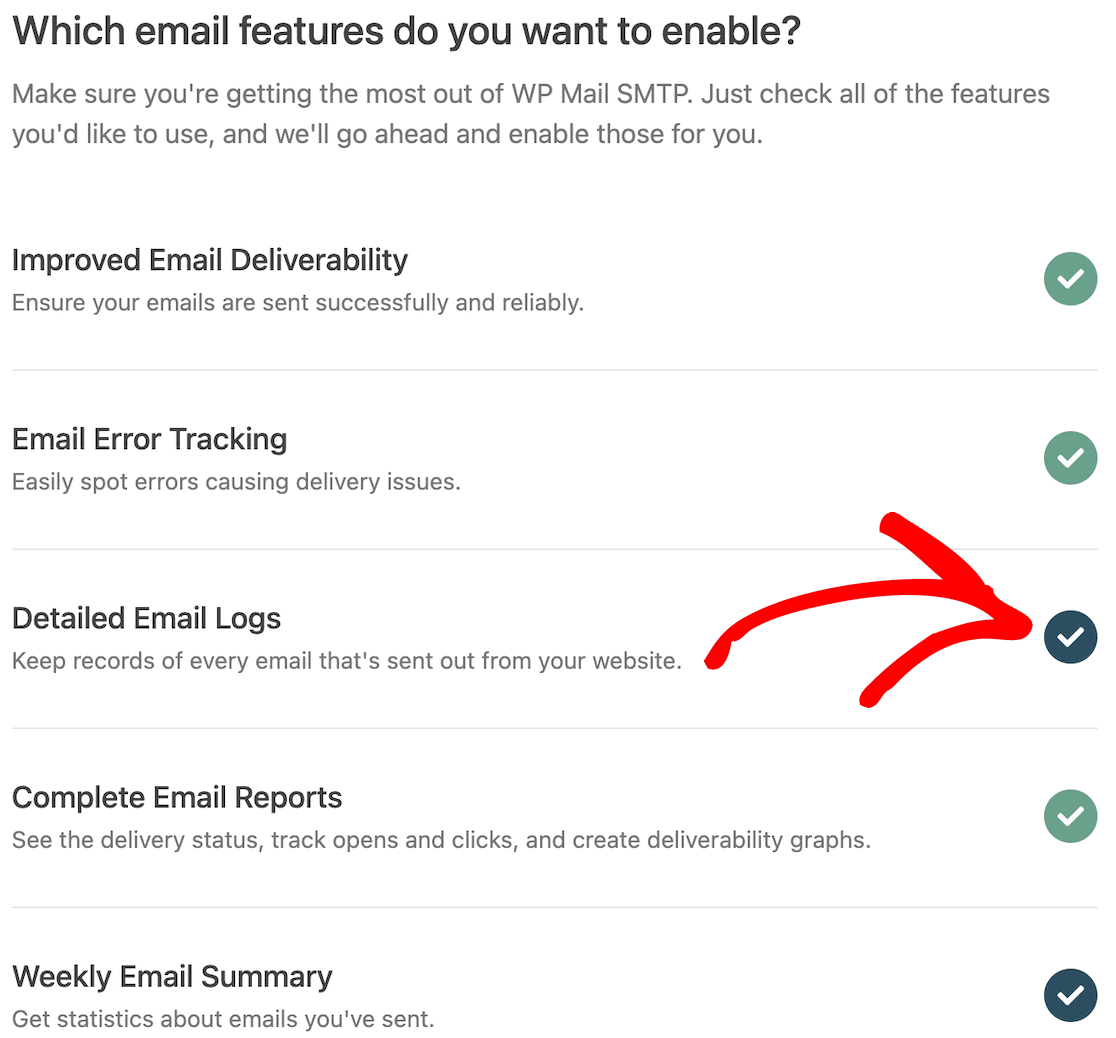
This will turn on Complete Email Reports. You can also get a Weekly Email Summary of your logs and Instant Email Alerts when an email doesn’t send.
After you’ve enabled these options, you’ll be given the opportunity to configure certain advanced email logging features.
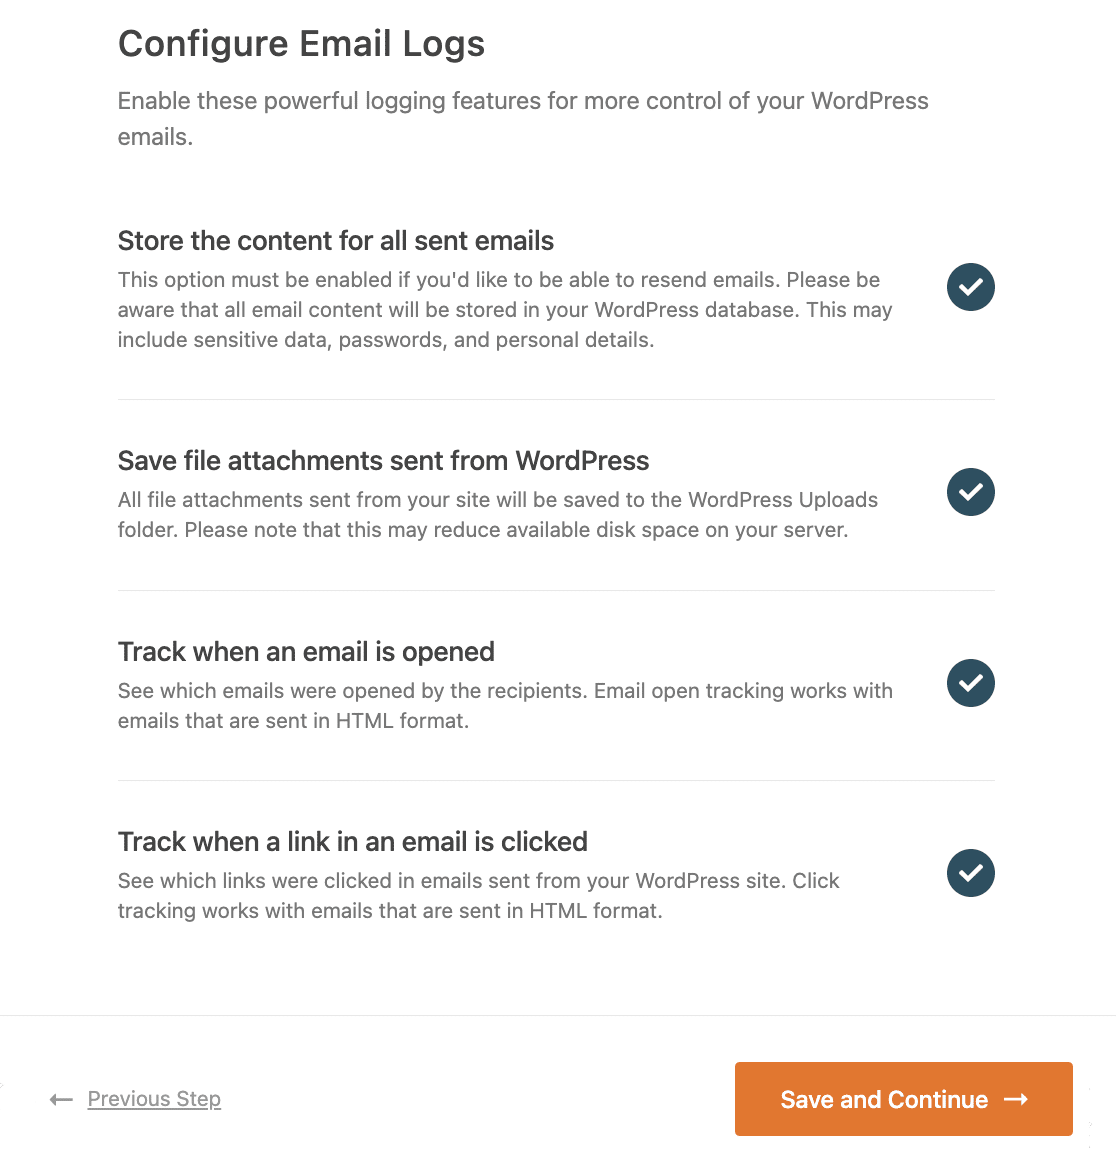
These options include:
- Store the content for all sent emails. Save email content in your site’s database.
- Save file attachments sent from WordPress. Save media in your site’s Uploads folder.
- Track when an email is opened. Track and see when recipients open your emails.
- Track when a link in an email is clicked. See when recipients click links in your emails.
Save your changes and move through to the last step of the Wizard. Go to WP Mail SMTP » Settings » Email Log if you ever want to change these settings.
If you want to learn more about this, you can find all the details in our post about WP Mail SMTP email logging.
4. Perform an Email Test with WP Mail SMTP
You’ll get an automated test email after completing the Setup Wizard that ensures your new email provider is operational.
If you face any trouble in sending or receiving a test email, make sure to check out this guide on how to fix WP Mail SMTP not sending test email.
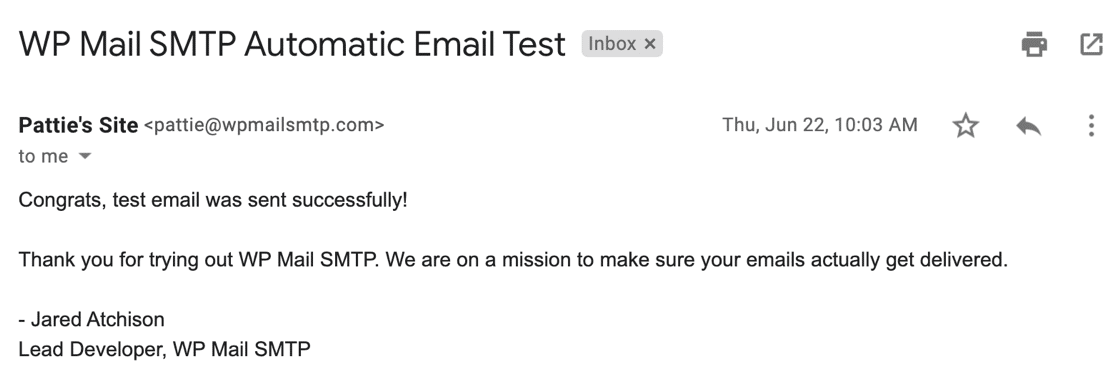
At this stage, you should wait until a few order emails have been generated to get a better idea about your email deliverability.
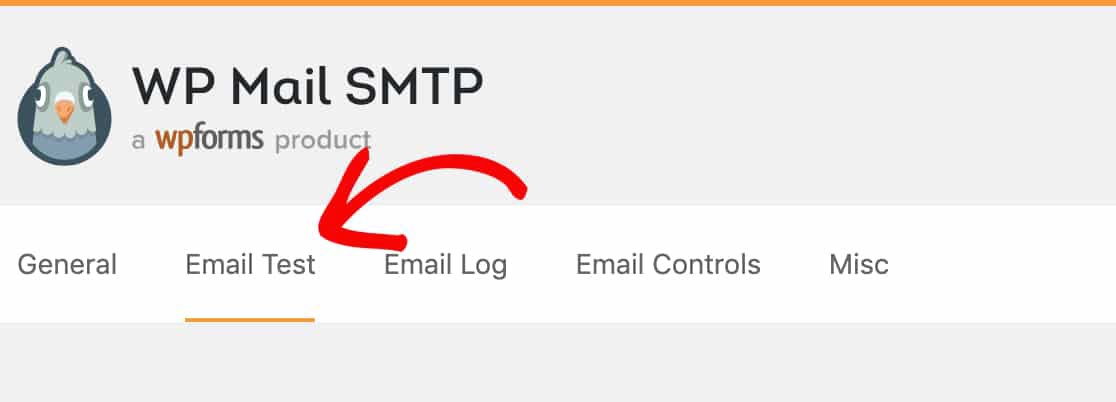
If you don’t want to wait, you can go to WP Mail SMTP » Tools » Email Test to send a few test emails from WP Mail SMTP.
5. View Your WooCommerce Email Log
Since we switched on email logging, every order email’s contents are now being recorded through WP Mail SMTP, which is useful for tracking failed emails.
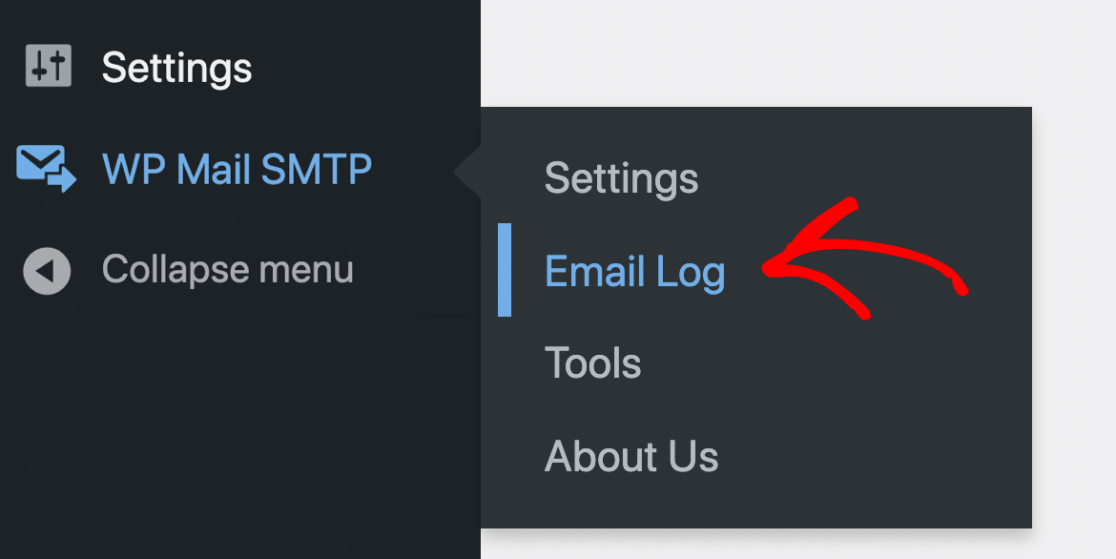
Check out how a typical email log from WooCommerce looks by going to WP Mail SMTP » Email Log from your dashboard.
Here, we see two order emails sent out after the buyers placed their orders. Since the Source is WooCommerce, it’s easy to find them.
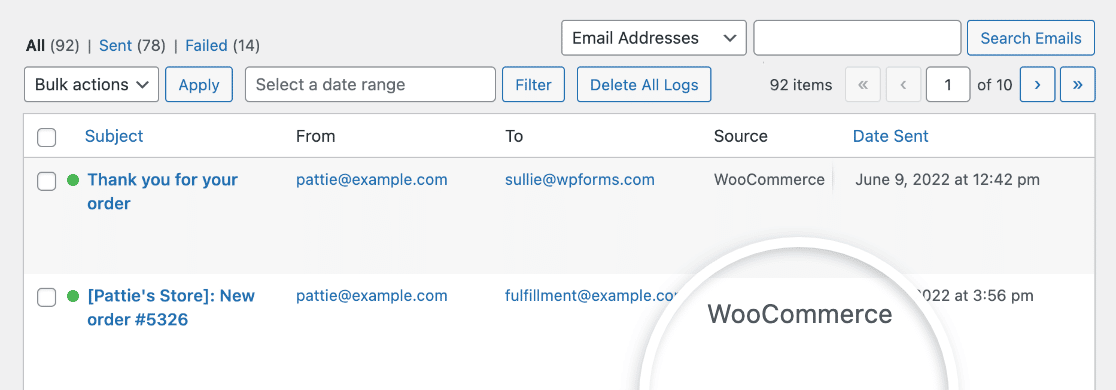
From the email log, we can also see:
- Email Subject
- From and To address
- Open and click tracking details
- Date and time sent
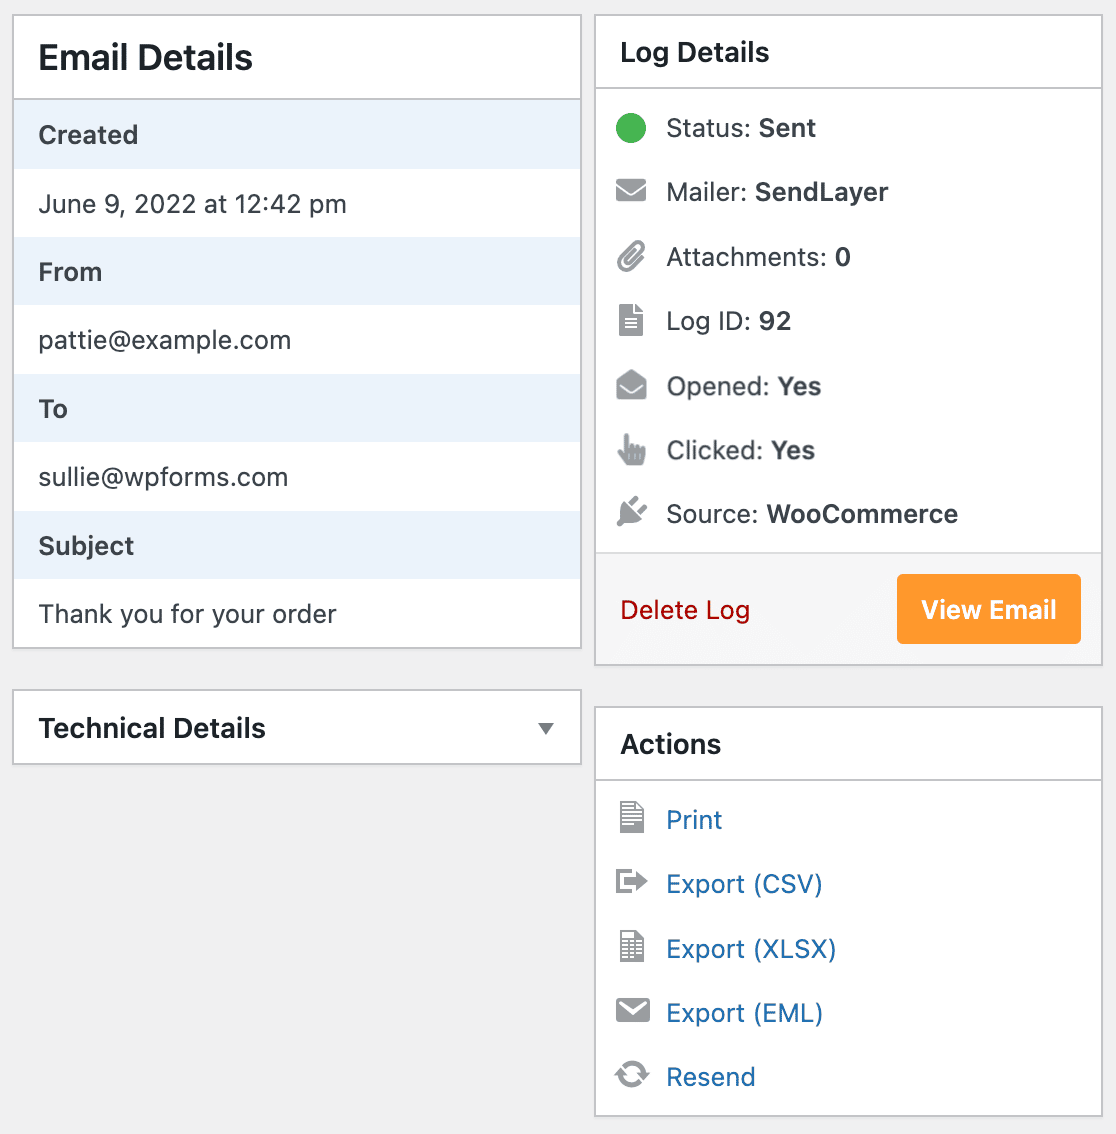
Now, let’s look at an individual email log to see if there’s anything else we can do. Move your mouse over the subject line and click on View Log.

In this fullscreen layout, you can easily check the email status (sent/failed) and perform a variety of other actions, such as:
- Print the email log
- Resend the email
- Export your email log to CSV or XLSX
- Export the entire email and attachments as an EML file
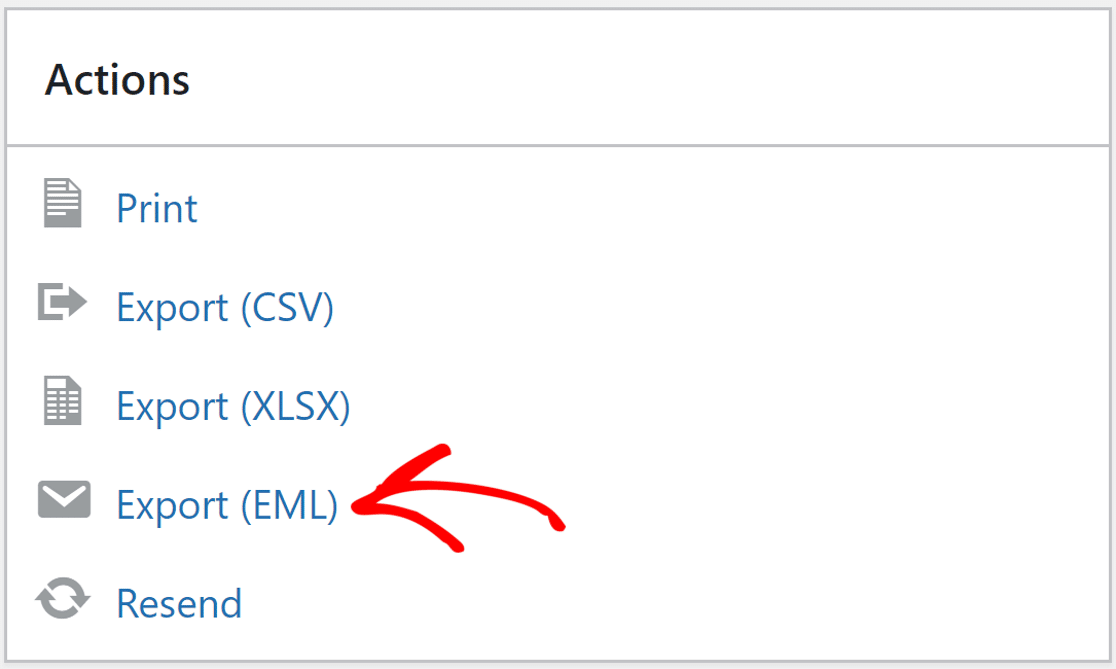
If you want to test how your sent WooCommerce email looks to customers, simply click on the Export (EML) option.
You can view the EML file in any email client. We chose to go with Outlook since it gives us an easy way to preview and test how the email looks.
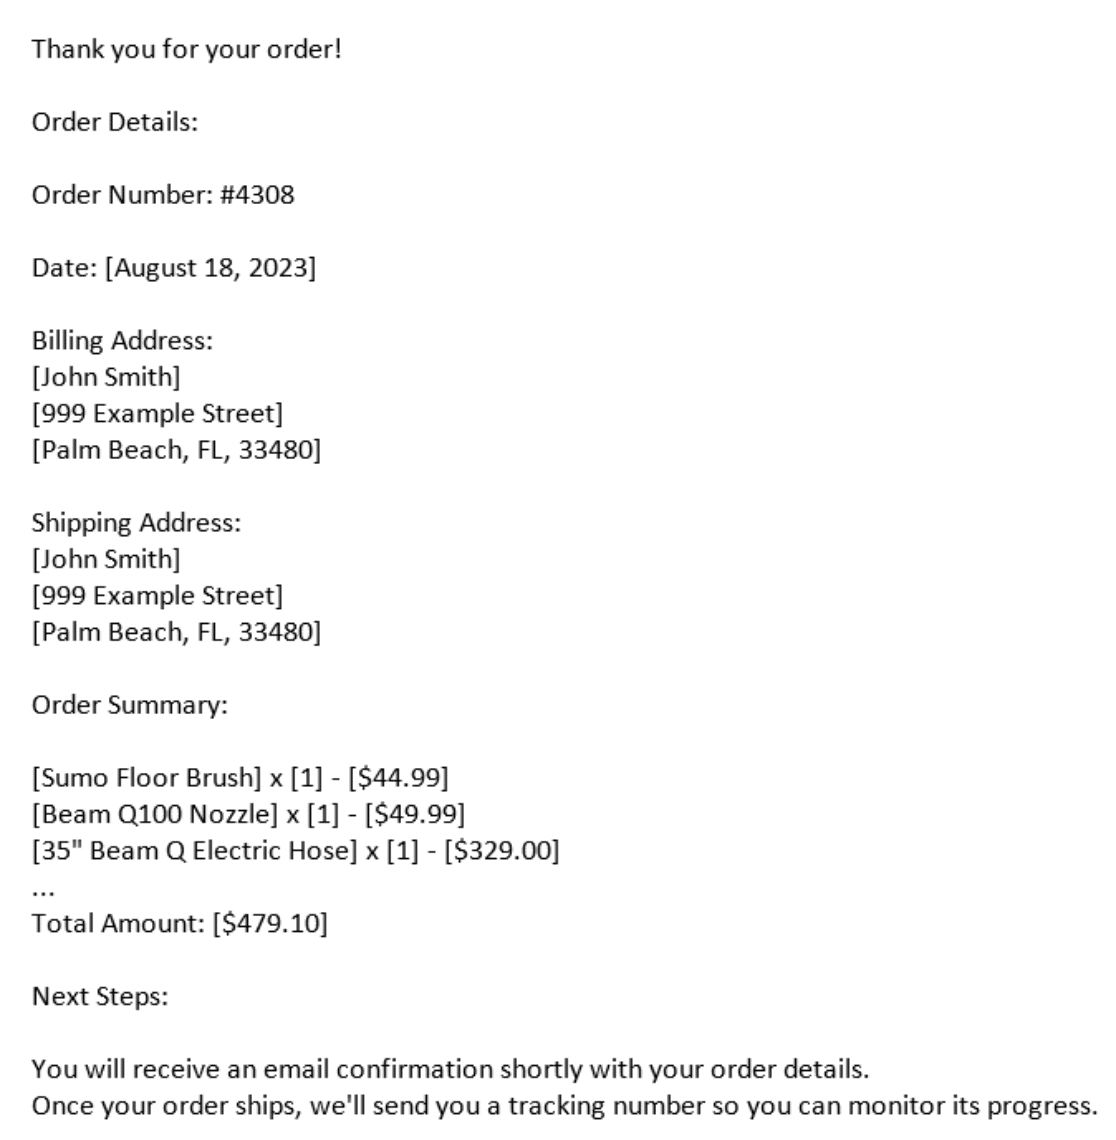
And that’s it! Now, you know how to preview your eCommerce emails and test them for deliverability to ensure customers are receiving them.
FAQs about WooCommerce Email Tests
WooCommerce email tests are a popular topic of interest among our readers. Here are answers to some common queries about it.
How do you configure WooCommerce email settings?
In your WordPress admin, go to WooCommerce > Settings > Emails to configure email settings, such as Email sender name & address, Email template colors, Email logo, Footer text, and Enable/disable emails.
How do I send a test email in WooCommerce?
The easiest way to send a test email in WooCommerce is by using the Preview E-mails for WooCommerce plugin. This adds a “Preview” button to the email customizer screen, allowing you to send a test email to yourself before sending it to real customers.
What email does WooCommerce use to send emails?
By default, WooCommerce will use the default WordPress wp_mail() function to send emails. This uses the SMTP server provided by your web host. To customize the from address and use different SMTP services, install the WP Mail SMTP plugin.
Next, Send Publish Notifications to Contributors
One reason to send WordPress emails is to inform authors when their posts are published, among other purposes. Learn how to configure WordPress and email notifications after a post is published.
Are forms used on your WordPress website? See if WPForms is the form builder you require to create any type of form specifically for your company by reading our comprehensive WPForms review.
Ready to fix your emails? Get started today with the best WordPress SMTP plugin. If you don’t have the time to fix your emails, you can get full White Glove Setup assistance as an extra purchase, and there’s a 14-day money-back guarantee for all paid plans.
If this article helped you out, please follow us on Facebook and Twitter for more WordPress tips and tutorials.

