Is Kali Forms not sending email from your WordPress site?
It’s super important that you receive all of the emails visitors send from your contact forms.
Let’s jump in and fix this with the best WordPress SMTP plugin.
Fix Your Kali Forms Emails Now
What Is Kali Forms?
Kali Forms is a contact form plugin for WordPress. The basic version is free, and you can add extra features with addons in the Pro version.
Kali Form is a relatively young product, but it has some of the same basic functionality that you’ll find in more advanced contact form plugins. In addition to the form builder, Kali Forms also has its own SMTP settings.
Kali Forms’ SMTP options are basic, so we’ll show you how to bypass them with an SMTP plugin to improve email deliverability.
How to Fix Kali Forms Not Sending Email
In This Article
1. Check Your Kali Forms Settings
Kali Forms creates a default contact form for you when you activate it. It’s definitely a good idea to check the settings for this form if you’re going to be using it.
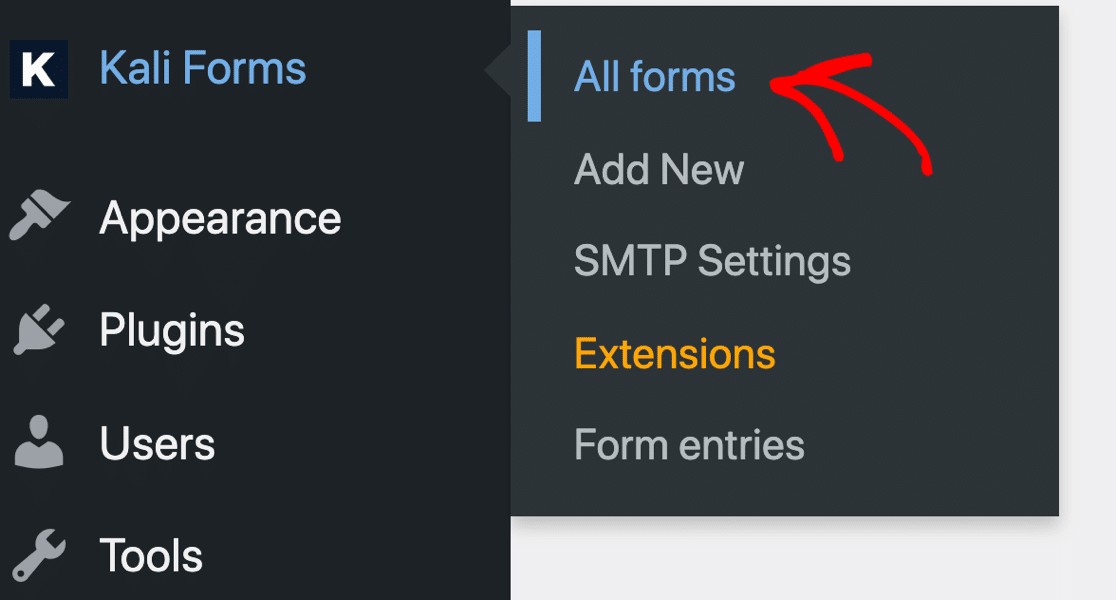
First, open up the forms by heading to Kali Forms » All Forms.
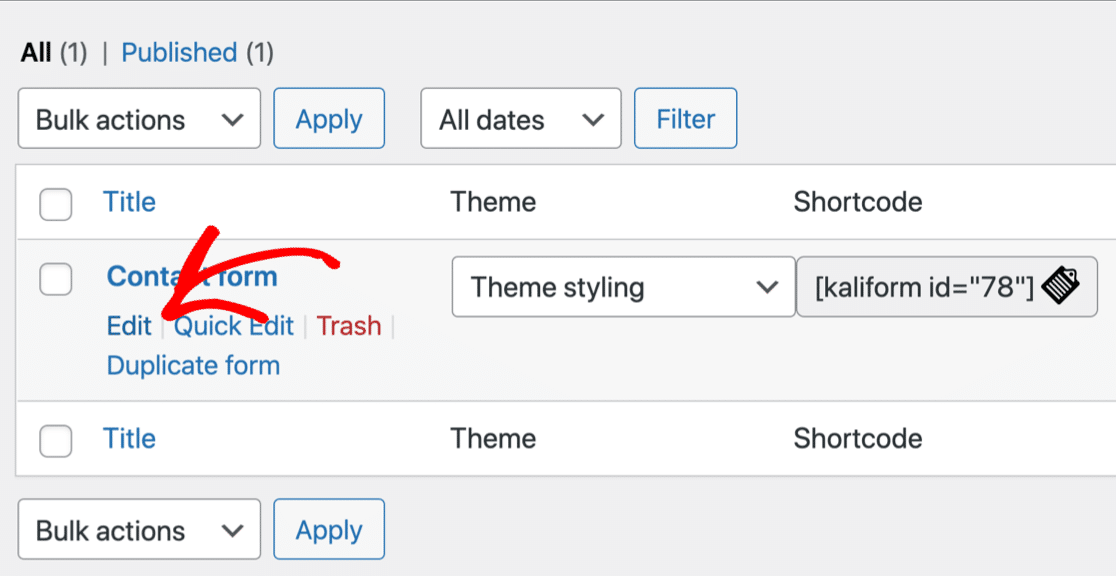
Now hover over the form and click Edit.
Check to make sure that:
- Form fields have labels. By default, Kali Forms assigns the name to the field, but not the label. It’s good practice to set the labels as well.
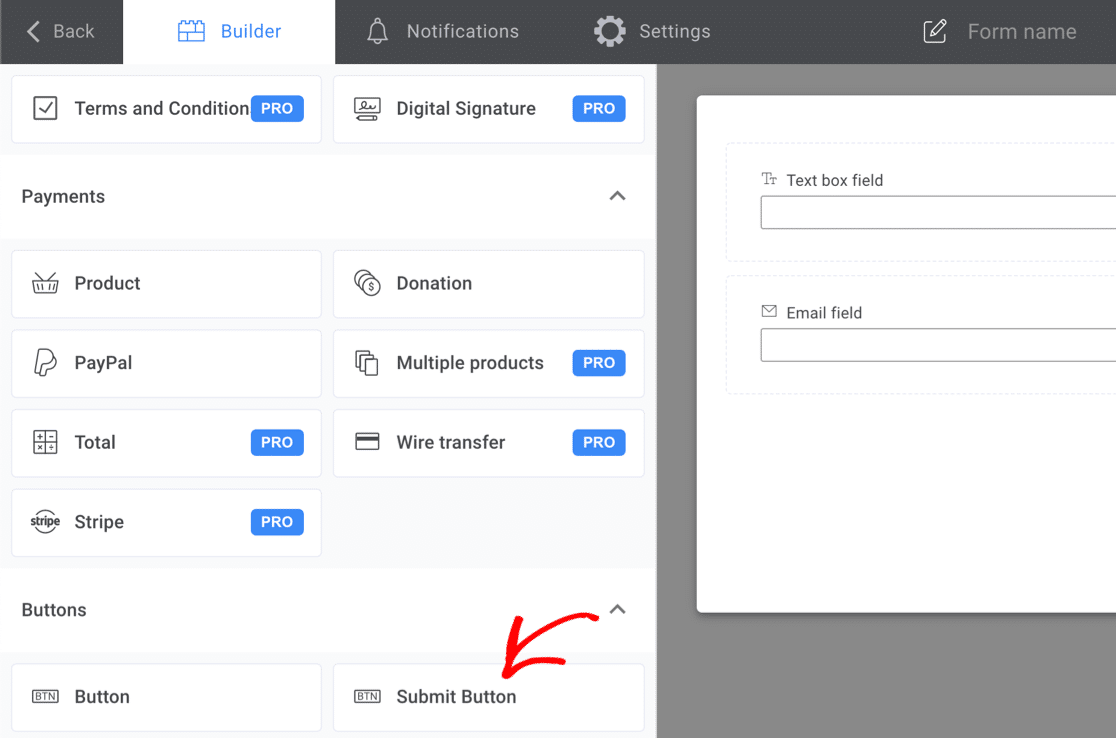
- Your form has a submit button. If you start out with a blank form, Kali Forms doesn’t add a Submit button, so you may have published your form without realizing that nobody can submit it. We recommend that you change the words on the button to something more useful than “Submit Button field,” which is the default button text.
2. Check Your Kali Forms Notifications
If you start out with a blank form, you won’t have any notifications at all. That could explain why Kali Forms is not sending email.
And if you’re using the default contact form or another template, it’s still a good idea to check that your notifications are set up correctly.
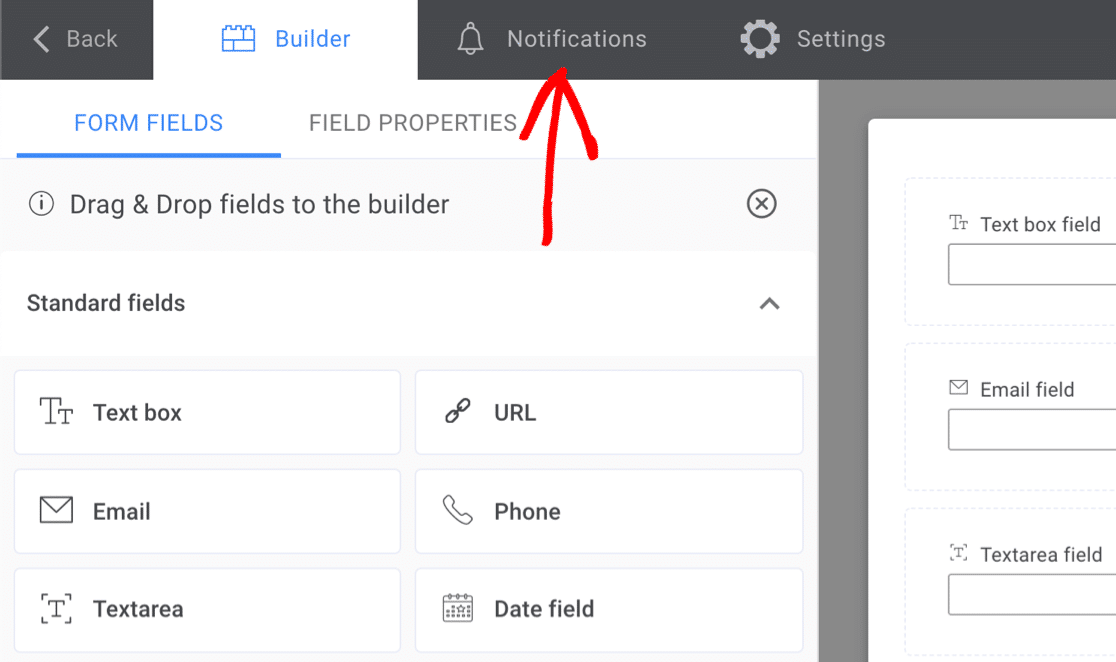
To start, click Notifications in the tabs at the top of the form builder.
If you don’t see any notifications here, you’ll want to set one up. We’ll give you some tips to help with that.
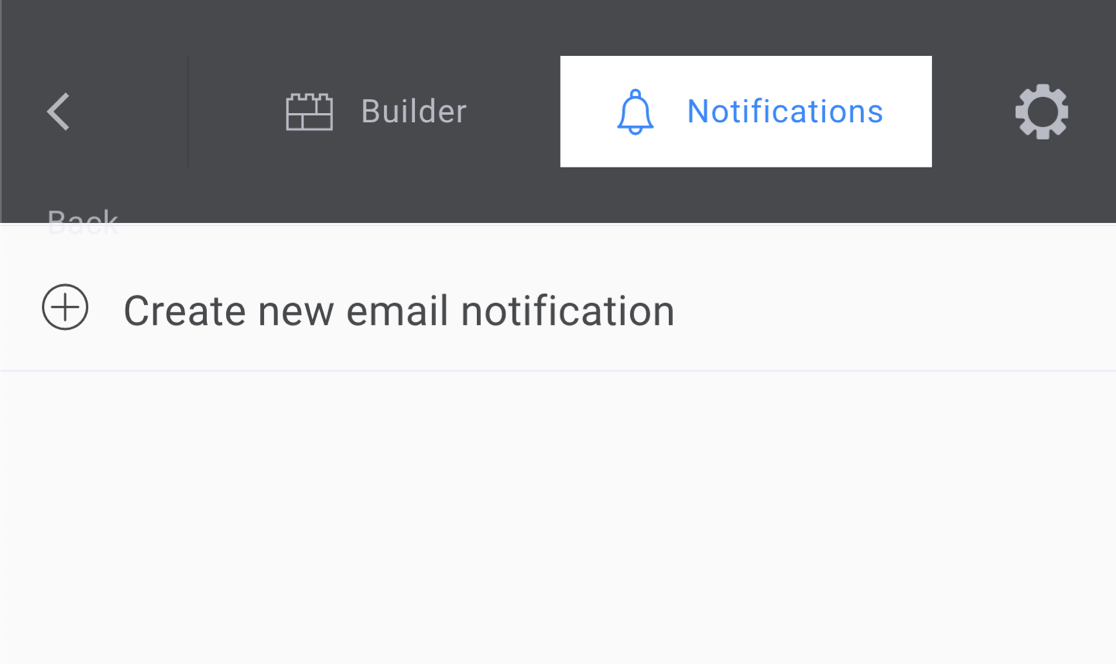
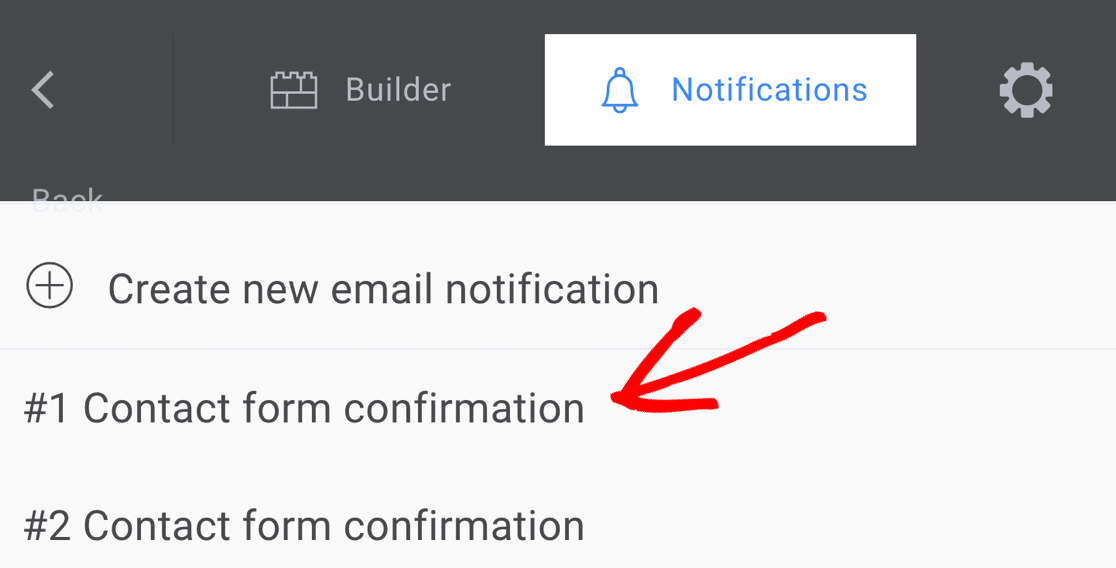
If you have notifications set up already, let’s click on the 1st notification to check the settings.
You’ll want to focus on the settings in the red box we added here:
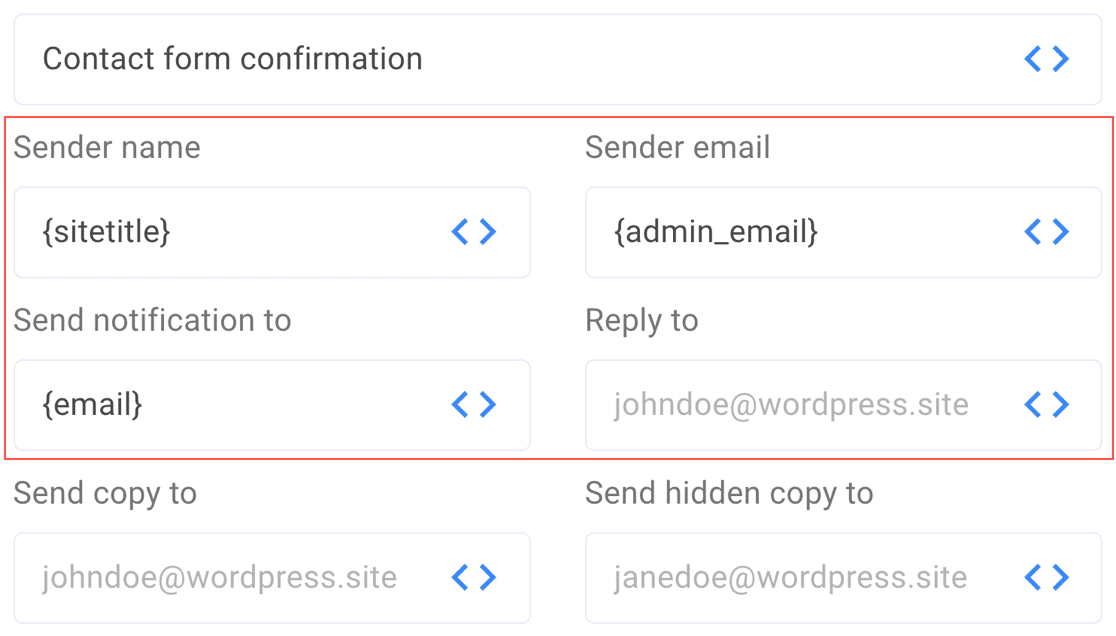
In particular, we’re going to check:
- Sender email (which we sometimes call the From Email). This defaults to your site admin email, which might not be what you want. Often, the site admin email doesn’t match the domain name your website is hosted on, and that can cause issues. So as a first step, you might want to change this to a different email address.
- Send notification to (which we usually call the Send To Email). If your From and To emails are the same, it can trigger spam alerts and warnings like the “be careful with this message” warning in Gmail.
You might also want to check that the Sender Name and Reply To addresses are configured here. Repeat the same steps with any other email notifications you have on your form.
Next, let’s look more closely at the WordPress SMTP settings in Kali Forms.
3. Disable Kali Forms SMTP Settings
In this step, we’re going to disable SMTP in Kali Forms so we can switch to WP Mail SMTP.
There are a few reasons that we recommend this for Kali Forms users:
- In general, it’s not a good idea to rely on your contact form plugin for SMTP since it can have unexpected consequences for other plugins. It’s far better to have a separate SMTP plugin for all WordPress email.
- Kali Forms allows you to send your emails through SMTP, but it doesn’t check any DNS settings. That means it would be easy to configure a mailer incorrectly. And if your DNS settings aren’t right, your WordPress emails will go to spam.
- The Pro version of WP Mail SMTP includes super-advanced features like email click and open tracking. That means you can see if your emails are getting engagement.
- Kali Forms is missing support for useful mailers like Gmail, so it doesn’t let you send form notifications from different Gmail aliases. WP Mail SMTP lets you use different authenticated email addresses for different plugins or forms.

So now you know why we need to switch to WP Mail SMTP, let’s disable Kali Forms SMTP.
First, let’s head to Kali Forms » SMTP Settings.
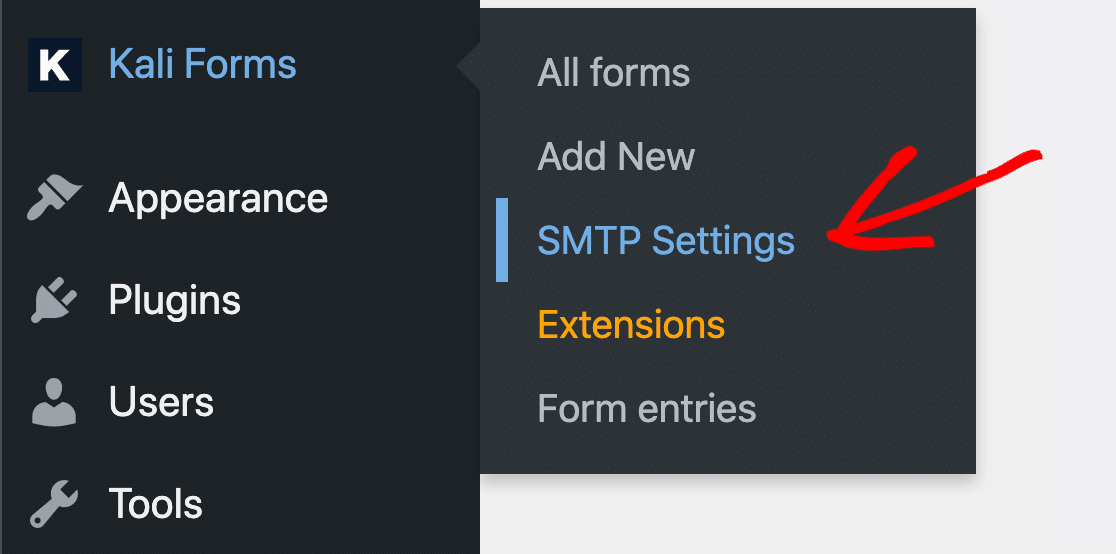
In the grid, select Default WP Mailer and save your settings.

By choosing Default WP Mailer here, we’re switching off all of Kali Forms’ SMTP settings so we can use WP Mail SMTP instead.
This will give you a lot more control over your emails, and it’ll also allow you to use a much wider range of email providers in WordPress.
4. Install WP Mail SMTP
WP Mail SMTP is the best SMTP plugin for WordPress. It lets you easily send emails through a 3rd party server or email provider.
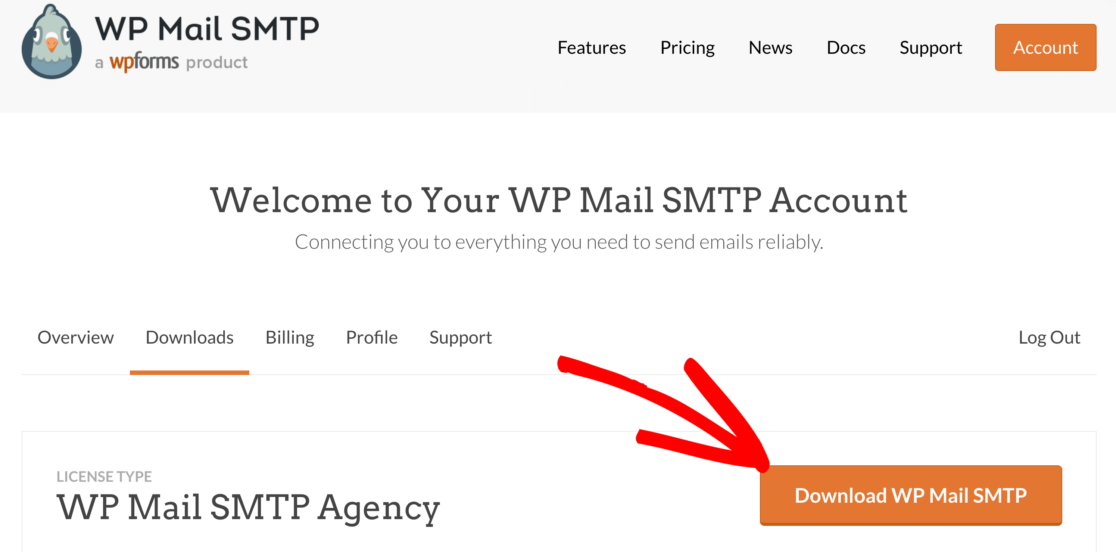
To start, you’ll want to download the zip file from your WP Mail SMTP account. You’ll find it in the Downloads tab.
Next, open up your WordPress dashboard.
Head to the Plugins page and upload the zip file to install the plugin. If you’re not sure how to do this, check out this article on how to install a plugin in WordPress for a little more guidance.

As soon as you activate the plugin, the WP Mail SMTP Setup Wizard will open. Click the Let’s Get Started button to begin.

On the next screen, click the mailer you want to use from the list. If you need to send a large number of emails, we recommend SendLayer, Brevo (formerly Sendinblue), or SMTP.com. These are great transactional email providers that can handle thousands of emails per day without delays.
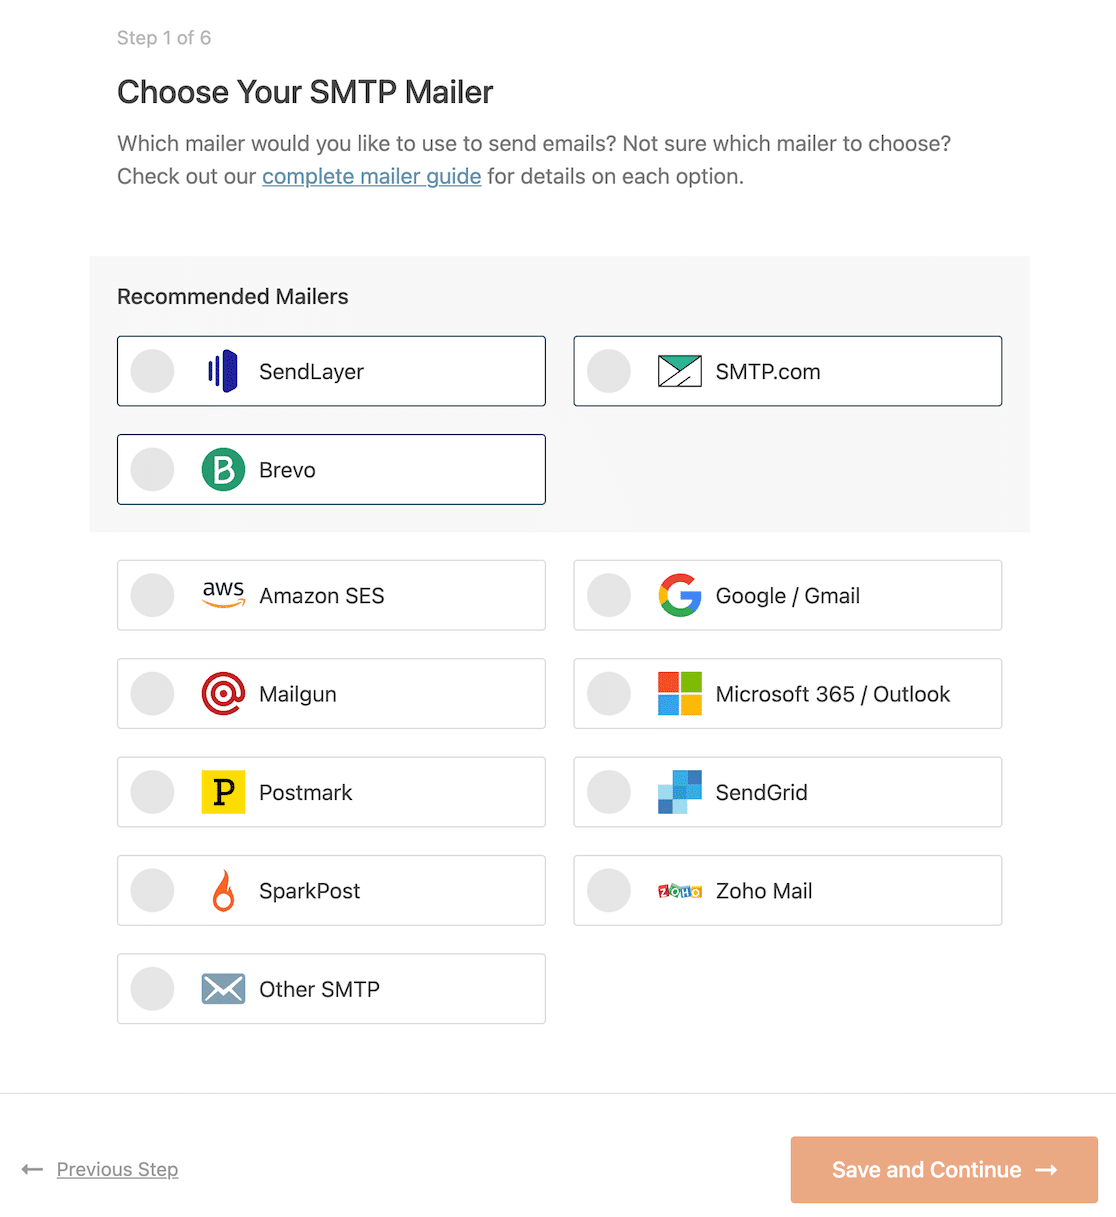
When you’ve chosen your mailer, use the links below to jump to our documentation for it:
| Mailers available in all versions | Mailers in WP Mail SMTP Pro |
|---|---|
| SendLayer | Amazon SES |
| SMTP.com | Microsoft 365 / Outlook.com |
| Brevo | Zoho Mail |
| Google Workspace / Gmail | |
| Mailgun | |
| Postmark | |
| SendGrid | |
| SparkPost | |
| Other SMTP |
The documentation will walk you through the process of setting up your account and entering the connection details into WP Mail SMTP.
If you want to set up multiple mailers, you can do so in the Additional Connections settings once you’ve finished the Setup Wizard. Then you can select a Backup Connection and configure Smart Routing.
Need a hand?
Our Elite license includes a full White Glove Setup service for SendLayer, SMTP.com, or Brevo.
5. Enable Detailed Email Logs
The Kali Forms email log is super basic. It lists emails that were sent, but that’s it.

So in the final part of the WP Mail SMTP Setup Wizard, we’re going to enable Detailed Email Logs.
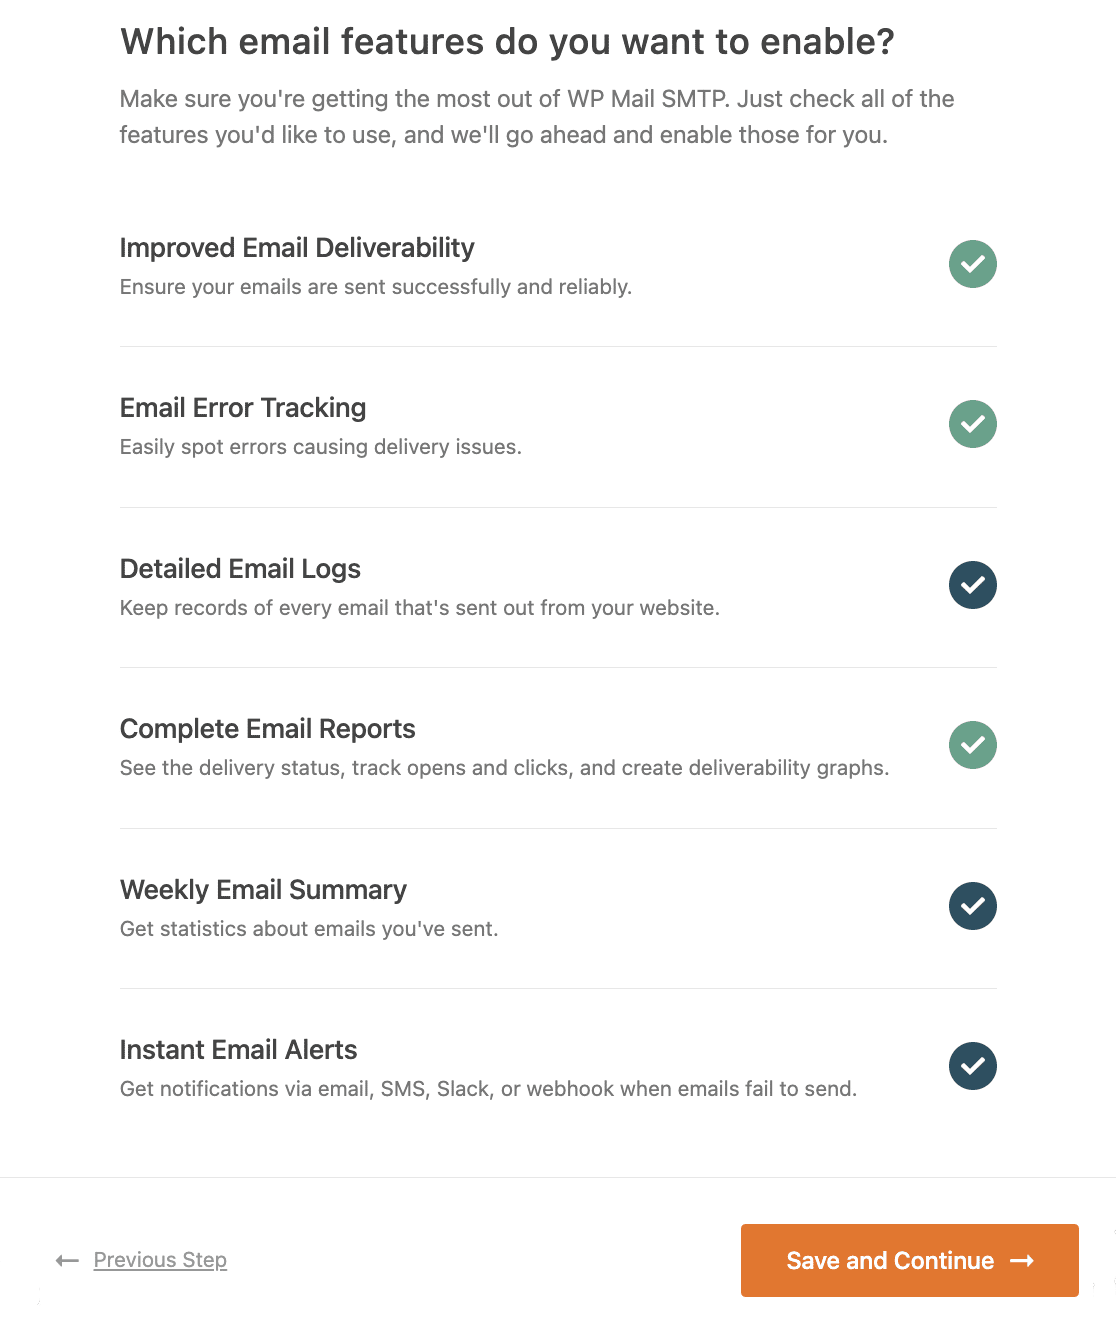
Detailed Email Logs will track your emails and show you if they were Failed or Sent. If your email provider supports it, it’ll also tell you if the emails were Delivered.
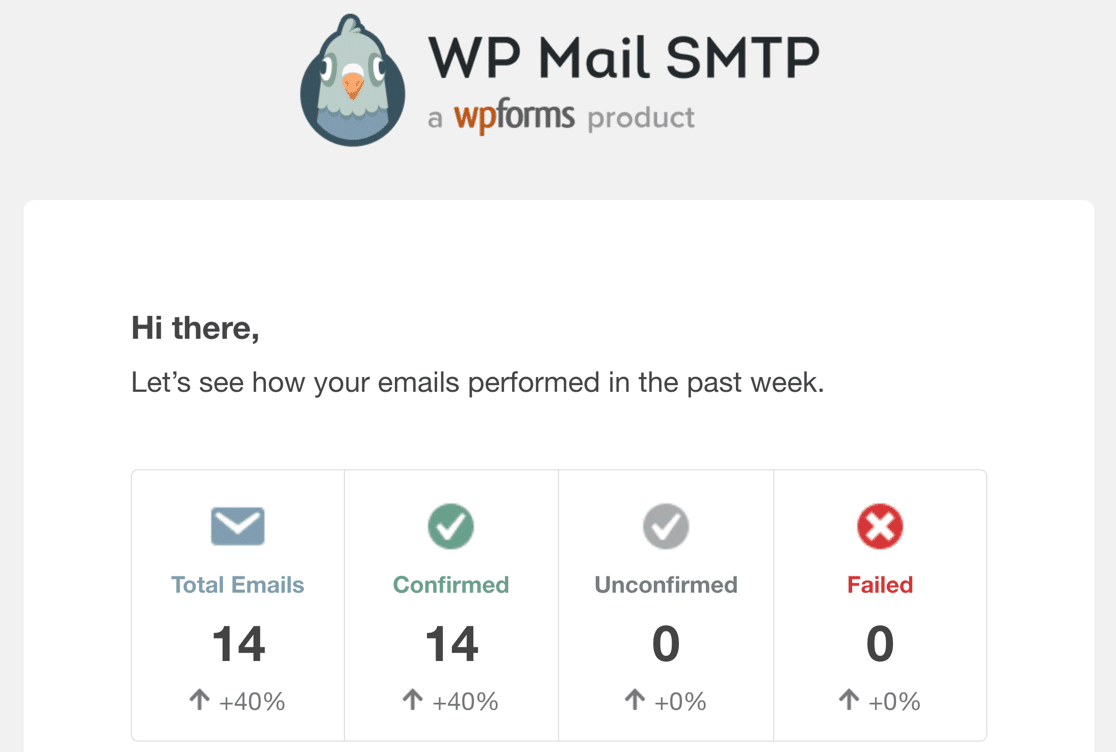
When you turn on this feature, you’ll also automatically enable Complete Email Reports. You can choose if you want to receive the Weekly Email Summary as well. This shows you the latest delivery stats for your emails.
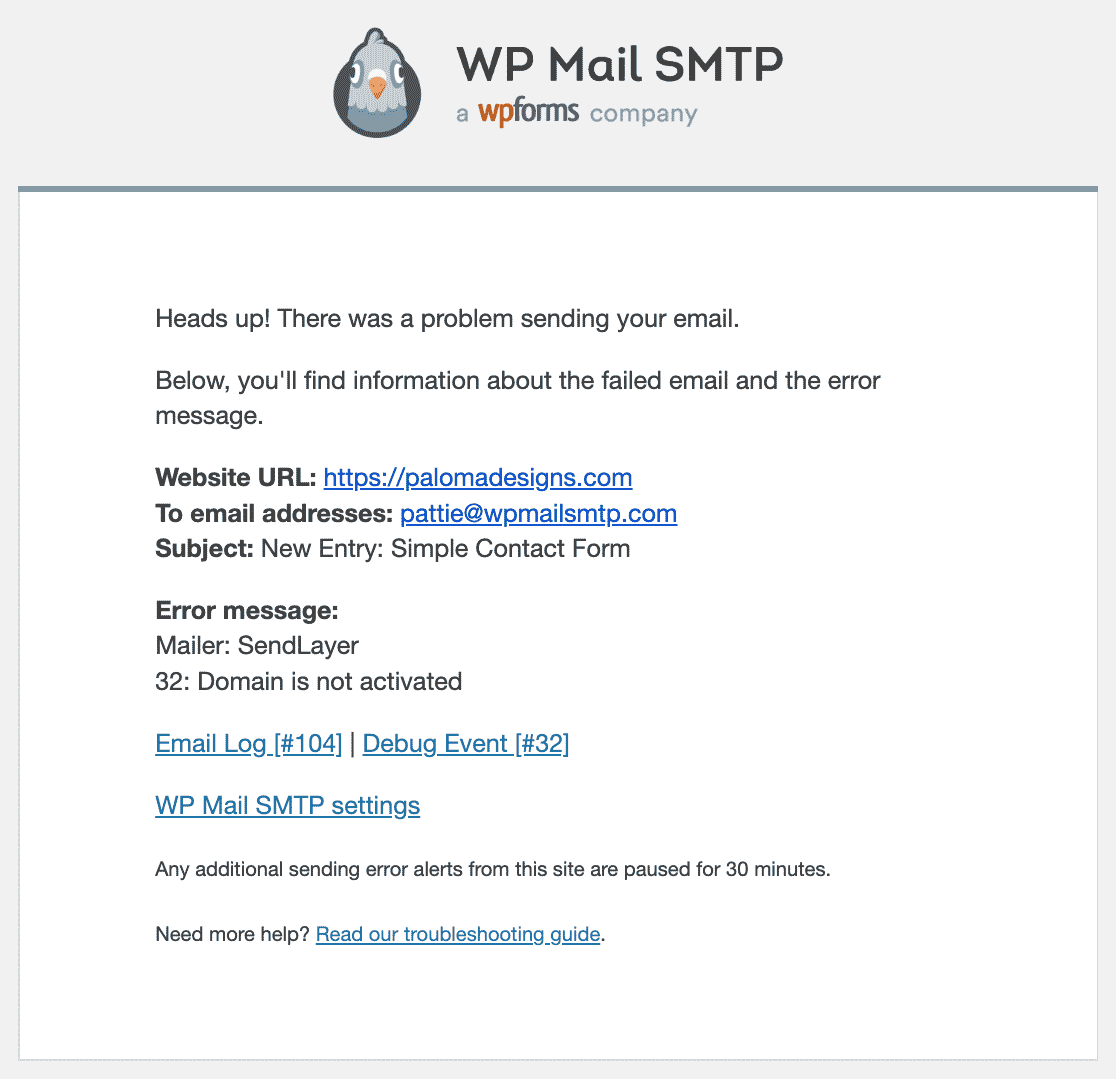
The other feature you can enable here is Instant Email Alerts. This will let you know if your site fails to send an email so that you can go fix the problem.
On the next screen, there are more email logging features you can enable.
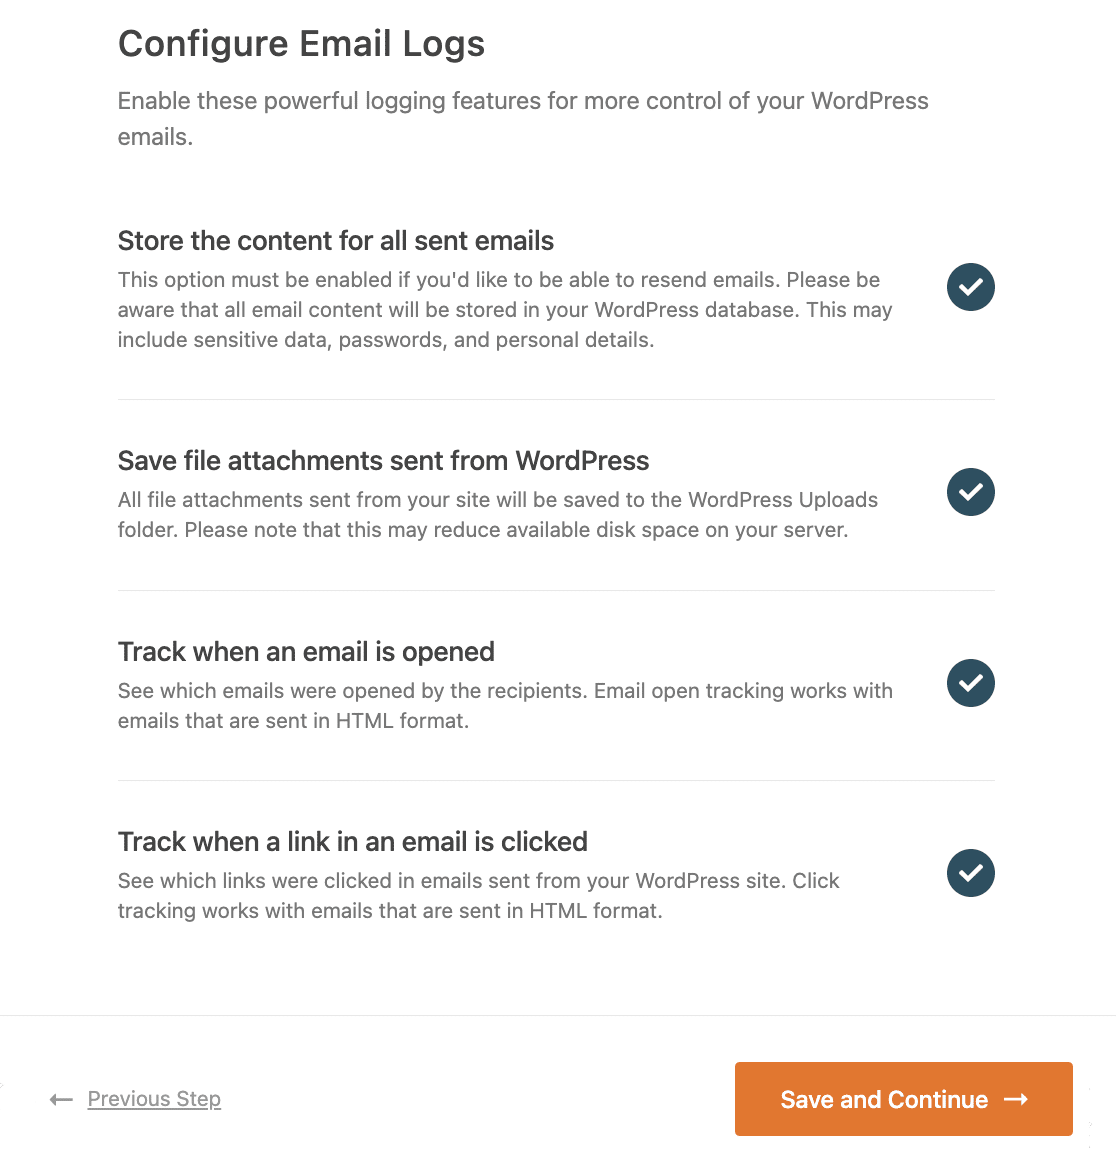
These include:
- Store the content for all sent emails. Save email content in your WordPress database.
- Save file attachments sent from WordPress. Store email attachments in your site’s Uploads folder.
- Track when an email is opened. Shows you how many recipients opened your email.
- Track when a link in an email is clicked. Monitor your emails’ click-through rates.
In addition, turning on these features lets you:
- Export email logs to CSV or XLS
- Export sent emails as EML files
- Resend WordPress emails individually or in bulk
So email logging is super helpful. Check out how it works in our article on how to log your WordPress emails.
Finally, enter you WP Mail SMTP license key in the Setup Wizard to complete the process.

And that’s it! When you finish up here, WP Mail SMTP will send you a test email automatically.
Fix Your Kali Forms Emails Now
Next, Switch Your Contact Form to WPForms
Did you know that WPForms has the most spam prevention options in any contact form plugin?
Check out this article on WPForms Lite vs Pro to see all of the awesome features you’ll get when you switch from Kali Forms to WPForms!
Ready to fix your emails? Get started today with the best WordPress SMTP plugin. WP Mail SMTP Elite includes full White Glove Setup and offers a 14-day money-back guarantee.
If this article helped you out, please follow us on Facebook and Twitter for more WordPress tips and tutorials.

