Is LearnDash not sending email notifications from your website? Many site owners run into this problem when students stop getting welcome emails, course updates, or quiz results.
LearnDash is a popular Learning Management System plugin for WordPress. If emails from LearnDash don’t make it to the user’s inbox, it can create confusion.
Most of the time, these emails aren’t being sent because your WordPress site isn’t using the right mail settings. The good news is that you don’t need to be a tech expert to fix it.
In this guide, I’ll walk you through the steps to get your LearnDash emails working again using a reliable SMTP plugin like WP Mail SMTP.
Fix Your LearnDash Emails Now! 🙂
Why Are LearnDash Notifications Not Working?
LearnDash uses a Notifications addon to send emails after certain actions occur on your site, like completing a course, finishing a lesson, or passing a quiz.
If your LearnDash notifications aren’t working, it’s likely that your WordPress emails are going to spam. That’s why it’s so important to fix your WordPress emails.
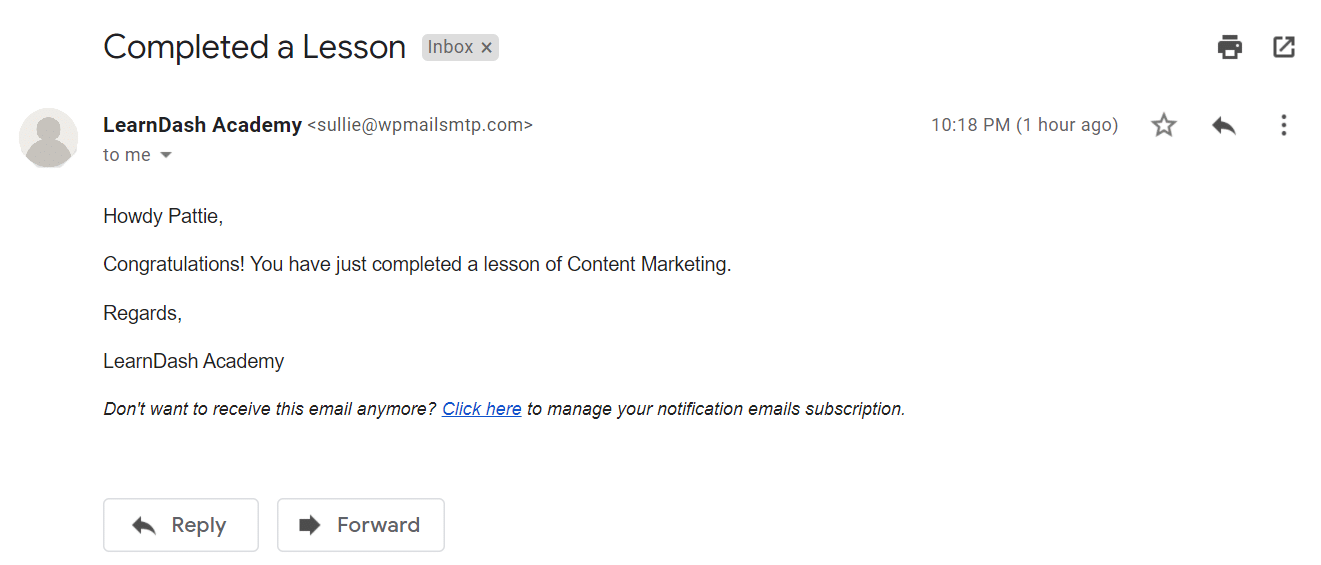
By default, WordPress uses the PHP mail() function to send emails from your website. This isn’t reliable because most web hosts are not properly configured to use it. Some disable it completely to prevent server abuse.
Also, since web hosts are not meant to send emails, they don’t provide the verification that is needed to bypass the spam filters. The lack of verification leads to emails being marked as spam.
How to Fix LearnDash Not Sending Email Issue
Ready to fix the issue of the notifications? Follow the steps below to first check your notification settings and then improve email deliverability with the help of WP Mail SMTP!
Step 1: Check LearnDash Notifications Addon Settings
Out of the box, LearnDash offers minimal control over email notifications. Although it can be used as a membership plugin, it doesn’t have quite the same control that you get with MemberPress.
The Notification addon lets you customize:
- When the notifications are sent
- Who receives them
- What’s included in the template
Since you’re facing the issue of email deliverability with LearnDash, we assume you already have the addon installed on your website. To start, log in to your WordPress dashboard and click on LearnDash LMS » Notifications.
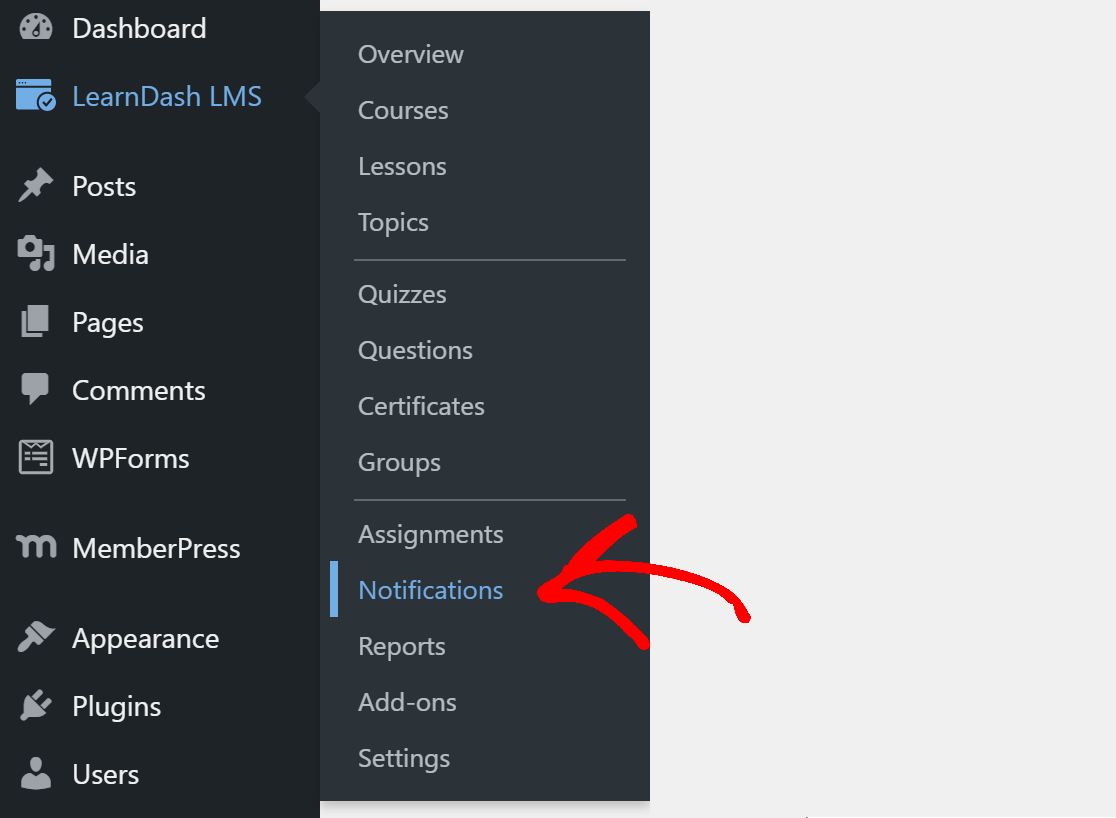
Here, you’ll see the list of all the notifications you have created so far. Click on any one of the notifications to open it.

Scroll down to the Notification Settings tab and look for the checkmarks next to Recipients. Make sure the right option is selected here.
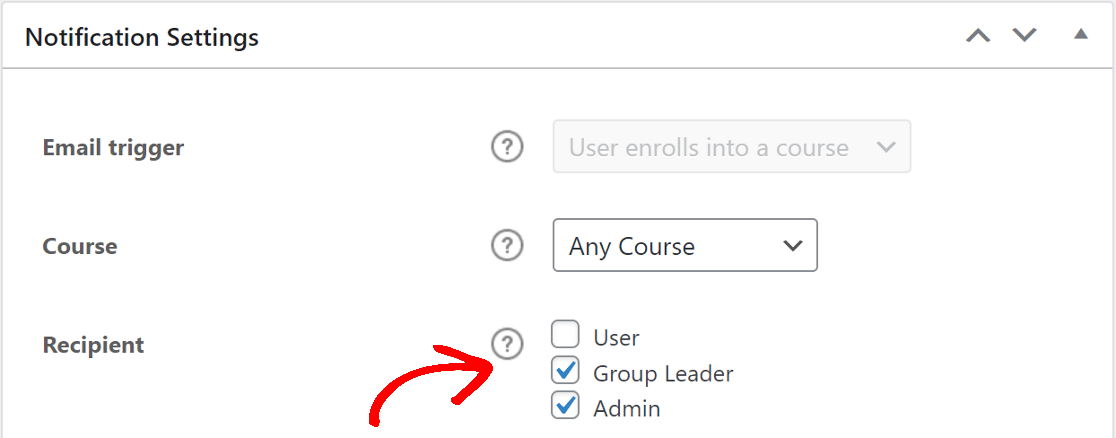
To send the notification to additional email addresses, type in the emails in the Additional Recipients box separated by commas.
Next, you have the Delay option. If you select the wrong option in the Delay Unit, the notification might arrive later than the expected time.

For most basic notifications, it is recommended to set the delay to 0 days. This will send the email as soon as the option is triggered.
Check the same set of options for all other notifications you have for the LearnDash plugin.
If the above solution doesn’t solve LearnDash not sending email notifications, proceed to the next step where we’ll install an SMTP plugin.
Step 2: Install the WP Mail SMTP Plugin
WP Mail SMTP is the best WordPress SMTP plugin. It connects your website to an external email service and adds verification to the emails.
This increases email deliverability and prevents email from going to spam. To start, download the zip file from your WP Mail SMTP account. You’ll find it in the Downloads tab.
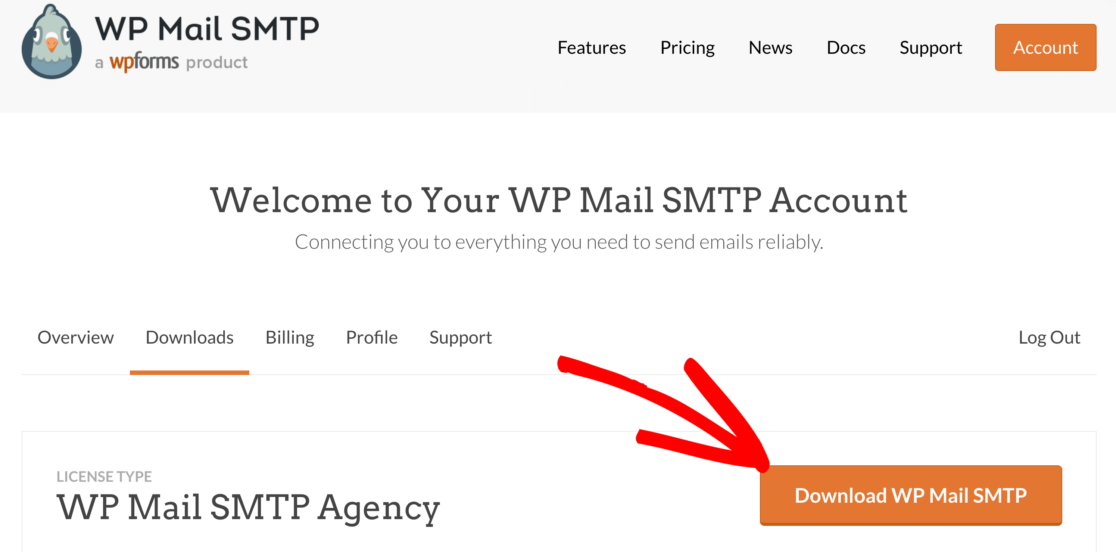
Next, open up the WordPress dashboard and upload the zip file to the plugin page on your WordPress site.

If you need help with this, refer to this guide on how to install a WordPress plugin.
After installing, make sure you Activate the plugin. As soon as you activate it, the Setup Wizard will open in your browser.
If you want to pause here, you can come back and restart the wizard by clicking the Launch Setup Wizard button in your WP Mail SMTP settings.
Step 3: Choose a Mailer Service
Now it’s time to connect your website to the mailer service. This will fix the LearnDash not sending email notification problem. Click the Let’s Get Started button to begin the process.

The mailer you choose here will depend on a few factors. Here are some tips to help you choose the best one:
- For large sites or sites that send a lot of transactional emails, SendLayer, SMTP.com, or Brevo (formerly Sendinblue) are the preferred choices. They are reliable and can handle a large number of emails on regular basis.
- WP Mail SMTP supports Gmail or Google Workspace. This is a great option for a small site with fairly low traffic. You can also use a Gmail alias to send WordPress emails if you want to.
- You can use the Other SMTP option if your web hosting has a mailer service. Some providers will limit the number of emails you can send, but this is another great option if you’re just starting out.
Go ahead and select the mailer you think is the best fit for you.
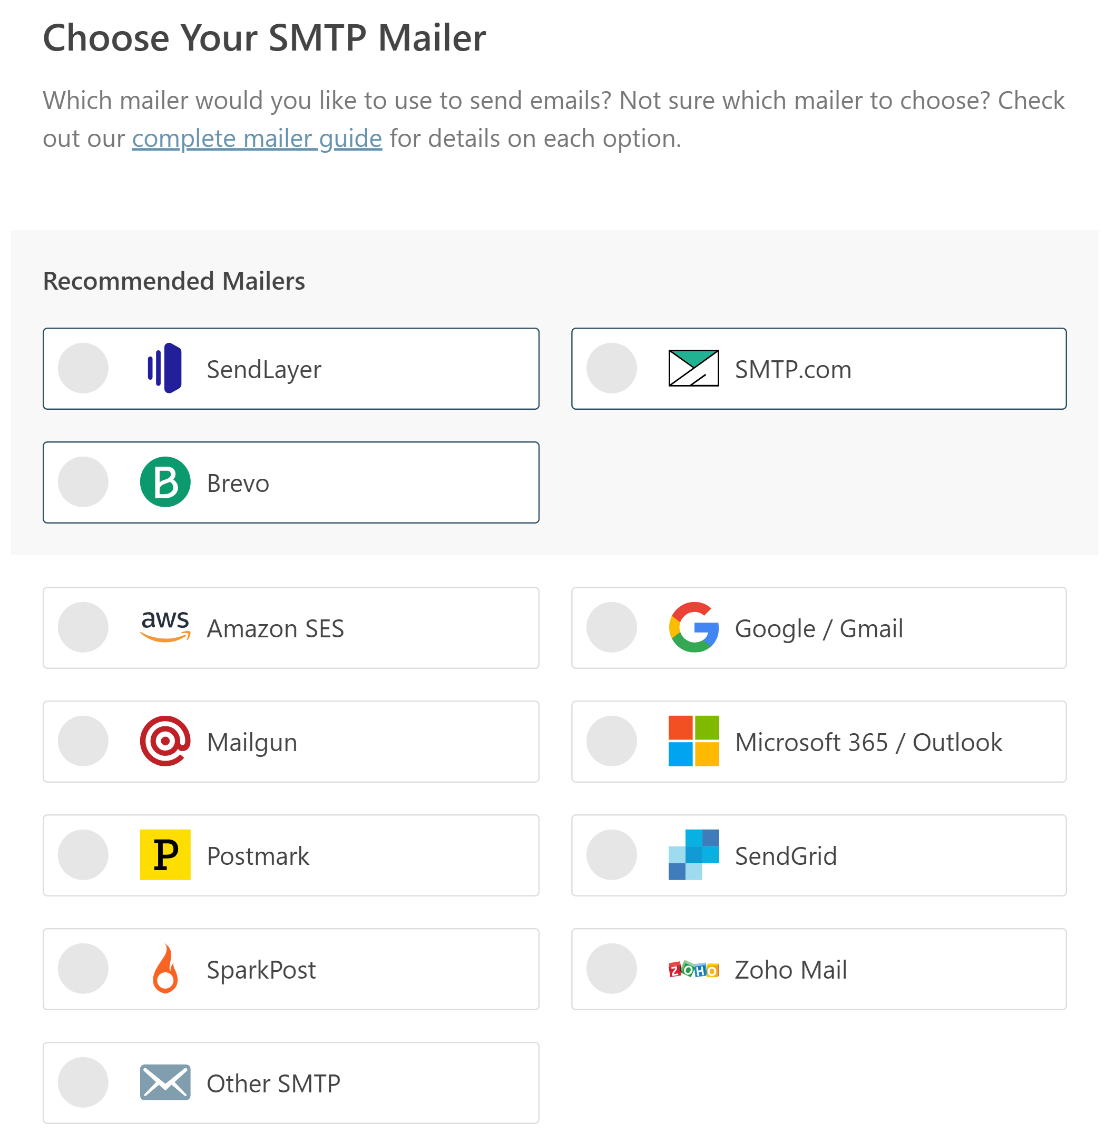
When you’ve chosen the mailer, open up the documentation to set up an account on the mailer website.
| Mailers available in all versions | Mailers in WP Mail SMTP Pro |
|---|---|
| SendLayer | Amazon SES |
| SMTP.com | Microsoft 365 / Outlook.com |
| Brevo | Zoho Mail |
| Google Workspace / Gmail | |
| Mailgun | |
| Postmark | |
| SendGrid | |
| SparkPost | |
| Other SMTP |
Want to set up multiple mailers? You can do so in the Additional Connections settings once you’ve finished the Setup Wizard.
Then you can select a Backup Connection and configure Smart Routing. After you’ve set everything up, switch back to this guide to enable email logging.
Step 4: Turn on Email Logging (Optional)
Next, you’ll see two options enabled by default.
- Improved Email Deliverability
- Email Error Tracking
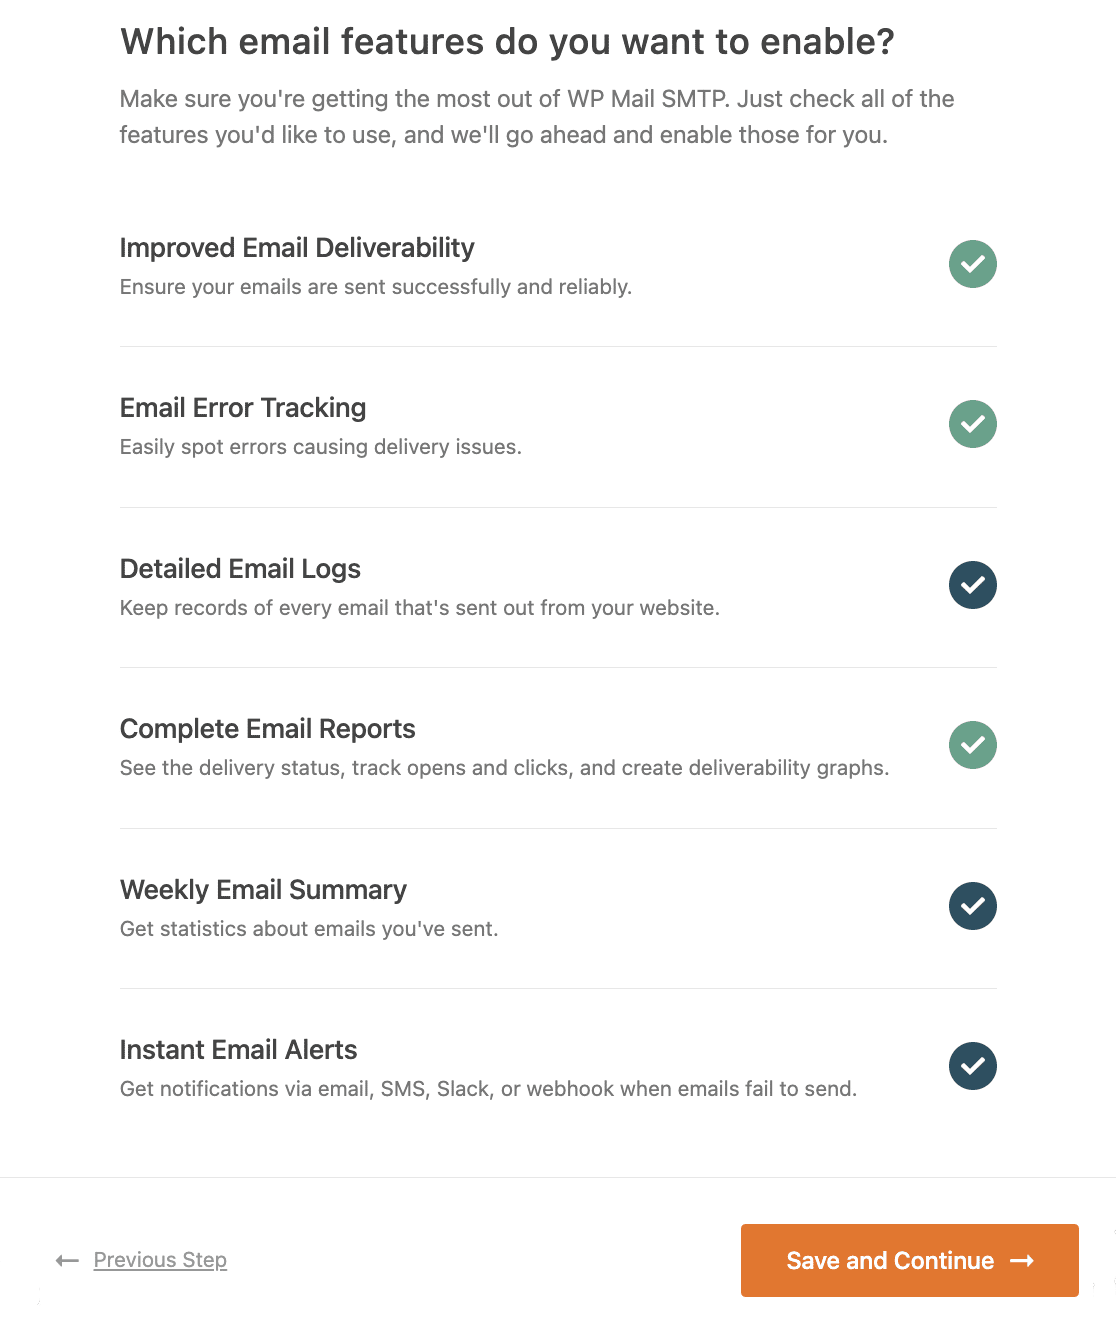
To fix the LearnDash not sending email notifications, you’ll want to have both the options enabled.
If you have the Pro plugin, you can turn on the Detailed Email Logs to track all emails that are being sent from your website.
If this is turned on, WP Mail SMTP Pro includes Complete Email Reports a helpful dashboard widget that shows the log in the form of a chart.
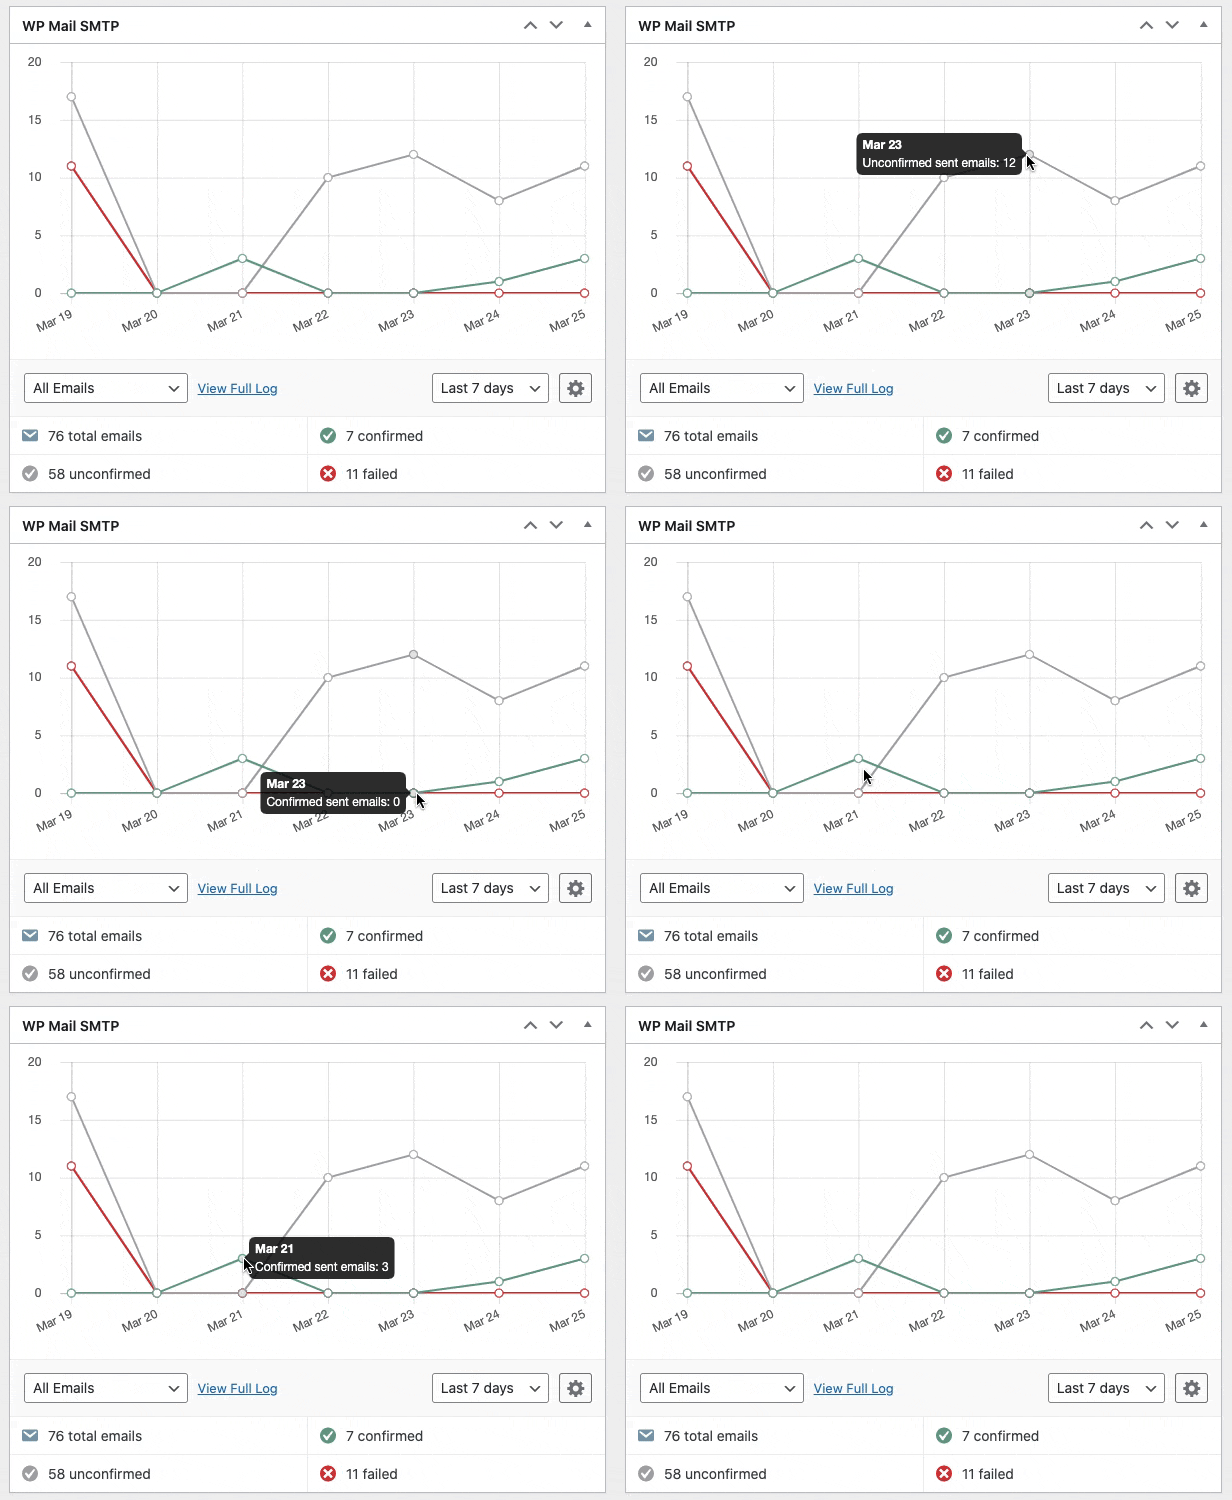
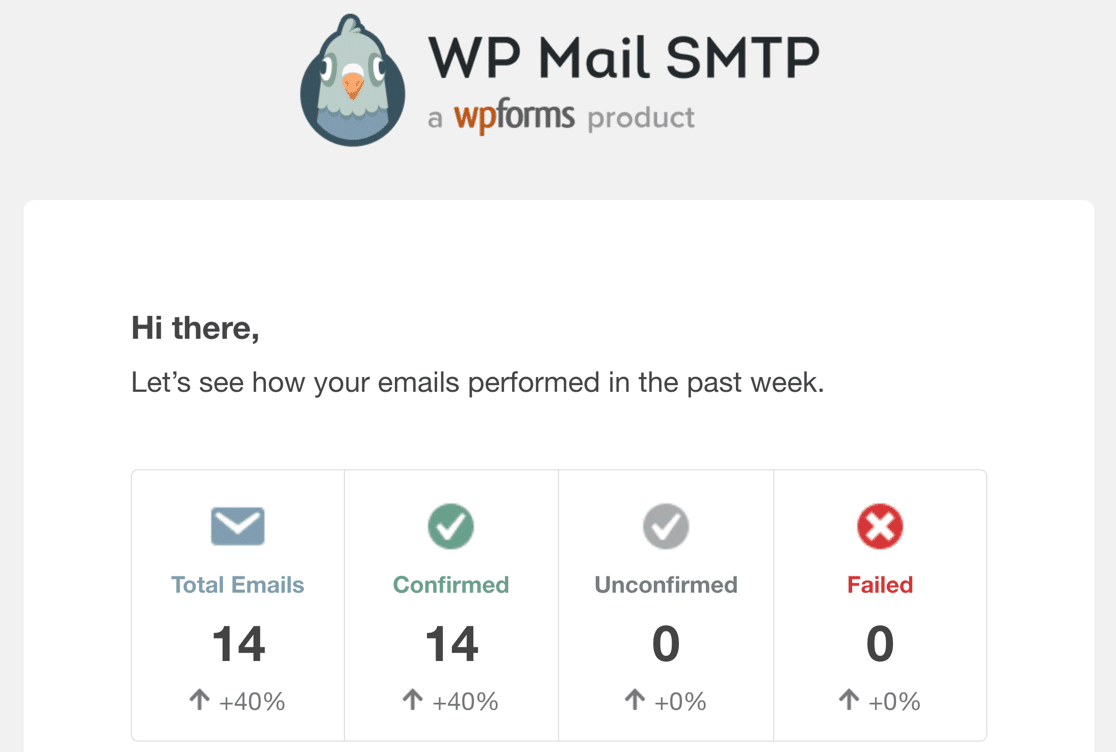
The Weekly Email Summary will send an overview of your email delivery stats to your inbox each week. This makes it easy to spot any error in your emails.
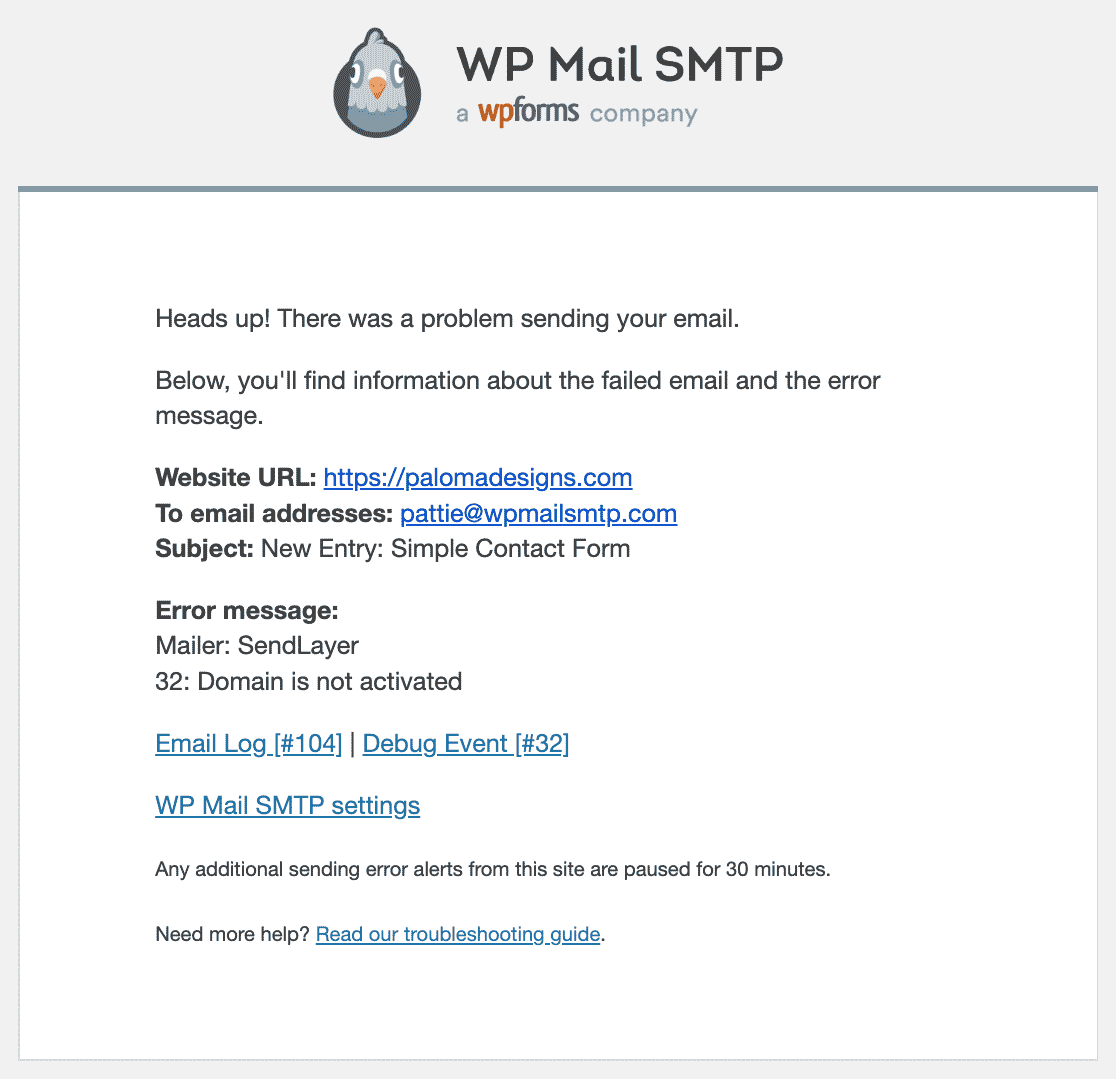
And Instant Email Alerts let you know right away if your website fails to send an email so you can fix the issue.
If you enable email logging, you’ll also have the chance to configure some additional settings.
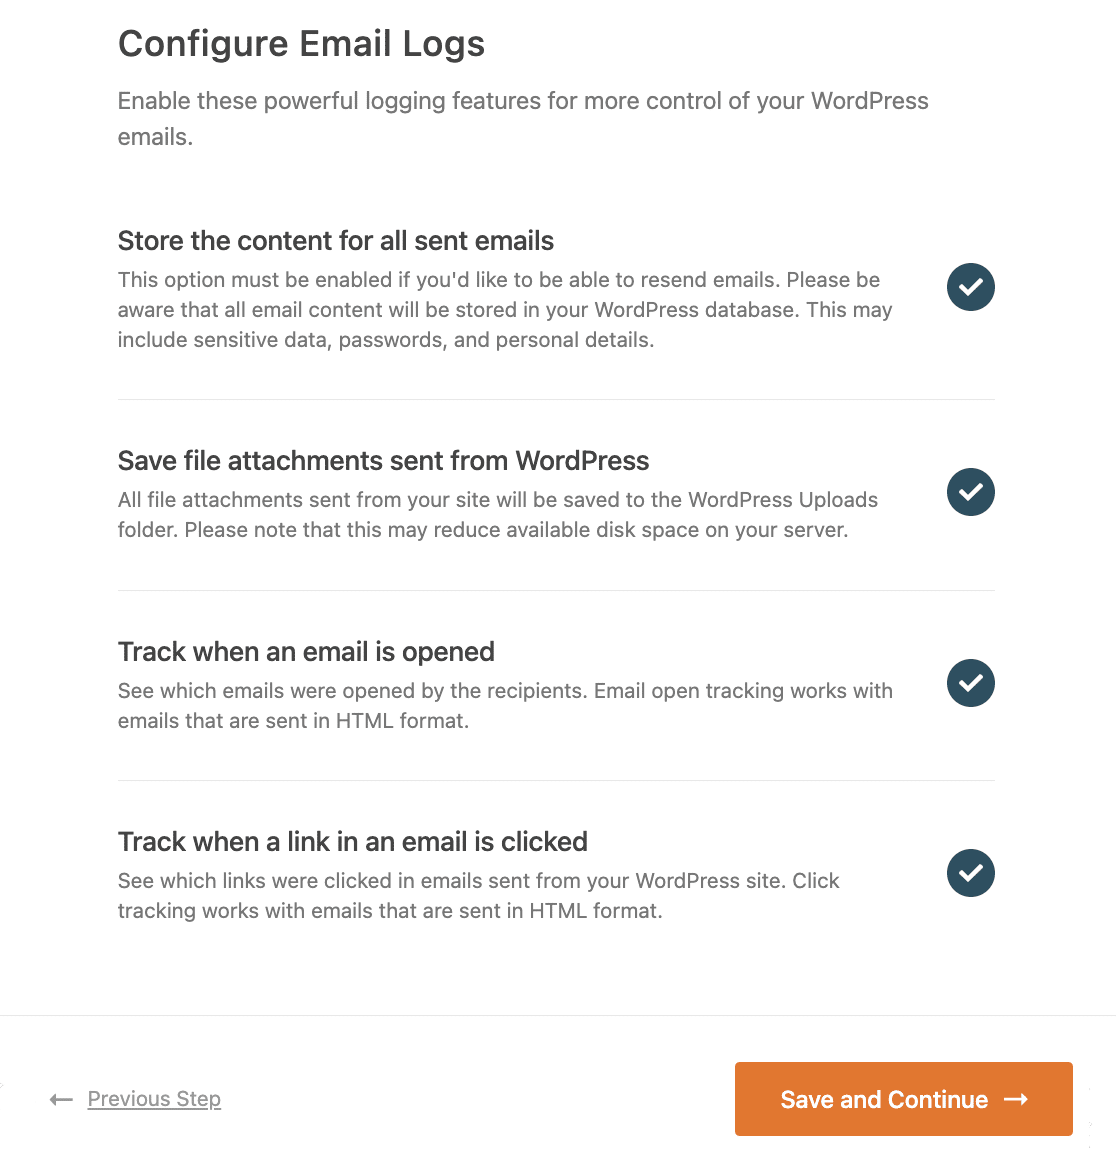
These options let you save email content and attachments and track user activity like email opens and link clicks.
For more details, make sure to check out our guide to WP Mail SMTP email logging.
For the last step, grab the license key from your WP Mail SMTP account and paste it into the box to enable automatic updates.

That’s it. You can now send a test email from WP Mail SMTP to check if the LearnDash not sending email notifications has been fixed.
Step 5: Change From Email In LearnDash
LearnDash doesn’t have the option to change the email address used to send notifications. By default, it uses the default address ([email protected]) to send out all emails from the website.
This email is non-existent for most websites. Email apps have filters that detect such emails and mark them as spam. This can lead to issues in email delivery.
With WP Mail SMTP, you can change the default address and force LearnDash to use one of the email addresses from your website.
Go to the WP Mail SMTP settings and under the General tab, look for the From Email option. Here, type the email address you want to send emails from and tick the option Force From Email.
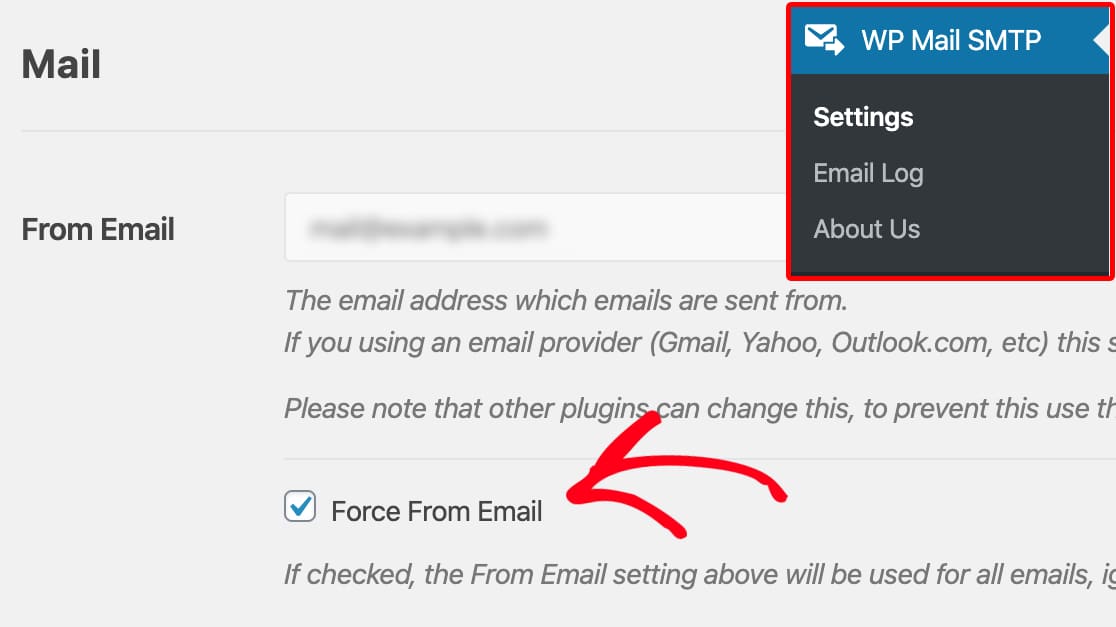
This is an awesome way to make sure all of your emails are being sent from the authenticated email address.
FAQs on How to Fix LearnDash Not Sending Notification Emails
LearnDash not sending notification emails is a popular topic of interest among our readers. Here are answers to some common queries about it:
Why is LearnDash not sending email notifications?
This usually happens when your WordPress site can’t send mail properly. Most web hosts block the default mail function, so messages from LearnDash never reach users.
How do I fix email issues in LearnDash?
Install WP Mail SMTP, choose a mailer like Brevo or SendLayer, and finish the setup. This connects LearnDash to a real mail service and fixes most email delivery problems.
Does LearnDash support SMTP for email delivery?
Yes. LearnDash sends mail using WordPress settings, so adding an SMTP plugin like WP Mail SMTP works right away. No extra tools needed.
How do I set up WP Mail SMTP with LearnDash?
Install WP Mail SMTP, open the setup wizard, pick your mail service, enter your account keys, and save. All LearnDash emails will now send through that service.
Can I use Gmail SMTP with LearnDash?
Yes. WP Mail SMTP supports the Google Workspace / Gmail mailer. You’ll need to create a web app in your Google account and paste the keys into the plugin or simply use the one-click option in WP Mail SMTP.
After that, LearnDash emails will send through Gmail. Fo more information on how to set up the Gmail mailer, follow the instructions in our Google Workspace / Gmail mailer doc.
How do I send course completion emails in LearnDash?
Go to LearnDash settings, turn on notifications, and choose the “Course Completed” trigger. Set the message and who gets it. Emails will go out when a student finishes the course.
Why are students not receiving LearnDash quiz results by email?
Check that quiz emails are turned on in LearnDash settings. If they are, the issue may be your site’s mail setup. Adding an SMTP plugin often fixes it.
How do I test if LearnDash emails are working?
Use WP Mail SMTP’s Email Test tool. Send a message to yourself. If it arrives, your LearnDash emails should work too.
What plugins help LearnDash send emails reliably?
WP Mail SMTP is the most used. It connects your site to services like Gmail, SendLayer, and Outlook, so your messages get through.
Can I customize LearnDash email templates without coding?
Yes. Many themes and page builders let you style LearnDash messages. You can also use the Notifications Addon to change wording and design without touching code.
Next, Add a DMARC Record In Your DNS Settings
Since you’re selling courses on your website, it’s important that you protect your domain against phishing. You can create a DMARC record in your DNS settings to make sure phishing emails and malware can’t be sent from your email address.
Ready to fix your emails? Get started today with the best WordPress SMTP plugin. If you don’t have the time to fix your emails, you can get full White Glove Setup assistance as an extra purchase, and there’s a 14-day money-back guarantee for all paid plans.
If this article helped you out, please follow us on Facebook and Twitter for more WordPress tips and tutorials.

