AI Summary
Is your WordPress email not sending on GoDaddy? I’ve been there and know how confusing it is, especially when everything seems to be set up correctly.
Most people don’t know that GoDaddy blocks the default email method WordPress uses to send messages. Apart from that, SMTP issues are pretty common for GoDaddy customers.
So, in this guide, I’ll show you exactly why WordPress emails fail on GoDaddy, what you can do about it, and how to make sure your site sends messages that actually get delivered!
Fix Your GoDaddy WordPress Emails Now! 🙂
First, let’s quickly recap why GoDaddy web hosting customers can have issues with WordPress emails.
Why Won’t WordPress Email Send on GoDaddy?
Like many hosting providers, GoDaddy blocks SMTP connections on some of its hosting plans. Sending email from WordPress can be tricky, even if you install the WP Mail SMTP plugin.
Unfortunately, some GoDaddy customers find that the Other SMTP option in WP Mail SMTP doesn’t work, regardless of the SMTP server they try to use.
If you’re having the same problem, you’ll see errors like:
- Could not connect to the SMTP host
- SMTP connect() failed
- Connection refused (111)
GoDaddy blocks SMTP to try and prevent its customers from sending spam. It’s not the only hosting company that does this: Amazon EC2 users often have issues with AWS not sending email, too.
On GoDaddy Managed Hosting, some customers can’t send emails because PHPMailer is broken when the GoDaddy Managed Hosting plugin is enabled. This can also cause website contact forms to time out or hang.
Troubleshooting can be frustrating because GoDaddy has so many different plans. I’ll show you 2 quick and easy options to solve GoDaddy not sending email from WordPress.
How to Fix WordPress Not Sending Emails on GoDaddy
In the first step, we’ll install the WP Mail SMTP plugin. You’ll need to do that now before moving on to the other steps.
Step 1: Install the WP Mail SMTP Plugin
WP Mail SMTP is the best SMTP plugin for WordPress. It lets you easily send emails through a 3rd party server or email provider.
For both of the solutions in this article, you’ll need WP Mail SMTP installed on your WordPress website.
If you haven’t installed WP Mail SMTP yet, you’ll want to download the zip file from your WP Mail SMTP account. You’ll find it in the Downloads tab.
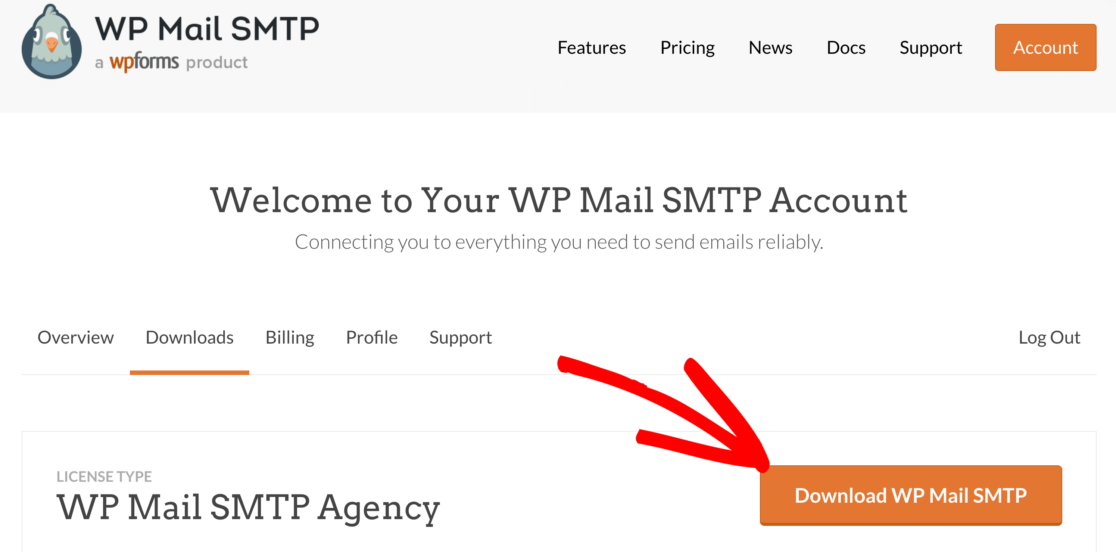
Next, open up your WordPress dashboard. Head to the Plugins page and upload the zip file to install the plugin.
If you’re not sure how to do this, check out this article on how to install a plugin in WordPress for a little more guidance.

As soon as you activate the plugin, the WP Mail SMTP Setup Wizard will open. Now we can consider which SMTP option to pick.
Step 2: Use GoDaddy’s SMTP Server
If you want, you can use the Other SMTP option in WP Mail SMTP and enter the SMTP server that GoDaddy provides for this.
Before you do this, keep in mind that GoDaddy’s SMTP server can be unreliable, so you might still see connection issues.
If you’d like try it anyway, we’ll show you how. In the WP Mail SMTP Setup Wizard, click the Let’s Get Started button.

On the next screen, click Other SMTP.
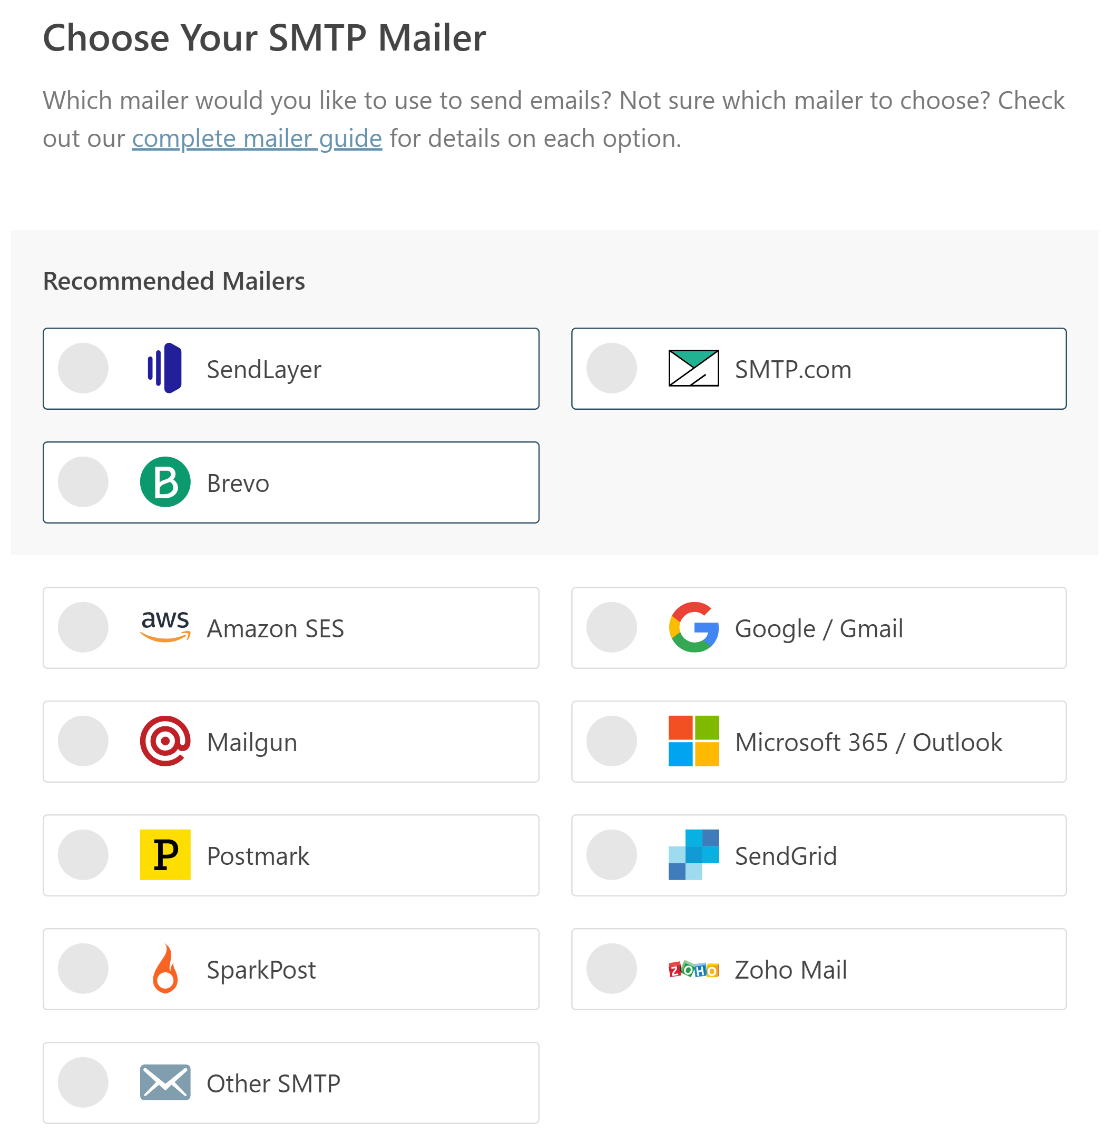
Use the following information to connect to GoDaddy’s own SMTP server:
- SMTP Host: This varies depending on the hosting plan you’re using, so you’ll need to look in GoDaddy’s documentation to find out what to put here.
- Encryption: None
- SMTP Port: 25
- SMTP Authentication: Disable
Once you’re done configuring the GoDaddy SMTP settings for WordPress, you can then set your From Name and From Email. At the end of the wizard, WP Mail SMTP will send a test email.
If this works for you, it’s all you need to do. But if you continue to experience issues with GoDaddy not sending email, keep reading for a better solution.
Step 3: Send Emails Through a Separate Service
Instead of using SMTP, you can use WP Mail SMTP to send emails through a different email provider. This is secure, and most GoDaddy customers will find it to be a lot more reliable, because:
- All WordPress emails will be authenticated, so they won’t go to your spam folder (or your customer’s)
- WP Mail SMTP will connect to the email provider’s API securely without sharing your username and password
- You can unlock additional information with some mailers, like the delivery status of each email.
For GoDaddy customers, Microsoft Outlook is a good option. GoDaddy offers email hosting plans for Outlook that you can easily use with WP Mail SMTP.
If you need to send a large number of emails, you could also choose SendLayer, Brevo (formerly Sendinblue), or SMTP.com. These are great transactional email providers that can handle thousands of emails per day without delays.
Let’s go back to the Setup Wizard. If you already ran it once, you can click the Launch Setup Wizard button in the WP Mail SMTP Settings page to start the wizard again.
Keep in mind that running the wizard again will remove your GoDaddy SMTP settings. Now, we’ve relaunched the Wizard, let’s click the Let’s Get Started button to begin.

On the next screen, just like before, you’ll want to click the mailer you want to use from the list.

When you’ve chosen your mailer, use the links below to jump to our documentation for it:
| Mailers available in all versions | Mailers in WP Mail SMTP Pro |
|---|---|
| SendLayer | Amazon SES |
| SMTP.com | Microsoft 365 / Outlook.com |
| Brevo | Zoho Mail |
| Google Workspace / Gmail | |
| Mailgun | |
| Postmark | |
| SendGrid | |
| SparkPost | |
| Other SMTP |
The documentation will walk you through the process of setting up your account and entering the connection details into WP Mail SMTP.
Need a hand?
Our Elite license includes a full White Glove Setup service for Sendlayer, SMTP.com, or Brevo.
If you want to set up multiple mailers, you can do so in the Additional Connections settings once you’ve finished the Setup Wizard. Then you can select a Backup Connection and configure Smart Routing.
Step 4: Enable Email Logging (Recommended)
At the end of the wizard, email deliverability and error tracking will be enabled automatically. If you also want to log WordPress emails, check the Detailed Email Logs button in this list.
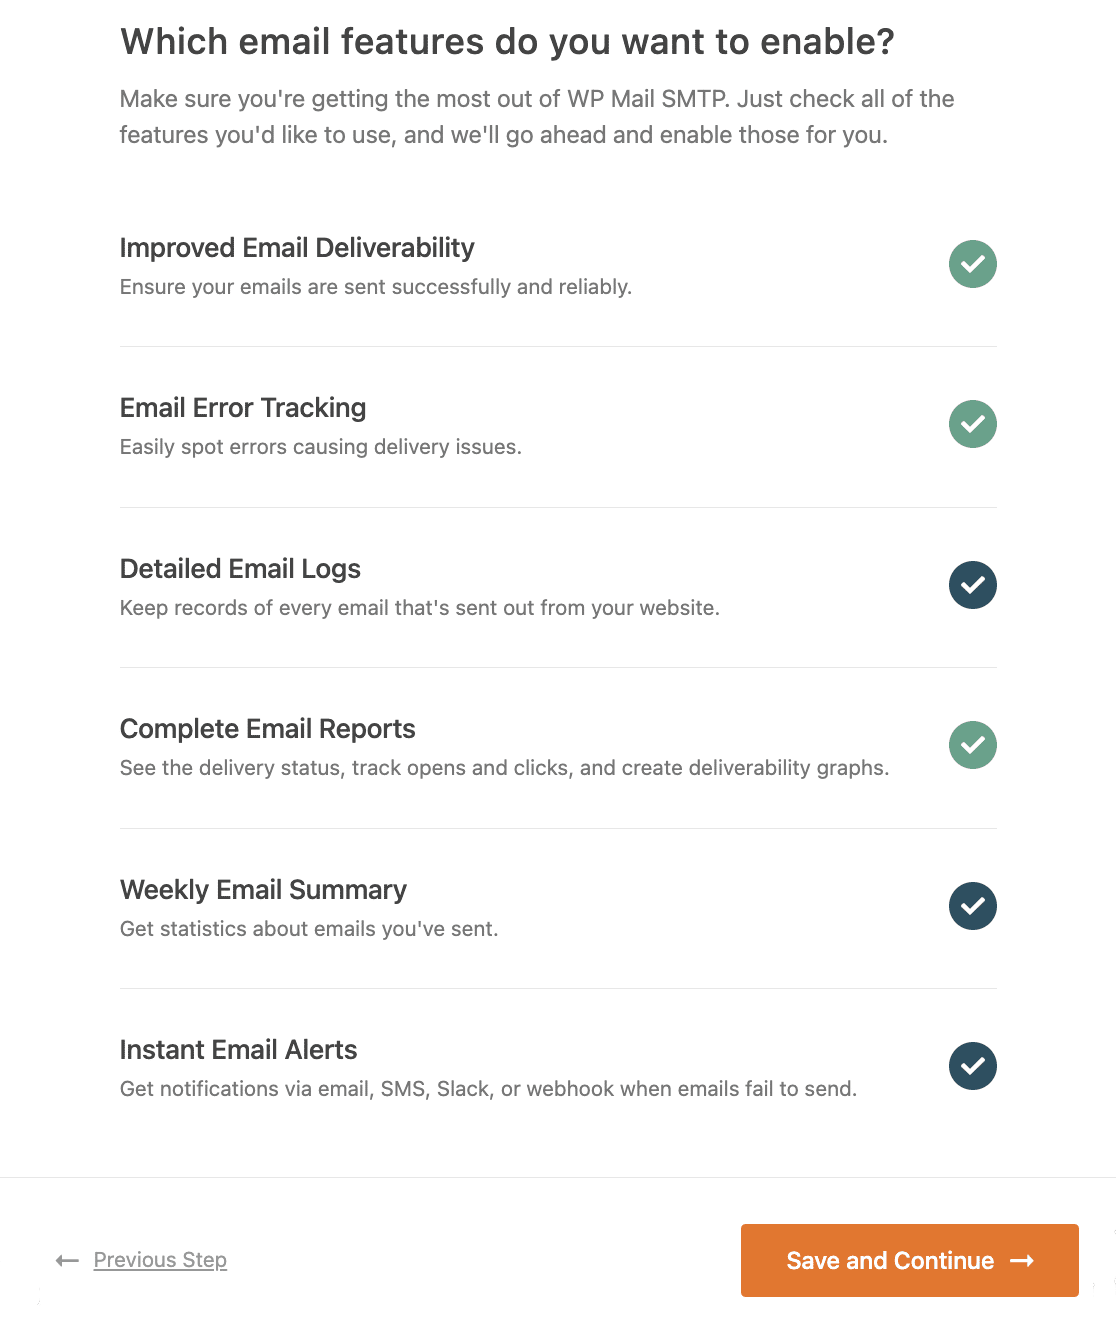
Detailed Email Logs will track your sent emails and show you if they were Failed or Sent. If your email provider supports it, the logs will also tell you if your emails were Delivered.
Turning on email logging automatically enables Complete Email Reports. You get to decide if you want to receive the Weekly Email Summary, which gives you recent email delivery stats right in your inbox.
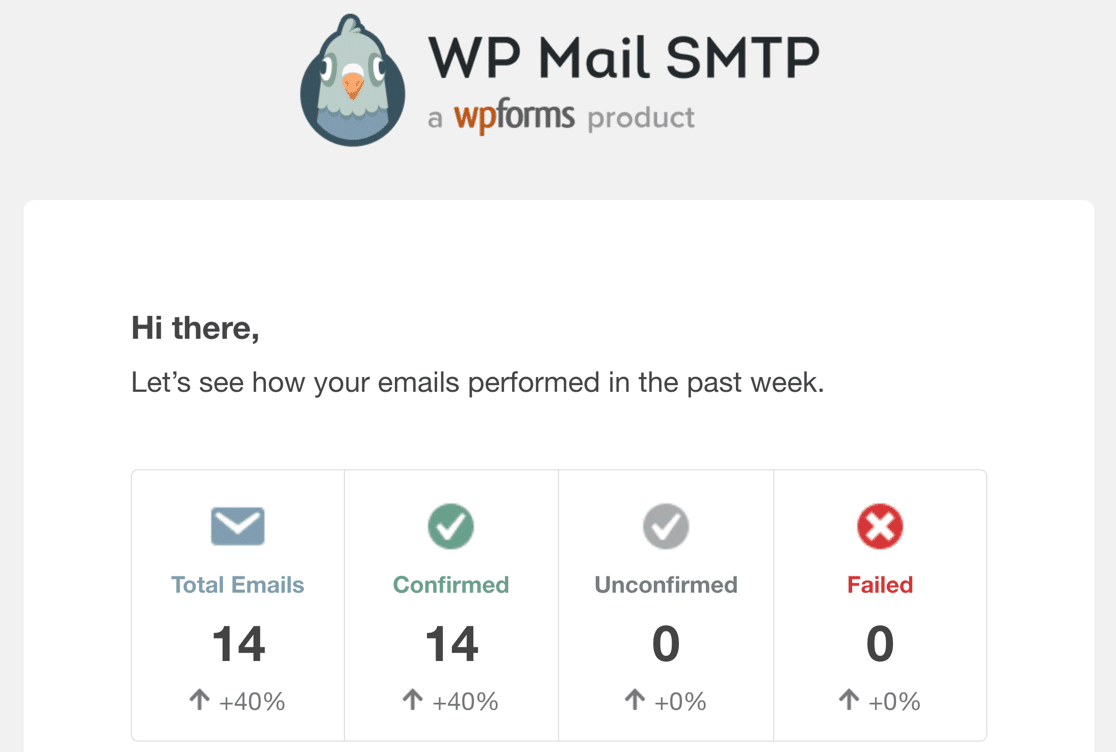
The other feature you can enable here is Instant Email Alerts. When this option is turned on, you’ll get a notification whenever your site fails to send an email. Then you can go in and fix the issue.
On the next screen, you’ll be able to configure advanced email log settings. Storing the content of all your site’s emails will let you resend them if you need to.
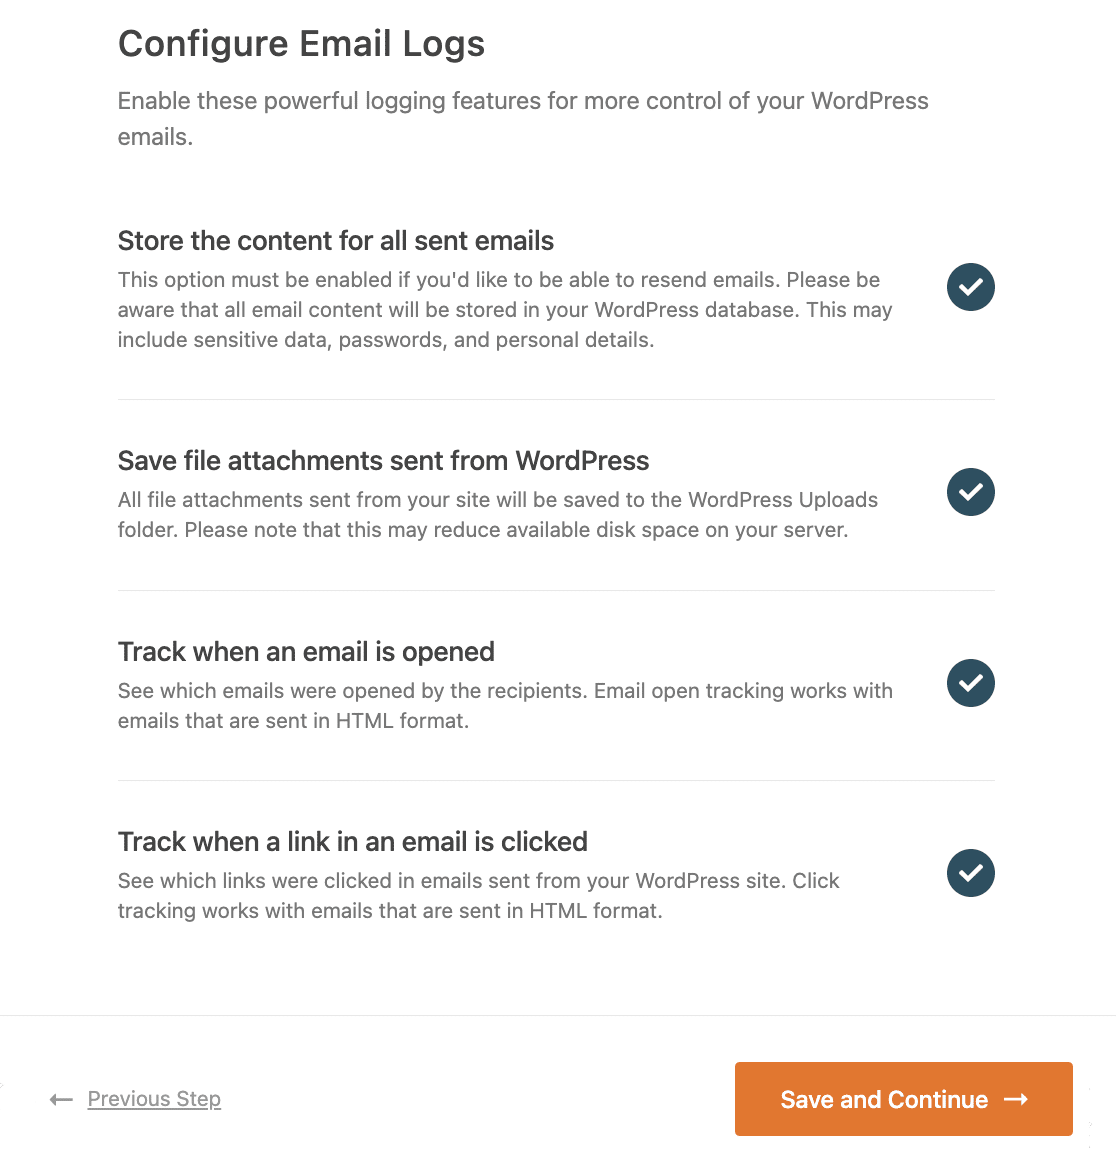
This feature is also handy to save file attachments if you want to be able to access them again later. You’ll also be able to track email opens and click-throughs, export or print your logs, and more. Check out how this works in our article on how to log your WordPress emails.
Upgrade to WP Mail SMTP Pro Now! 🙂
Step 5: Resend Failed Emails from WordPress
Sometimes, even after setting everything up, emails still don’t go out. I’ve had this happen on client sites where the SMTP server was briefly down or something just timed out in the background. It’s rare, but it happens.
If you’re using WP Mail SMTP, the good part is that you don’t need to retype or rebuild anything. You can just resend the failed message with a couple of clicks. To do that, go to WP Mail SMTP » Email Log from your WordPress dashboard.
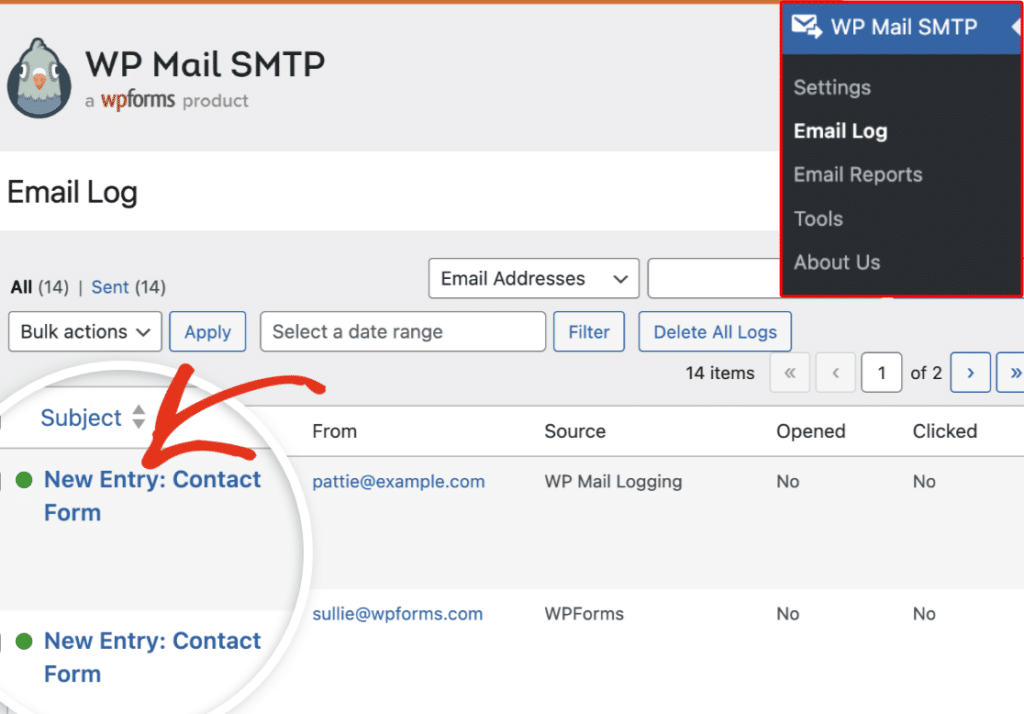
If an email fails to send, you’ll see a red dot next to it in the email log. Click View Log next to the failed email to open its details.

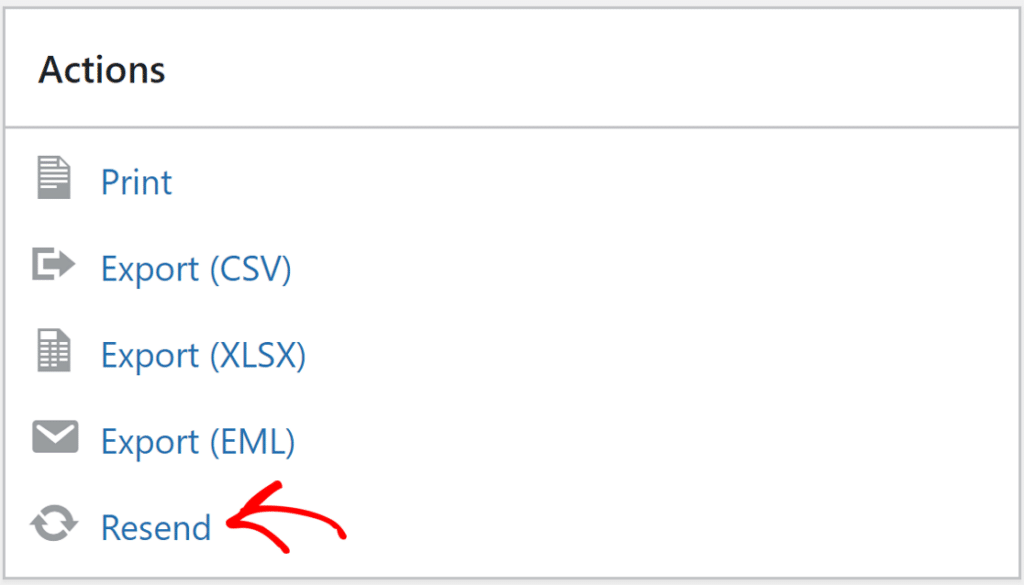
On the right side, under the Actions section, you’ll spot the Resend button. Click on it to continue with the resend process for any failed emails.
Before sending it again, you can double-check or even change the email address. That’s useful if the original address had a typo. Once you’re ready, hit Yes to confirm, and WP Mail SMTP will try sending it again.
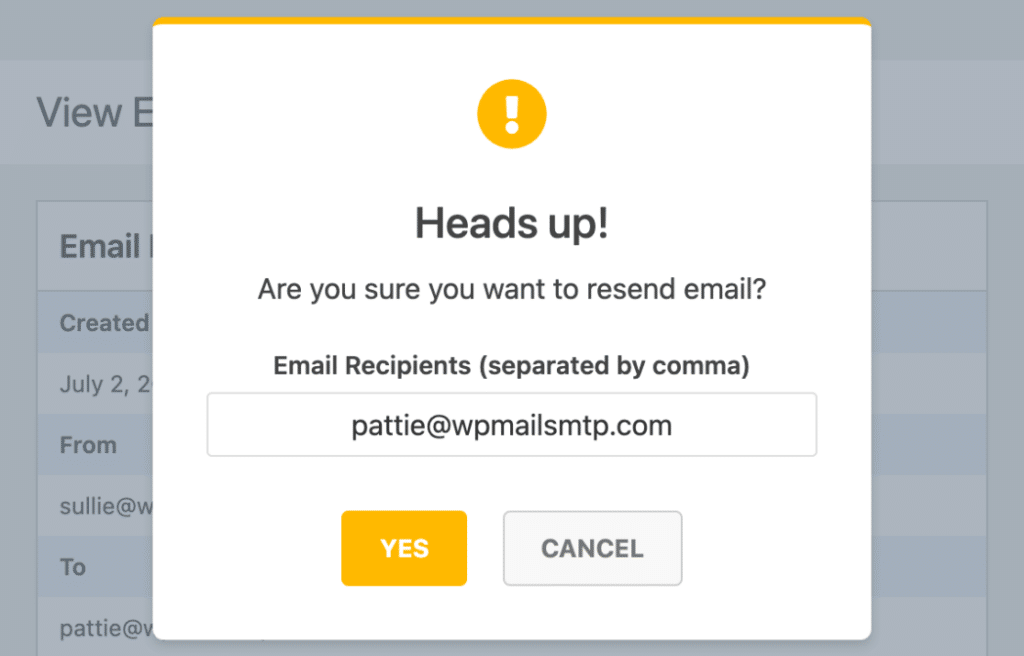
And that’s it! You should now be able to send emails from your WordPress site again and if any email fails to deliver, you can also resend them in a few clicks!
FAQs – How to Fix WordPress Not Sending Emails on GoDaddy
Check out some of the questions we most frequently receive regarding WordPress not sending emails with GoDaddy.
Can I use WP Mail SMTP with GoDaddy?
Yes, WP Mail SMTP works well with GoDaddy. You’ll just need to enter the correct SMTP settings and connect to your GoDaddy-hosted email address.
Does GoDaddy block email sending from WordPress?
Yes, GoDaddy often blocks PHP mail, which is used by default in WordPress. That’s why SMTP is needed to send emails successfully.
Why is my contact form not sending emails with GoDaddy?
Your form might be trying to send emails using PHP mail, which GoDaddy blocks. Use an SMTP plugin like WP Mail SMTP to fix this.
How do I fix GoDaddy SMTP not working in WordPress?
Make sure your SMTP settings are correct, including the port and encryption type. If that doesn’t help, try switching to a third-party mailer in WP Mail SMTP like SendLayer or Brevo. This usually fixes the problem right away.
What’s the best SMTP option for GoDaddy users?
From what I’ve seen, using a dedicated mailer like SendLayer or SMTP.com gives you the most reliable results on GoDaddy. These mailers help you avoid delivery issues caused by GoDaddy’s built-in email limitations.
Next, Still Not Receiving Emails From GoDaddy? Try This!
Even after setting up WP Mail SMTP, I’ve seen some people still face issues when trying to send emails through GoDaddy. In most cases, the issue has nothing to do with WordPress or even GoDaddy.
It might be because the domain’s DNS records aren’t set up the right way. These include SPF, DKIM, and DMARC records. Configure them correctly to boost your email deliverability.
Ready to fix your emails? Get started today with the best WordPress SMTP plugin. If you don’t have the time to fix your emails, you can get full White Glove Setup assistance as an extra purchase, and there’s a 14-day money-back guarantee for all paid plans.
If this article helped you out, please follow us on Facebook and Twitter for more WordPress tips and tutorials.

