AI Summary
Ever needed to find an important file that was sent from your WordPress site, only to realize there’s no record of it? By default, WordPress doesn’t save any outgoing emails or their attachments.
Once an email is sent, it’s gone forever, leaving you with a critical blind spot in your business operations. Without a record, you can’t troubleshoot delivery issues or provide proof of communication.
Keeping a copy of every file attachment makes it easy to archive or check the files your site’s sending out. In this article, I’ll show you how to save WordPress email attachments easily.
Save Your WordPress Email Attachments Now! 🙂
How Do I Send an Attachment in WordPress?
Your WordPress site sends attachments more often than you think. For example:
- Contact form plugins like WPForms allow users to upload files
- WooCommerce plugins attach PDF invoices to order emails
- Backup plugins can send .zip files of your site.
The problem is, each of these systems sends attachments independently, and none of them keep a central record.
No matter how you send attachments, storing a copy automatically makes sense.
For more information, check out our dedicated post: How to Send An Email With Attachments in WordPress.
How to Save WordPress Email Attachments
Follow the steps below to learn how to use WP Mail SMTP Pro to automatically save a copy of every attachment your website sends, creating a secure and searchable archive right inside your WordPress dashboard.
Step 1: Install the WP Mail SMTP Plugin
WP Mail SMTP is the best email plugin for WordPress. It lets you send emails through an external email service to make sure they don’t get filed as spam.
The Pro version of the plugin also has a super powerful email log. I’m going to show you how to use that to save email attachments.
To download the plugin, head over to your WP Mail SMTP account and switch to the Downloads tab to grab the latest version of the plugin file.
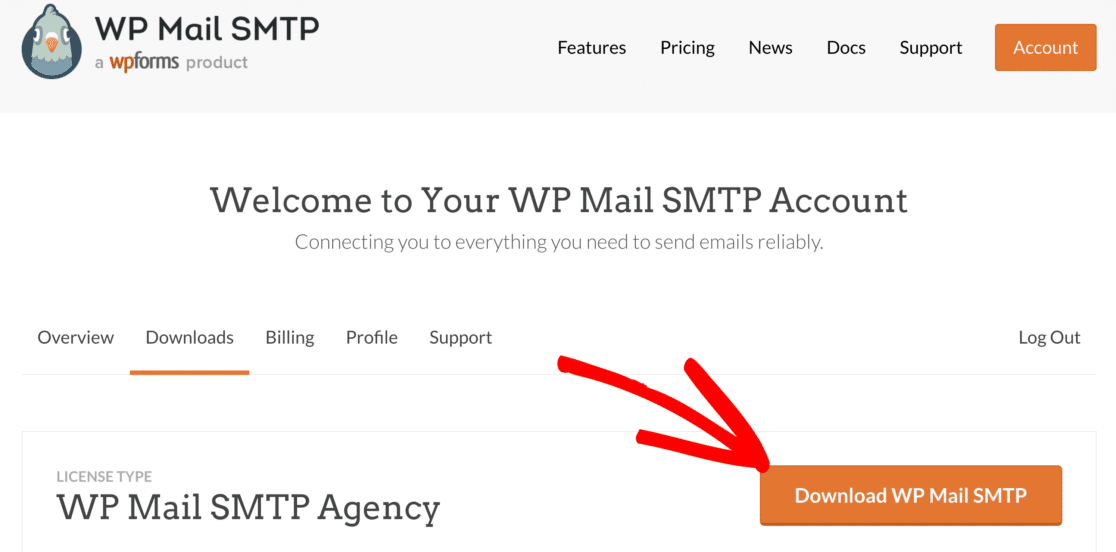
Switch back to your WordPress dashboard and upload the zip file to the plugins page. Need a hand? Check out how to install a WordPress plugin.

Once the plugin is installed, be sure to Activate it. This will start the Setup Wizard, which simplifies the entire configuration process and ensures you don’t miss any critical settings.
Step 2: Connect to a Reliable Mailer Service
In the first step of the Wizard, we’ll connect your website to a 3rd party email service provider. Click the Let’s Get Started button to begin the process.

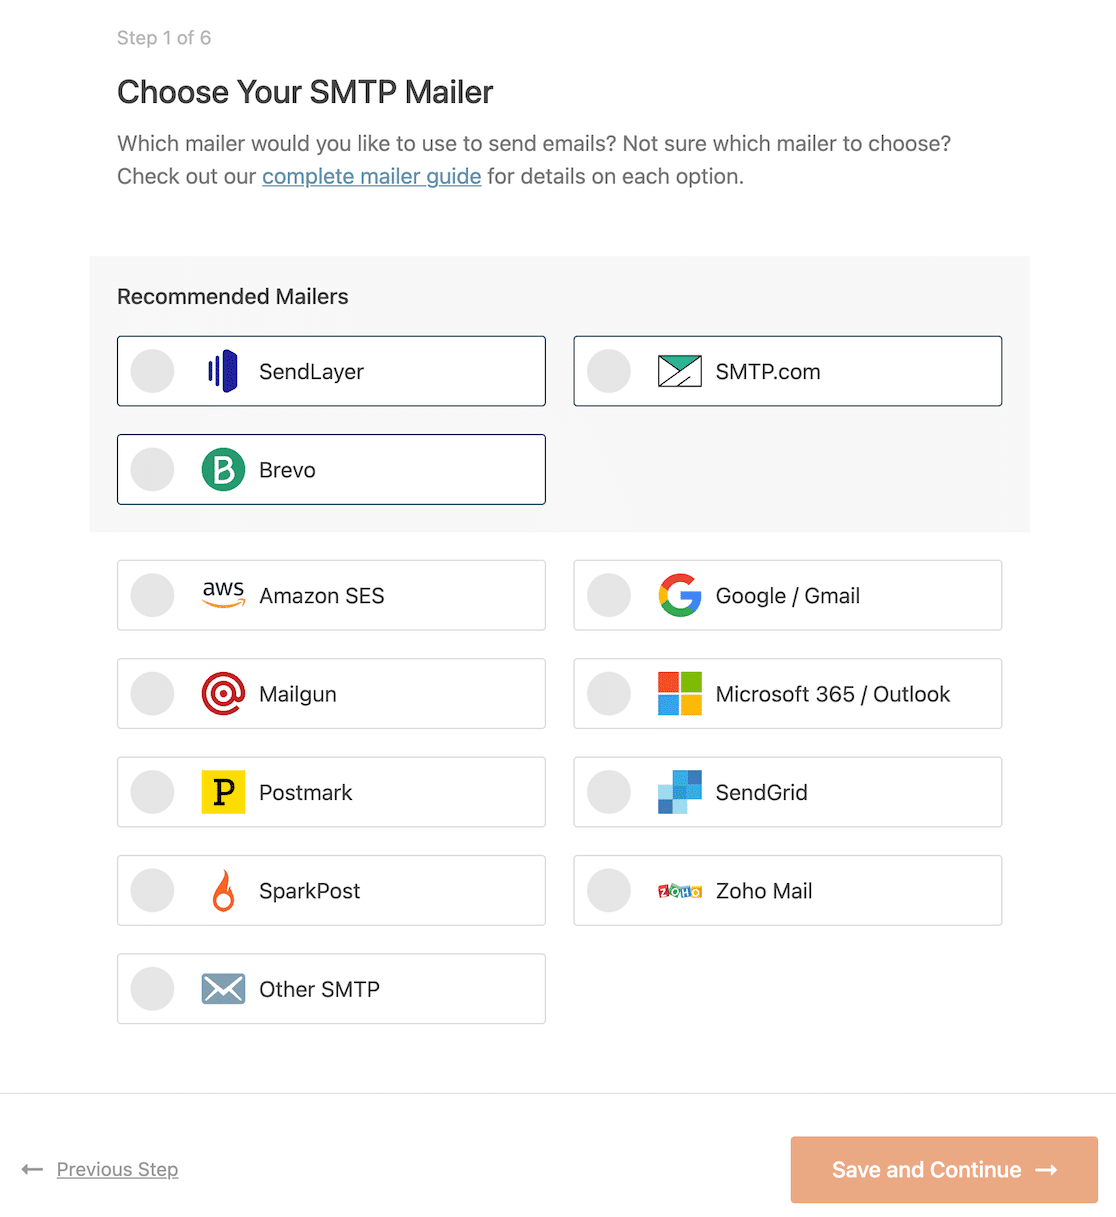
Now, you’ll see a list of all the mailer options supported by WP Mail SMTP. Before choosing a mailer, it’s a good idea to consider:
- The type of emails you send: WooCommerce order emails need to be delivered much more quickly than emails from hobby sites, so we recommend a transactional email provider for that purpose.
- The size of the attachments: Amazon SES charges extra for attachments, while some other providers have attachment size limits as low as 4MB:
| Provider | Attachment size limit | Fee for attachments |
|---|---|---|
| Brevo (formerly Sendinblue) | 4 MB | |
| SMTP.com | 15 MB | |
| Amazon SES | 40 MB | $0.12 per GB |
| Sendgrid | 10 GB | |
| Gmail | 25 GB | |
| Google Workspace | 25 GB | |
| Outlook/ Microsoft 365 | 4 MB | |
| Zoho Mail | 20 MB | |
| Other SMTP | Varies |
When choosing a mailer, keep in mind that a high size limit doesn’t necessarily mean all of your attachments will be delivered.
Most email providers will block very large attachments. In some cases, the recipient may not have enough mailbox space to receive the message. These are both good reasons to save email attachments in WordPress.
When you’ve decided on a provider, select it from the list in the Setup Wizard and and follow the documentation link to complete the connection.
| Mailers available in all versions | Mailers in WP Mail SMTP Pro |
|---|---|
| SendLayer | Amazon SES |
| SMTP.com | Microsoft 365 / Outlook.com |
| Brevo | Zoho Mail |
| Google Workspace / Gmail | |
| Mailgun | |
| Postmark | |
| SendGrid | |
| SparkPost | |
| Other SMTP |
When you’ve set up a connection, switch back to this guide to follow the next steps in the wizard.
Step 3: Enable Email Logging Features
After you connect your mailer, you’ll have the option to turn on additional WP Mail SMTP features. Be sure to turn on the Detailed Email Logs. This feature will track the headers, subject, and recipient.
When Detailed Email Logs are enabled, the Complete Email Report will be turned on automatically. I also recommend that you turn on the Weekly Email Summary so you can keep track of your emails without logging in to WordPress.
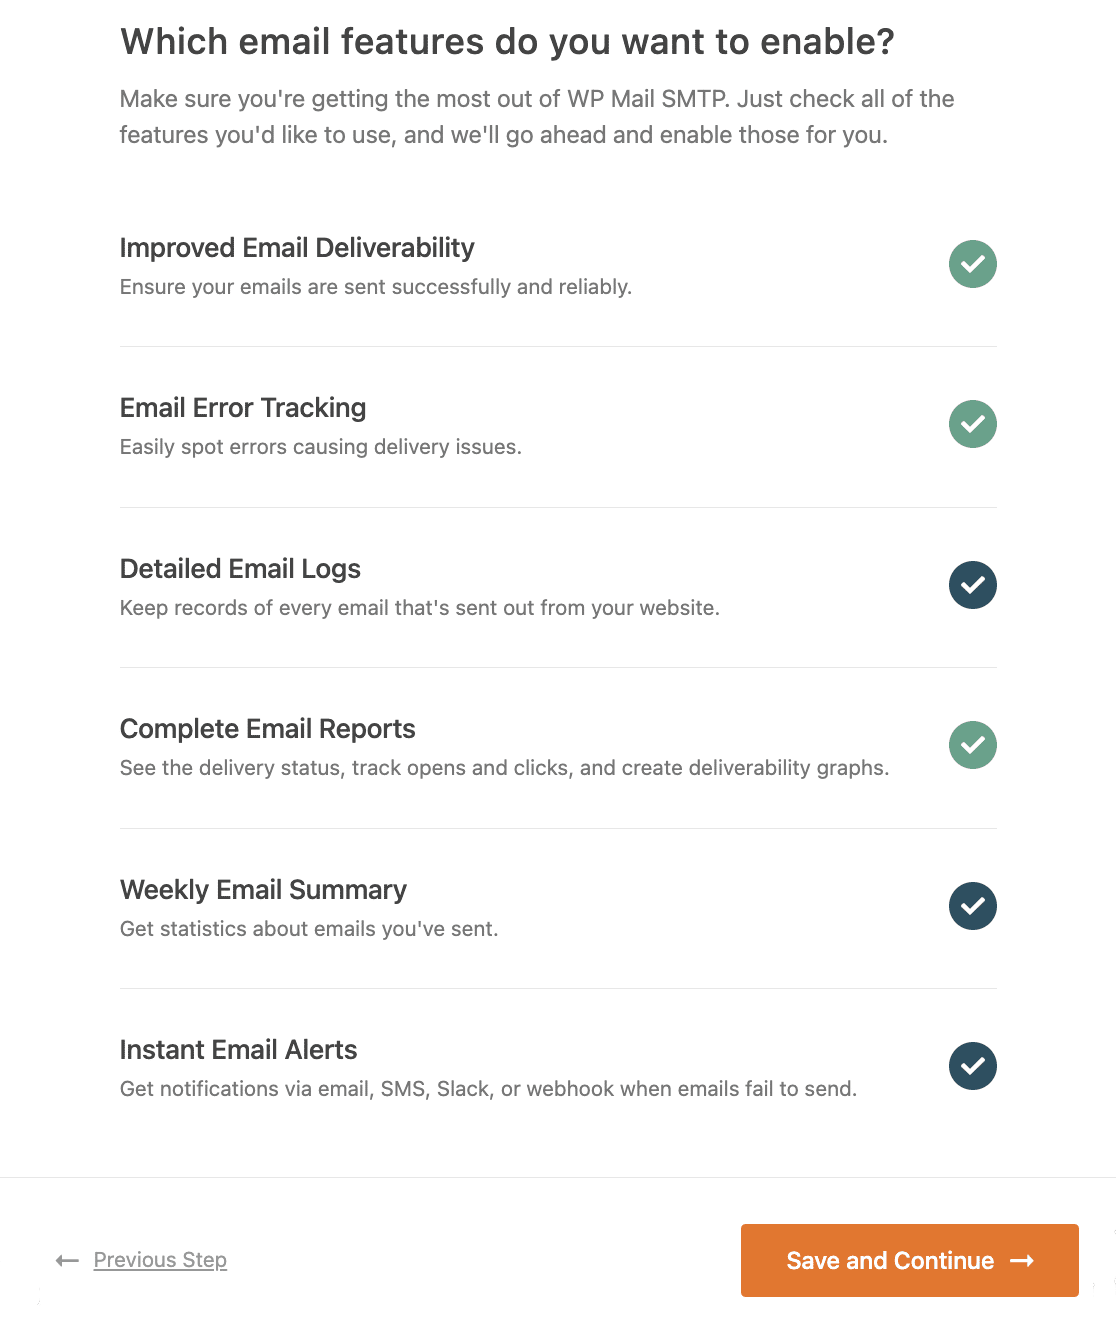
Once you’ve enabled these features, click Save and Continue to move to the final configuration step.
Step 4: Save Email Attachments in WordPress
This is the final and most important configuration step in the Setup Wizard. Here, you’ll tell WP Mail SMTP to start saving a copy of every attachment that your website sends.
On this screen, you must check the box for Save file attachments sent from WordPress. This is the setting that activates the core feature of this guide.
The Setup Wizard will also let you configure additional settings for your email logs. These include:
- Store the content for all sent emails. This feature saves the content of your WordPress emails in your site’s database. It must be turned on if you want to resend emails.
- Track when an email is opened. If you want to track user engagement, you can turn on this option to see when recipients open your emails.
- Track when a link in an email is clicked. This feature also helps with user tracking and enables you to see when recipients click the links in your emails.
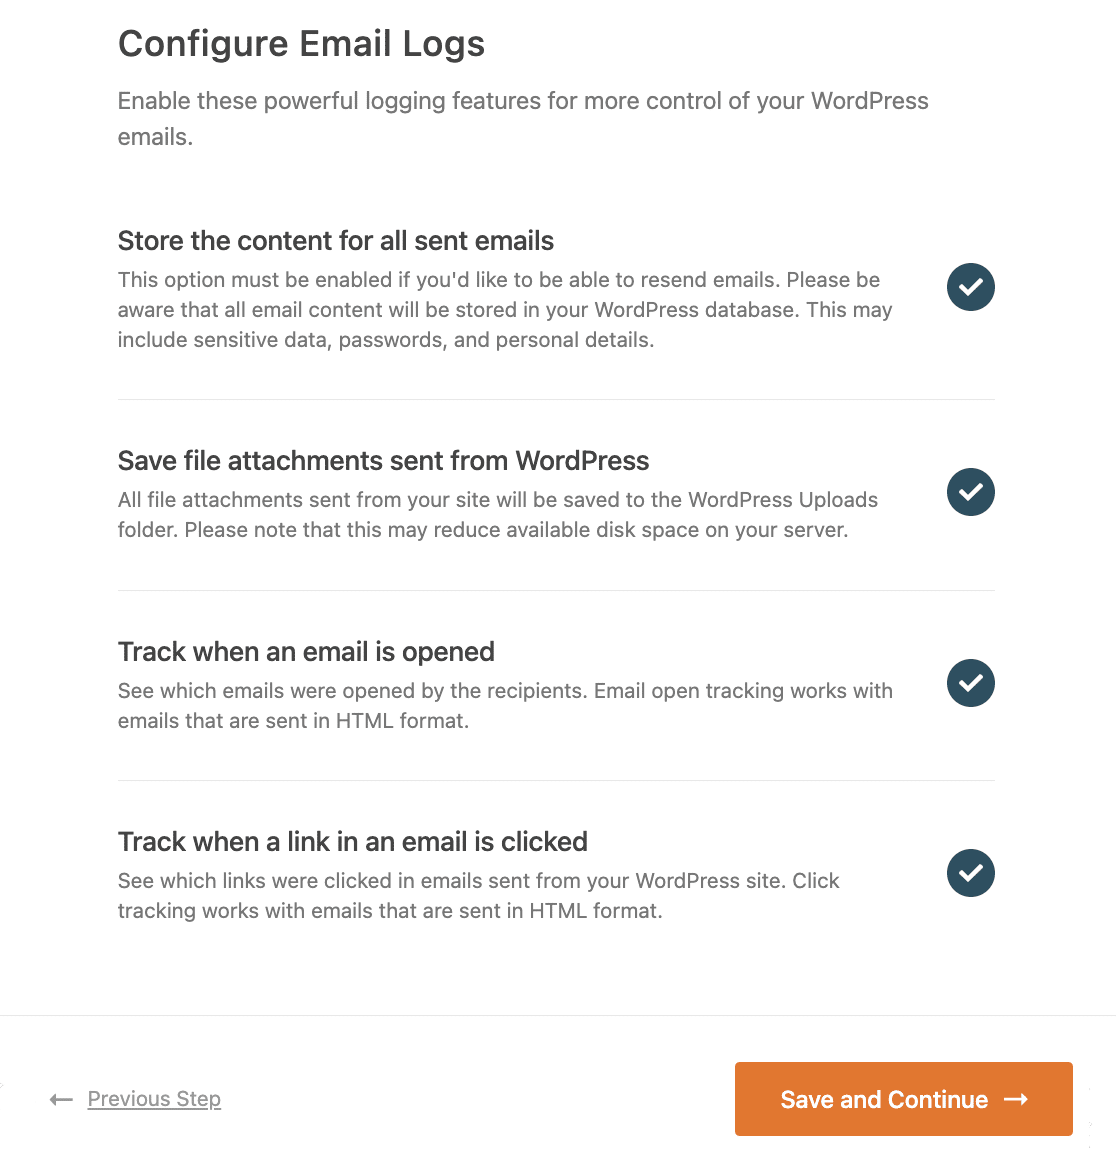
If you ever need to edit any of these settings, just go to WP Mail SMTP » Settings » Email Log. Let’s view an email attachment in WordPress next.
Step 5: View Attachments in WordPress
Now that attachment logging is active, every email your site sends with a file will be stored in your WordPress dashboard.
Once you’ve sent out an email with attachments in WordPress, you can download email attachments easily from the log. To try it out, go to WP Mail SMTP » Email Log.
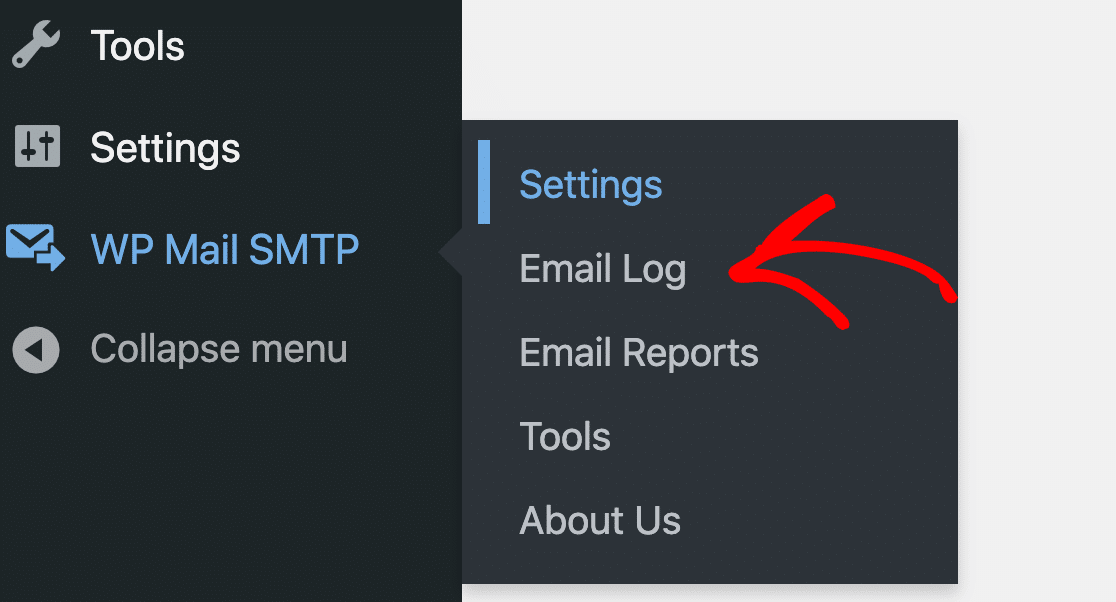
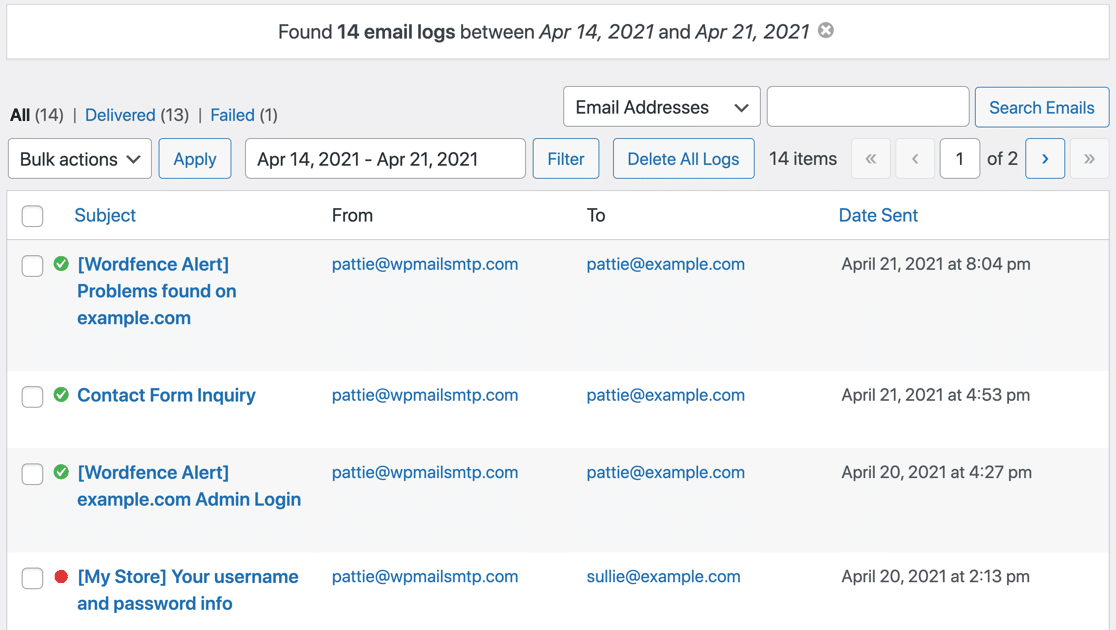
This screen shows a complete list of all emails your site has sent. To find a specific email, you can use the search bar to look for a recipient’s email address or a specific subject line.
You’ll see the original file attachments listed in the Attachments section. Click on the link to view or download the attachment.
Although you can see the original file name here, it’ll be saved with a random file name behind the scenes. That helps to keep your files secure.
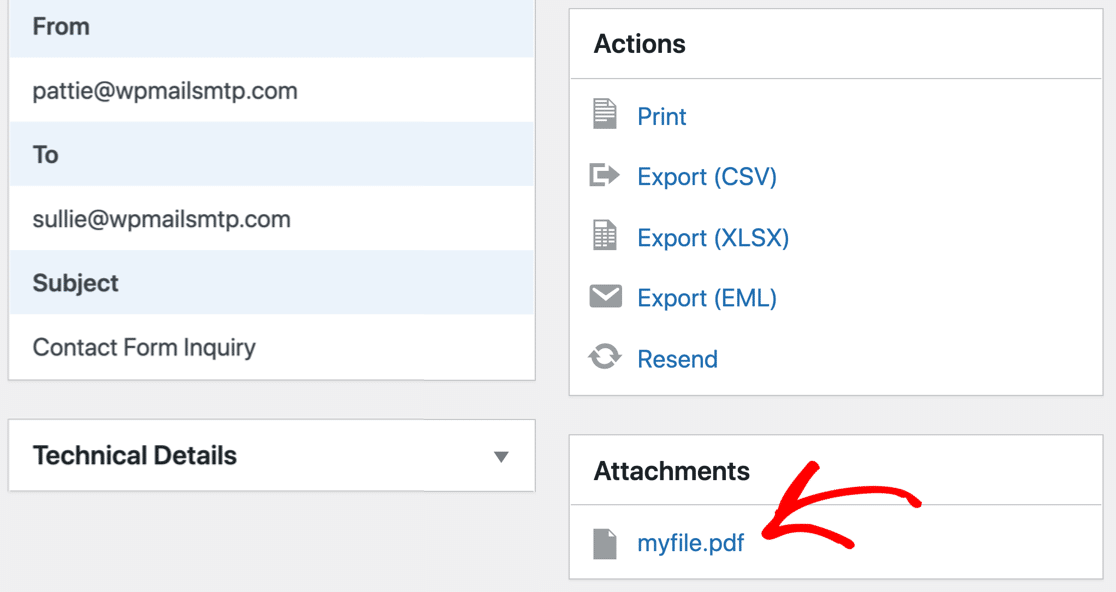
Keep in mind that the attachment files are associated with the email log. So if you delete the email log, the corresponding attachments will also be deleted from your web hosting account.
What if you want to download all attachments at once? Let’s see how we can export attachments easily using WP Mail SMTP.
Step 6: Export Attachments From the Email Log
Having a record of your attachments is great for individual lookups, but sometimes you need to download them in bulk for accounting, legal, or archival purposes.
WP Mail SMTP lets you export the email log and attachments in CSV, XLSX, and EML format. The process is slightly different for EML, so we’ll show you how to do it both ways.
To create your export file, head over to WP Mail SMTP » Tools. Then, click on the Export tab at the top.
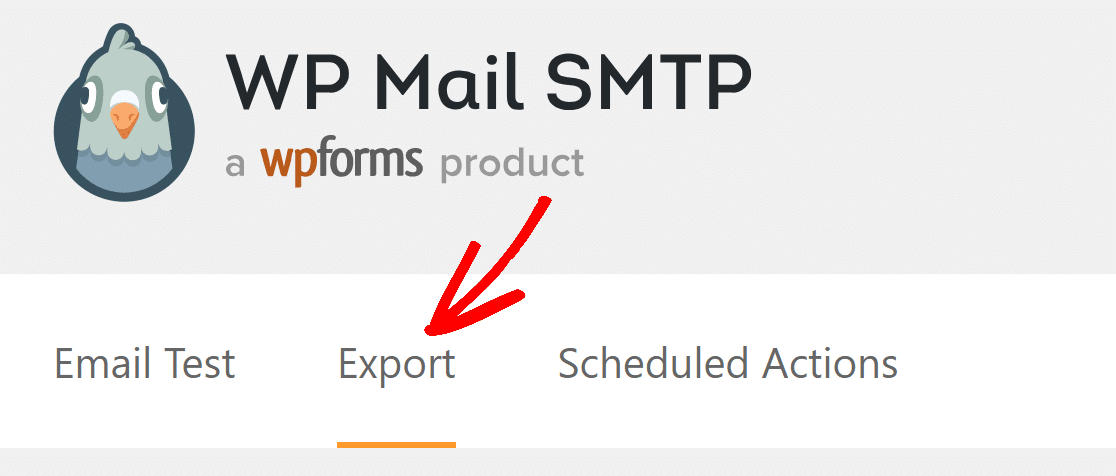
First, let’s look at exporting email logs and attachment details in a CSV or spreadsheet.
Exporting Email Attachments in CSV or XLSX Format
CSV and XLSX exports include a link to each attachment file, rather than including the files themselves. This helps to keep the file size small. First, select either CSV or Microsoft Excel under Export Type.
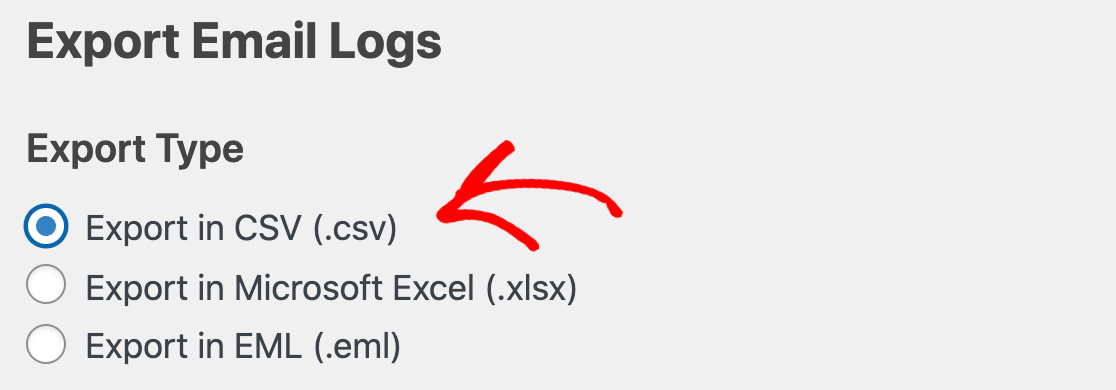
Under Common Information, make sure the Attachments checkbox is selected. This will add a column to your spreadsheet containing a direct link to each saved file.
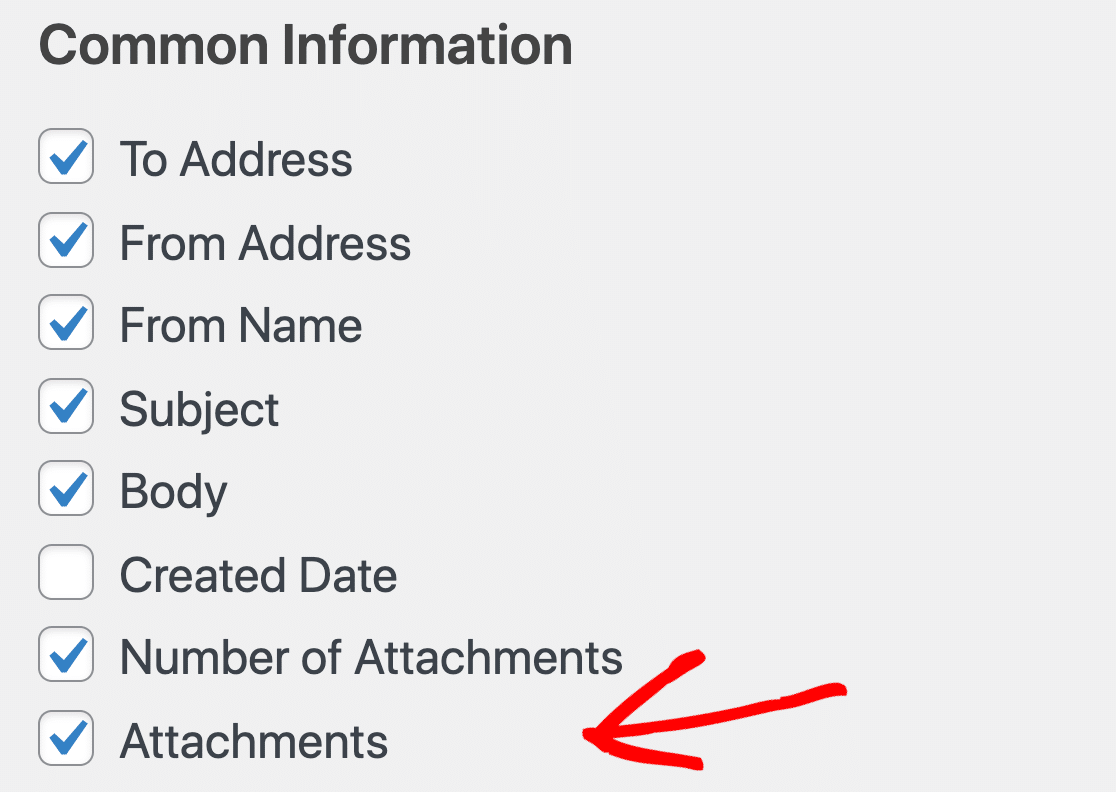
If you want, you can include more information and filter the export.
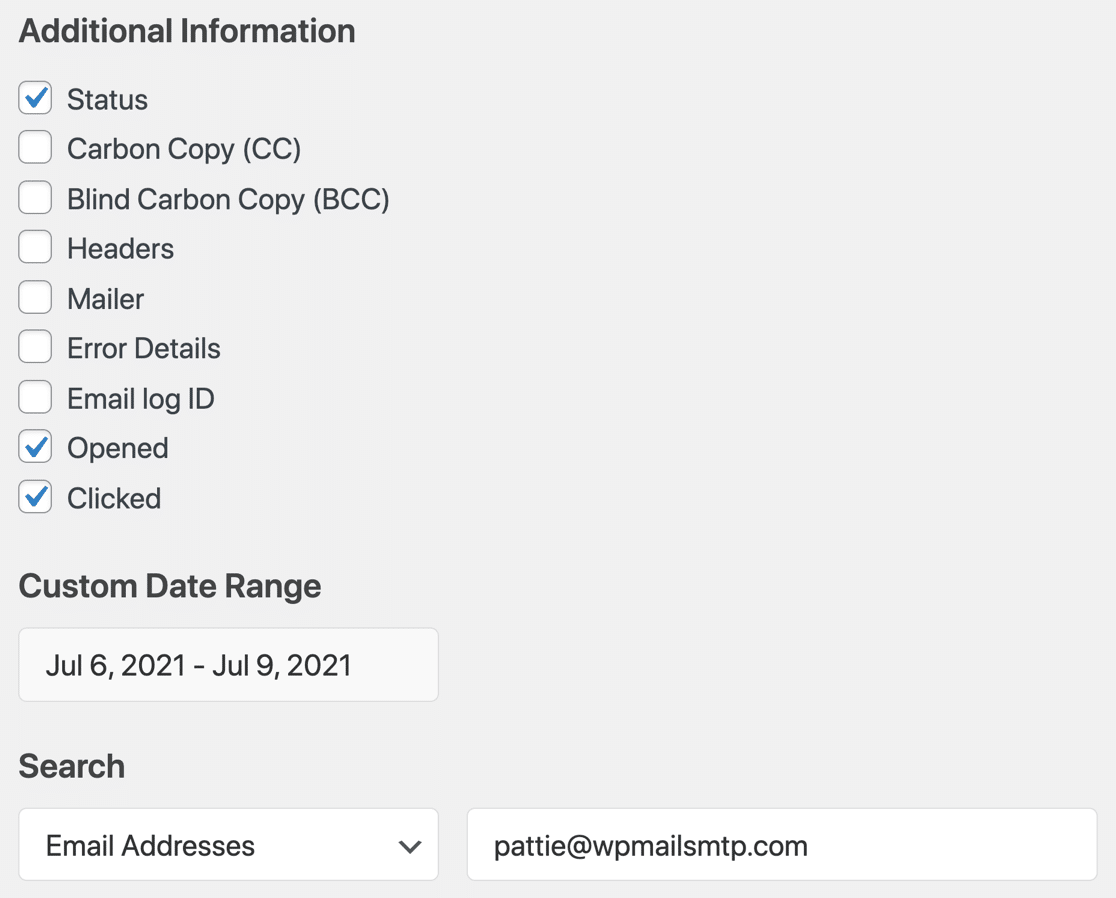
Click on the Download Export File and a file will be downloaded in the format you selected in export type. When you open it up, the attachments are listed in the Attachments column.

As I mentioned above, the file name has been replaced with a random name for security.
Exporting Email Attachments in EML Format
If you want to export the attachments themselves, it’s better to use EML format. That way, you’ll get a zip file of each email including the original attachments.
To export emails with their attachments, click EML in the Export Type section. EML files contain all the detail from the log, including the email content if you chose to save that.
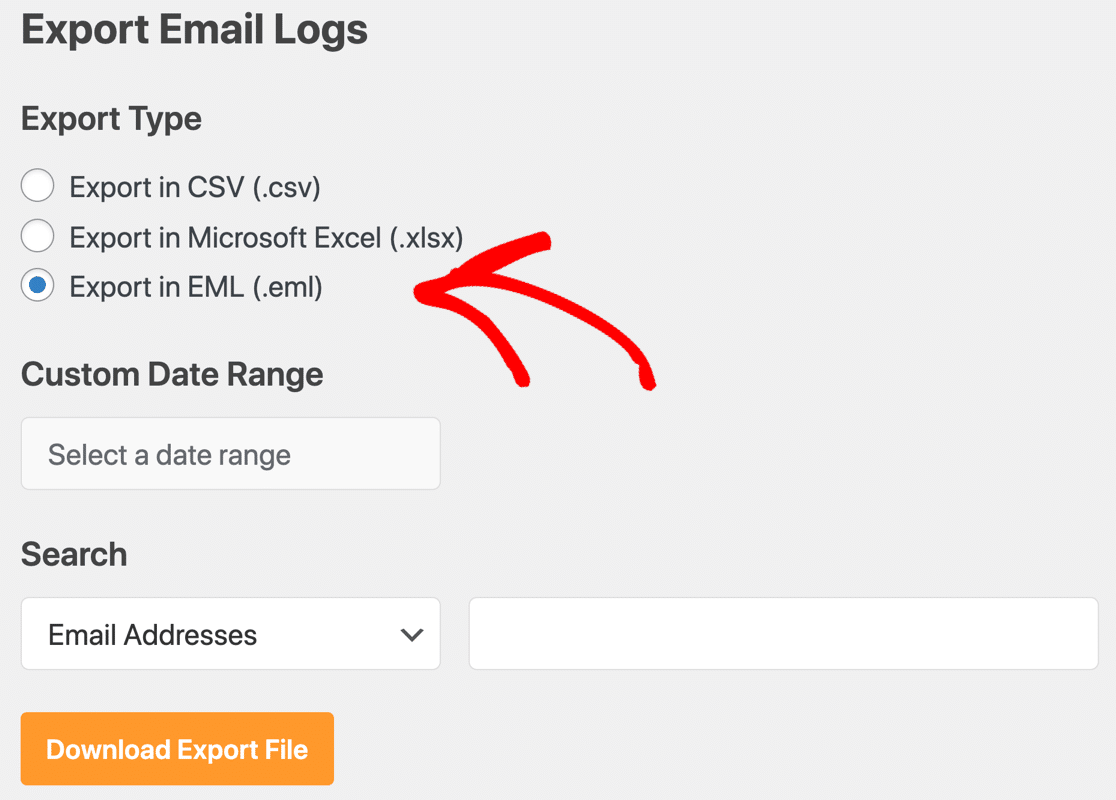
Now click Download Export File to download all the emails in EML format. Inside the zip file, you’ll see each individual email.

Click on any email to view the log and its attachments. This is an awesome way to preview custom email templates.
For example, if you’re using a WooCommerce email customizer plugin, you can export your templates in EML format and try opening them in different email clients.
FAQs about Saving Email Attachments in WordPress
Here are answers to the most common questions we get about archiving attachments sent from WordPress.
Where are the email attachments actually stored?
When you enable attachment logging in WP Mail SMTP, the files are securely saved in your website’s standard Uploads folder (typically wp-content/uploads/wp-mail-smtp).
For security, the plugin assigns a randomized filename to each attachment to prevent direct public access, but you will always see the original filename in your Email Log for easy identification.
Do I need WP Mail SMTP Pro to save attachments?
Yes, the ability to save, view, and export email attachments is a feature included in all WP Mail SMTP Pro and higher licenses.
The Pro version unlocks the Detailed Email Logs, which is the core feature that powers the attachment archiving functionality.
Does this work for attachments sent from my contact form plugin (like WPForms)?
Absolutely. WP Mail SMTP works at the WordPress level, so it will automatically save attachments from any plugin that uses the standard wp_mail() function to send emails.
This includes popular form builders like WPForms, Ninja Forms, and Formidable Forms, as well as e-commerce plugins like WooCommerce that send PDF invoices.
What happens to the saved attachment if I delete the email log entry?
If you delete an email log entry from the WP Mail SMTP Email Log, the corresponding attachment file will also be permanently deleted from your server. The attachment is directly tied to the log entry to ensure that your server doesn’t fill up with orphaned files.
Will saving a copy of every attachment slow down my website?
No, the process of saving an attachment is highly optimized and has a negligible impact on your site’s performance. The action happens in the background after the email has been sent.
However, over a long period, storing thousands of large files can consume your server’s disk space, so it’s a good practice to periodically review and clean out very old attachments.
Next, Enable Open and Click Tracking
Now you know how to save email attachments in WordPress using the WP Mail SMTP plugin. While you’re at it, make sure to turn on Open and Click tracking too.

Open and click tracking lets you see when your emails are being read. To see how it works, check out our article on how to enable open and click tracking for WordPress emails. Ready to log your emails?
Ready to fix your emails? Get started today with the best WordPress SMTP plugin. WP Mail SMTP Elite includes full White Glove Setup and offers a 14-day money-back guarantee.
If this article helped you out, please follow us on Facebook and Twitter for more WordPress tips and tutorials.

