AI Summary
Is Bluehost not sending emails from your WordPress website?
Emails from the website are important and we need to make sure they reach the right inbox.
In this guide, we’ll show you how to fix the Bluehost email deliverability issue using an SMTP plugin.
How Do I Fix WordPress Not Sending Email Problems?
You can fix the WordPress not sending email problem by using an SMTP plugin that re-routes all of your emails with the right authentications.
The most common reason for emails from your WordPress site to go missing is that your hosting service is not configured to send emails. WordPress, by default, uses the PHP wp_mail() function to send emails from the website. This isn’t a reliable way as its capabilities are tied to the server configuration.
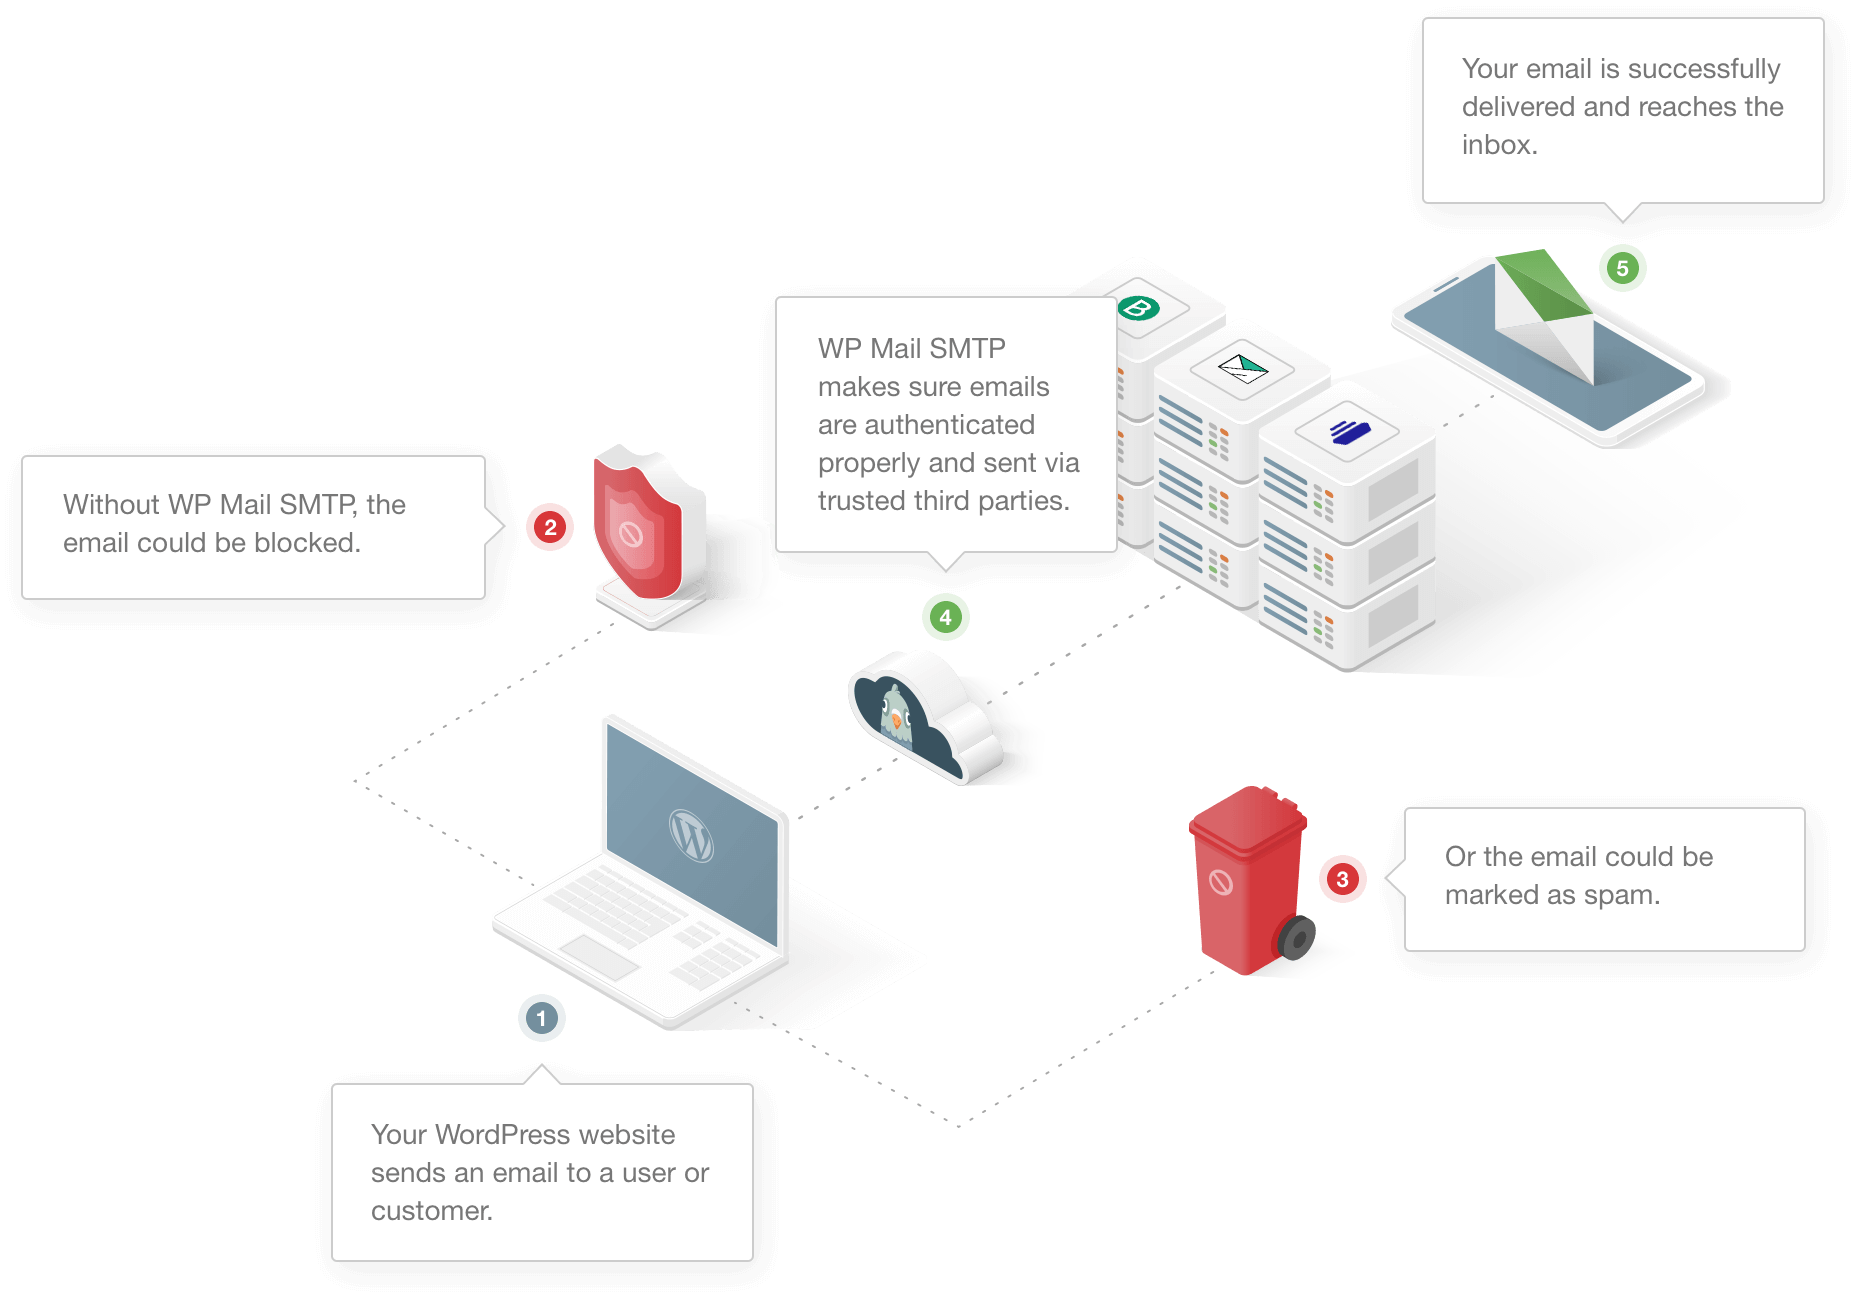
Another major problem with emails sent from WordPress is that they often fail the spam test. Major email services like Gmail have spam filters that detect automated emails from WordPress and mark them as spam.
We can fix the Bluehost WordPress not sending email problem by using an external email service like SendLayer. WP Mail SMTP connects your website to an external service and sends emails through it. This adds important verification to the messages that help them bypass the spam filter.
How To Fix Bluehost WordPress Emails Not Sending Issue
Step 1: Check Your Email Settings in Bluehost
All Bluehost plans include the email service. Apart from the basic plan, all other plans have unlimited email space.
If you are facing the Bluehost WordPress email not sending issue, a good starting point is to check if you have allocated limited space for that specific email.
To start, log in to your Bluehost account and from the sidebar, click on Advanced.
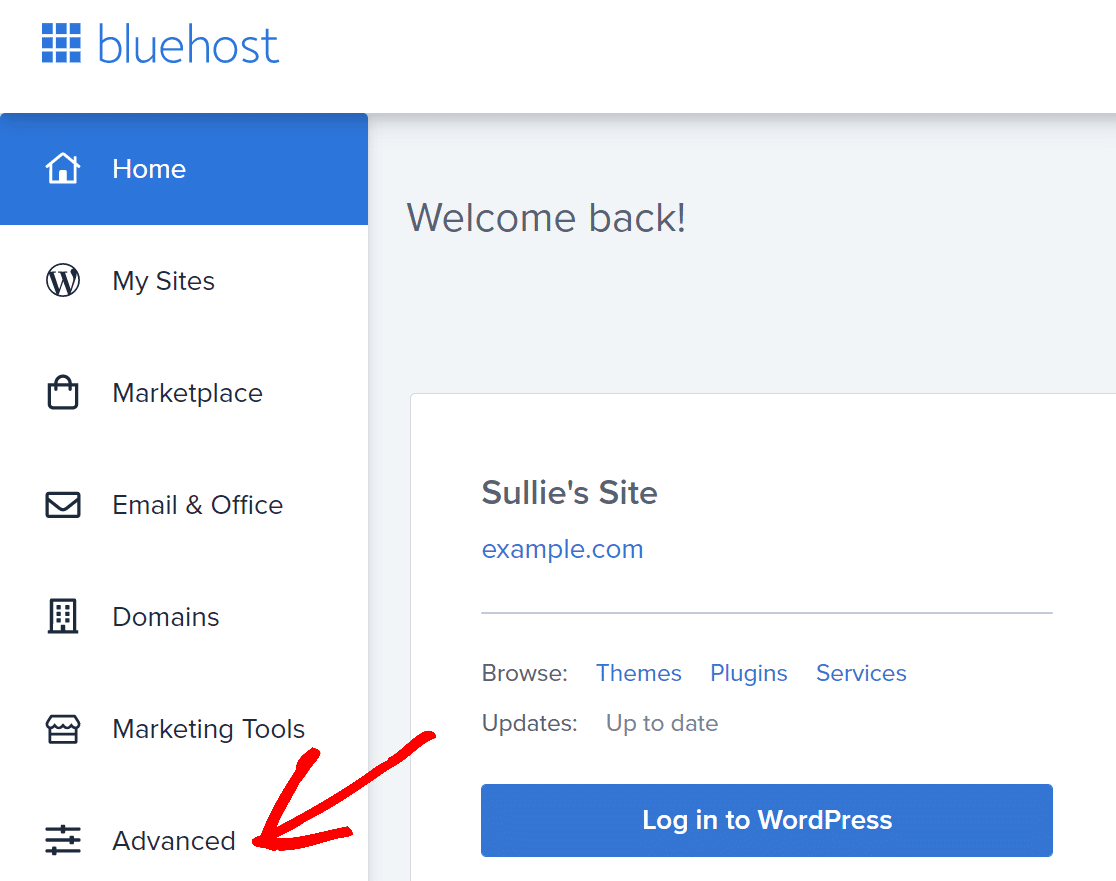
This will take you to the cPanel. Under the Email section, click on Email Accounts.
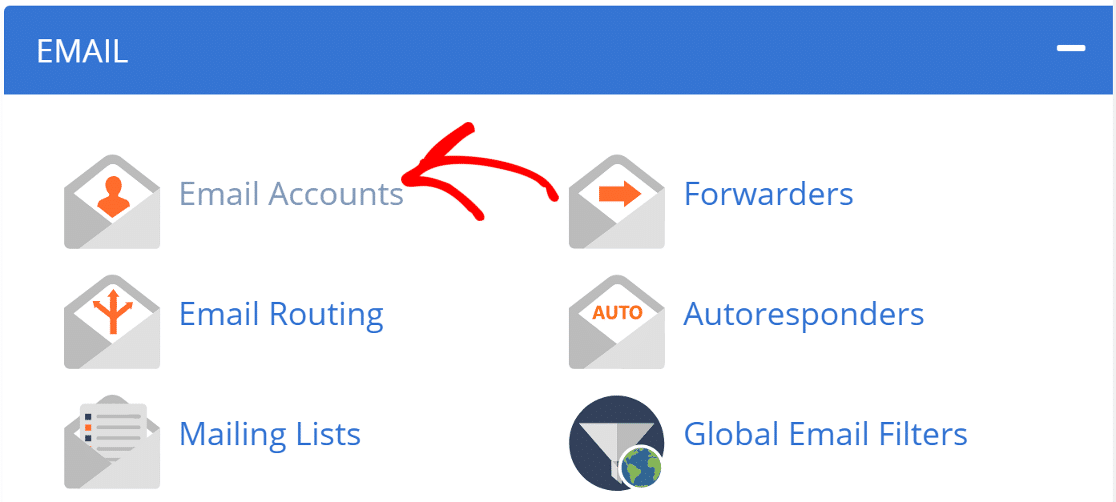
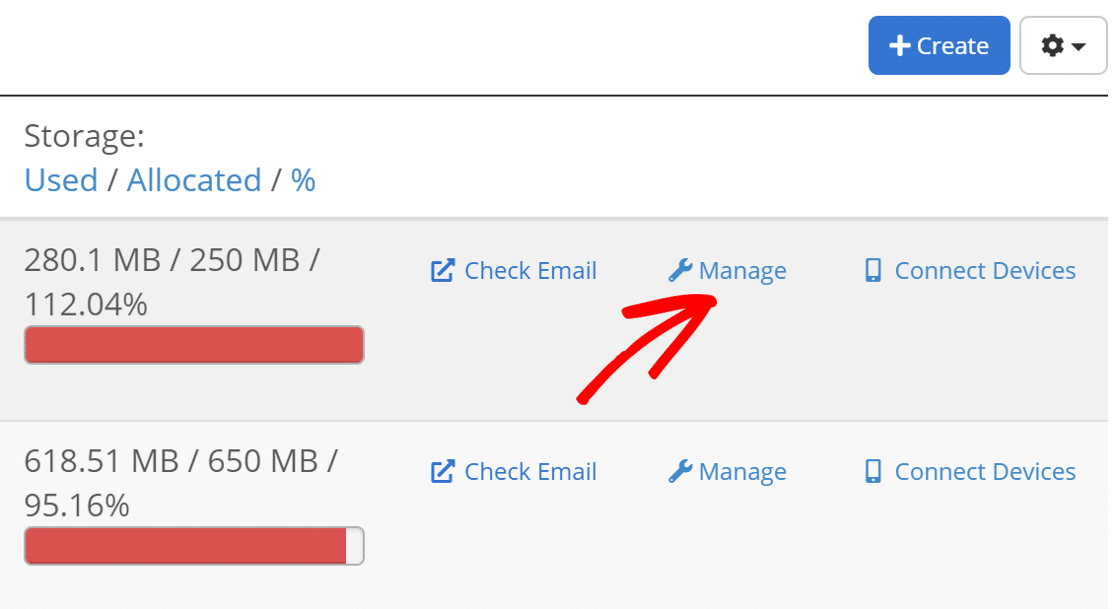
Here, you will see all the different email accounts you have created on this hosting. Look for the email address you wish to update, then click Manage.
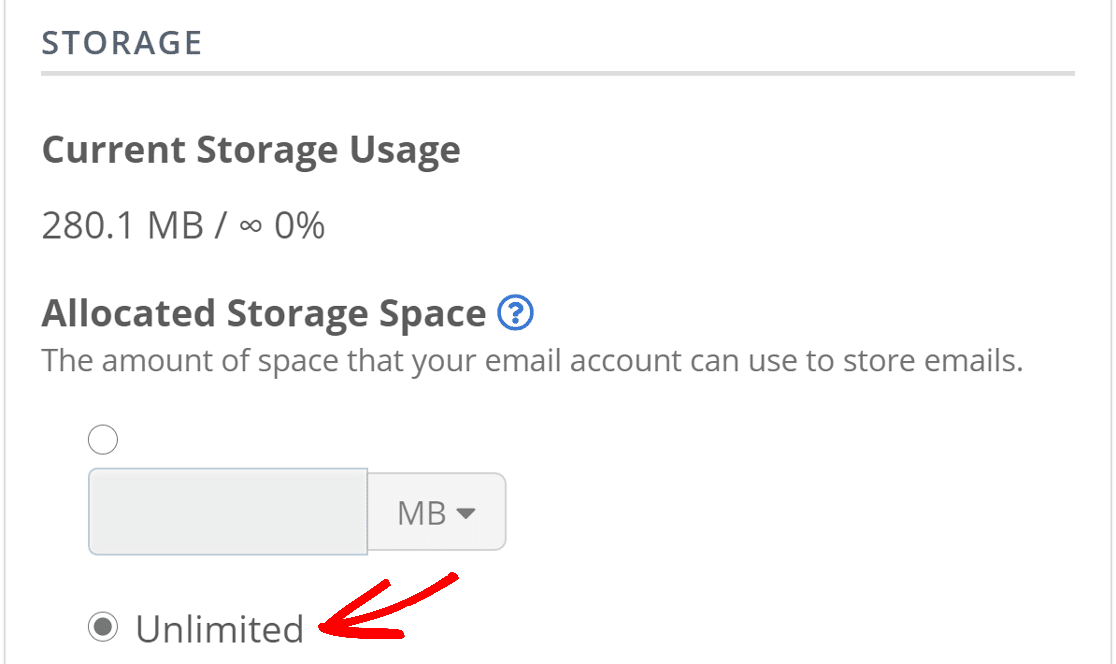
Scroll down to the Allocated Storage Space section. Here, change the email storage to unlimited.
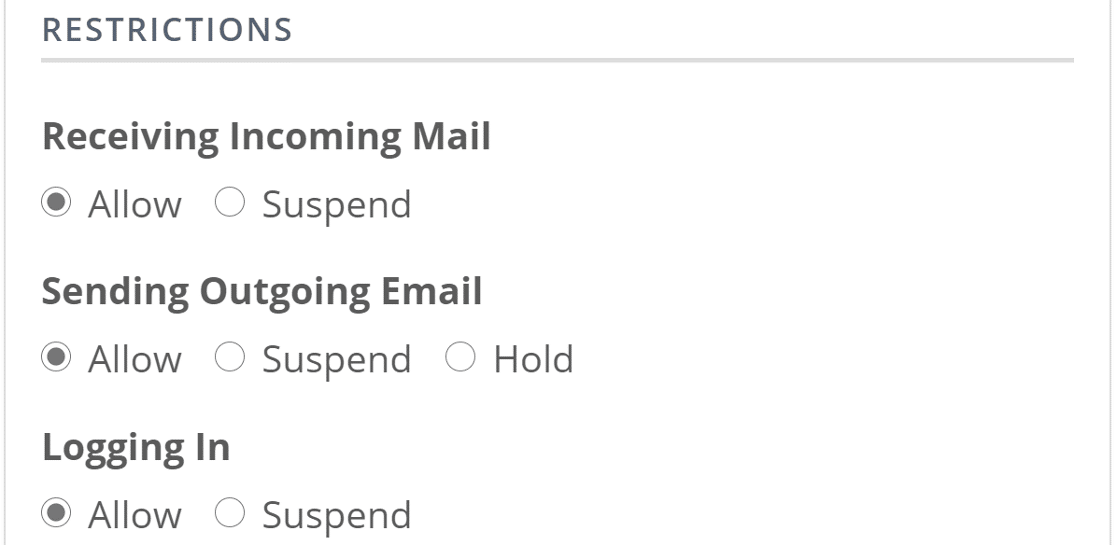
Scroll down and under Restrictions, make sure Allow is selected next to each option.
Click on Update Email Settings at the bottom of the page to save the settings.
Now that we have enough space to send emails, let’s check the contact form settings.
Step 2: Check Contact Form Settings
The emails from the website might not arrive if the contact form on your website is not correctly set up. WordPress has multiple contact form plugins and each works differently.
We have covered the email deliverability issue with some of the most popular contact form plugins on this blog. If you use any from the list, click the below link and follow the steps:
- WPForms
- Contact Form 7
- Elementor Form
- Ninja Forms
- Gravity Forms
- Jetpack Contact Form
- Formidable Forms
- Beaver Builder Contact Form
- Contact Form by BestWebSoft
- SiteOrigin Contact Form
Once you’ve set the correct settings for the contact form, switch back to this guide and follow the steps to install the WP Mail SMTP plugin.
Step 3: Install the WP Mail SMTP Plugin
WP Mail SMTP is the best WordPress SMTP plugin. Instead of relying on your hosting service, it solves the Bluehost WordPress email not sending issue by connecting your website to an external email service.
This adds important authentication to your emails and helps them bypass the spam filters.
Install the Plugin
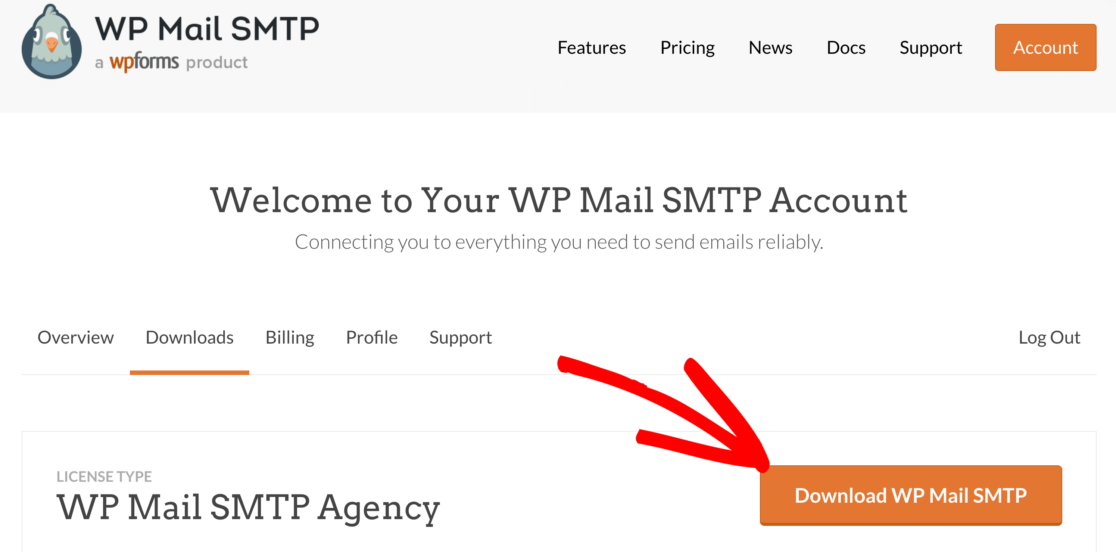
To start, go to your WP Mail SMTP account and under the Downloads tab, click the orange Download WP Mail SMTP button to download the latest version of the plugin.
Switch back to the WordPress dashboard and upload the zip file to the Plugins page. If you need help with this part, you can refer to this guide that explains how to install a WordPress plugin in more detail.

After you’ve installed the plugin, make sure you Activate it. This will start the Setup Wizard in your browser which will make it easy to configure the plugin.
Connect Your Website to SMTP Service
In this step, we’ll choose a mailer service that will fix the Bluehost WordPress not sending email issue.
Click on the Let’s Get Started button to begin.

The mailer service will depend on a lot of factors. Here are a few tips to help you choose the right one:
- For large sites that send lots of emails on daily basis, transactional email services like SendLayer, SMTP.com, and Brevo (formerly Sendinblue) are the ideal choice because of the reliability they offer.
- For small business sites or blogs that have moderate traffic, Gmail or Google Workspace is a great option. You can also use a Gmail alias to send WordPress emails if you want to.
- If you want to use the SMTP service provided by Bluehost, you can choose the Other SMTP option and enter the cPanel email credentials. With WP Mail SMTP, you can avoid exposing the credentials in your WordPress dashboard by using constants to secure your SMTP settings.
Go ahead and choose the email provider that you think is the best fit for you.
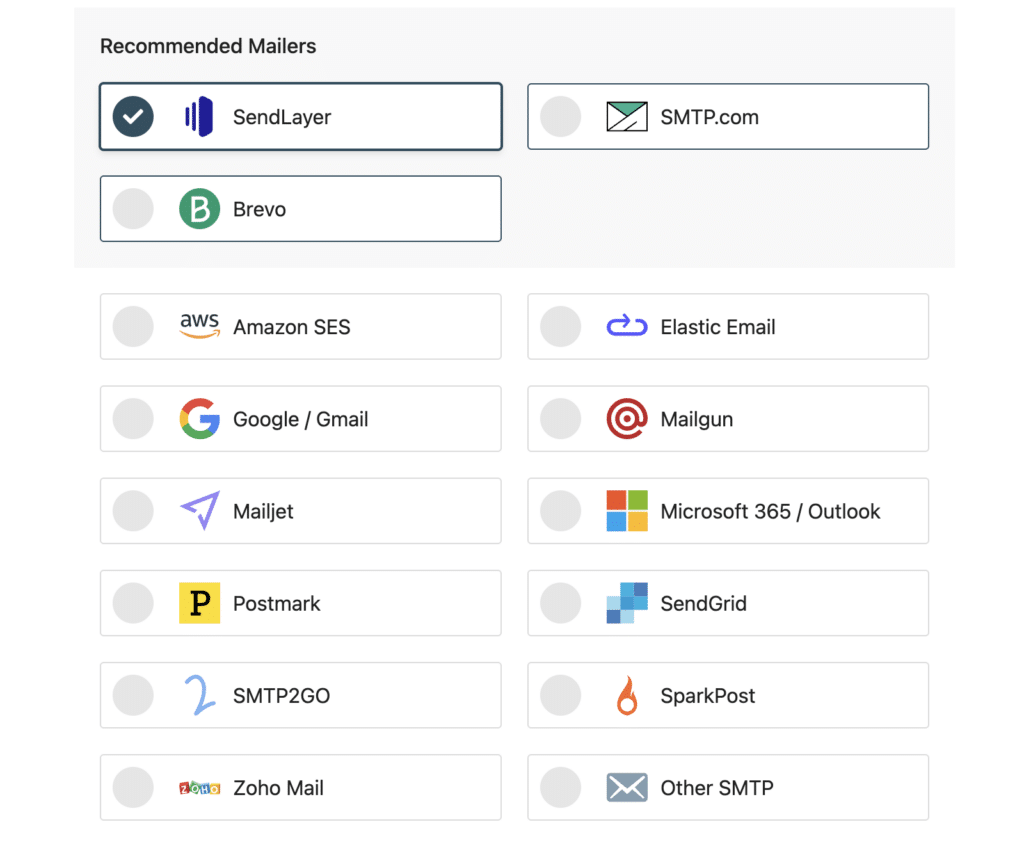
Open the documentation page and go through the steps to set up the service on the mailer website.
Want to set up multiple mailers? You can do so in the Additional Connections settings after you finished the Setup Wizard. Then select a Backup Connection and configure Smart Routing.
When you have set everything up, switch back to this guide and follow the steps below.
Enable Email Logging (Optional)
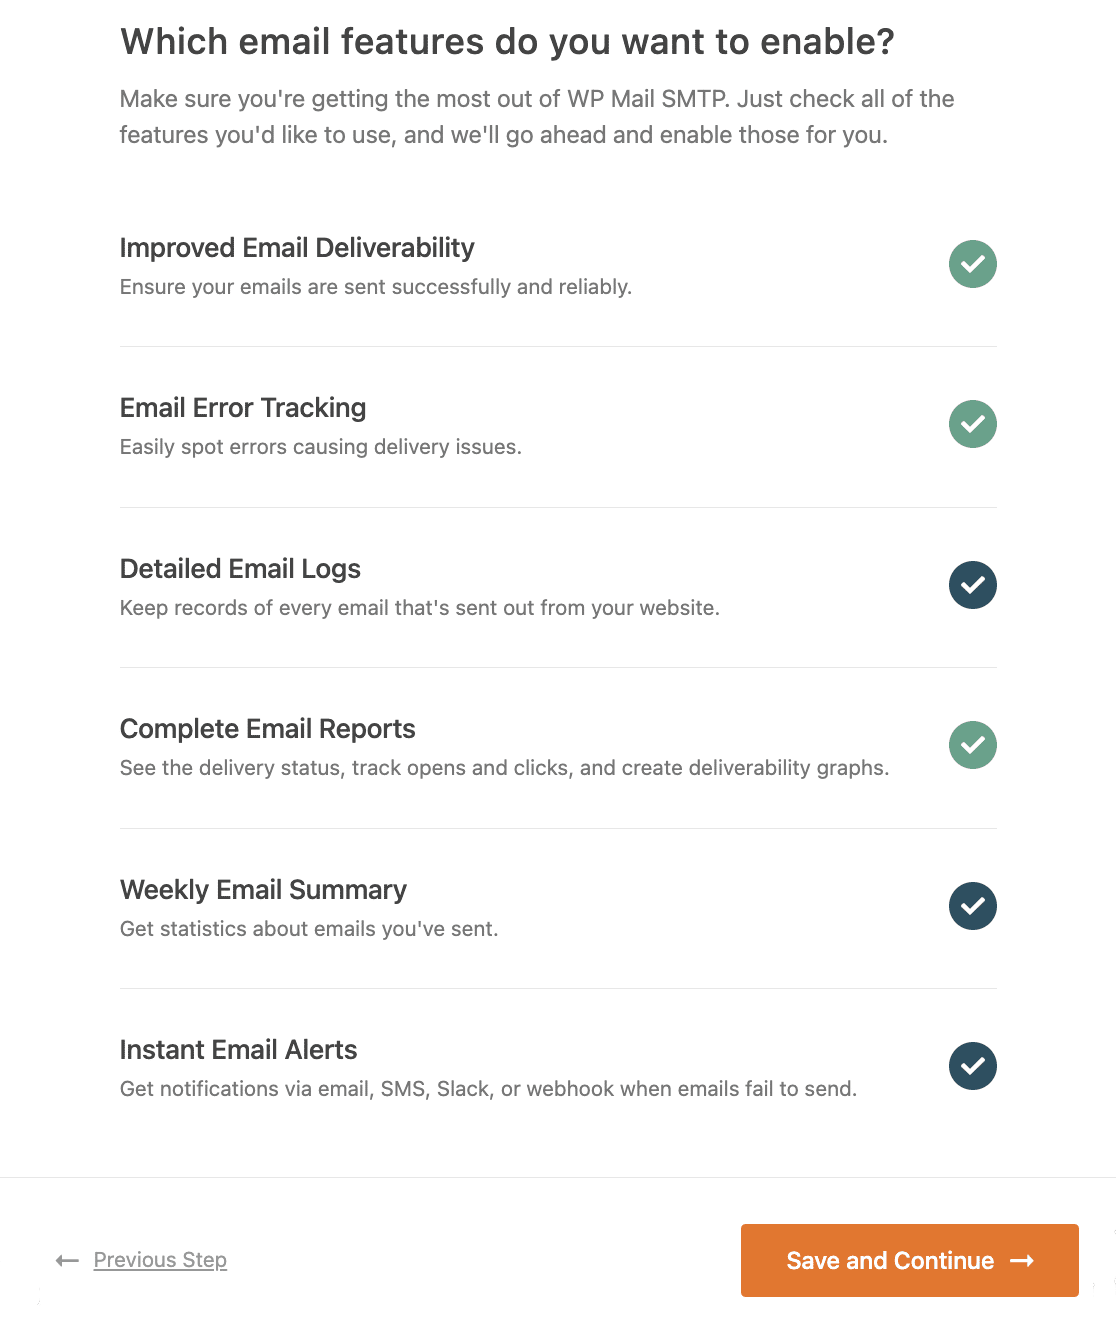
In the next step, WP Mail SMTP will ask you which feature you’d like to enable. By default, two options will be enabled for you.
- Improved Email Deliverability
- Email Error Tracking
In our Pro version, the Detailed Email Logs will let you keep a track of all the emails that are being sent from your website. They provide Complete Email Reports with data about your site’s emails.
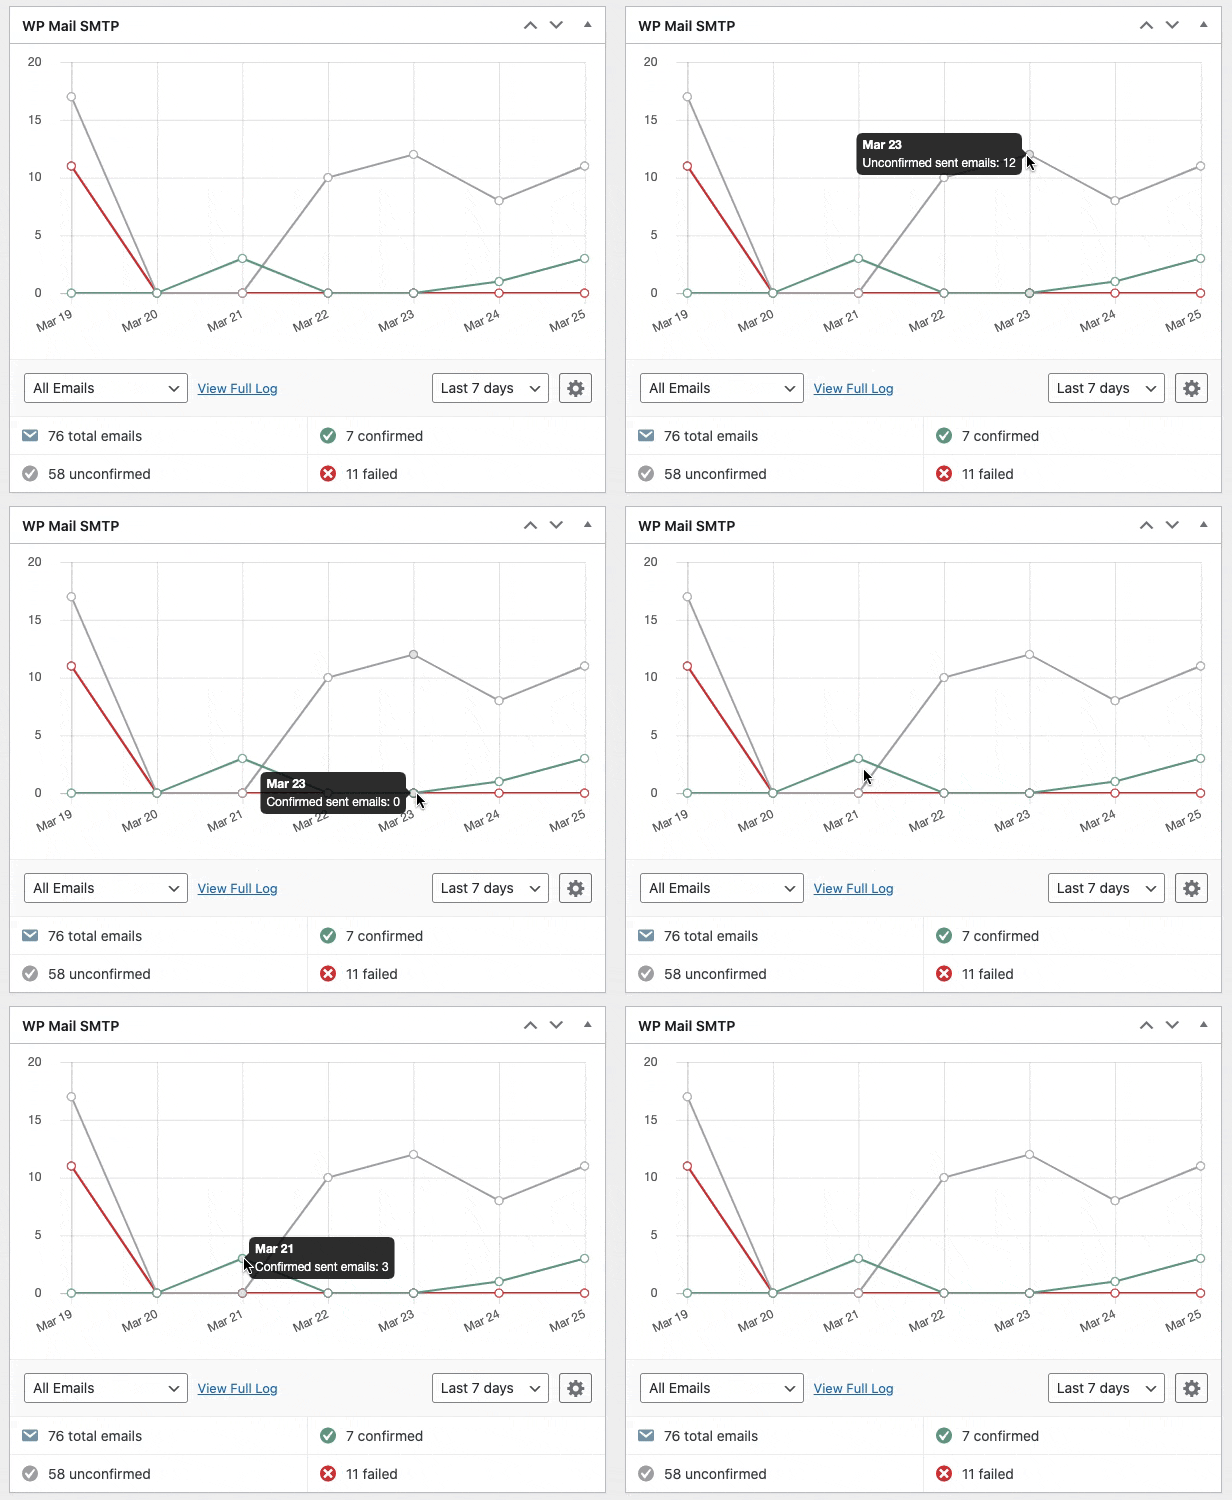
WP Mail SMTP also has a helpful dashboard widget that displays the log in the form of a chart.
And you can turn on the Weekly Email Summary to see an overview of the past week’s emails in your inbox.
Another feature you can enable is Instant Email Alerts. When your site fails to send an email for any reason, you’ll receive a notification about.
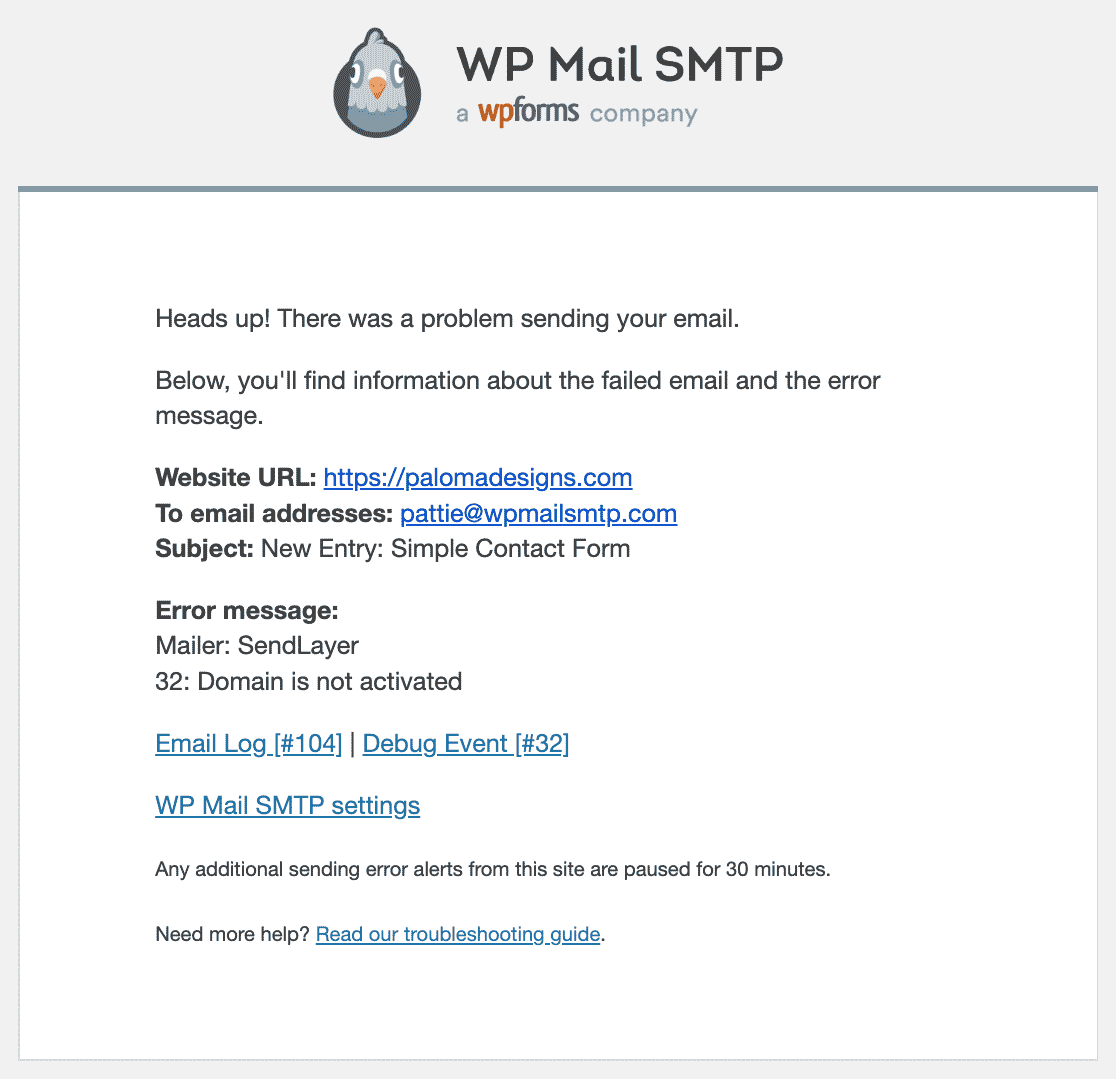
This message includes information to help you troubleshoot the issue and get your emails working again.
On the next screen, you can configure more email log settings.
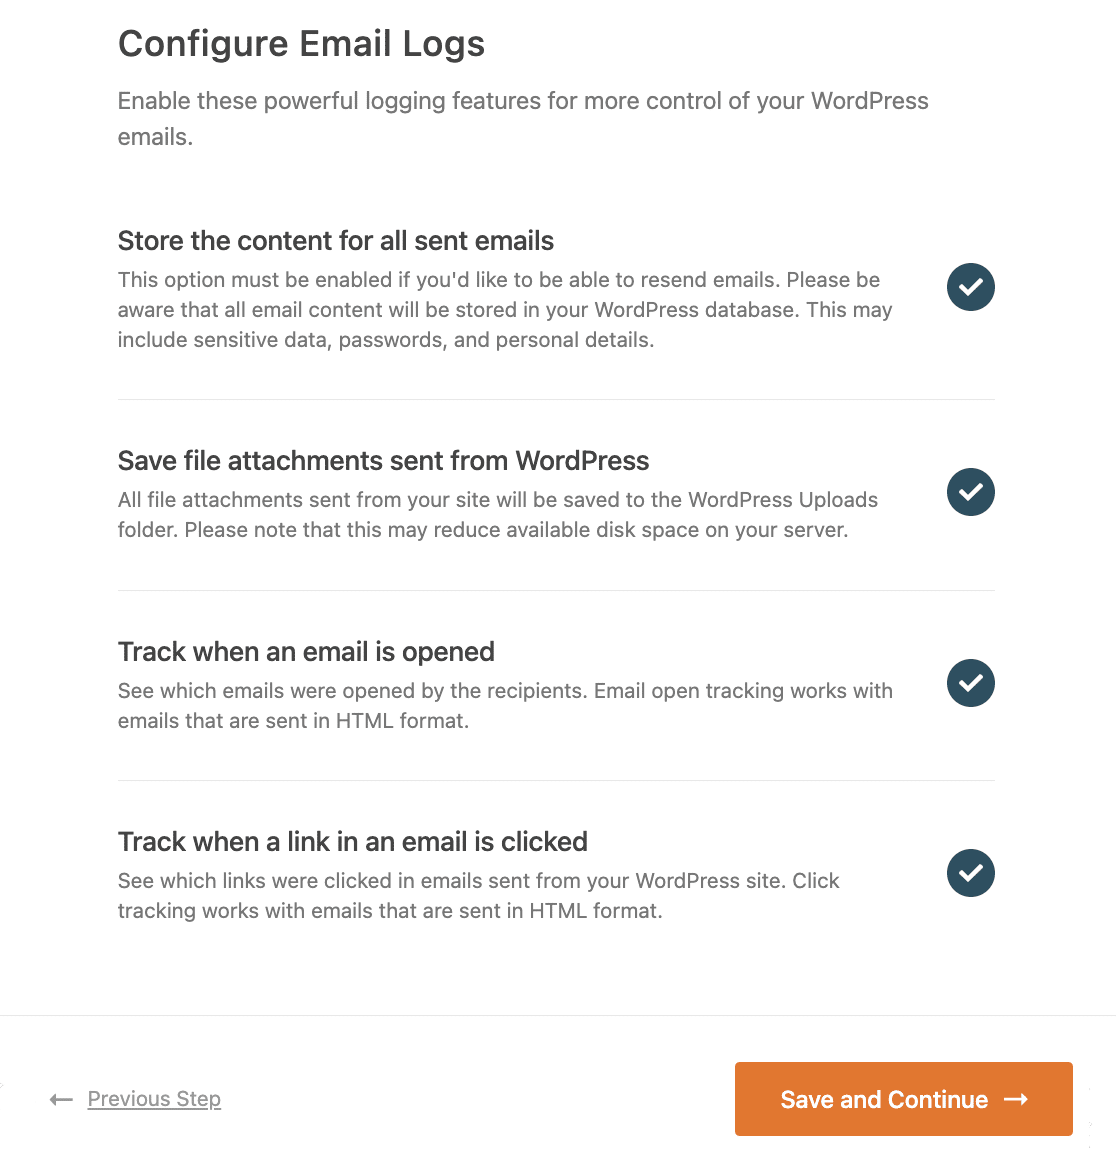
These options will let you save the content of your emails, store attachments for future reference, and trac
In addition to seeing your emails’ delivery statuses, turning on email logs will let you:
- Export your logs to a spreadsheet
- Print logs
- Save attachments
- Track email opens and link clicks
- And more
Read our article on how to log WordPress emails to see how this works.
For the final step, go to your WP Mail SMTP account and grab the license key from the Downloads tab. Paste it here to enable extra features and automatic plugin updates.

That’s it! You’ve done everything to fix the Bluehost WordPress not sending email issue.
Next, Use WPForms to Build a Contact Form
The emails from the website go missing due to misconfiguration in the contact form settings. Not all contact form plugins work the same way.
WPForms is the most popular contact form plugin with more than 6+ million active installations. It works great with most of the plugins on WordPress.
WPForms and WP Mail SMTP work great hand in hand and you are less likely to face any email issue. If you want to know more about what WPForms is, you can read this post which explains it in detail.
Ready to fix your emails? Get started today with the best WordPress SMTP plugin. If you don’t have the time to fix your emails, you can get full White Glove Setup assistance as an extra purchase, and there’s a 14-day money-back guarantee for all paid plans.
If this article helped you out, please follow us on Facebook and Twitter for more WordPress tips and tutorials.

