AI Summary
Is WordPress not sending the admin email change confirmation email? This email is crucial if you want to change your site admin email in WordPress.
The tricky part is, WordPress does try to send the email. But if your site isn’t set up to send emails the right way, it either gets lost or blocked.
If that sounds like what you’re dealing with, don’t worry. I’ll walk you through what’s actually happening behind the scenes and how to fix it so the email goes through without fail.
Why the Confirmation Email Doesn’t Arrive?
WordPress doesn’t have a built-in email server. So by default, it tries to send emails using PHP mail, a function that runs on your hosting server.
The problem? Most hosting providers don’t treat those messages as reliable, especially if you’re using shared hosting. A lot of them get blocked before they even leave the server.
The easiest and most reliable fix is to set up SMTP (Simple Mail Transfer Protocol). This method sends your emails through a real email provider, like Gmail, Outlook, or your domain’s email.
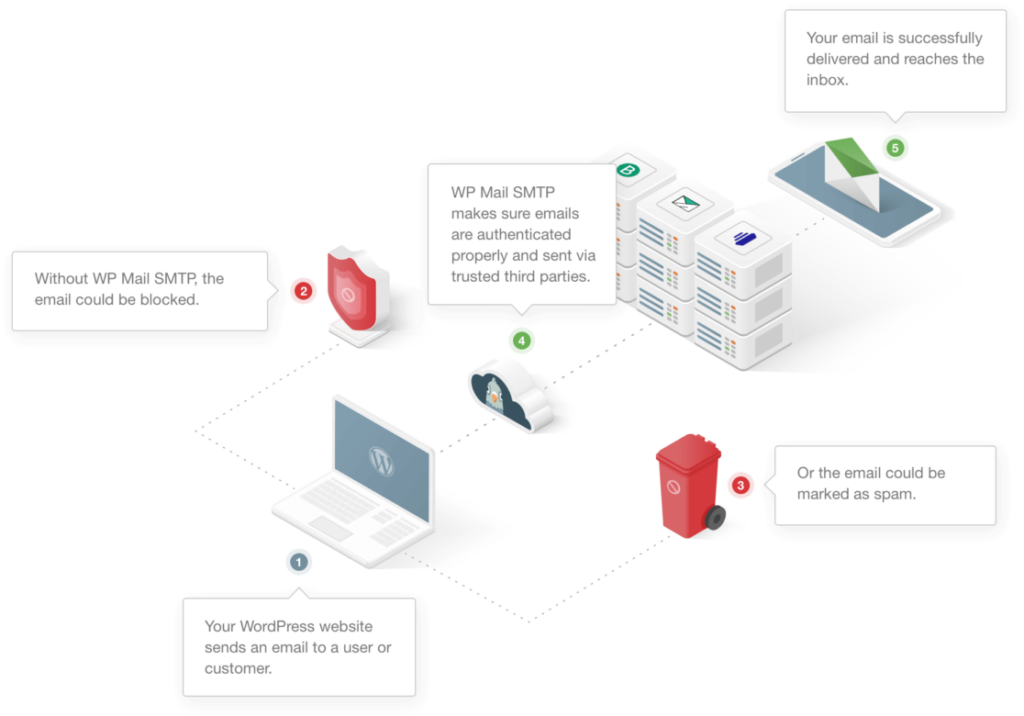
Which plugin should you use? You can easily fix WordPress’s failure to send emails by using the WP Mail SMTP plugin, which connects your website to a third-party email provider.
You just install the plugin, choose your email provider, and follow the step-by-step setup wizard. You’ll also be able to see a log of sent emails and resend any that failed.
I’ll show you how to install WP Mail SMTP in this guide. Once you’ve done that, you can request the admin email change again, and you’ll receive the notification without any problems.
How To Fix WordPress Admin Email Change Not Sending Confirmation
Here’s how to get started with WP Mail SMTP to fix WordPress admin email change not sending confirmation.
- Step 1: Install the WP Mail SMTP Plugin
- Step 2: Set Up a Mailer Connection
- Step 3: Enable Email Logging (Optional)
- Step 4: Resend the Admin Email Change Notification
- Step 5: Control WordPress Default Notifications
Step 1: Install the WP Mail SMTP Plugin
WP Mail SMTP is the best SMTP plugin for WordPress. We’re going to install it to fix your emails before we try to resend the admin email notification.
To start, head over to the WP Mail SMTP website and log in to your account. Click the orange button under the Downloads tab to grab the latest version of the plugin file.
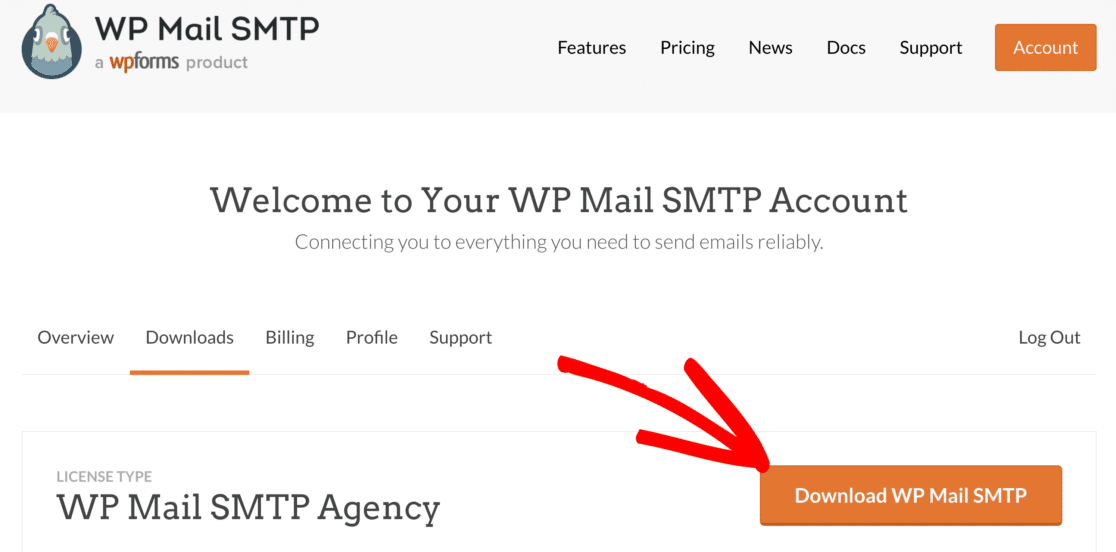
Switch to the WordPress dashboard of your website and upload the zip file to the plugins page. If you are new to WordPress or need help with this part, you can check out this guide on how to install a plugin.

Once the plugin is installed, be sure to Activate it. As soon as you do that, the Setup Wizard will start in your browser. Now we’re ready to connect your WordPress site to an SMTP server or 3rd party email provider.
Step 2: Set Up a Mailer Connection
In this step, we’ll connect the website with a dedicated mailer service. To begin, click the Let’s Get Started button.

WP Mail SMTP allows you to select from a variety of mailing services. Here are a few tips to help you pick the best one for your site:
- We recommend that you use a transactional email provider for WordPress. This will give you professional service and near-instant email delivery. SendLayer, SMTP.com, and Brevo (formerly Sendinblue) are all good solutions.
- If you already have access to an SMTP service, you can choose the Other SMTP option and enter the credentials. With WP Mail SMTP, you can avoid exposing the credentials in your WordPress dashboard by using constants to secure your SMTP settings.
Go ahead and choose the email provider that you think is the best fit for your business.
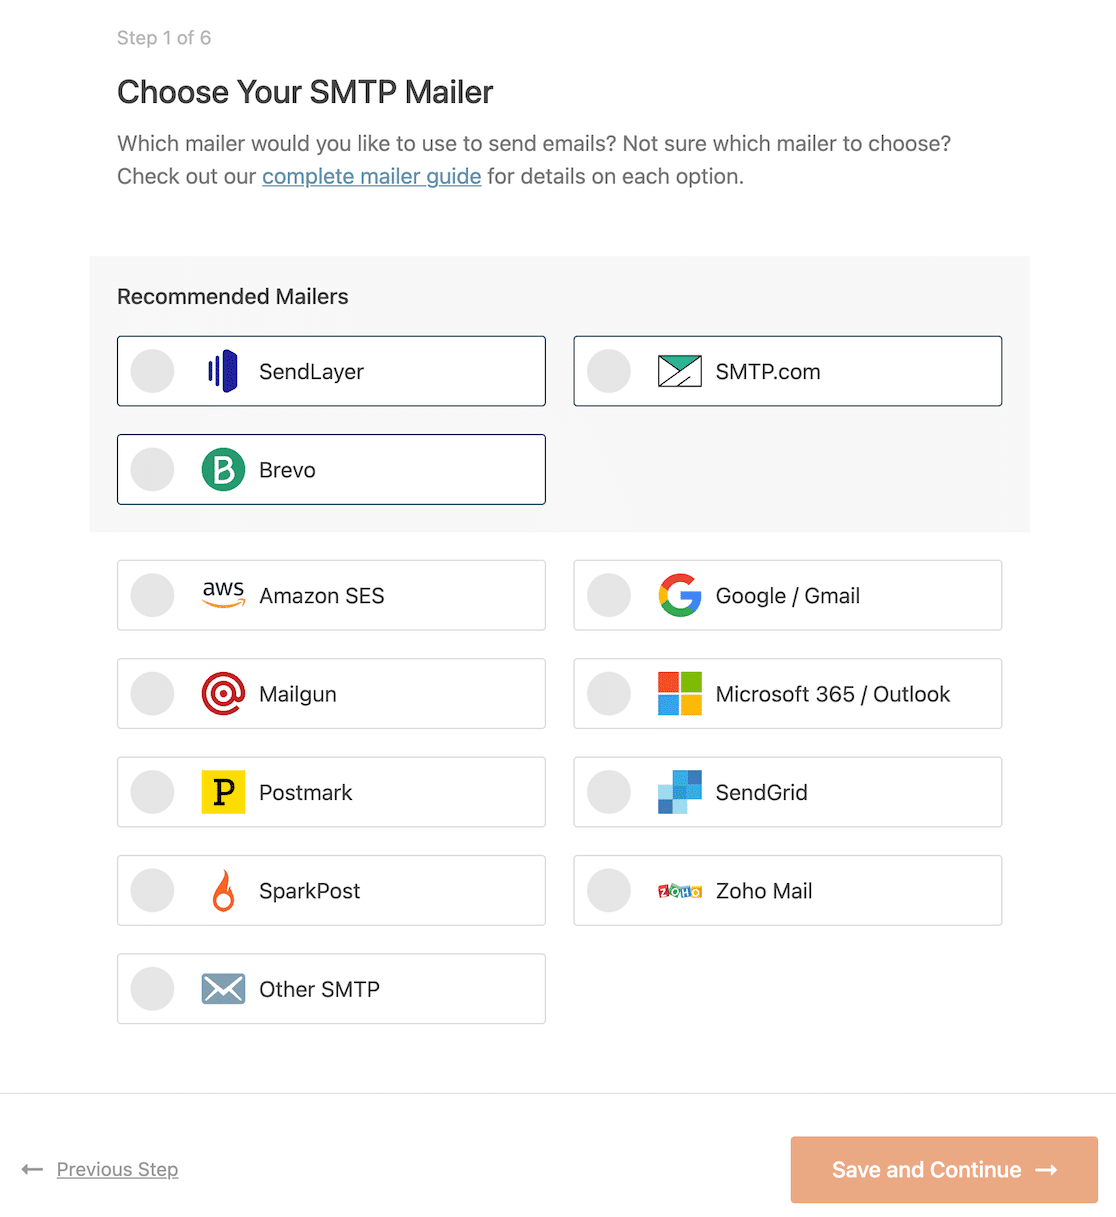
Once that’s done, you’ll want to set up your new email provider. Open the documentation page and go through the steps:
| Mailers available in all versions | Mailers in WP Mail SMTP Pro |
|---|---|
| SendLayer | Amazon SES |
| SMTP.com | Microsoft 365 / Outlook.com |
| Brevo | Zoho Mail |
| Google Workspace / Gmail | |
| Mailgun | |
| Postmark | |
| SendGrid | |
| SparkPost | |
| Other SMTP |
If you want to set up multiple mailers, you can do so in the Additional Connections settings once you’ve finished the Setup Wizard.
Then you can select a Backup Connection and configure Smart Routing. When you have set everything up, switch back to this guide.
Step 3: Enable Email Logging (Optional)
At the end of the Setup Wizard, you’ll be able to turn on the Detailed Email Log if you have a Pro license.
The email log saves information about every email that is being sent from your website, including the subject line, recipient, and headers, in Complete Email Reports.
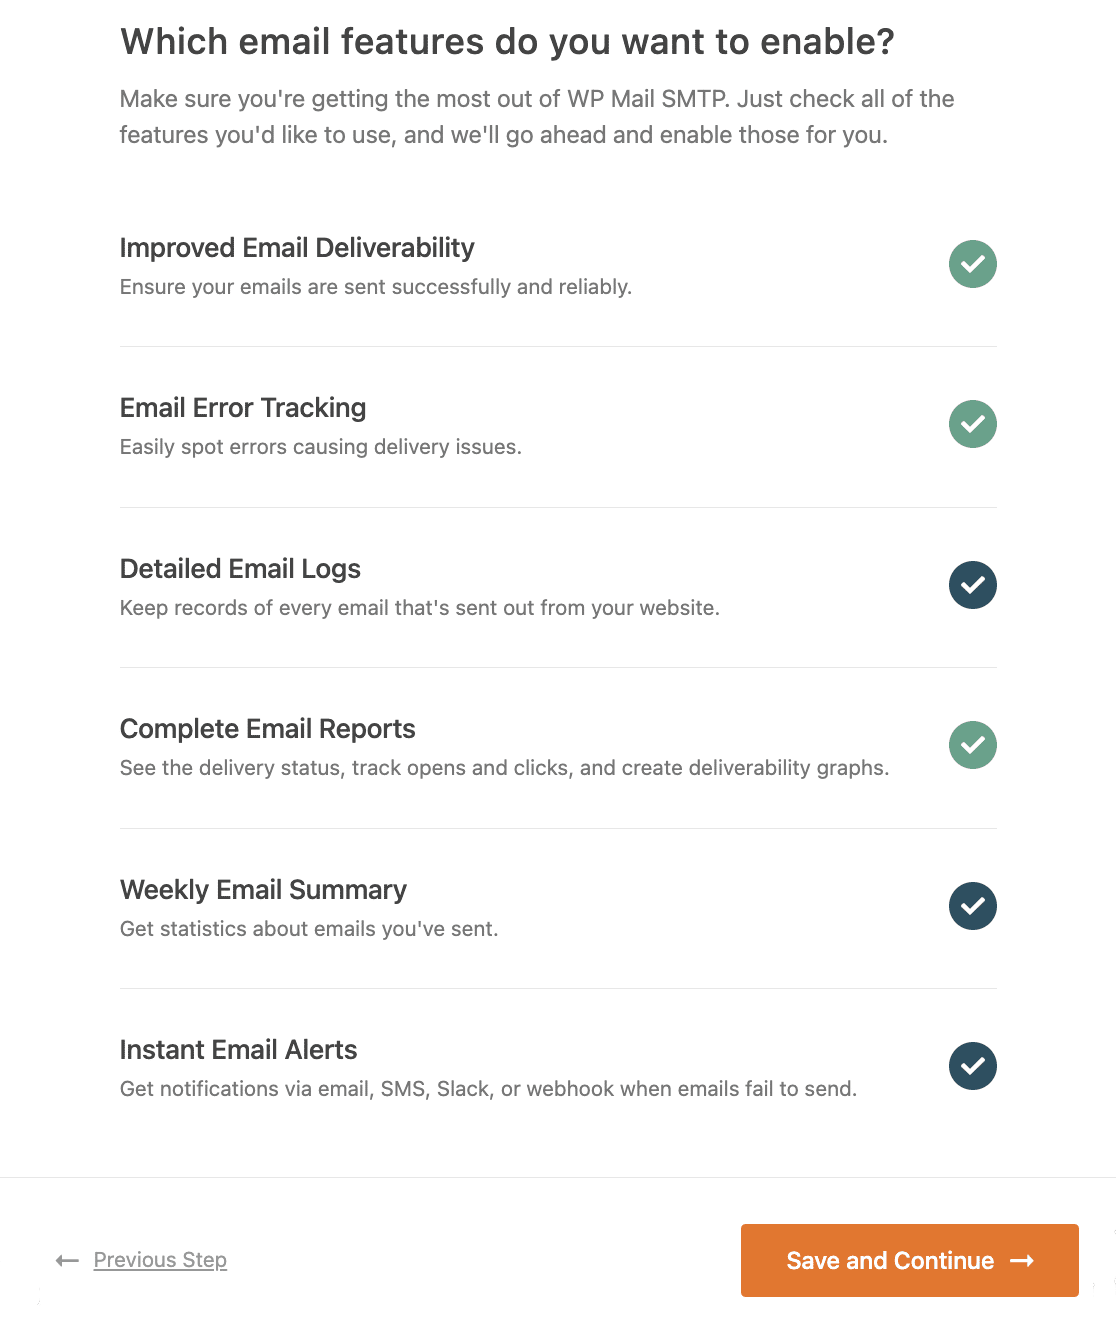
The Weekly Email Summary will send you an overview of your logs each week. You may also want to enable Instant Email Alerts so you’ll know right away if your site fails to send an email.
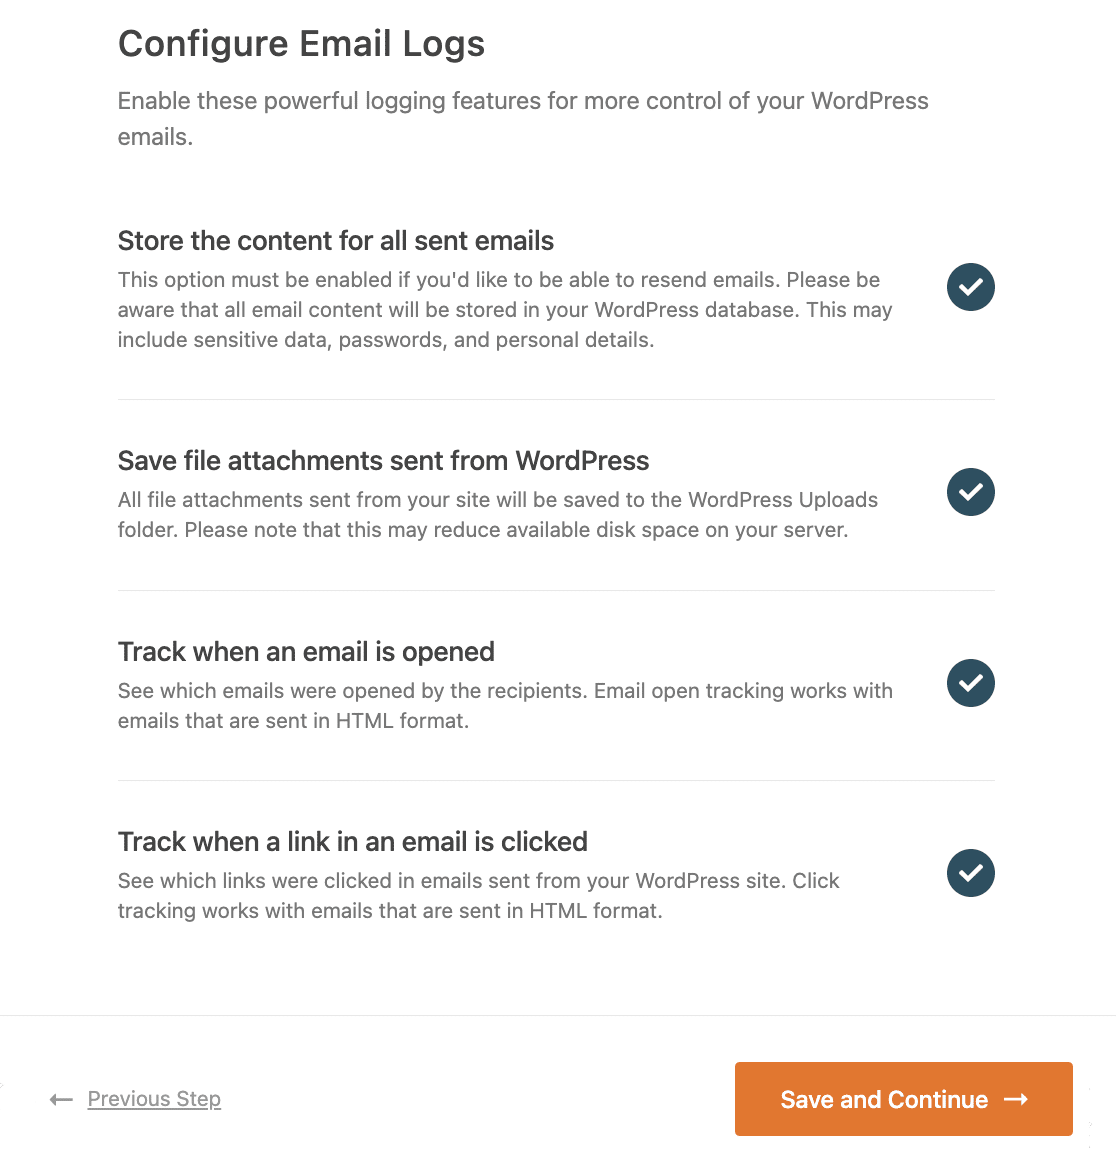
On the next screen you can enable some advanced email logging options. Turning on all of these options will give you access to:
- Full email logging: Save a copy of the body of each email along with the headers
- Open and click tracking: See open and click analytics for your WordPress emails
- Save email attachments: Store every attachment sent from WordPress – ideal if you want to save copies of WooCommerce invoices or file attachments
- Export email logs: Export details of sent emails and any attachments that were originally sent with them
- Export in EML format: Export a complete copy of any sent email and its attachments
- Email resend: Resend emails individually or in bulk
Read our article on how to log WordPress emails to get more details. For the next step, copy the license key from your WP Mail SMTP account and paste it into the box to enable the Pro features and future automatic updates.

That’s it! You’ve done everything you need to do to fix your WordPress emails. Let’s go ahead and change the admin email address now to resend the confirmation email.
Step 4: Resend the Admin Email Change Notification
If you’ve changed your admin email and nothing seems to happen, you probably already know that WordPress is still waiting on that confirmation click.
So, head to your WordPress dashboard, go to Settings » General, and then look for the Administration Email Address field.
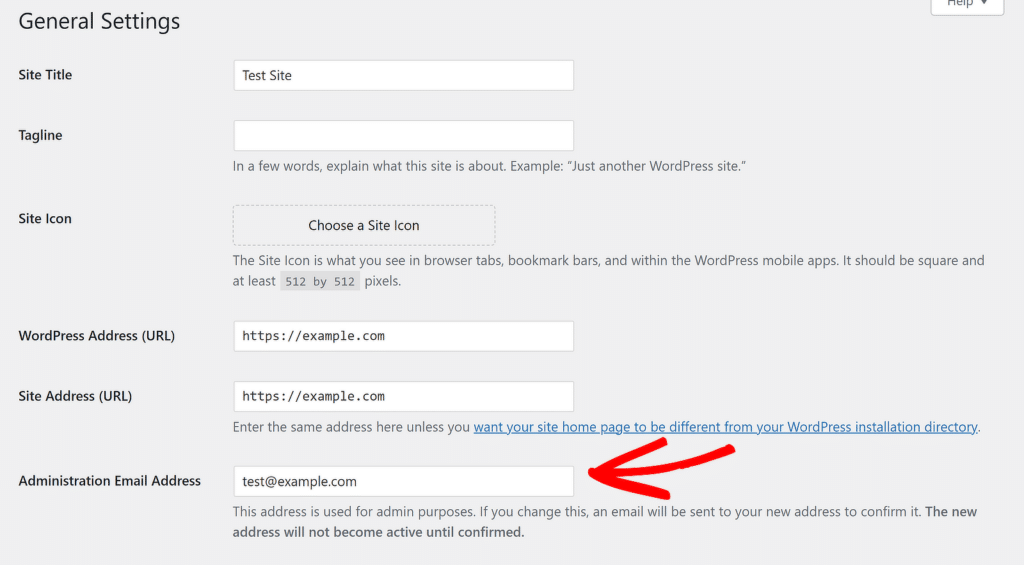
If you see a message under that field saying something like: “There is a pending change of the admin email to [email protected]”, you know the new email hasn’t been verified yet.
With SMTP now set up, you should be able to receive emails easily, so just resend the confirmation by saving the same new email again and check your inbox!
In the final step, I’ll show you a quick tip that’ll help you to control the email notifications you get from WordPress.
Step 5: Control WordPress Default Notifications
Apart from the admin email confirmation, WordPress also sends out default email notifications for activity on your website, like:
- New user registration notifications
- Plugin and core update notifications
- Password reset emails
- GDPR data requests
- And more
WP Mail SMTP lets you easily control the default notifications and disable them. To disable notifications, go to WP Mail SMTP settings and switch to the Email Controls tab.

Here, you’ll find all default emails that WordPress sends and a toggle to control them. You can quickly turn OFF the ones you don’t want to receive.
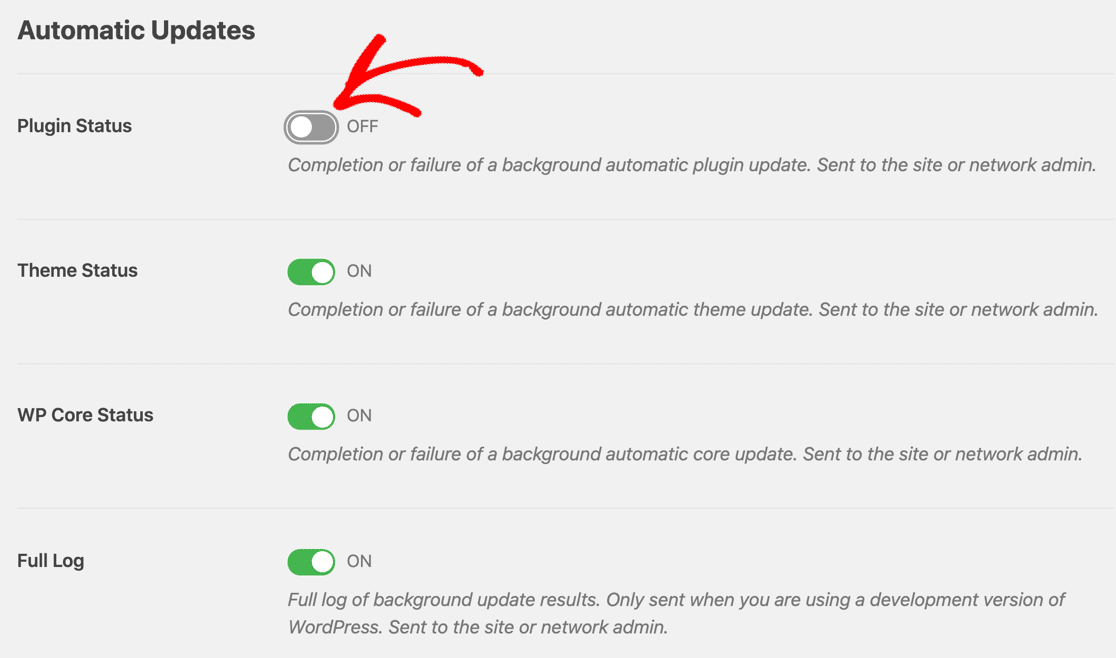
And that’s it! You fixed WordPress not sending admin email change notifications. And you also learned how to control the other emails WordPress sends from your site.
FAQs — WordPress Admin Email Change Not Sending Confirmation
We get a lot of questions about what causes the WordPress admin email change to not send a confirmation. Check out some of the FAQs below.
Why didn’t I get a confirmation email when I changed the admin email?
WordPress sends a confirmation email to the new address you enter, but it won’t go through if your website isn’t set up to send emails properly.
This is common on issue on sites that use GoDaddy. You can fix this by setting up WP Mail SMTP on your site and using a third-party mailer like SendLayer or Brevo!
How do I resend the admin email confirmation in WordPress?
There’s no built-in resend button. But you can go to Settings » General, retype the new email address, and click Save Changes again. WordPress will send a fresh confirmation email.
Can I change the admin email without confirmation?
Yes. If the confirmation email fails, you can change the admin email directly from your database. This skips the email step entirely. You’ll need access to phpMyAdmin and your WordPress database to do this safely.
Why does my admin email say “pending change”?
WordPress shows this when it’s waiting for you to click the confirmation link. If the email doesn’t arrive or gets blocked, it stays stuck. You’ll need to fix your email delivery setup or change the email manually through the database.
Does changing the admin email affect my login?
No. Your login details are tied to your WordPress user account, not the site’s admin email. You can still log in with the same username and password after the change.
Next, Check Your DNS Records
Now that we’ve got the SMTP settings sorted out, we need to make sure that your DNS settings are right. If you have an email list, you might already have SPF records set up for that. But sometimes, a second SPF record gets added. This can invalidate both records.

Instead, you’ll want to merge the SPF records so they only occupy 1 line in your DNS. It’s important to fix this so that Gmail doesn’t block your emails.
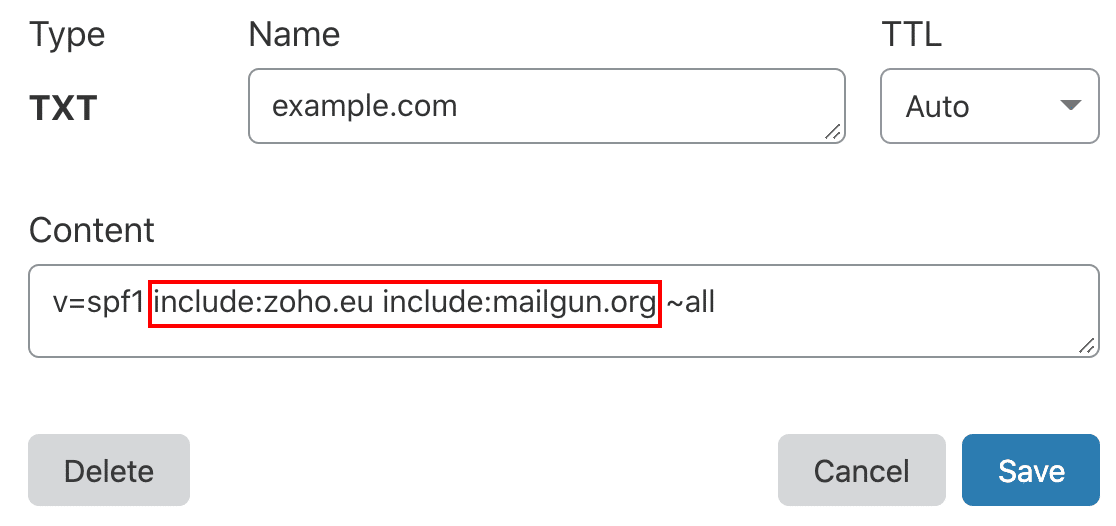
If you need more information on setting up your DNS, start with this guide to fixing multiple SPF records on your domain.
Ready to fix your emails? Get started today with the best WordPress SMTP plugin. If you don’t have the time to fix your emails, you can get full White Glove Setup assistance as an extra purchase, and there’s a 14-day money-back guarantee for all paid plans.
If this article helped you out, please follow us on Facebook and Twitter for more WordPress tips and tutorials.

