Is The Newsletter Plugin not sending emails reliably? This is one of the most common problems WordPress users face, especially after setting up a new email list or changing plugin settings.
The emails may get stuck in a queue, blocked by your host, or land in spam. That’s why it’s recommended that when sending newsletters, you should use a separate SMTP plugin for better deliverability.
In this guide, I’ll walk you through the exact steps to find the problem and fix it fast, so your messages reach the people who signed up to hear from you.
Fix Your Newsletter Plugin Emails! 🙂
Quick Test: Is Your Newsletter Plugin Sending At All?
Before you check any settings, it’s a good idea to make sure your newsletter plugin is trying to send emails in the first place. Here’s a quick way to test it:
- Go to your newsletter plugin and send a test message to your own email.
- Wait a few minutes and check your inbox and spam folder.
- If nothing arrives, your site might not be sending any email at all.
One common reason newsletter emails don’t send is because the “From” address doesn’t match your website’s domain. Many hosts block messages if the sender address looks fake or doesn’t belong to your site.
For example, if your site is example.com, your sender email should look like [email protected], not a Gmail or Yahoo address. To fix this, go to your newsletter plugin’s settings and use an address with your site’s domain (like [email protected]).
If this still doesn’t fix it, then chances are your website hasn’t been configured to send emails reliably. By default, almost all WordPress plugins use wp_mail() to send emails.
But the wp_mail() function is not very reliable. So when something goes wrong with it, you’ll find email delivery issues across your whole site.
How To Fix The Newsletter Plugin Not Sending Email
The easiest way to fix all problems with the wp_mail() function is to reconfigure it to use SMTP rather than relying on PHP. The easiest way to achieve this is by using WP Mail SMTP.
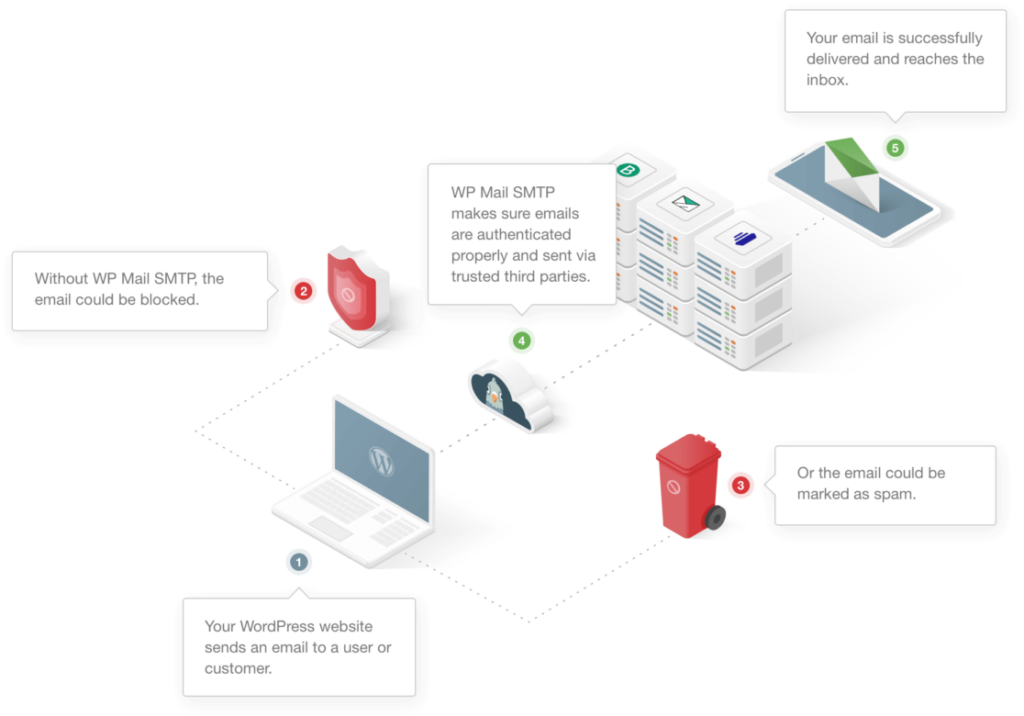
This plugin configures your WordPress site to use SMTP, which is a proven method of sending your emails because it adds proper authentication to your messages.
Moreover, this plugin sends your emails through a dedicated 3rd party email service provider rather than your default web host. As a result, your email deliverability is always guaranteed.
1. Install the WP Mail SMTP Plugin
The Newsletter Plugin used to have its own SMTP settings, but they discontinued it and users would often see a warning message in the plugin if they tried to access it.

Now, The Newsletter Plugin does offer a separate SMTP Addon, but it only works with newsletters and service messages (like the welcome email, activation email, and so on).
All other emails sent by your blog are not delivered by this addon. To fix this, I recommend installing WP Mail SMTP – the best SMTP plugin for WordPress.
WP Mail SMTP reconfigures WordPress’ built-in email function so you can use an external email service provider. It also has a ton of extra features that’ll help you track the success of your newsletters.
For example, WP Mail SMTP adds list-unsubscribe headers to all emails sent from WordPress. This is essential, because if your SMTP plugin doesn’t add those headers, you won’t comply with Google’s new sender requirements. (Learn more about list-unsubscribe headers in our guide.)
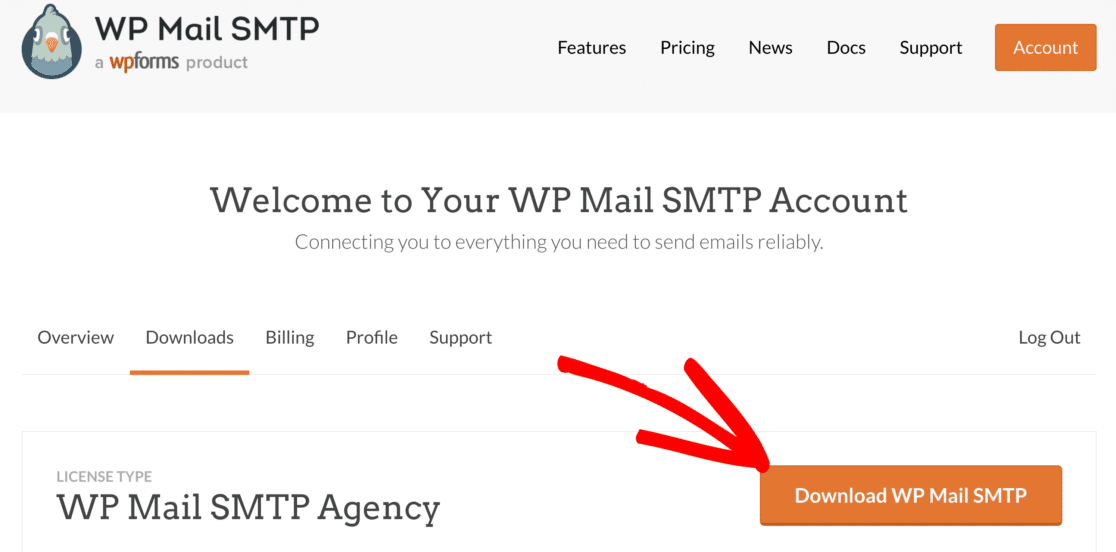
To download the plugin, go to the WP Mail SMTP website and log in to your account. You’ll find the download button under the Downloads tab.
Switch to your WordPress dashboard and upload the zip file. If you need help with this part, learn how to install a WordPress plugin.

After you install the plugin, be sure to Activate WP Mail SMTP. This will start the Setup Wizard so we can set up your email provider.
2. Connect to a Mailer Service
In this step, we’ll pick an email service that’ll be used to fix The Newsletter Plugin not sending emails. It’ll also fix all of your other WordPress emails at the same time. Click on the Let’s Get Started button to begin.

On the first screen, you’ll be asked to choose a new email provider for your website. The choice you make here will depend on:
- Whether you send any transactional emails, like WooCommerce order emails, in addition to your newsletters.
- How many emails you’ll send each month, taking every plugin into account
- What your budget is
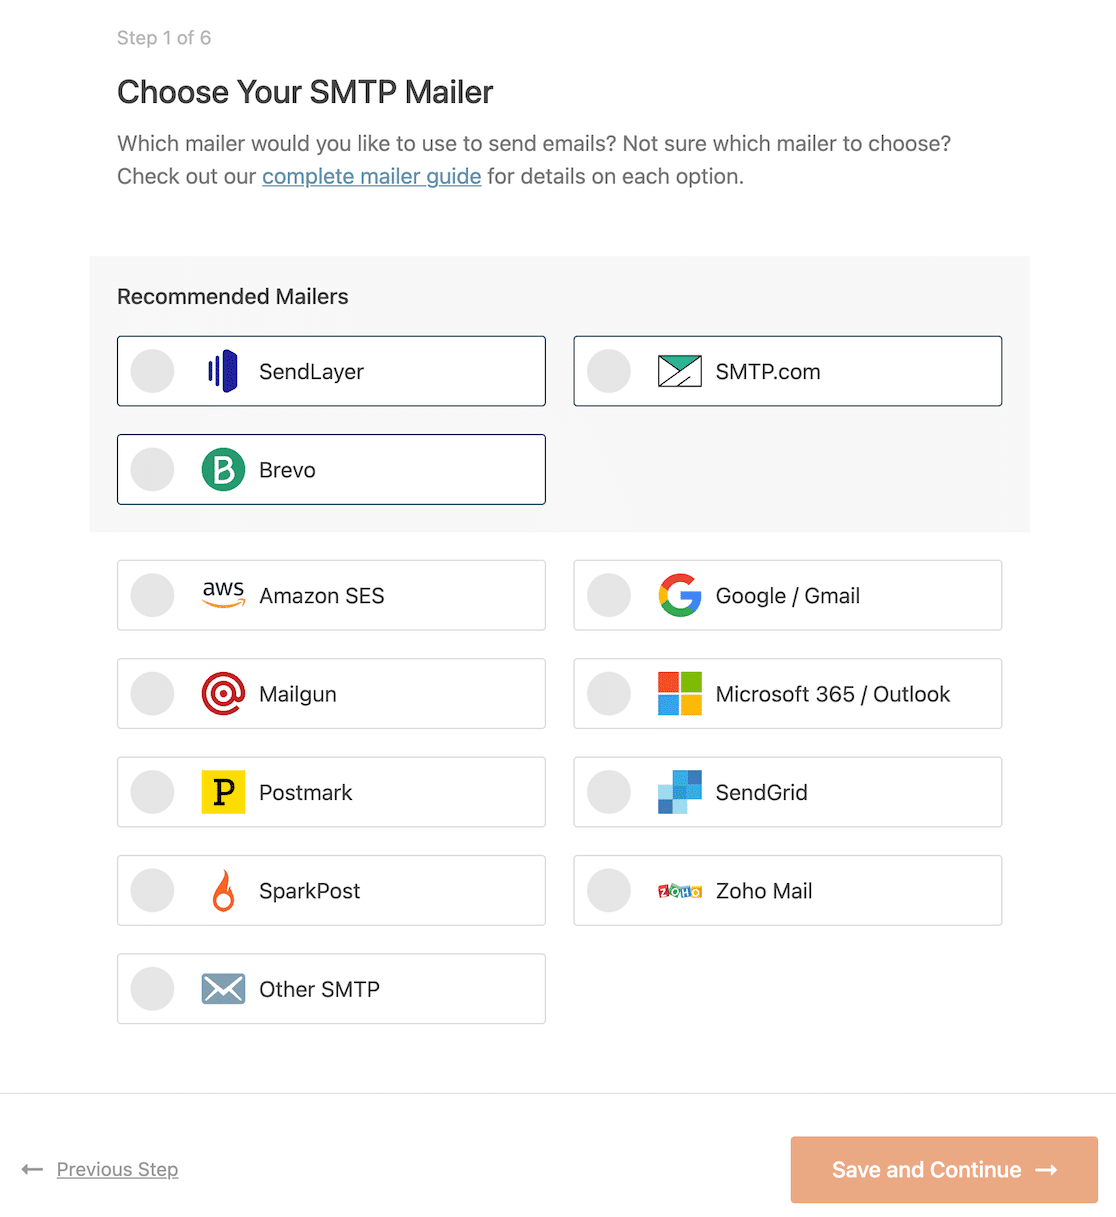
If you only send out newsletters, you don’t necessarily need a transactional email provider. Newsletters aren’t usually time-sensitive, so it doesn’t matter if they’re not delivered immediately.
However, transactional email providers have other benefits in addition to fast delivery. For example, they’ll be more likely to support bulk email sending, which means sending large numbers of emails all at once. As your list grows, that’ll become more and more important.
If you’re in any doubt, we recommend SendLayer, SMTP.com, or Brevo. These email service providers strike a good balance between quality service and cost.
Once you’ve decided on a mailer, the next step is to set up your account and connect it to your website. Click on the link below to open our setup documentation for your new email provider:
| Mailers available in all versions | Mailers in WP Mail SMTP Pro |
|---|---|
| SendLayer | Amazon SES |
| SMTP.com | Microsoft 365 / Outlook.com |
| Brevo | Zoho Mail |
| Google Workspace / Gmail | |
| Mailgun | |
| Postmark | |
| SendGrid | |
| SparkPost | |
| Other SMTP |
Need a hand?
Our Elite license includes White Glove Setup for SendLayer, SMTP.com, or Brevo.
Want to set up multiple mailers? You can do so in the Additional Connections settings, then select a Backup Connection and configure Smart Routing.
3. Enable Email Logging and Alerts
As you move through the Setup Wizard, you’ll be asked if you want to enable 2 important features: Detailed Email Logs and Instant Email Alerts.
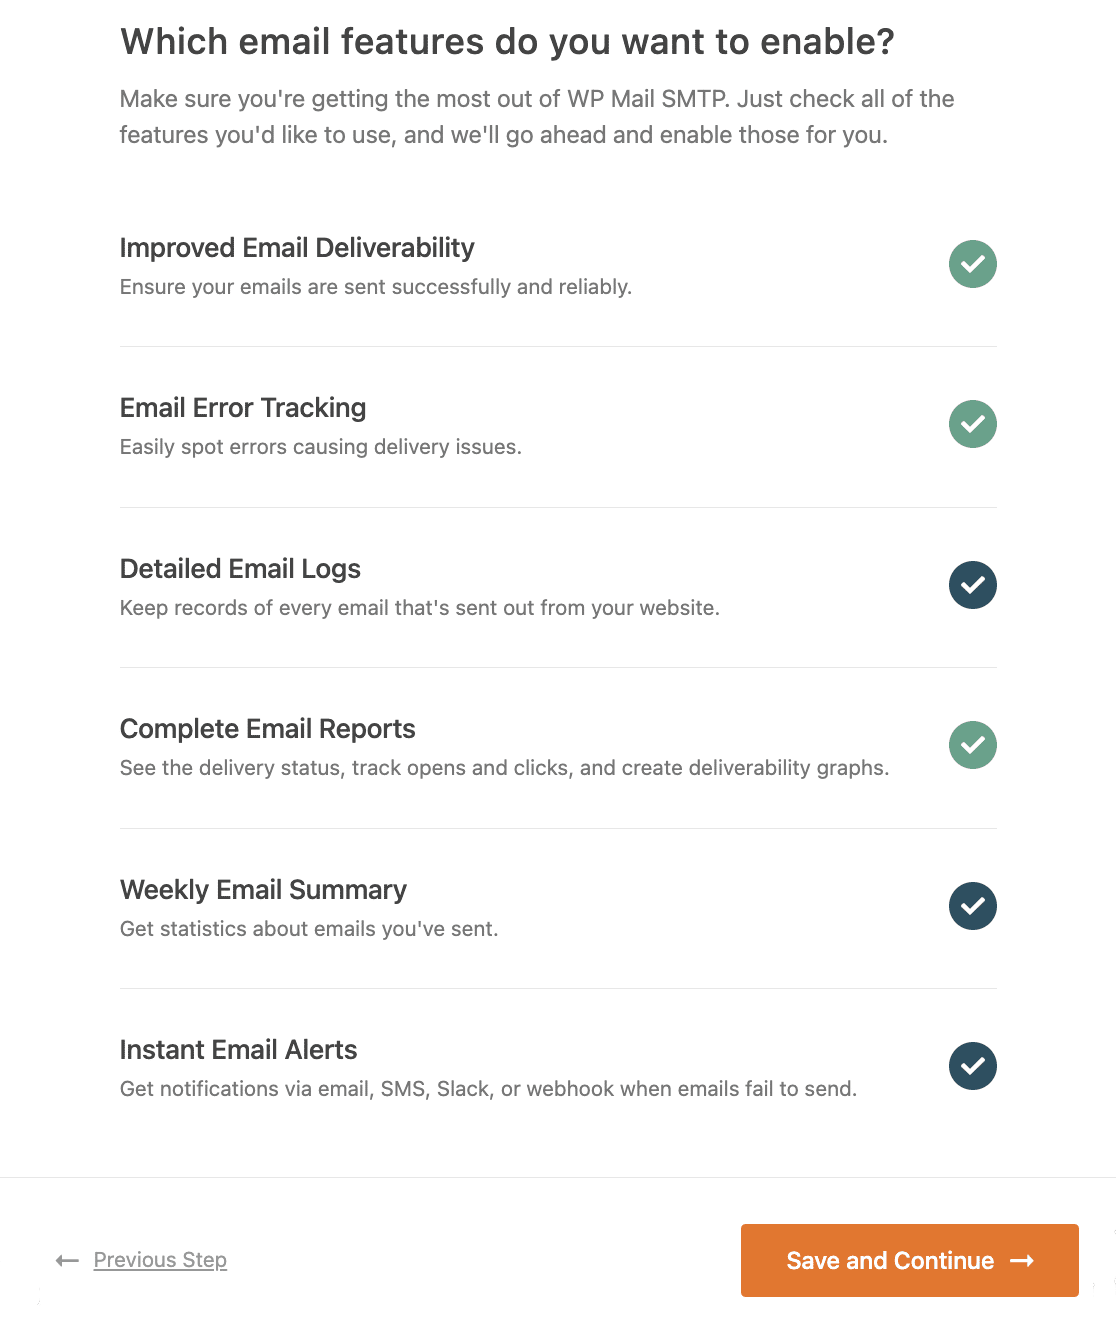
I recommend that you enable both of these options. If you have the Pro version of the plugin, Detailed Email Logs will save the email headers to Complete Email Reports.
If you want to log the entire contents of every email, I’ll show you how later in the tutorial. Turning this feature on also gives you the option to receive the Weekly Email Summary.
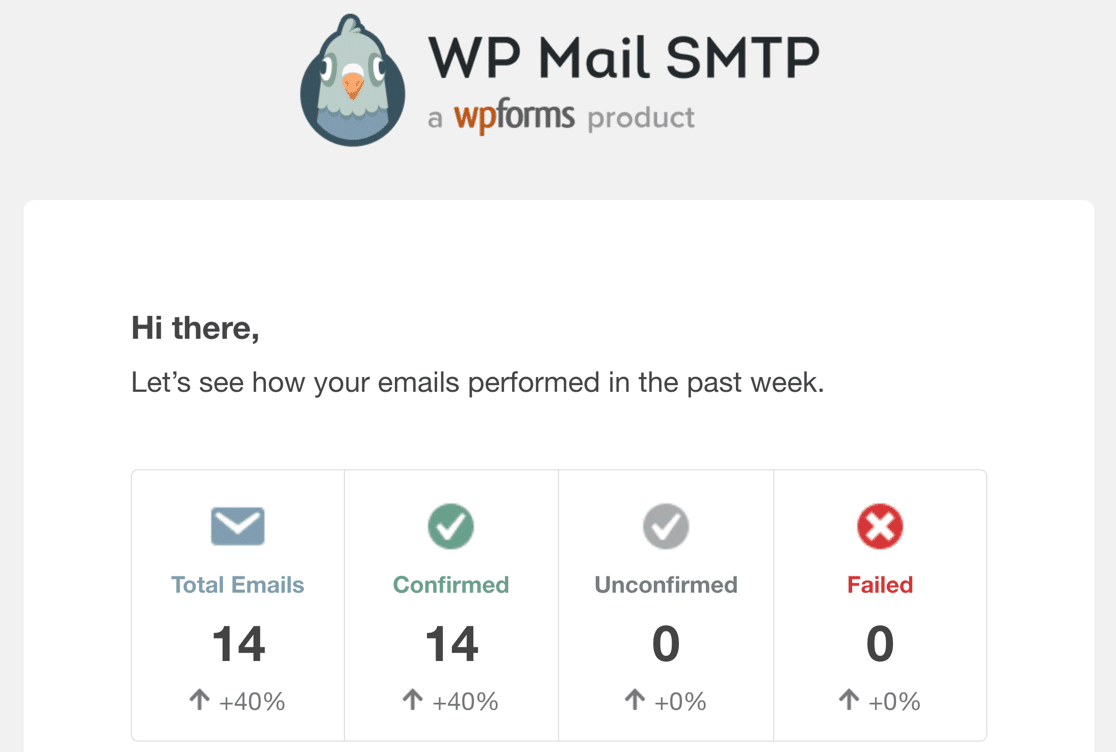
This will help you to keep track of your email deliverability without logging into WordPress. You’ll get an email every Monday that shows you how many emails were sent, and how many failed.
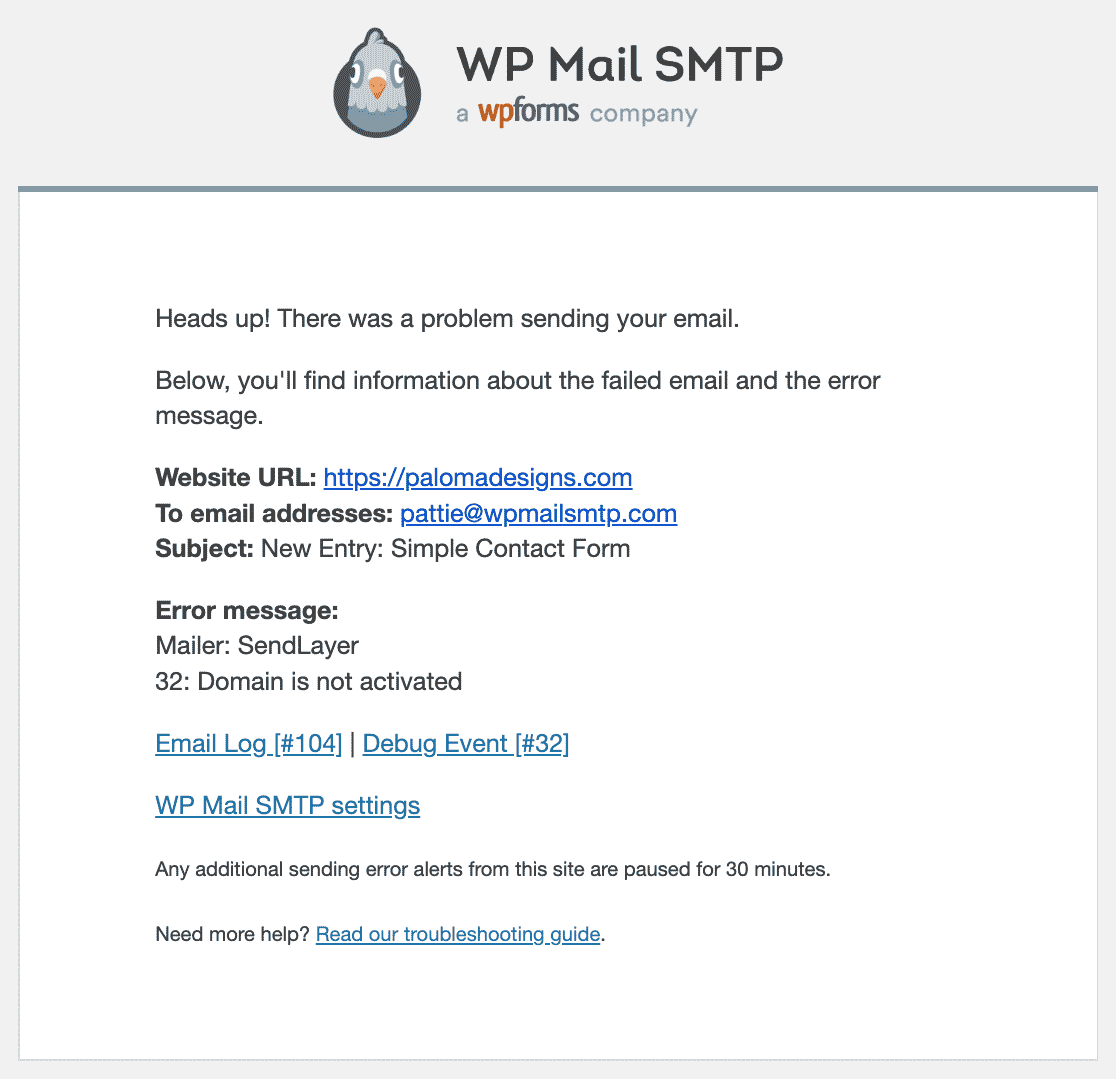
And finally, the Instant Email Alerts will notify you whenever an email fails to send. This gives you the chance to quickly resolve any problems so your emails start sending again.
Go ahead and select all the options here and complete the Setup Wizard when you’re done. You’ll get an automatic test email to confirm that your new email provider is working.
4. Improve Newsletter Open and Click Tracking
The Newsletter Plugin has its own open and click tracking that shows statistics for your email marketing messages. But you can’t see statistics for your other WordPress emails, like contact form messages and password resets.
If you want to track the performance of your entire WordPress site in one place, this will only get you part-way there. We can improve on this with the email open and click tracking in WP Mail SMTP.
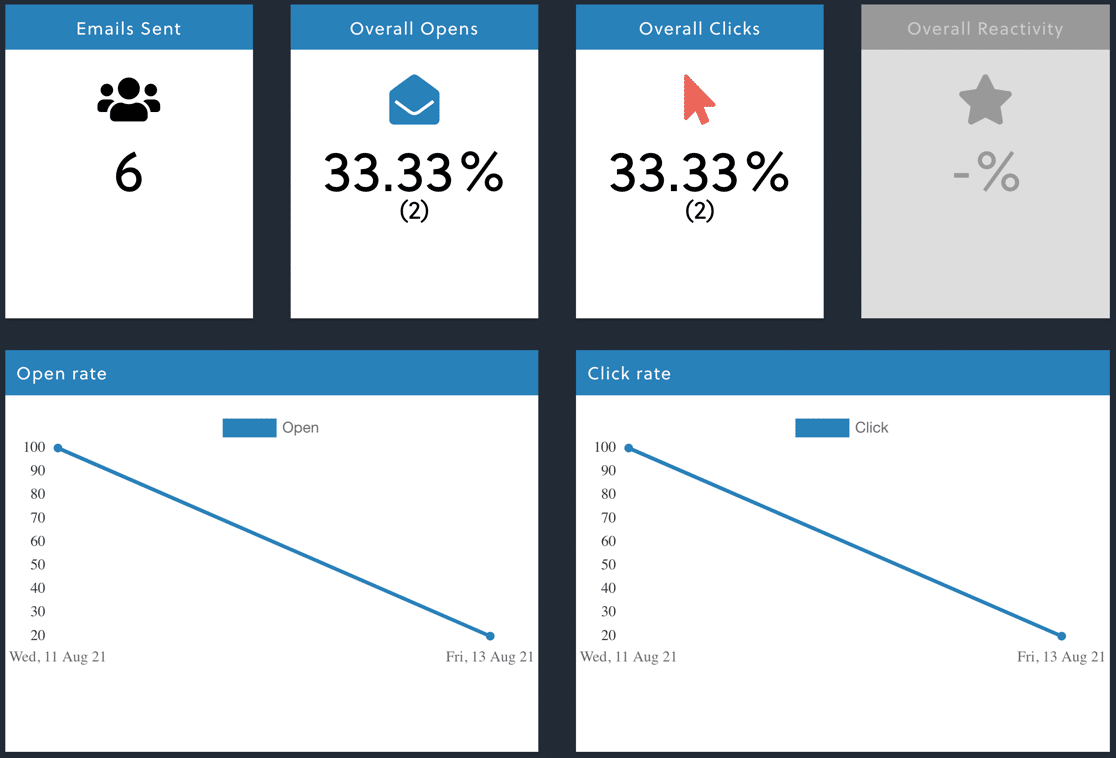
It shows you open and click statistics for your newsletters, forms, WooCommerce emails, and more. And the great news is that you can use both types of open and click tracking at the same time if you’d like to.
Let’s enable the additional email tracking features in WP Mail SMTP.
On the next screen of the Setup Wizard, select the Track when an email is opened and Track when a link in an email is clicked options.
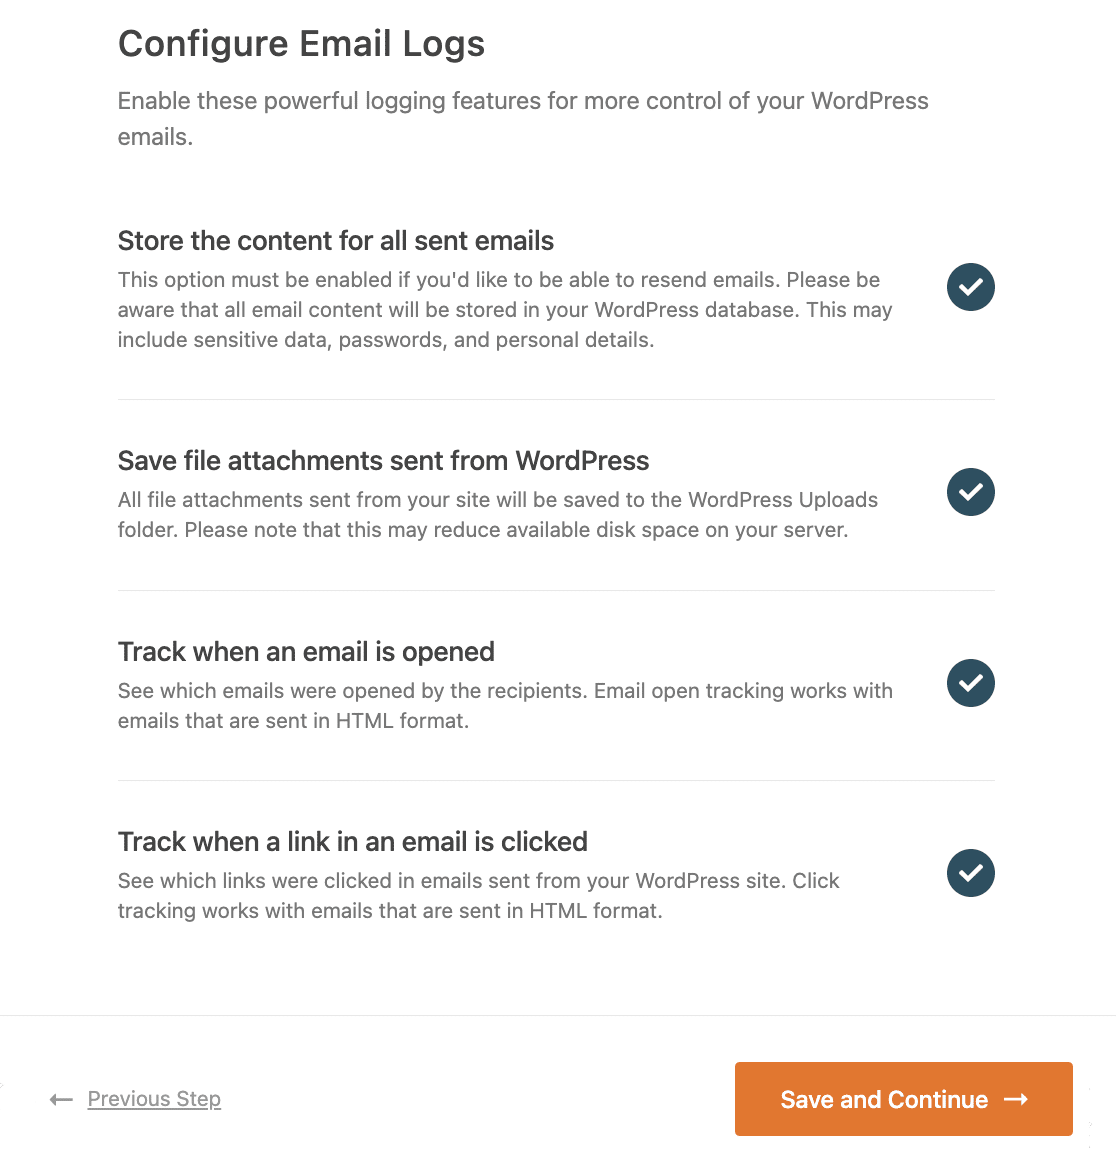
You can also store all the content of your emails and save file attachments if you want. These features are useful if you ever need to resend an email or print file attachments.
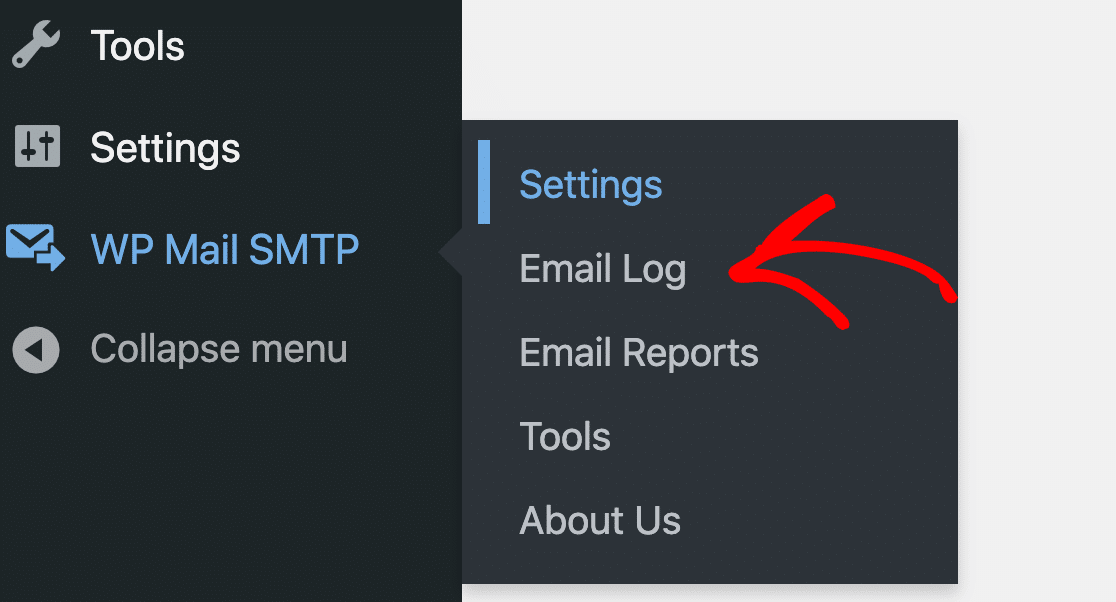
If you need to change these settings later, go to WP Mail SMTP » Settings » Email Log. For more details on WP Mail SMTP email logs, check out our email logging tutorial.
Great! Now we’ve fixed The Newsletter Plugin not sending email and we’ve improved your click tracking and open tracking too. Let’s look at 2 new ways to view that open and click tracking data.
5. View Sent Newsletters in Your Email Logs
With WP Mail SMTP email tracking enabled, you can now see a lot more detail about your WordPress emails. Along with the headers, we can also see opens and clicks for individual messages.
The statistics are updated immediately, so we can check on performance now. Let’s take a look at the Email Log.
At the top of the email log page, we can see 2 emails from The Newsletter Plugin: 1 test newsletter, and one test email.

Looking a little closer, we can see that both emails were opened and clicked.

And we can open the email log to see all the available information.
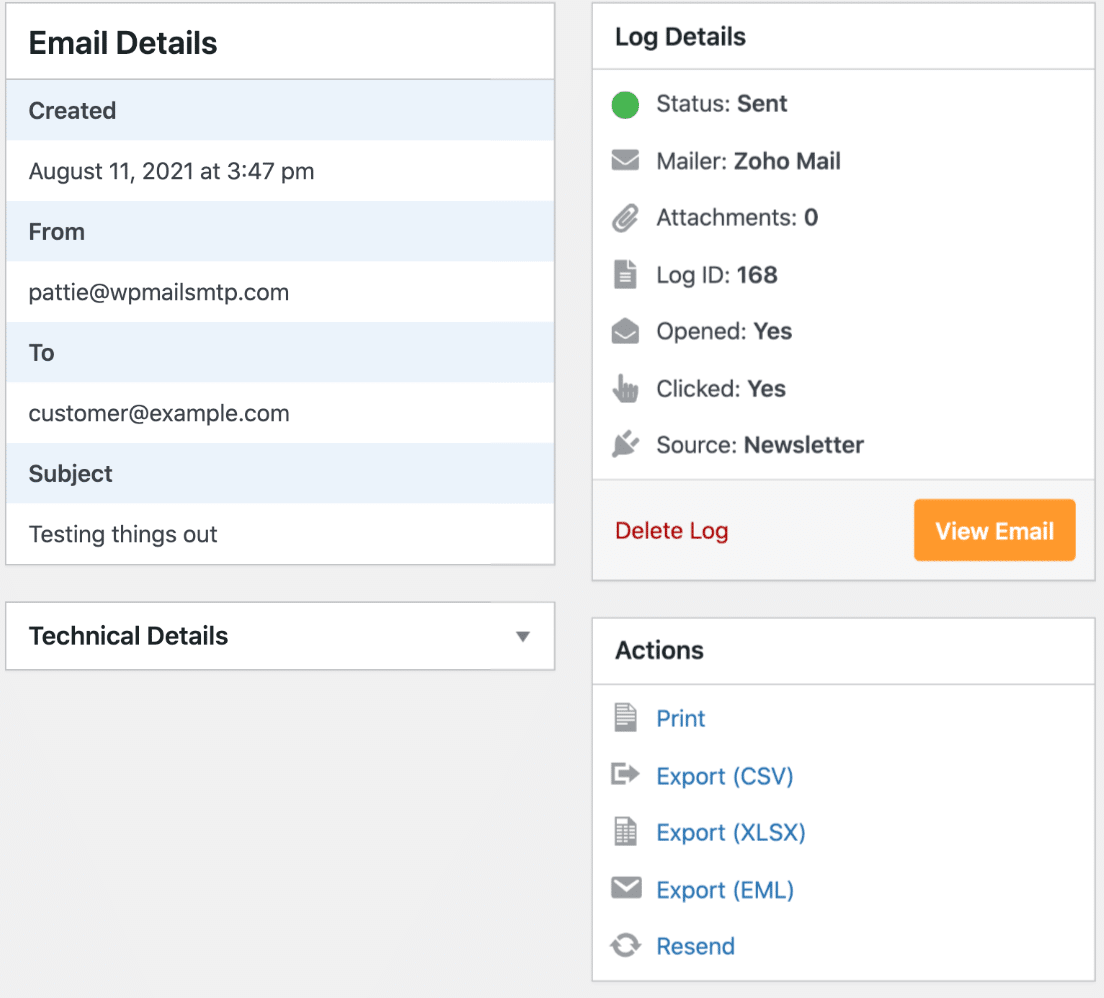
You’ll also notice that you have some new features here:
- Print: Print a copy of the email log, or save it as a PDF file
- Export: Export the email log to a CSV or XLS file, or export the entire email as an EML file
- Resend: Send the newsletter to the same person, or forward it to someone else.
Next, let’s look at some new reporting options so you can easily monitor your newsletter deliverability.
6. Check Your Email Reports and Newsletter Statistics
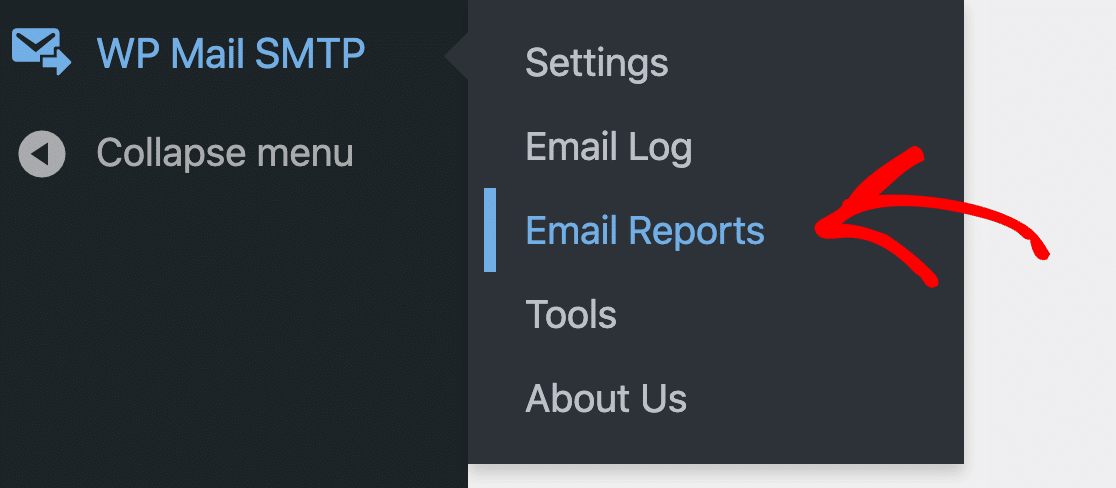
Now you’ve fixed The Newsletter Plugin not sending email, your Email Reports will keep you informed about deliverability and performance. Let’s take a look at the Email Reports in WP Mail SMTP.
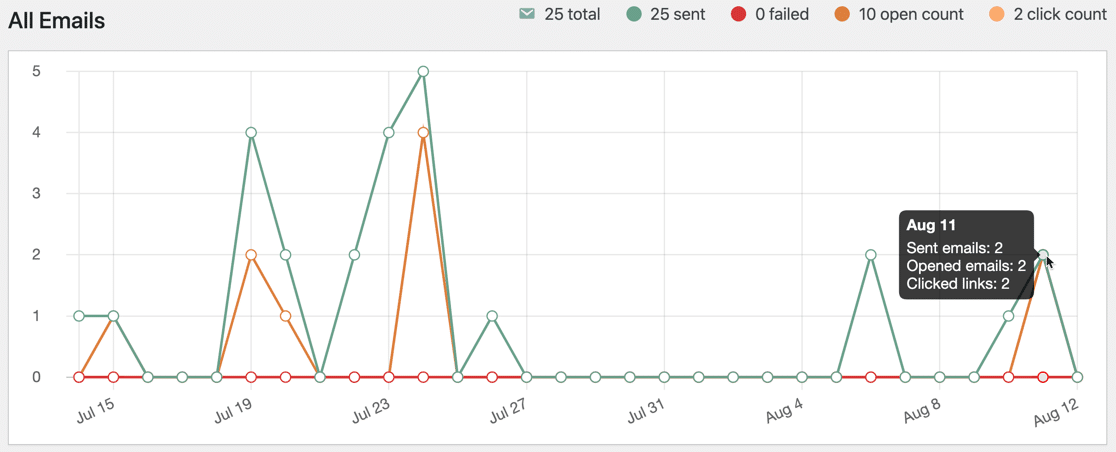
At the top, we can see the email report for all emails sent from this website. This chart displays sent and failed emails as well as email tracking data.
Underneath, we can see information about emails sent from your WordPress site.
WP Mail SMTP automatically groups emails by subject line. That allows you to easily see newsletter performance. Here’s an example with higher statistics so you can easily see how it works:
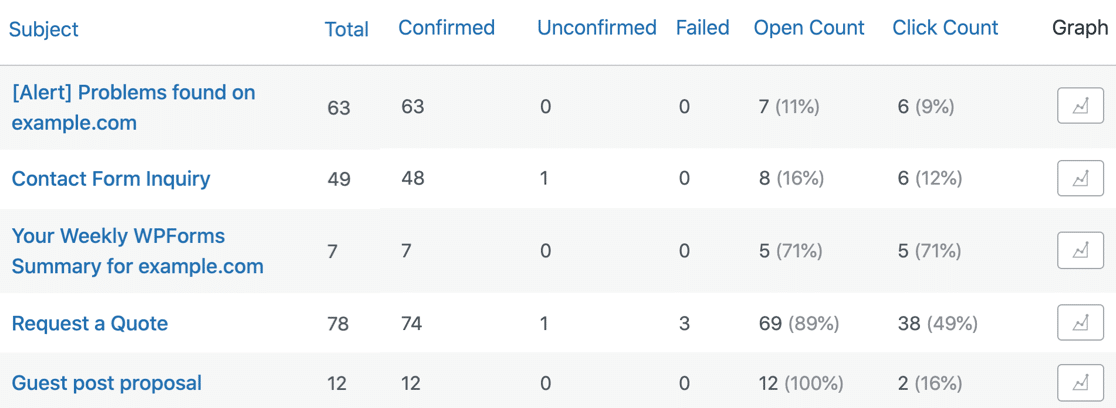
Now you have much more information about your newsletter performance. And you can click the Graph icon to make a custom chart for any individual newsletter.
And that’s it! Now you know how to fix The Newsletter Plugin not sending emails with SMTP.
FAQs on How to Fix The Newsletter Plugin Not Sending Emails
The Newsletter Plugin not sending emails is a popular topic of interest among our readers. Here are answers to some common queries about it:
What sender email should I use in the Newsletter plugin settings?
Use an address that matches your site’s domain, such as [email protected]. Mail from free accounts like Gmail often gets blocked or flagged as spam.
How do I connect the Newsletter plugin to SMTP with WP Mail SMTP?
Install WP Mail SMTP, run its wizard, pick your mail provider, and finish the test email. Then leave the Newsletter plugin set to “WP Mail” so every send uses the new SMTP connection.
How can I clear or restart a stuck email queue in the Newsletter plugin?
Go to Newsletter › Maintenance › Delivery Queue and click Restart. If the queue list is huge, delete the rows shown there and start a fresh send.
Can I resend a newsletter that failed to send the first time?
Yes. Open Newsletter › Emails, hover over the failed item, and click Resend. The plugin pushes it back into the send queue.
How do I check bounce or error logs for the Newsletter plugin?
Turn on Advanced Log in the plugin’s settings or enable Email Log in WP Mail SMTP. You’ll see each send with any error or bounce notice.
Does my host limit how many newsletter emails I can send per hour?
Most shared hosts cap mail between 100 and 500 messages per hour. Ask your host or look in cPanel, then set the plugin’s batch size under that limit.
Why are my newsletter emails going to spam instead of the inbox?
Top reasons include a free sender address, missing SPF or DKIM records, or weak subject lines. Switch to SMTP, use a domain-based address, and add proper DNS records.
How do I set up SPF and DKIM so the Newsletter plugin emails pass checks?
Add an SPF TXT record like v=spf1 include:spf.yourmail.com ~all in your DNS. Then add the DKIM record supplied by your mail provider.
Wait for DNS to update and test with an email checker to make sure both pass. Check out this guide for more detailed instructions on SPF, DKIM, and DMARC.
Next, Turn Your Newsletter Into a Community
Have you thought about creating an online community based on your newsletter? A community could inspire new ways to promote and monetize your content.
To start building yours, check out our list of the best membership plugins for WordPress. You might also want to see our instructions for fixing Elementor Forms email issues if you’re facing any.
Ready to fix your emails? Get started today with the best WordPress SMTP plugin. If you don’t have the time to fix your emails, you can get full White Glove Setup assistance as an extra purchase, and there’s a 14-day money-back guarantee for all paid plans.
If this article helped you out, please follow us on Facebook and Twitter for more WordPress tips and tutorials.

