AI Summary
I’ve been helping WordPress users fix email delivery issues on SiteGround for years, and I can tell you that this is one of the most frustrating problems site owners face.
Here’s what typically happens: you move your site to SiteGround or start a new WordPress site, and suddenly your contact forms stop working.
Customers fill out your forms, but you never get their messages. Or maybe you’re getting some emails, but they’re inconsistent, and you’re worried about what you might be missing.
In this guide, I’ll walk you through the exact steps I use to fix WordPress email issues on SiteGround. We’ll cover everything from basic SiteGround email settings to advanced SMTP configuration and DNS optimization.
Fix Your SiteGround Emails Now! 🙂
How to Fix Emails from WordPress Not Sending on SiteGround
Before we dive into fixes, you need to understand why WordPress emails fail specifically on SiteGround. I’ve worked with dozens of hosting providers, and each has its own quirks, but SiteGround’s approach to email creates some unique challenges.
- 1. Understanding SiteGround Email Limitations
- 2. Check Your Contact Form Plugin Notification Settings
- 3. Install the WP Mail SMTP Plugin
- 4. Create SPF, DMARC, and DKIM Records
- 5. Send a Test Email From WordPress
1. Understanding SiteGround Email Limitations
SiteGround includes email hosting with most of their plans. Shared Hosting, Managed WordPress, and WooCommerce hosting all come with unlimited email accounts. Sounds great, right? But here’s where it gets tricky.
Each email account you create has a maximum size limit of 10GB. While that sounds generous, I’ve seen clients hit this limit surprisingly quickly, especially if they’re receiving a lot of form submissions.
The wp_mail() Problem
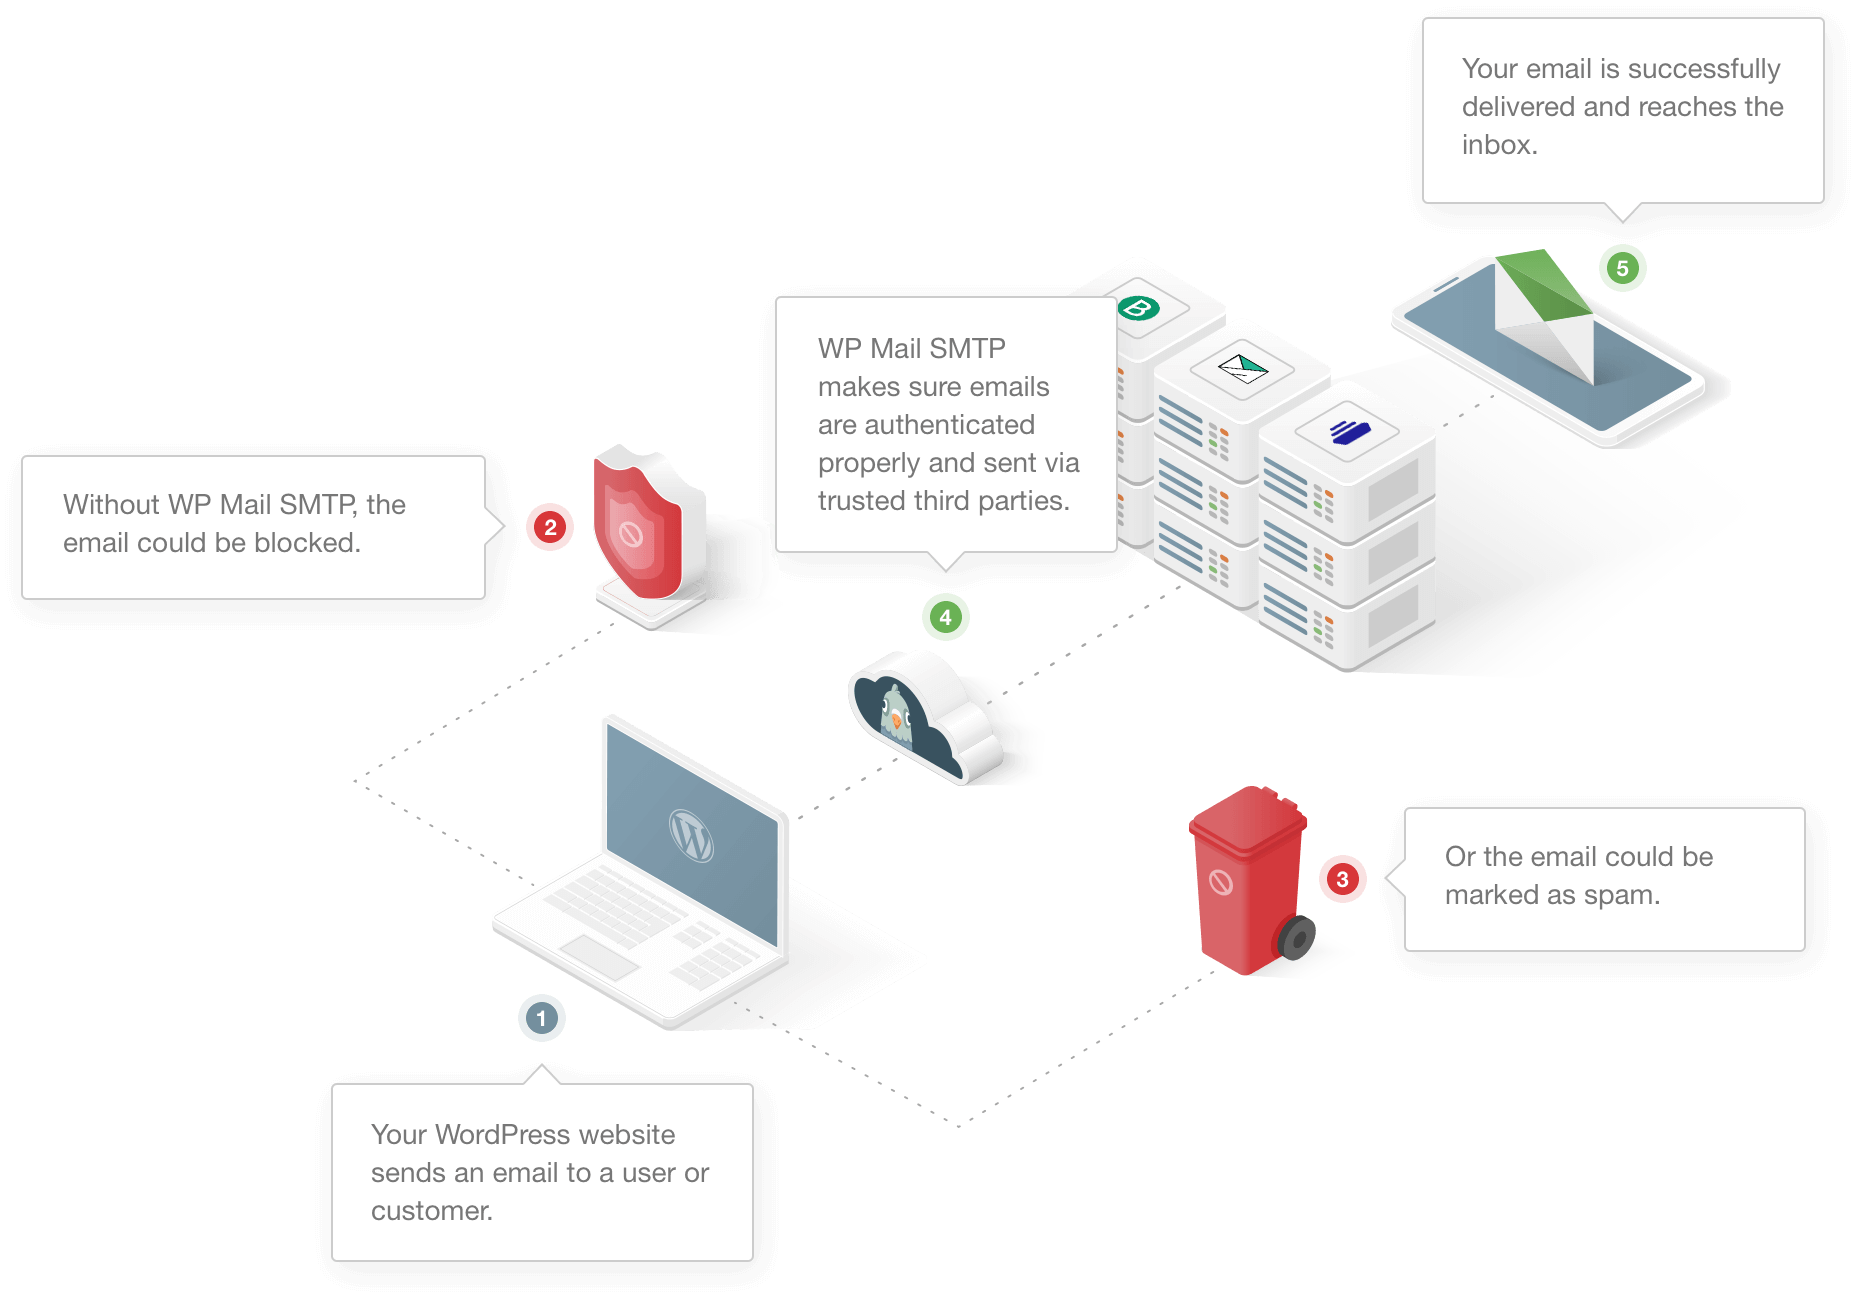
WordPress uses a built-in function called wp_mail() to send emails. On most shared hosting environments (including SiteGround), this function sends emails without proper authentication.
Email providers like Gmail, Yahoo, and Outlook have gotten increasingly strict about accepting unauthenticated emails, which means your messages often get flagged as spam or rejected entirely.
I see this constantly with SiteGround clients. Their forms work perfectly in testing, but real customer emails disappear into the void because they lack proper SMTP authentication.
WP Mail SMTP reconfigures WordPress to use an external email service instead of the default wp_mail() function. That means every email generated by WordPress will have the authentication needed to get through spam filters.
Resource Limitations on Shared Hosting
SiteGround’s shared hosting comes with resource limits that can affect email delivery. If your site experiences high traffic or runs resource-intensive plugins, the server might prioritize web performance over email processing.
To start, log in to your SiteGround Client Area and click Websites. Then click on the Site Tools button for your site and go to Email » Accounts.
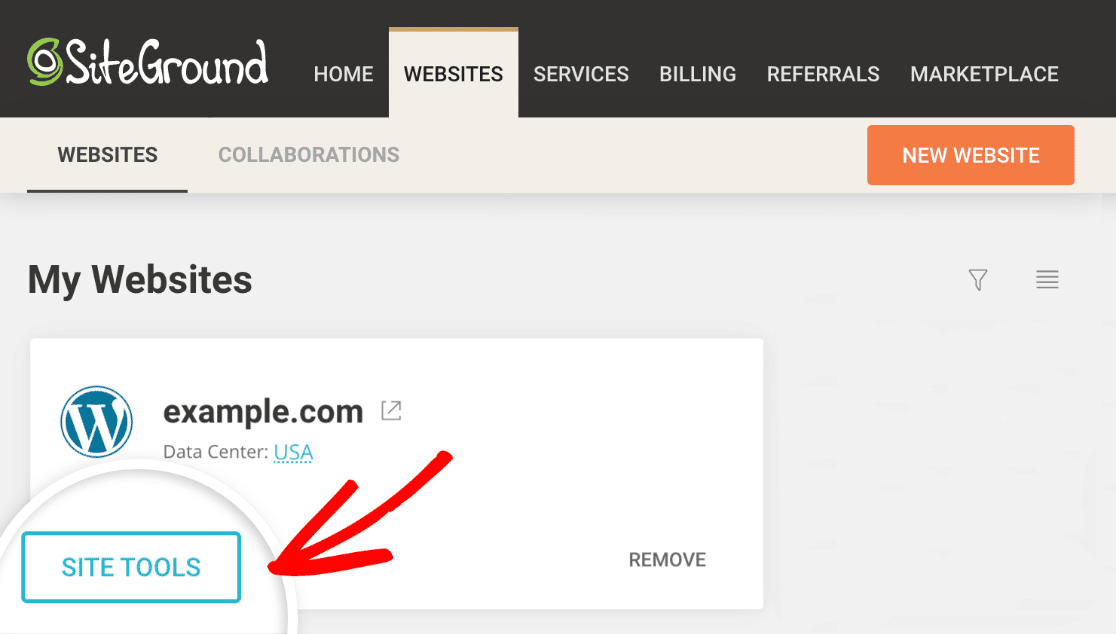
Look for the email mailbox that you’re using to receive emails from WordPress. Click on the 3 dots on the right and click Change Quota.
You can also click Log in to Webmail and check the remaining allowance. If everything looks okay here, let’s check your WordPress settings.
Verifying Email Account Settings
While you’re in the Email Accounts section, click on Mail Configuration for your main email account. This shows you the incoming and outgoing server settings that you’d use if you were setting up this email in Outlook or Apple Mail.
Pay attention to the SMTP server details here. We might need these later if you decide to use SiteGround’s SMTP instead of an external provider.
2. Check Your Contact Form Plugin Notification Settings
For most users, the #1 issue is emails from contact forms going to spam.
If you’re having difficulty with a specific contact form plugin, I’ll help you review all of the settings to make sure the notifications are set up correctly.
We created guides specifically for the most popular form plugins. Click the link below to jump to the contact form plugin you’re using:
- WPForms
- Contact Form 7
- Elementor Form
- Ninja Forms
- Gravity Forms
- Jetpack Contact Form
- Formidable Forms
- Beaver Builder Contact Form
- Contact Form by BestWebSoft
- SiteOrigin Contact Form
And if you’re using WooCommerce on SiteGround, you can also check this guide on how to fix WooCommerce not sending order emails. We’ll show you some solutions for issues with your WooCommerce order notifications.
If you’re using a different plugin to send emails in WordPress, let’s install the WP Mail SMTP plugin on your SiteGround website now.
3. Install the WP Mail SMTP Plugin
WP Mail SMTP will solve emails from WordPress not sending on SiteGround. You can use the plugin with free mailer services, or pay for an account if you need more capacity.
To start, download the zip file from your WP Mail SMTP account so you can install it on your website. You’ll find it in the Downloads tab.
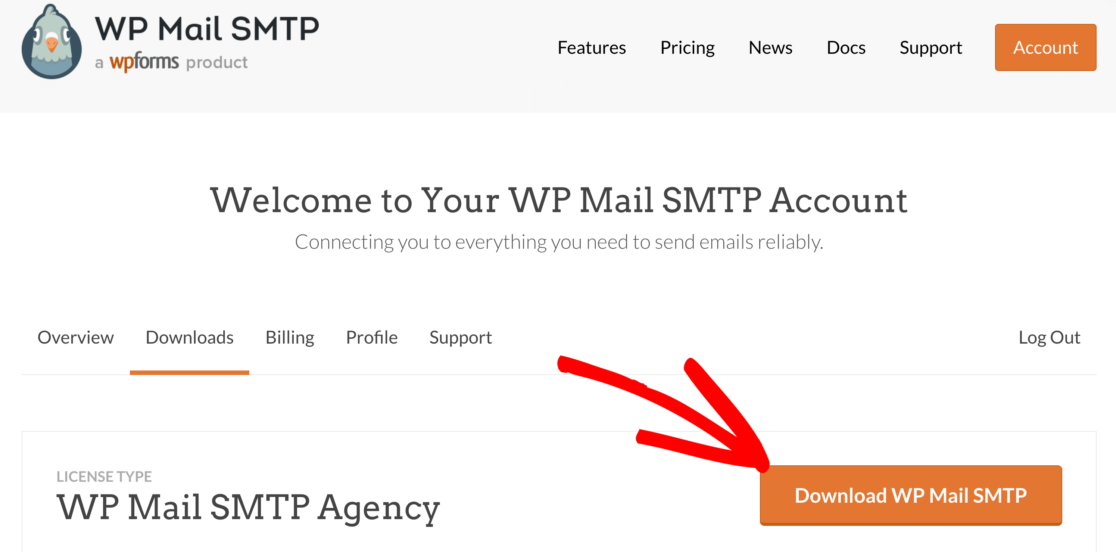
Next, open up your WordPress dashboard. Head to the Plugins page and upload the plugin to your WordPress site. If you’re not sure how to do this, check out this guide to installing a plugin in WordPress.

As soon as you activate the plugin, the WP Mail SMTP Setup Wizard will open. You can also re-start the wizard at any time by clicking the Launch Setup Wizard button in your WP Mail SMTP settings.
Just know that re-starting the wizard later might reset your SMTP settings.
Choose Your Email Service Provider
Now we can choose a new provider to handle outgoing WordPress emails. Click the Let’s Get Started button to begin.

On the next screen, click the mailer you want to use in the list.
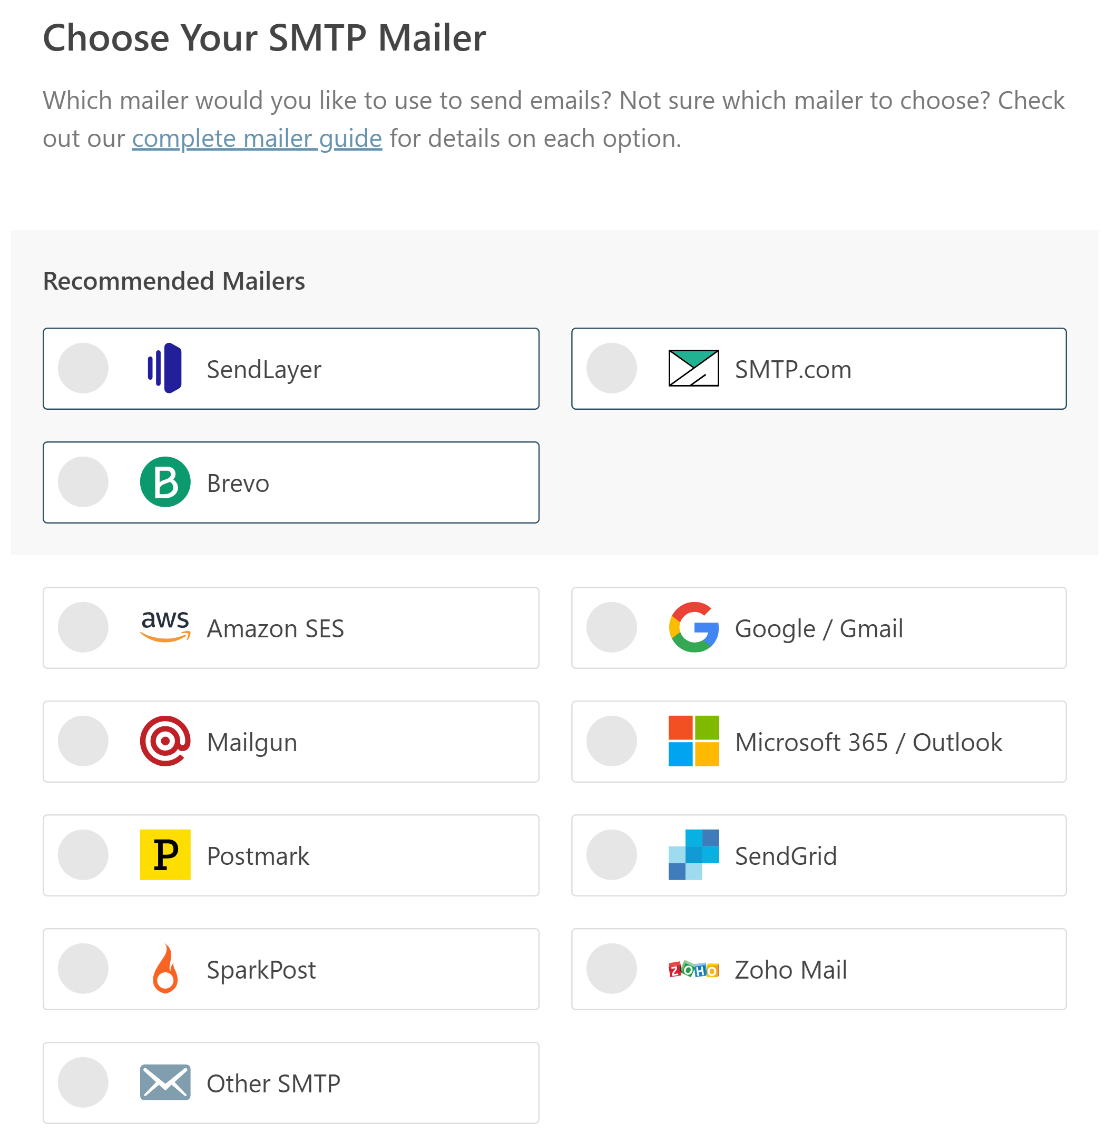
I recommend SendLayer, SMTP.com, or Brevo (formerly Sendinblue) because they’re reliable, and they’ll work well with most websites.
In particular, these mailers are awesome for busy SiteGround sites that generate a lot of transactional emails. If you have a small site, you can use Gmail or the Other SMTP server option.
The Other SMTP option lets you use any mail server that you already have access to. If you choose this option, be sure to enter the SMTP port carefully.
When you’ve chosen your mailer, open up our documentation to complete the setup steps on the provider’s side:
- SendLayer
- SMTP.com
- Brevo
- Amazon SES
- Google Workspace / Gmail
- Mailgun
- Microsoft 365 / Outlook.com
- Postmark
- SendGrid
- SparkPost
- Zoho Mail
- Other SMTP
You can open the documentation in a new tab, then come back to this guide when you’re done. Take care when configuring you mailer to avoid WP Mail SMTP sending errors.
Want to set up multiple mailers? You can do so in the Additional Connections settings once you’ve finished the Setup Wizard. Then you can select a Backup Connection and configure Smart Routing.
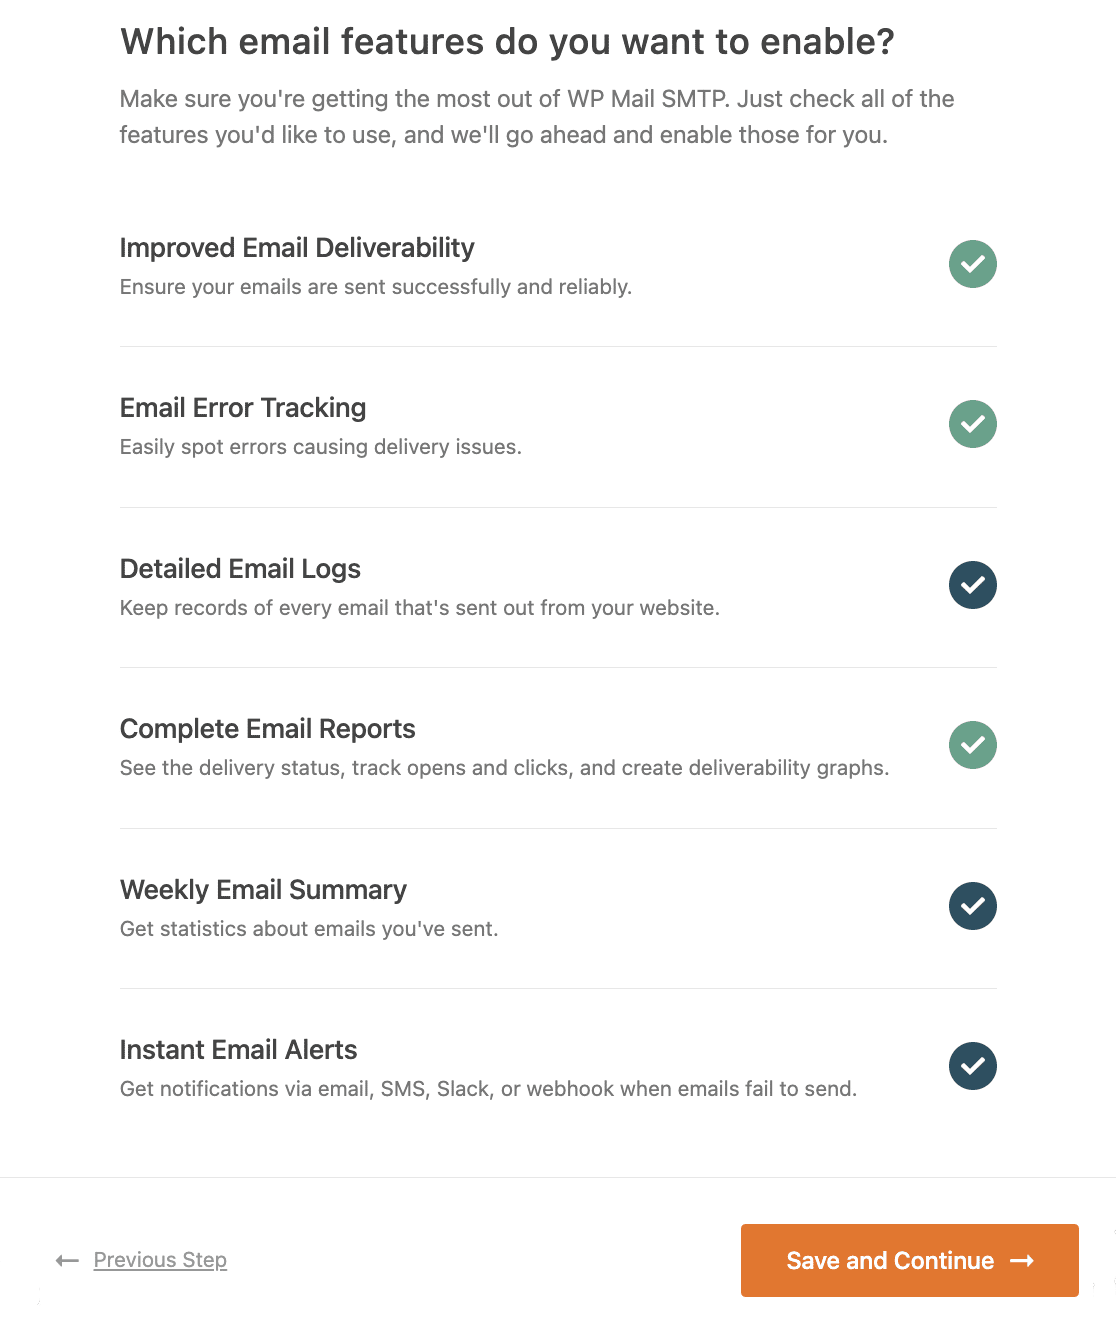
Next, email deliverability and error tracking will be enabled. We recommend that you also enable Detailed Email Logs.
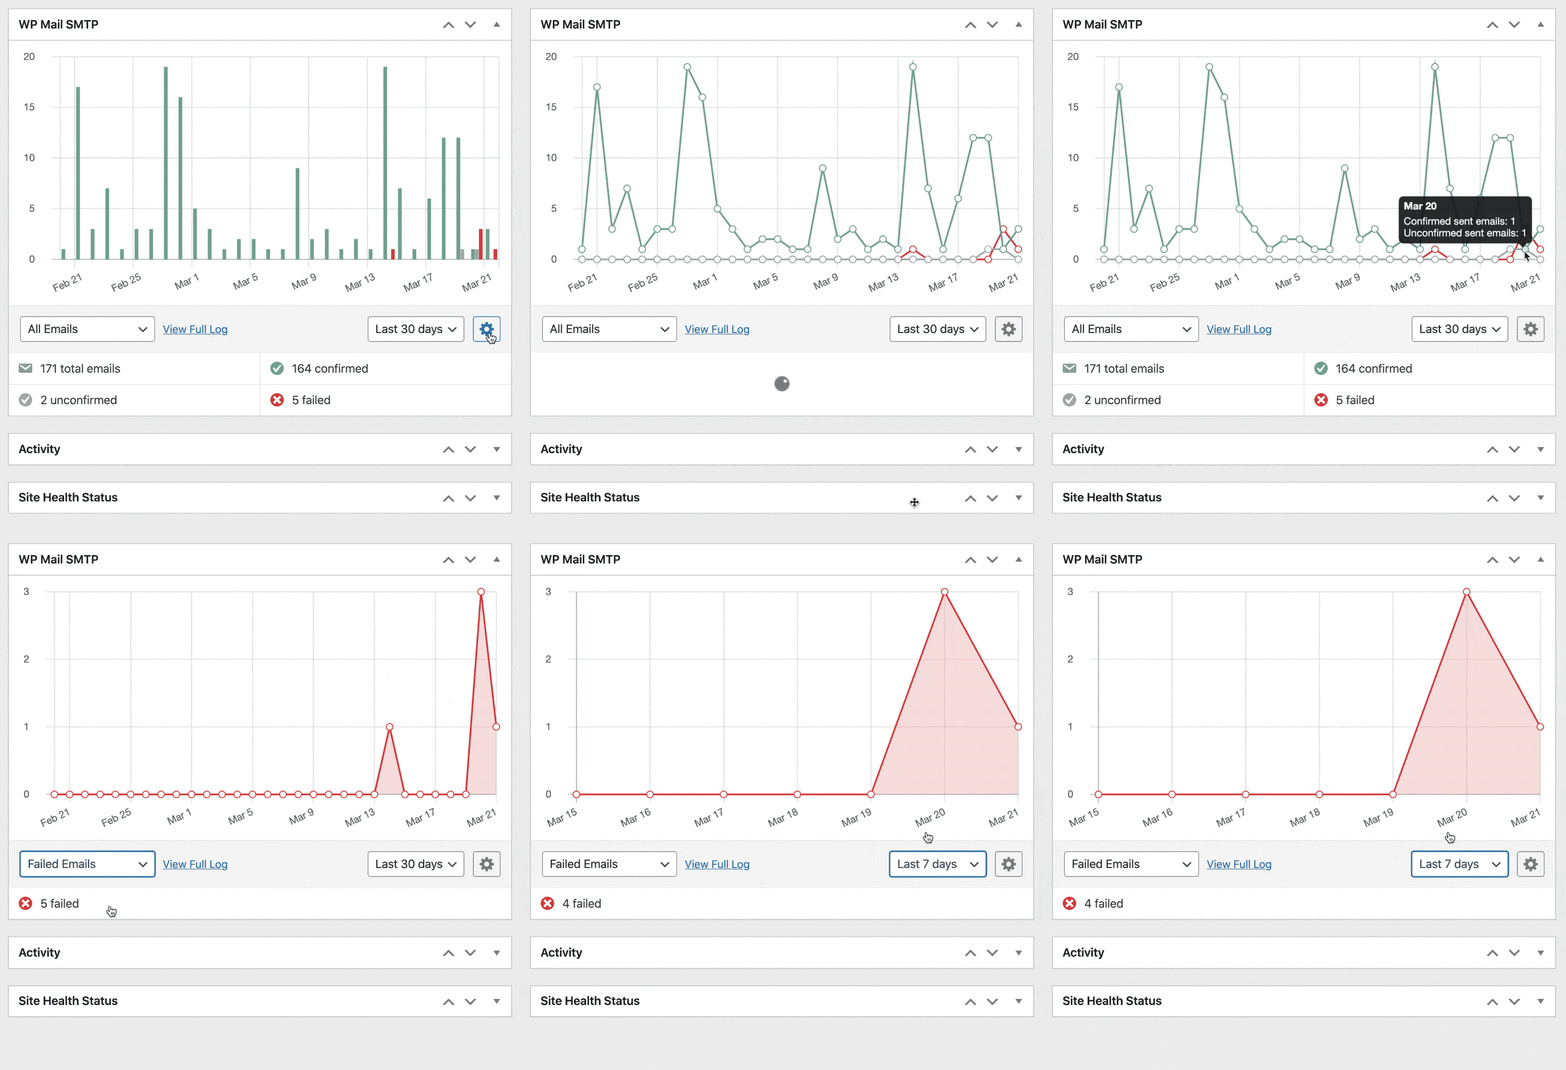
Your WordPress email logs are searchable to make it easy to track down problems. And the Pro version also has an awesome dashboard widget that helps you track email deliverability right from the WordPress admin area.
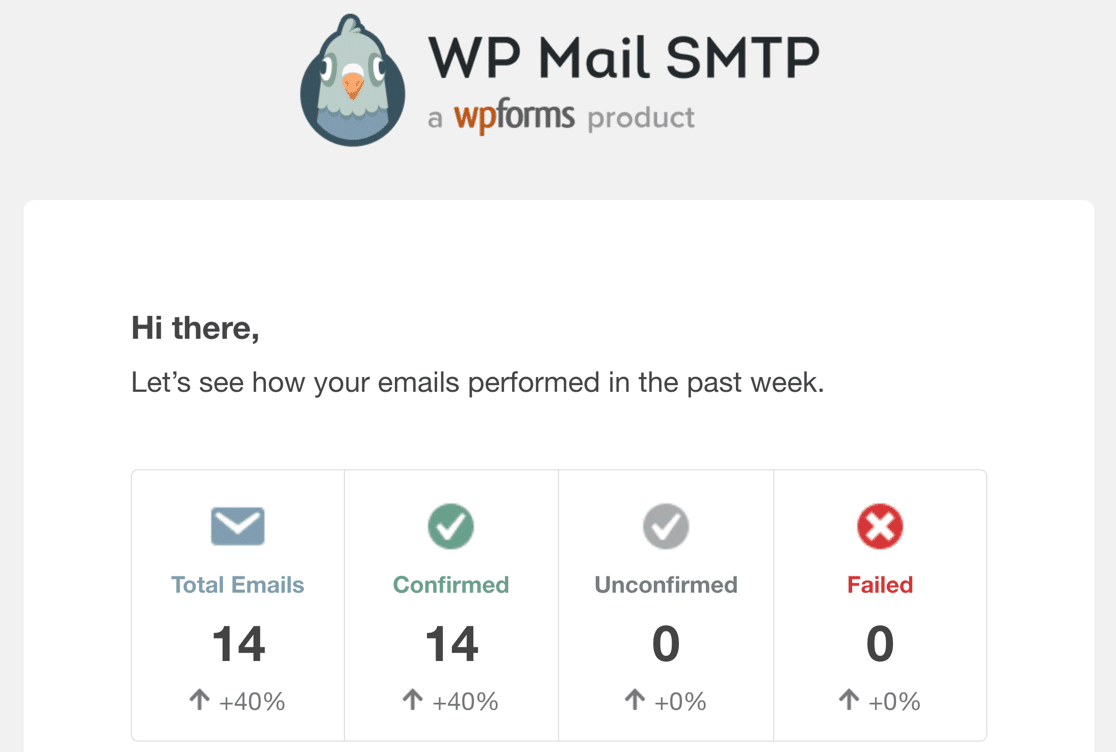
Complete Email Reports will turn on automatically when you enable email logging. You can decide if you want to receive the Weekly Email Summary, which will deliver the past week’s email delivery stats to your inbox.
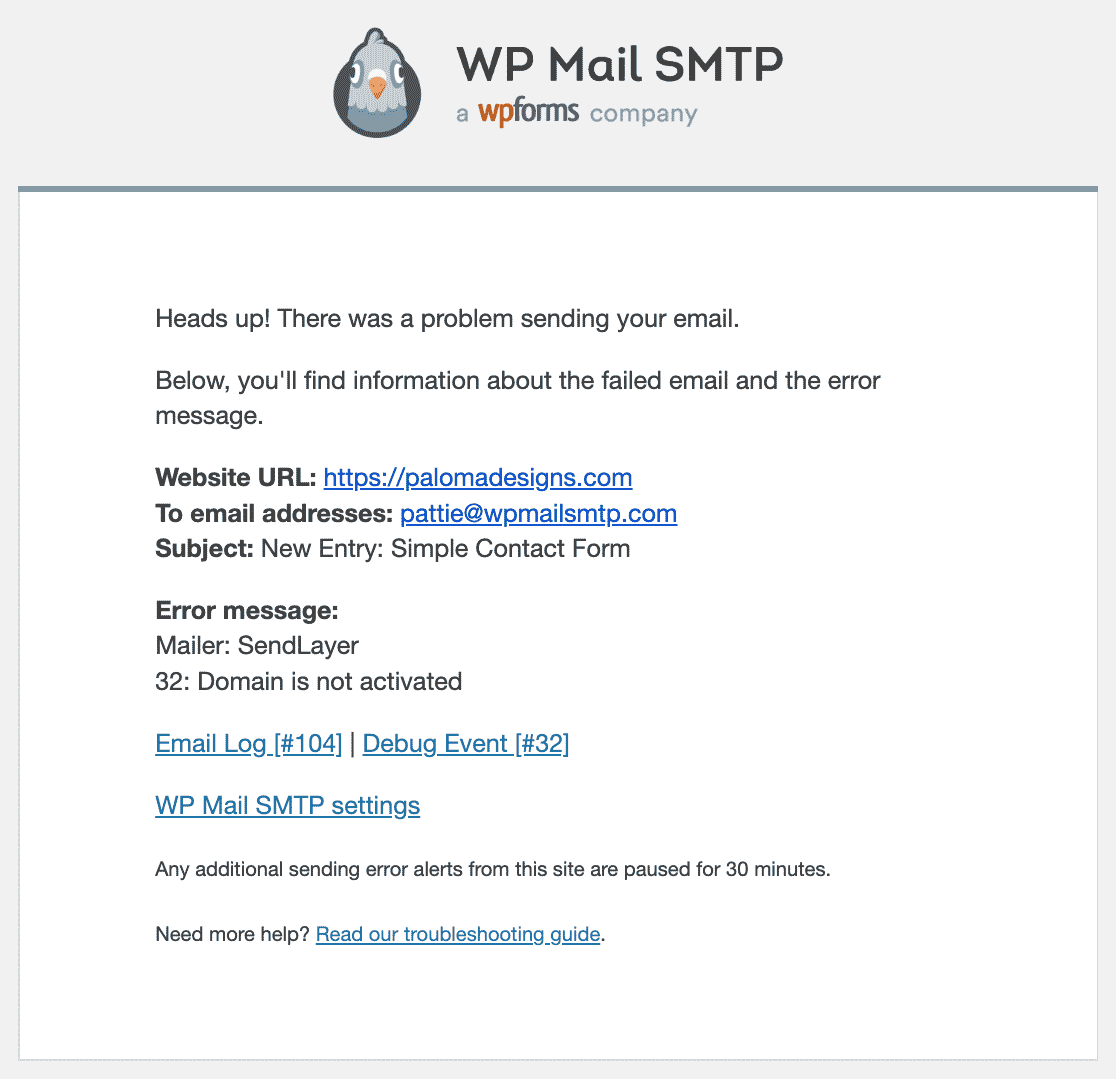
You can also take advantage of Instant Email Alerts, which let you know when your site fails to send an email. That way you can quickly log in and fix the problem.
Finally, if you enabled email logging, you can also turn on these advanced options.
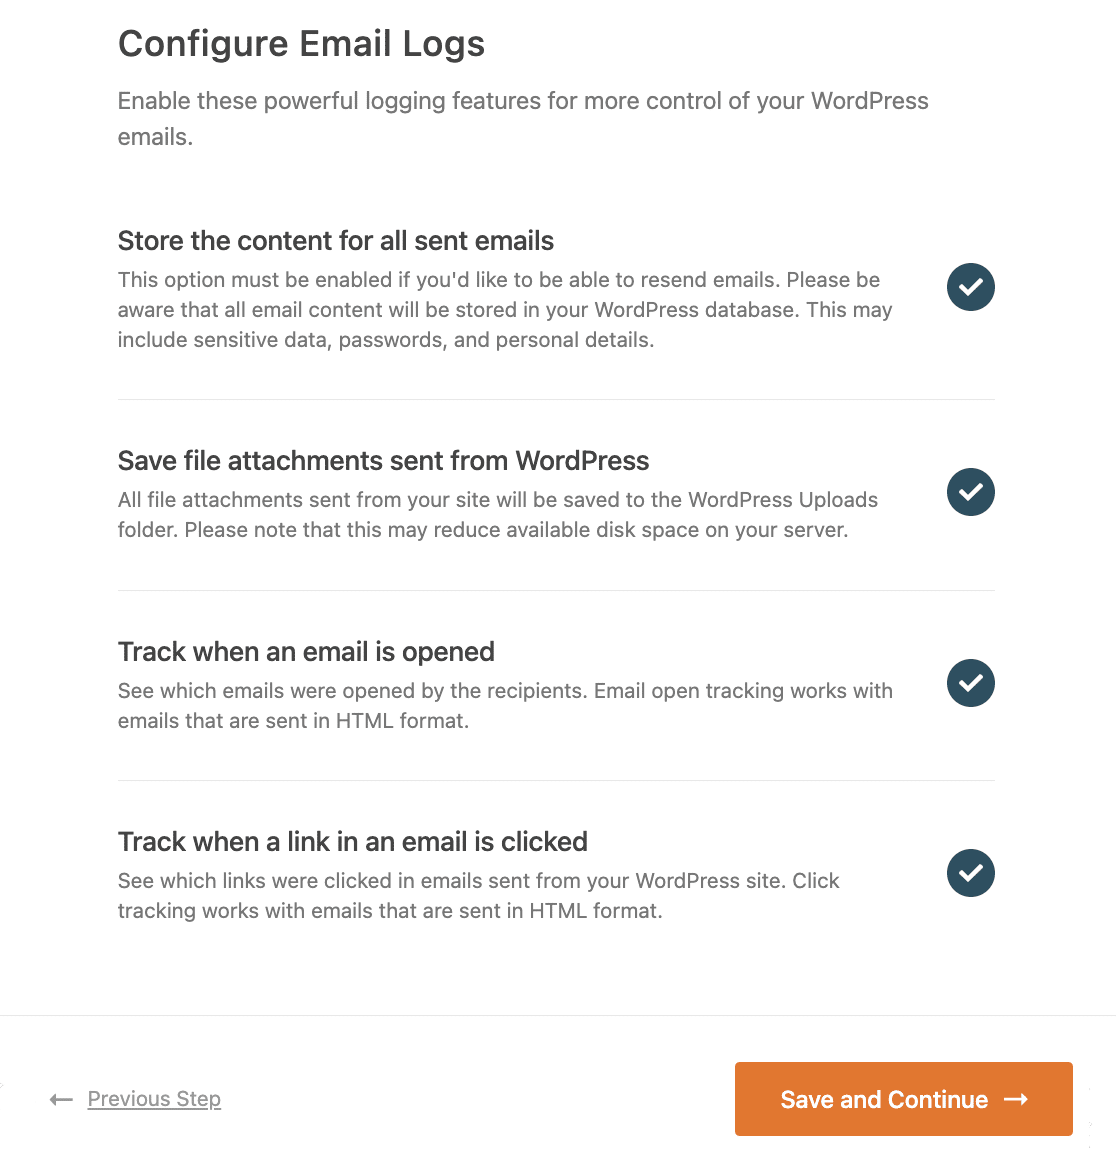
They let you save email content and attachments and track email open and link clicks. You’ll also be able to resend emails, export or print your logs, and more.
If you’d like to see how our email logging works, check out this guide on how to log your WordPress emails. All set? Let’s quickly recap the DNS Zone settings in SiteGround and then run a final email test.
4. Create SPF, DMARC, and DKIM Records
When you set up your email provider, the documentation may have given you new DNS records that you need to create.
If you bought your domain from SiteGround, you’ll want to head back to Websites » Site Tools as we showed in Step 1. This time, click on Domain » DNS Zone Editor in the menu on the left.
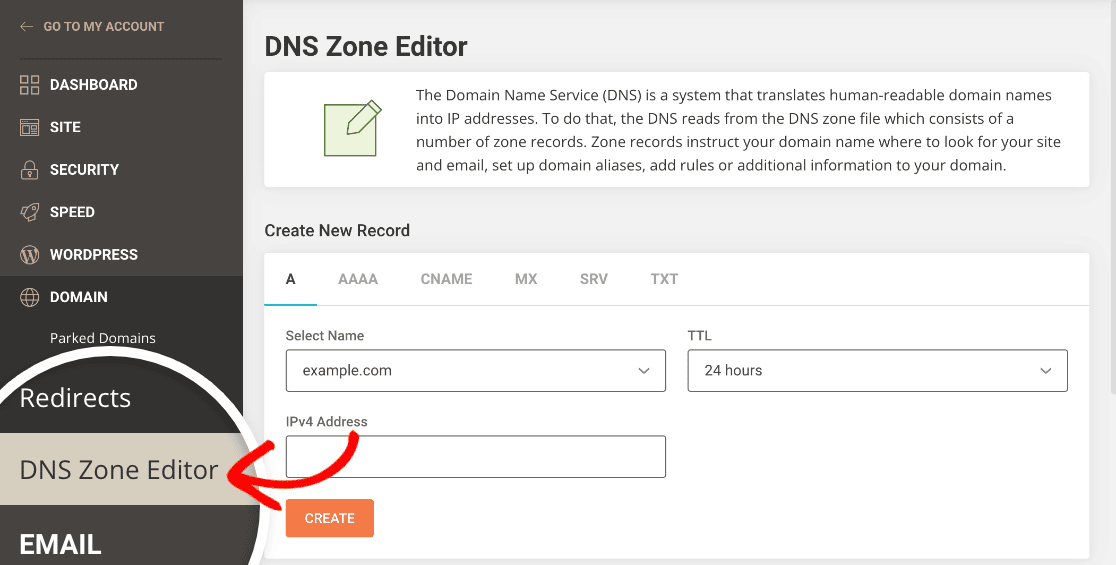
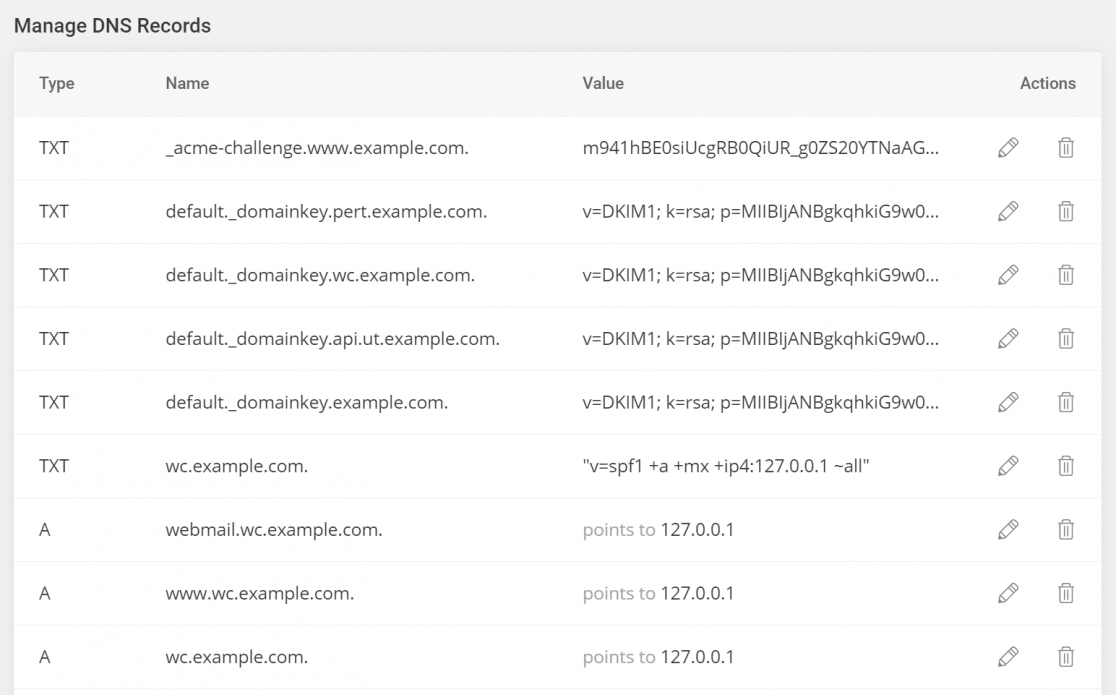
The DNS Zone Editor will have a list of the records already created.
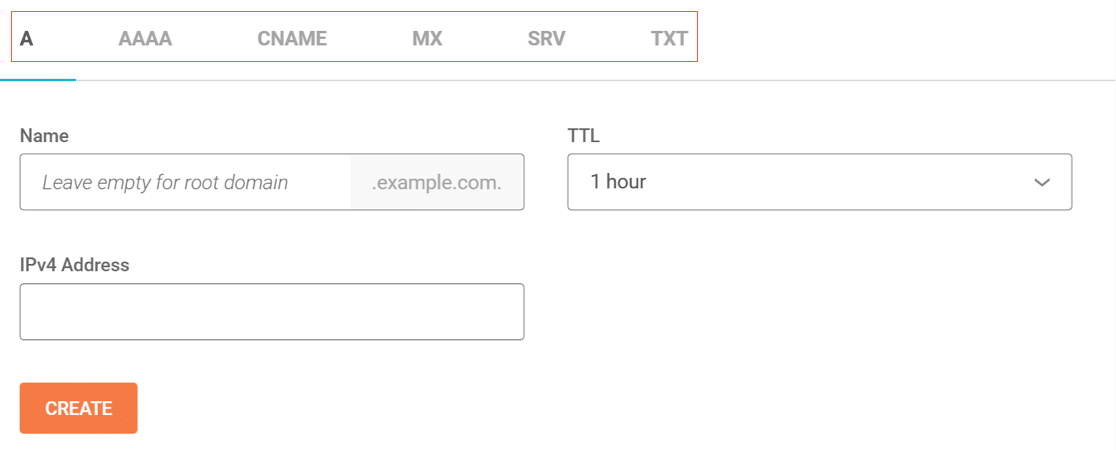
You can create new records in the main DNS Zone Editor screen. Be sure to click the correct record type from the tabs across the top.
We have a detailed guide that explains what your DMARC, DKIM, and SPF records do. For now, let’s quickly recap the settings so you can check them in the DNS Zone Editor.
DKIM
DKIM electronically signs the emails sent from your domain. Some providers need a DKIM so the email header can be validated, which proves your message is genuine and not spoofed.
SPF
The SPF record lists the servers that are authorized to send email from your domain. Here’s an example of an SPF record that we checked in MXToolbox.
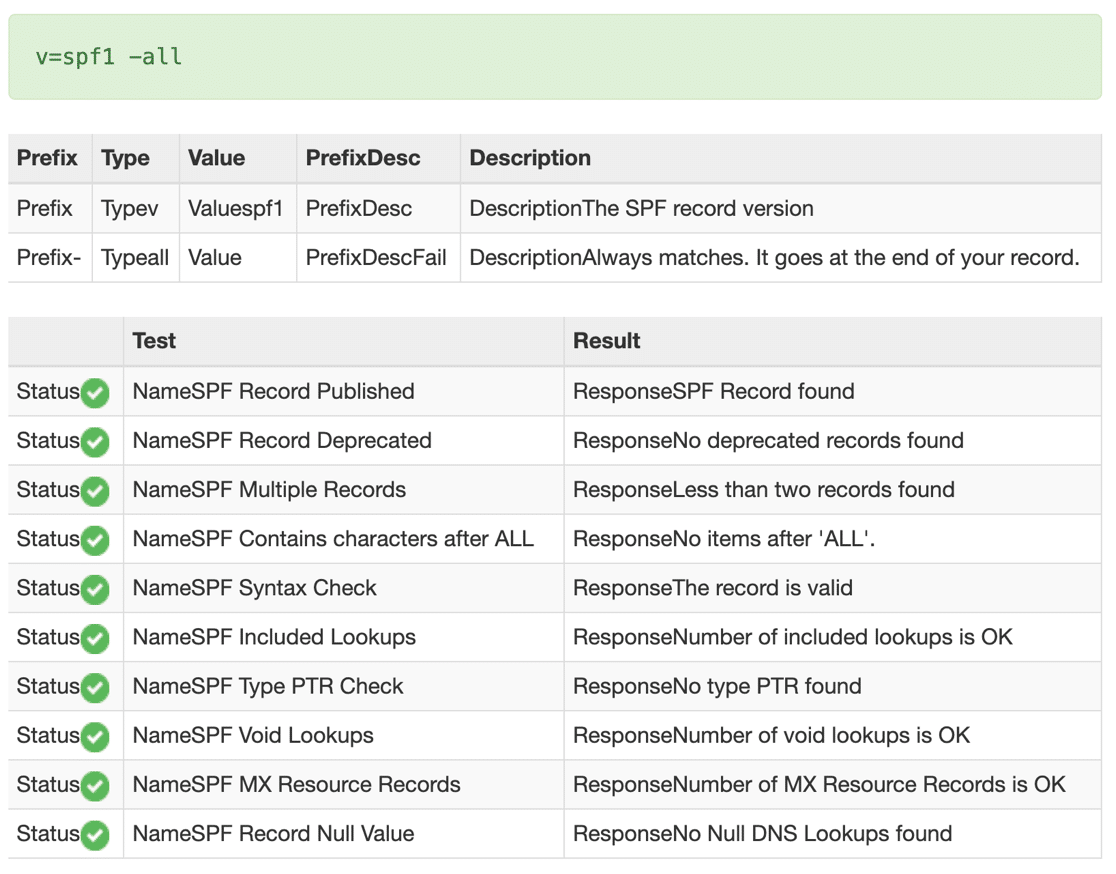
It’s important that you only have 1 SPF record in your SiteGround DNS Zone.
You may already have an SPF record if you’re using other services with your domain. For example, if you’re sending monthly newsletters using an email provider service, you might have an SPF record for that already.
So to add your email provider, you’ll want to merge the new SPF record with the existing one. To find out how to do that, read this simple guide on how to merge multiple SPF records.
DMARC
A DMARC record is responsible for routing mail that’s been flagged as spam by the mail server. It also sends reports to tell you the outcome of spam filtering activity.
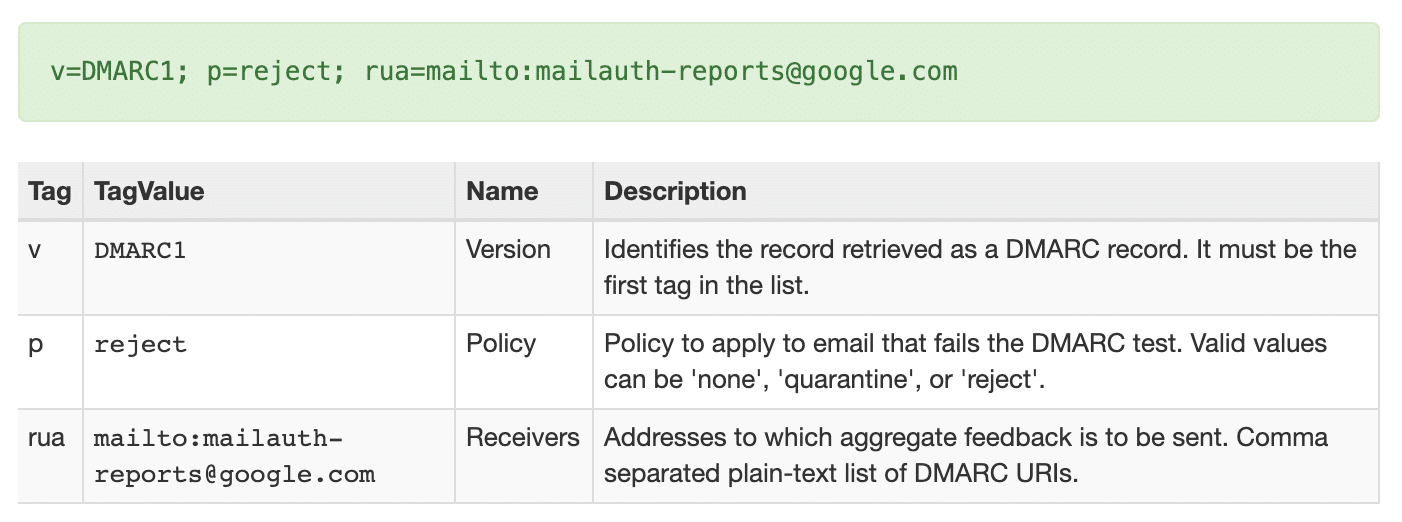
Your email provider should give you all of the details you need to create a DMARC record. If you need more help, check out this article on how to create a DMARC record. It includes a generic DMARC record that will work on most domains.
CNAME, TXT, MX
Some mailer services also require these records, although they’re less common than the other 3. If you don’t see these in your email provider’s setup instructions, you shouldn’t create them for emails.
Wait for your DNS Zone changes to propagate before moving on to the final step. This can take up to 48 hours.
5. Send a Test Email From WordPress
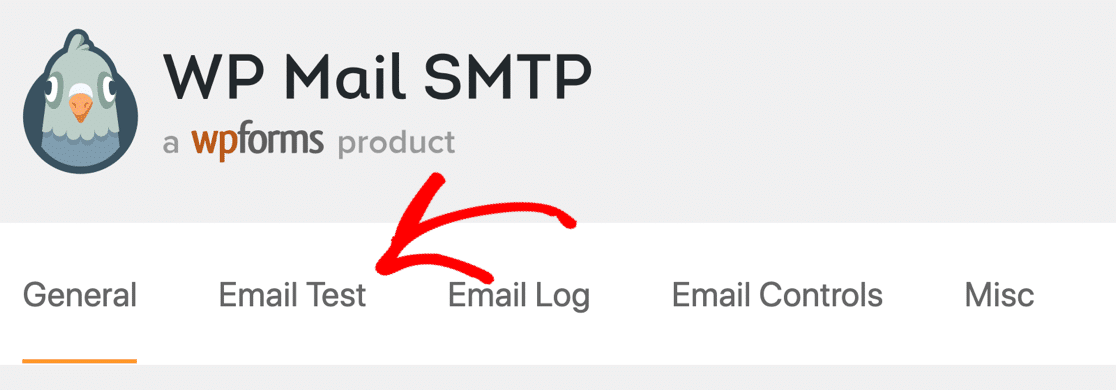
Now you’ve set up SMTP with your SiteGround WordPress site, let’s check that your emails are working. To do that, head to the Email Test tab on your WP Mail SMTP settings page.
Now fill in the form and send the test email.
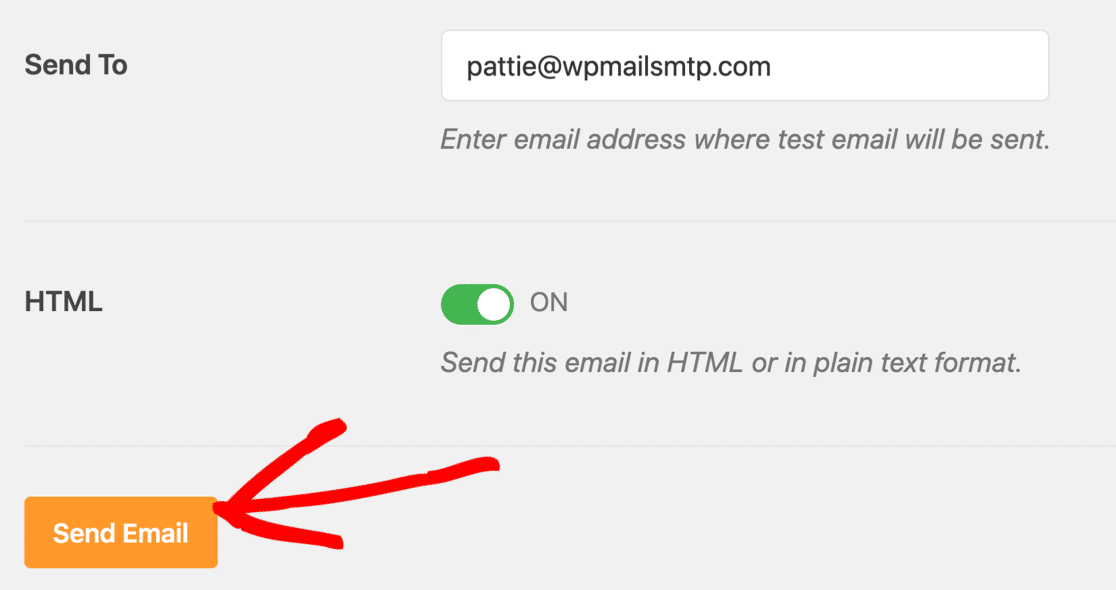
Behind the scenes, WP Mail SMTP will run its Domain Checker and scan your DNS Zone. You should see a message with a green label to show that your SiteGround site is now sending email with the right authentication.

If you see a warning message, it could be because there’s an issue with your DNS Zone settings in SiteGround. The warning message will explain what you need to check.
And that’s it! We fixed issues with emails from WordPress not sending on SiteGround. Next, let’s take a look at some commonly asked questions about SiteGround and email deliverability problems.
FAQs on How to Fix Emails from WordPress Not Sending on SiteGround
What are the SMTP settings for SiteGround?
SiteGround’s SMTP settings vary by server, but you can find your specific settings in Site Tools » Email » Accounts » Mail Configuration. Typically, the SMTP server is something like mail.yourdomain.com, with port 587 for TLS or port 465 for SSL.
However, I strongly recommend using WP Mail SMTP with an external provider like SendLayer. External providers like SendLayer offer better deliverability and don’t count against your hosting resource limits.
How do I create SPF records in SiteGround?
To create SPF records in SiteGround, go to Site Tools » Domain » DNS Zone Editor and click on the TXT tab.
Create a new TXT record with your domain name and the SPF value provided by your email service provider.
Remember, you can only have one SPF record per domain, so if you already have one, you’ll need to merge the new settings with your existing record rather than creating multiple SPF records.
Why are my WordPress emails going to spam on SiteGround?
WordPress emails go to spam on SiteGround primarily because they’re sent without proper authentication.
SiteGround’s shared hosting uses the wp_mail() function, which doesn’t include DKIM signatures or proper SPF alignment that modern email providers require.
Installing WP Mail SMTP with an external provider and configuring proper DNS records (SPF, DKIM, DMARC) typically resolves spam issues immediately.
How do I set up DKIM records on SiteGround?
DKIM records are set up in SiteGround’s DNS Zone Editor under Site Tools » Domain » DNS Zone Editor.
Click the TXT tab and create a new record with the DKIM selector and public key provided by your email service provider.
The record name usually looks like “selector1._domainkey” and the value is a long public key string. Most external SMTP providers will give you the exact DKIM record to copy and paste.
Does SiteGround offer good email hosting?
SiteGround offers basic email hosting with unlimited accounts and 10GB storage per mailbox, which works fine for simple websites.
However, their email service isn’t ideal for business-critical communications because it lacks advanced deliverability features and can be affected by shared hosting resource limits.
For WordPress sites that rely on form notifications, order confirmations, or automated emails, I recommend using SiteGround for web hosting but an external service for email.
Can I use Gmail SMTP with SiteGround hosting?
Yes, you can use Gmail SMTP with SiteGround hosting through WP Mail SMTP, but it’s not ideal for business websites.
Gmail limits you to 500 emails per day and may flag automated WordPress emails as suspicious, potentially affecting your personal Gmail account.
For business use, dedicated transactional email services like SendLayer or Mailgun are more reliable and won’t interfere with your personal email.
Next, Get More Control Over Your WordPress Emails
Do you get tons of emails about plugin updates from your WordPress site? WP Mail SMTP Pro lets you turn these off if you don’t want to receive them.
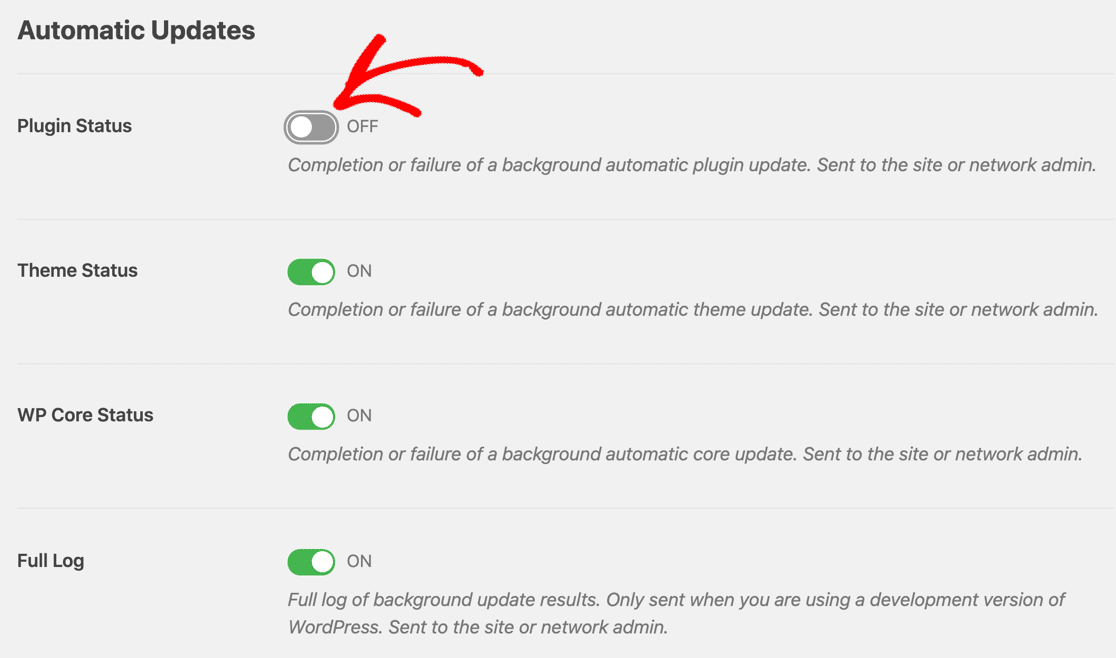
These plugin settings let you easily reduce the number of emails you get from WordPress! If you’re ready to disable unwanted WordPress emails, check out our guide to WP Mail SMTP email controls.
Ready to fix your emails? Get started today with the best WordPress SMTP plugin. If you don’t have the time to fix your emails, you can get full White Glove Setup assistance as an extra purchase, and there’s a 14-day money-back guarantee for all paid plans.
If this article helped you out, please follow us on Facebook and Twitter for more WordPress tips and tutorials.

